capt_jack994
-
Posts
6 -
Joined
-
Last visited
Posts posted by capt_jack994
-
-
I’ve been trying to find a collapsible stock for my M3, part #61028. I was able to source the tube, but the stock itself is proving difficult to find. TIA
-
On 4/3/2021 at 9:13 AM, RAIII said:
I saw it as well and agree it looks nice.
Will be interesting to see when some one gets one the difference from the GG&G for 25% more money.
I have the GG&G for my M3. Definitely one of the best upgrades I’ve done. I’ve been sick of FFT constantly being out of stock on 90% of the inventory. Not to mention the preorder ordeal is ridiculous as well as the fact that returns aren’t accepted. I’m happy to pay a little more for peace of mind.
-
I’ll take a vid in semi and pump mode next time I go to the range
-
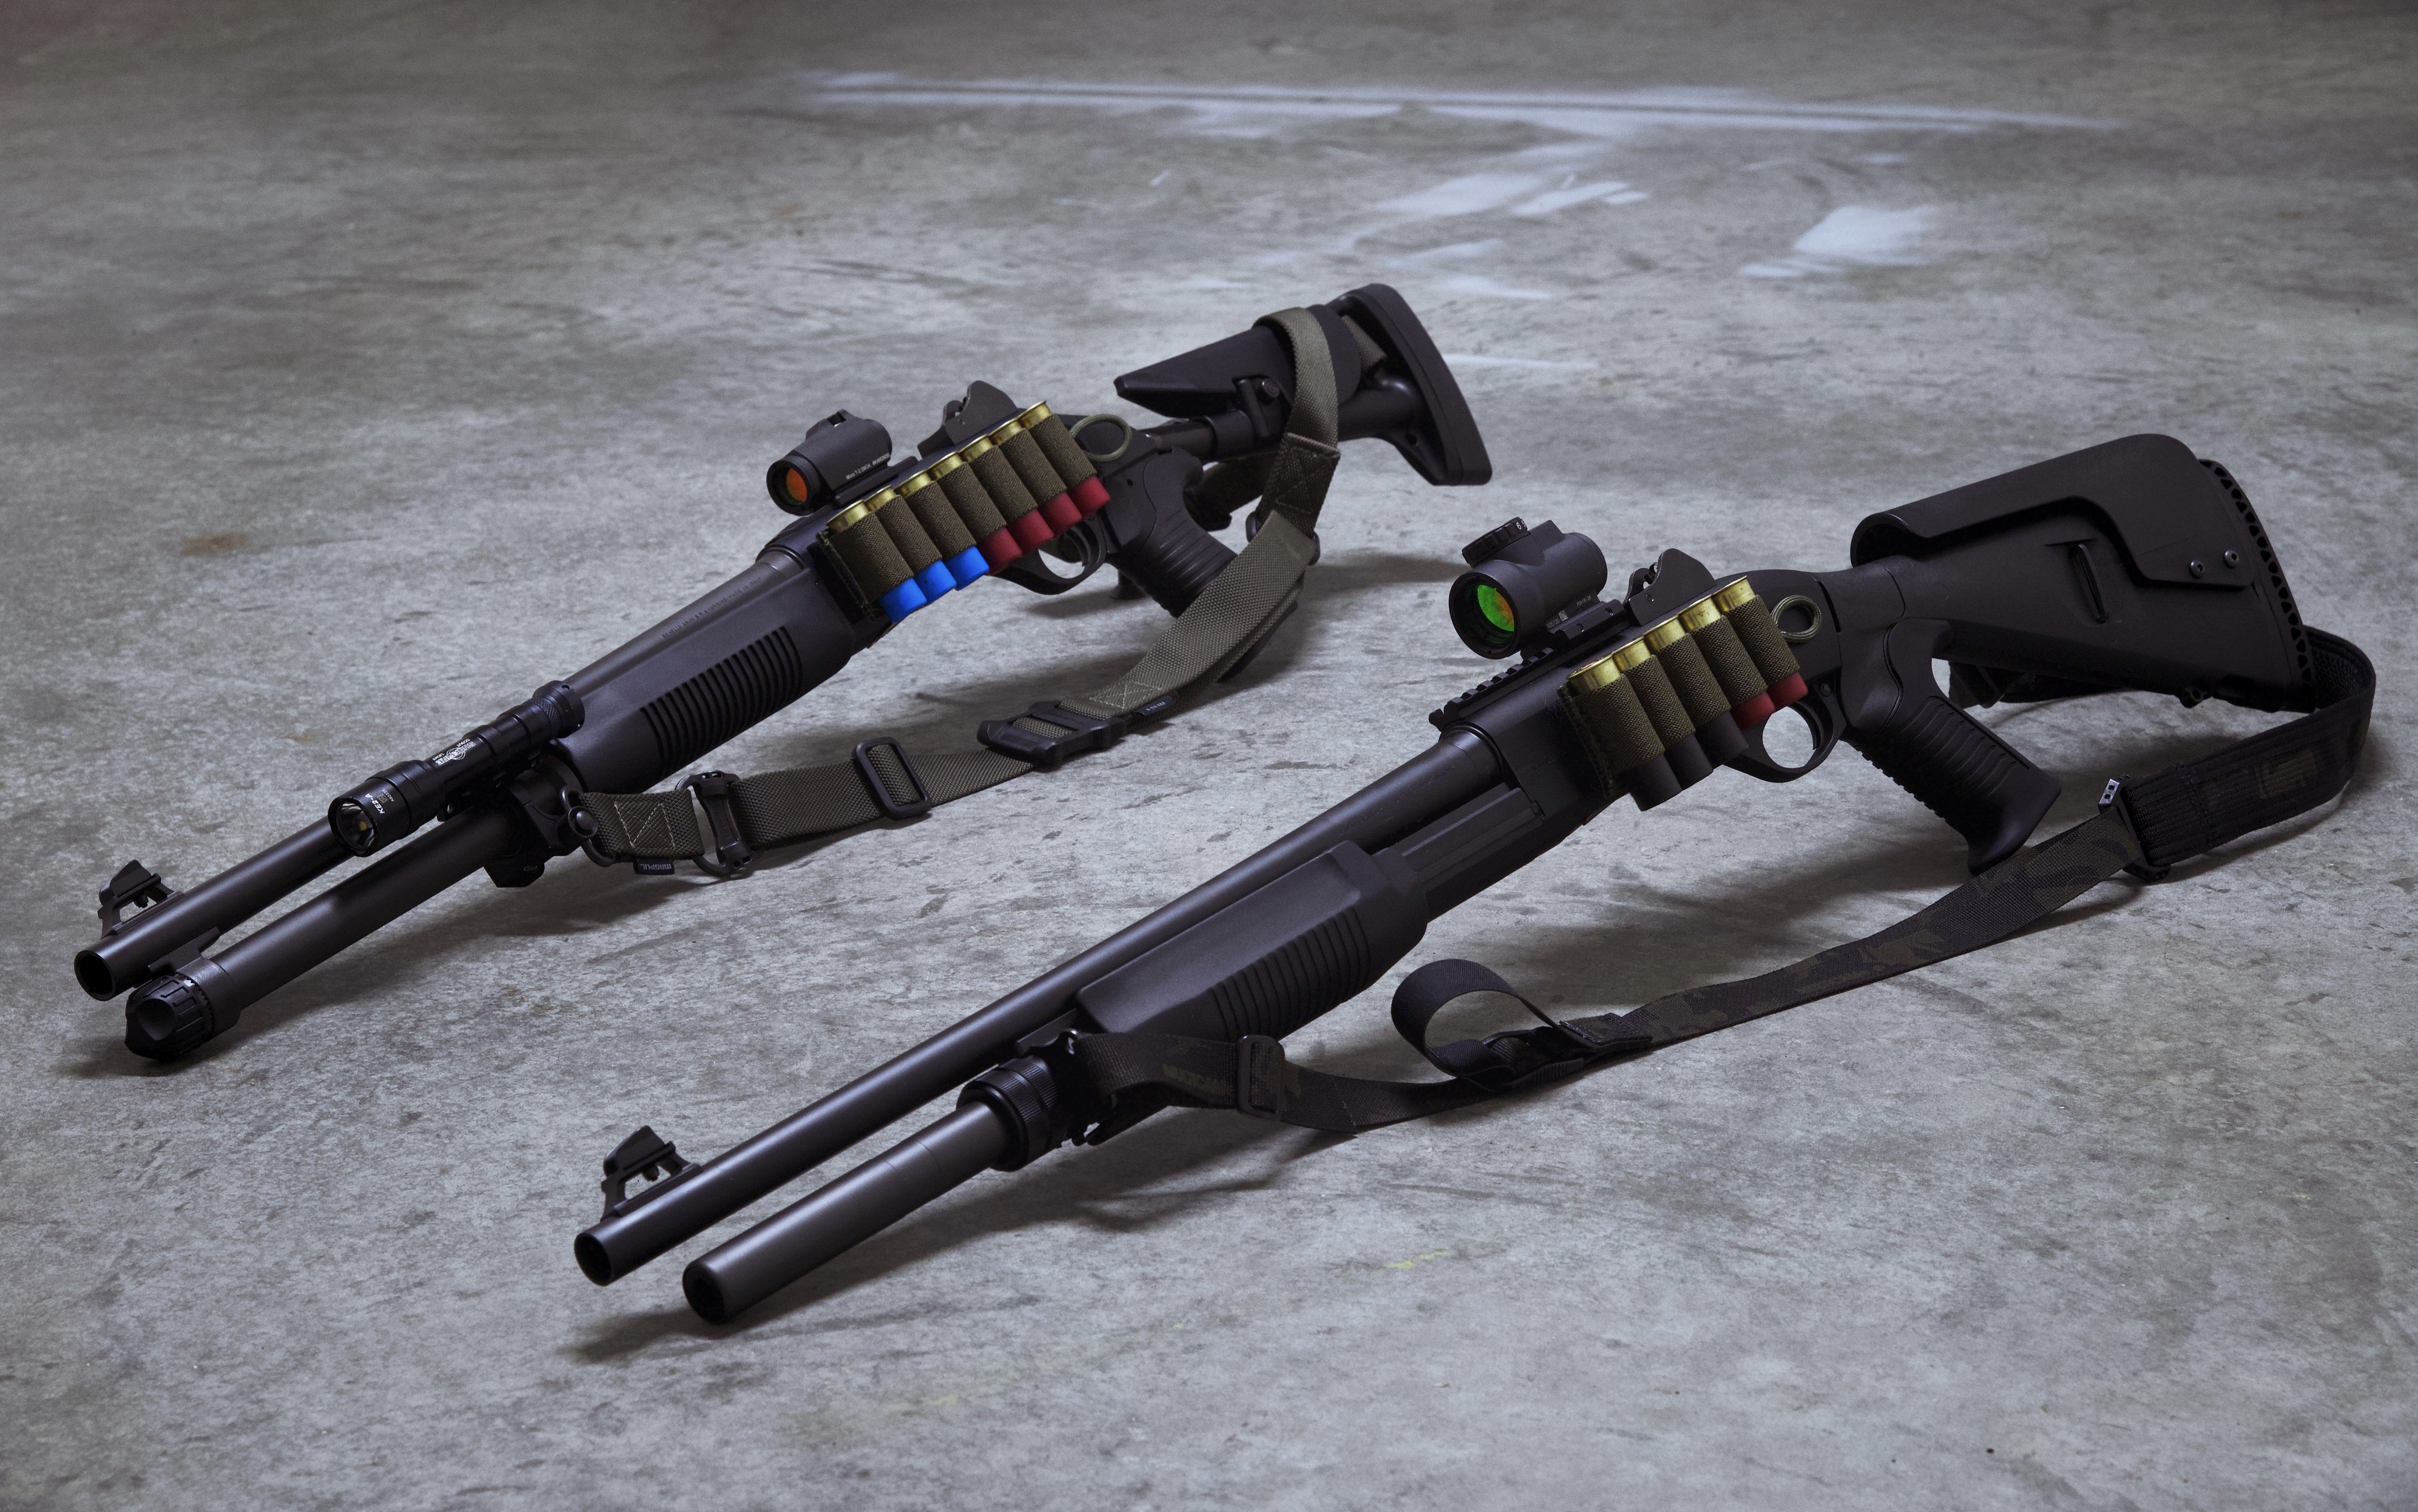
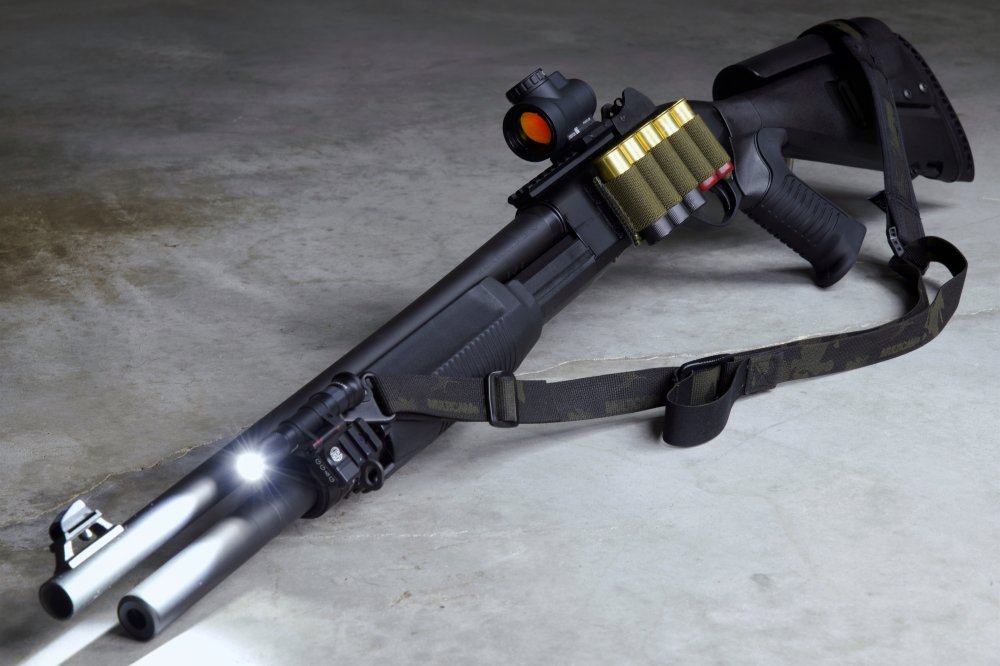
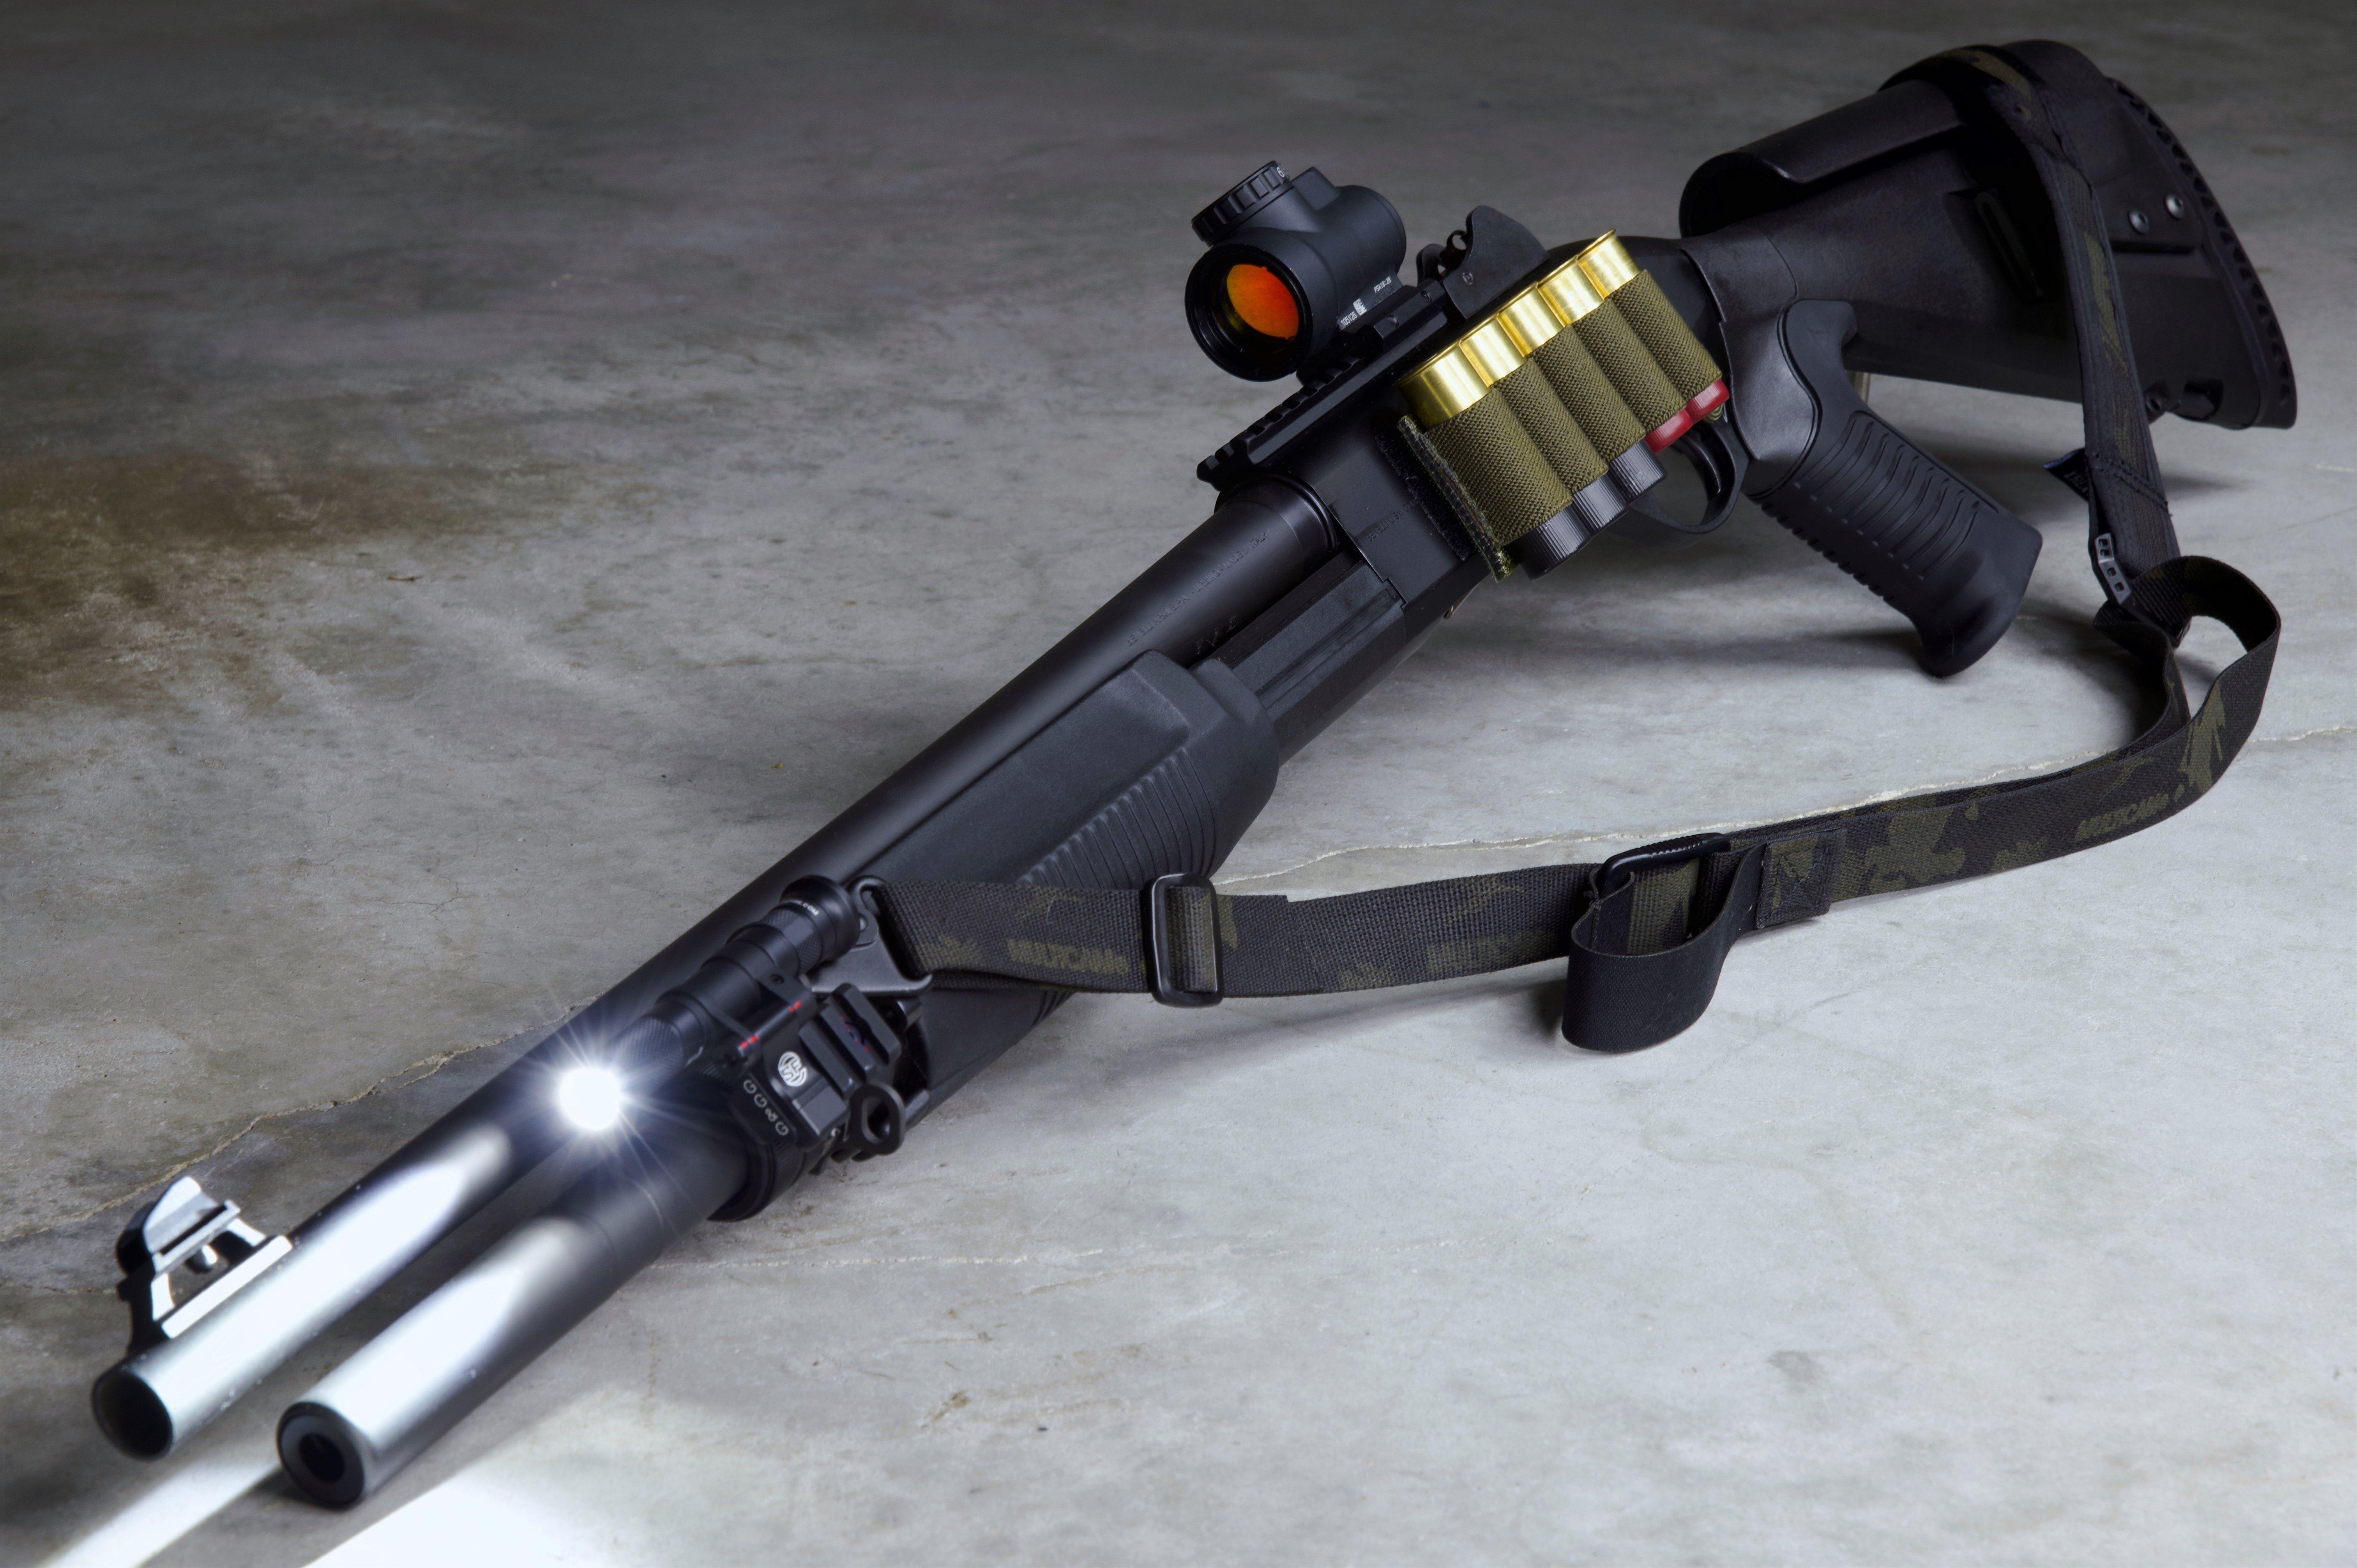
After almost a year, I’ve finally completed my M3 build. Parts list is as follows:
Trijicon MRO, Benelli 7 round mag tube, Urbino stock, Esse 5 round shot shell carrier, TRex arms sling, Blue Alpha Gear sling clip, GG&G M2 pic rail, GG&G oversized bolt release button, and a Surefire micro scout light pro.
Since it is very difficult to source a proprietary light mount specifically made for the M3, I decided to fabricate my own using a GG&G M2 light mount. The details of this modification can be found here:
-
 1
1
-
 1
1
-
-
This will be for those of you who do not want a clamp style mount that attaches directly to the barrel and/or shell tube.
Required tools & hardware:
- Dremel & cutoff wheel
- Vise
- File
- 20mm-25mm o-ring
- GG&G Benelli M2 sling and flashlight mount
- Your light of choice that will mount to a pic rail
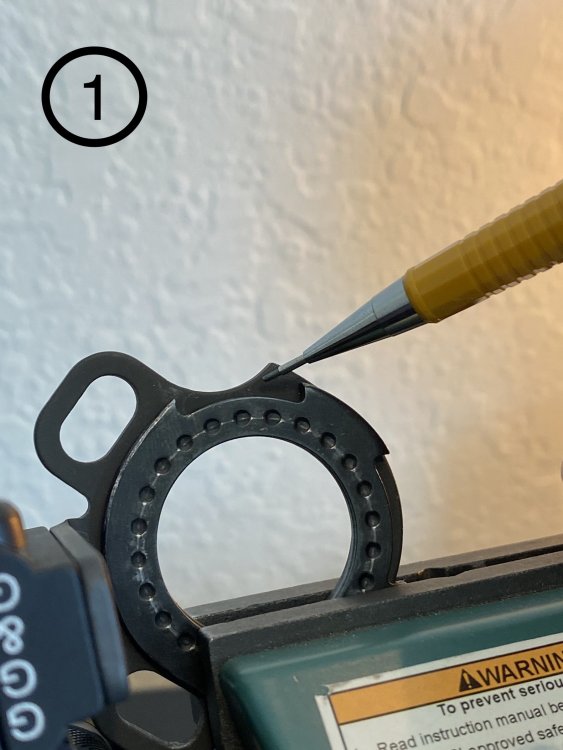
Since the GG&G M2 light mount has a smaller scalloped cut than what is required to fit on the M3, some cutting and shaping is required:
Start out by using the original sling mount as a stencil for tracing out the required cut out size onto the GG&G mount for a reference when cutting with a dremel [Figure 1].
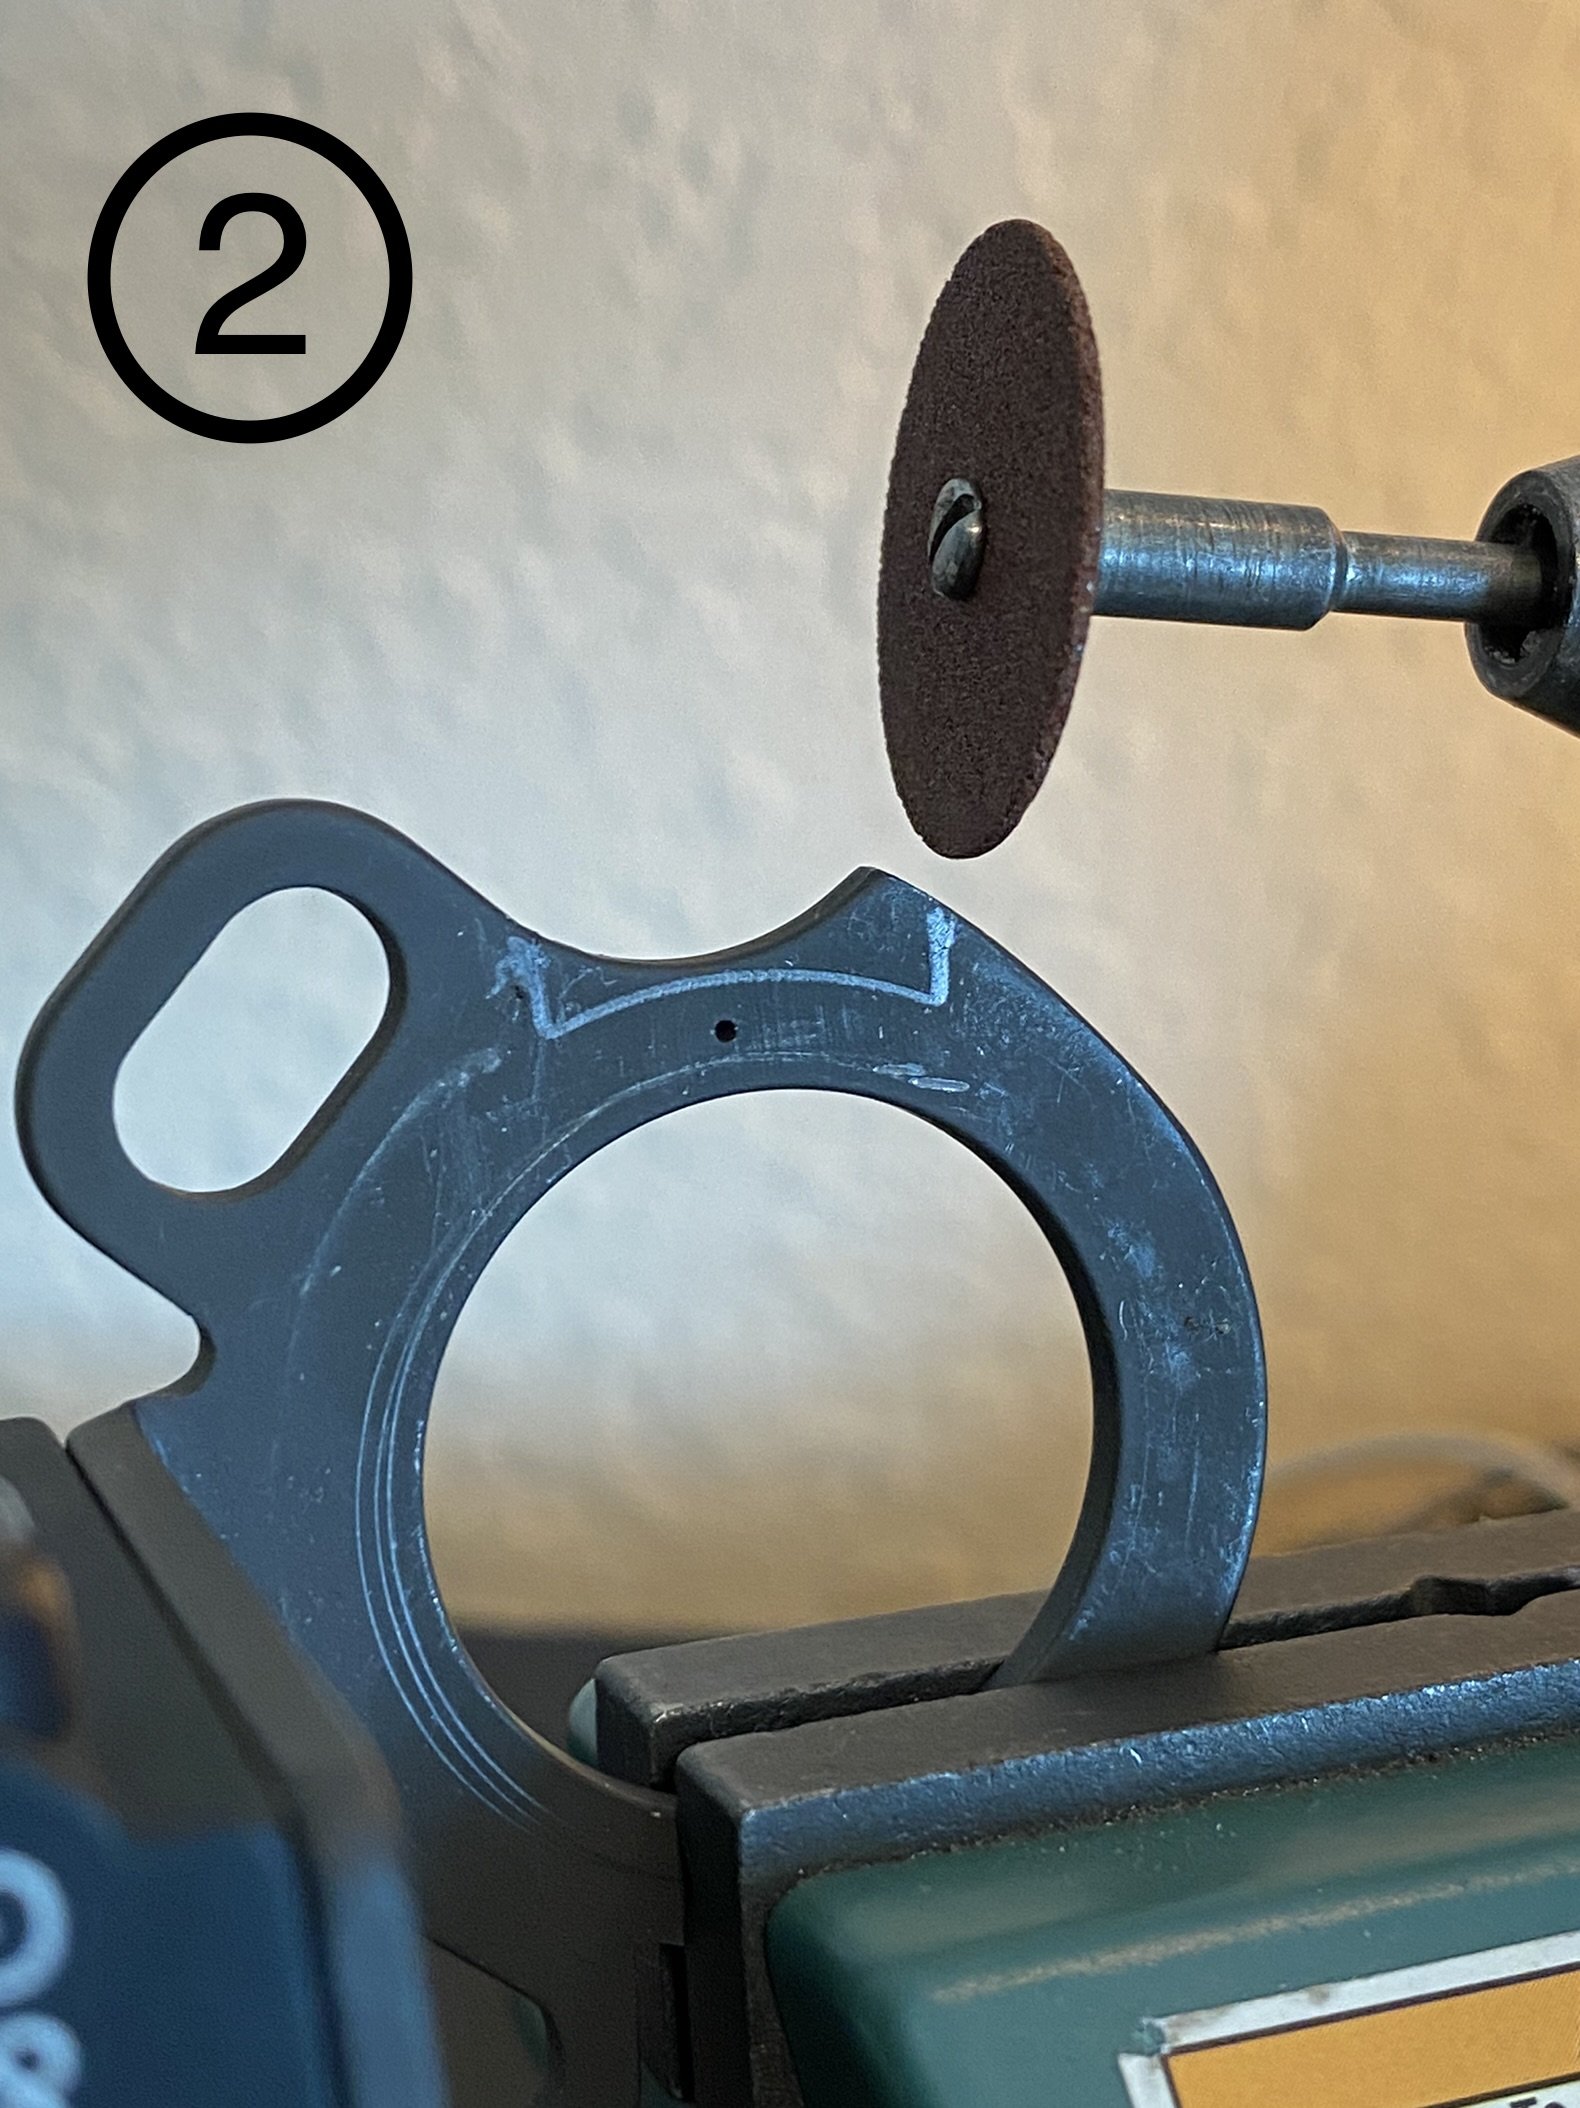
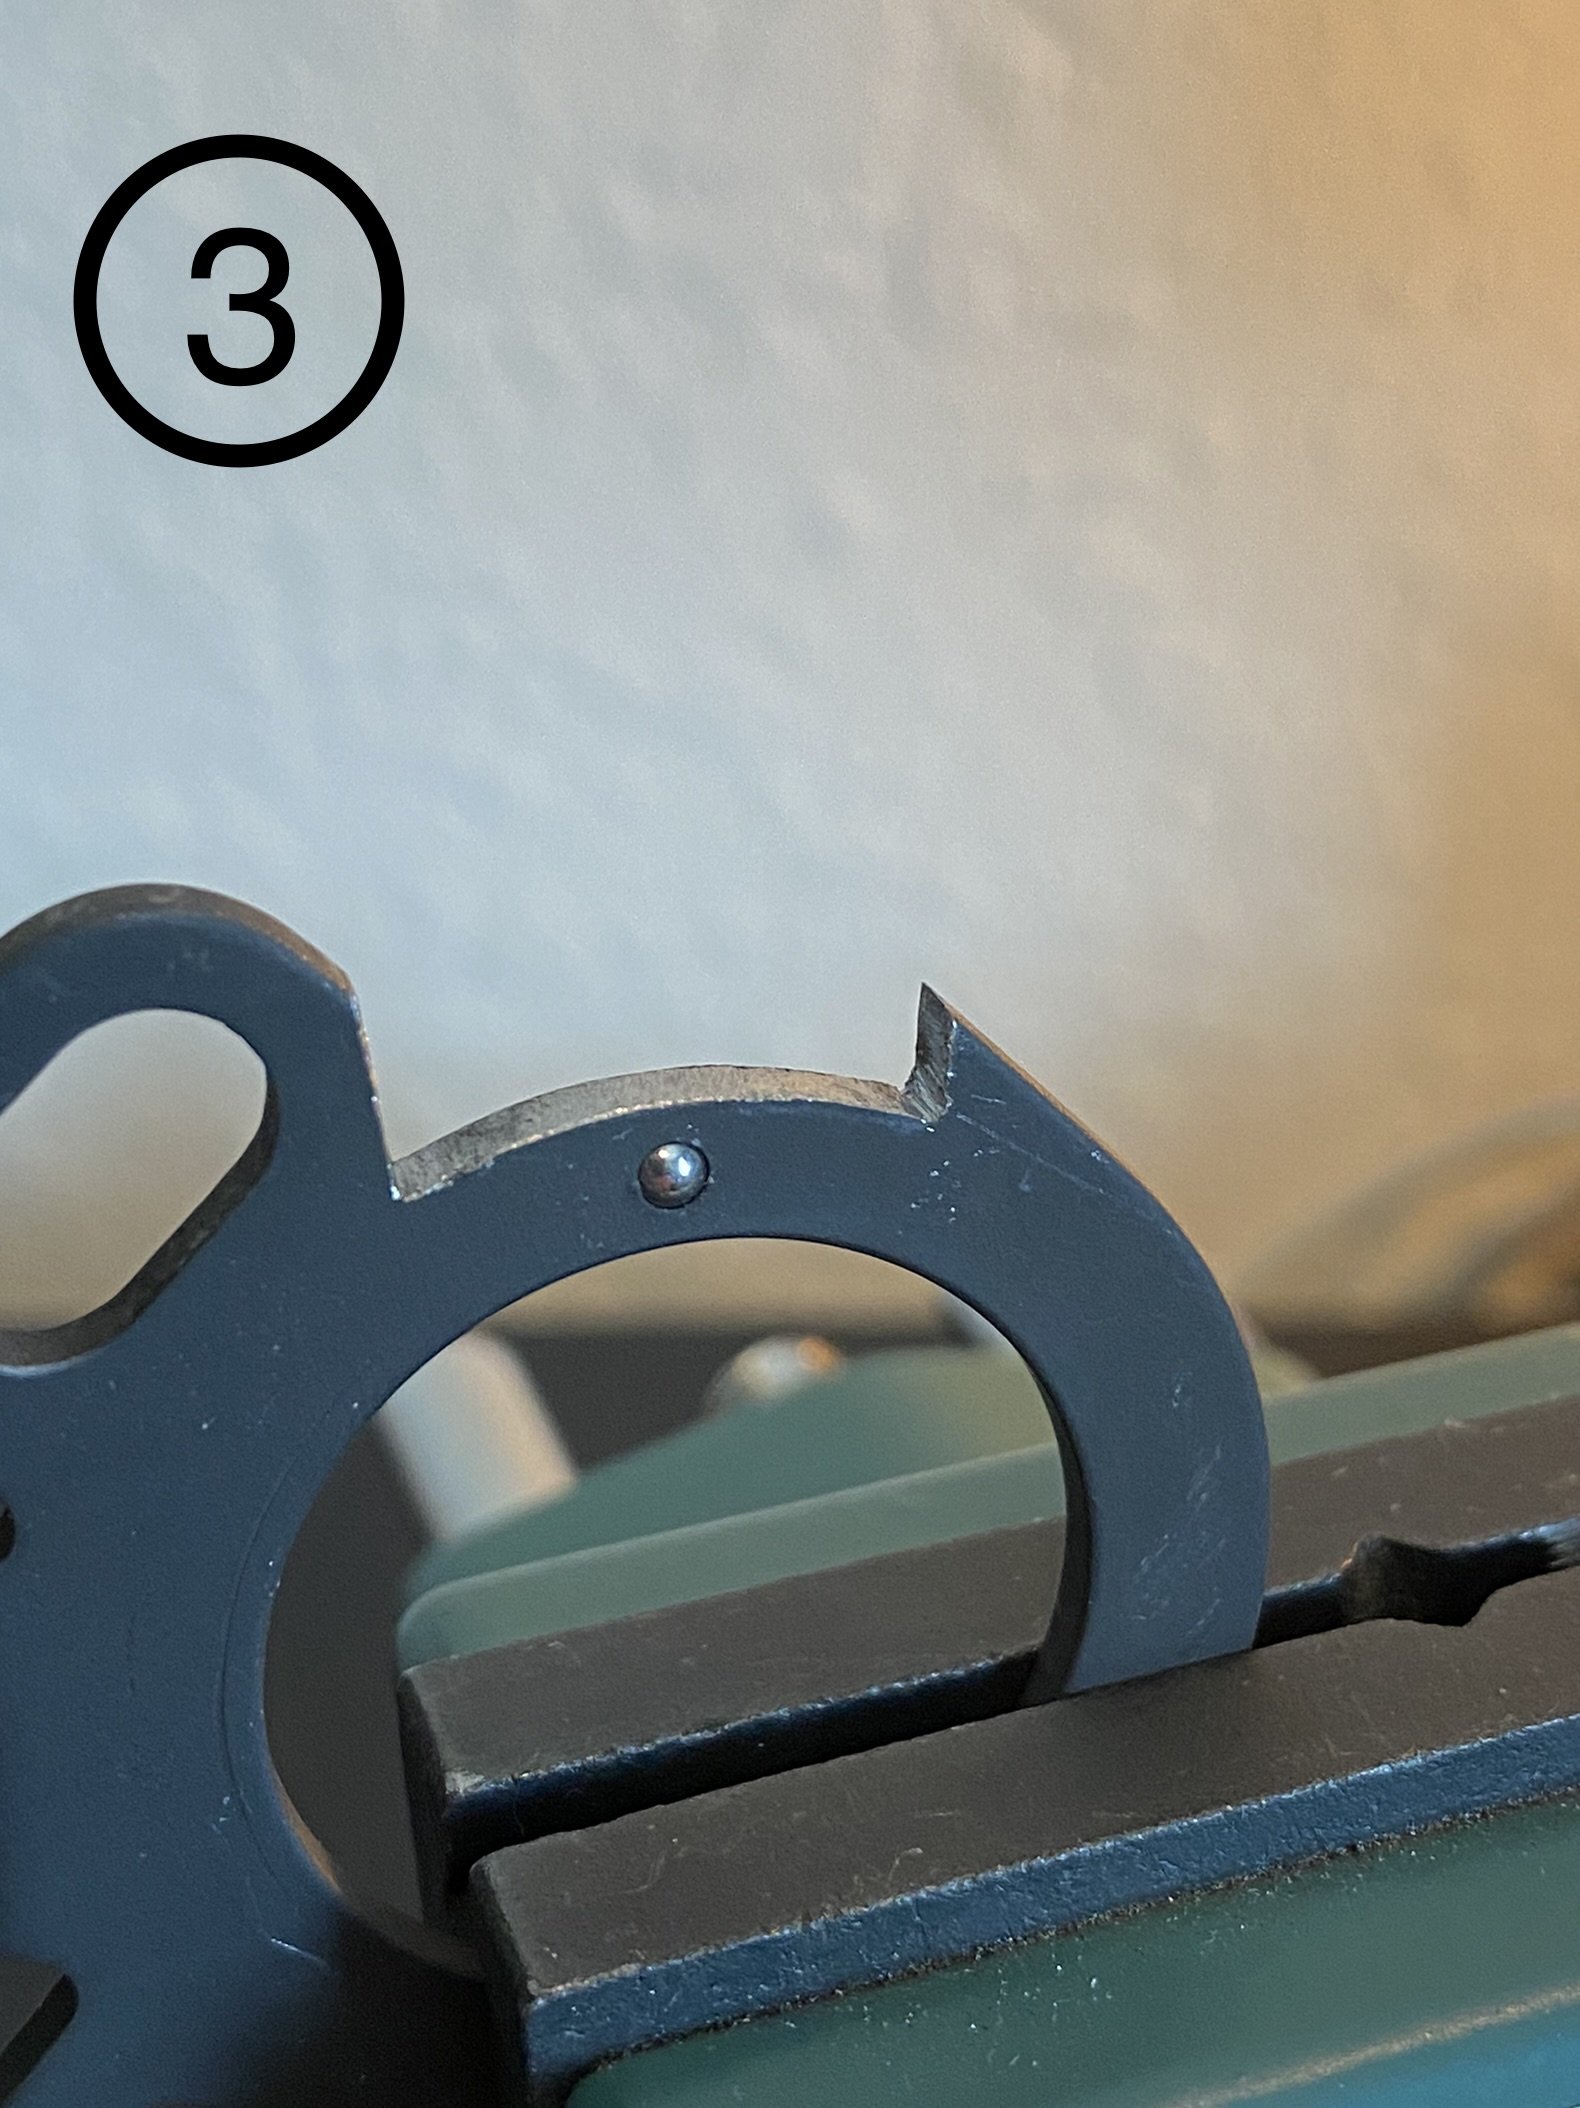
Once the outline is traced, use a dremel to remove material [Figures 2, 3].
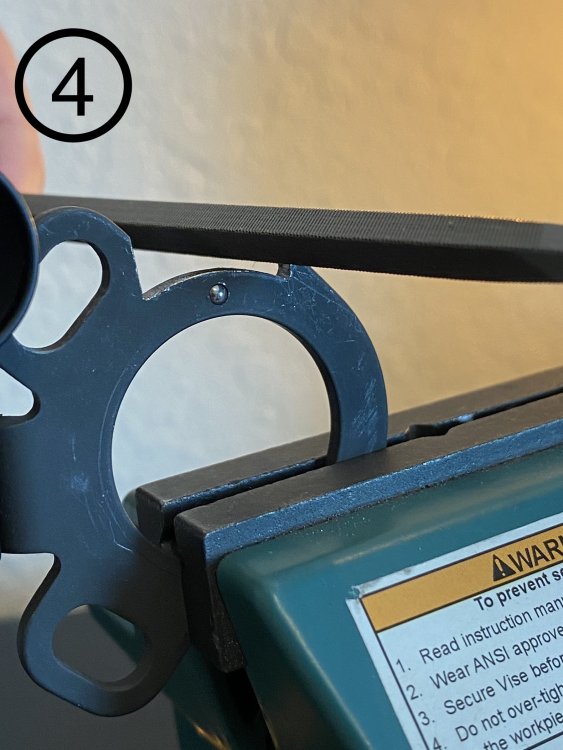
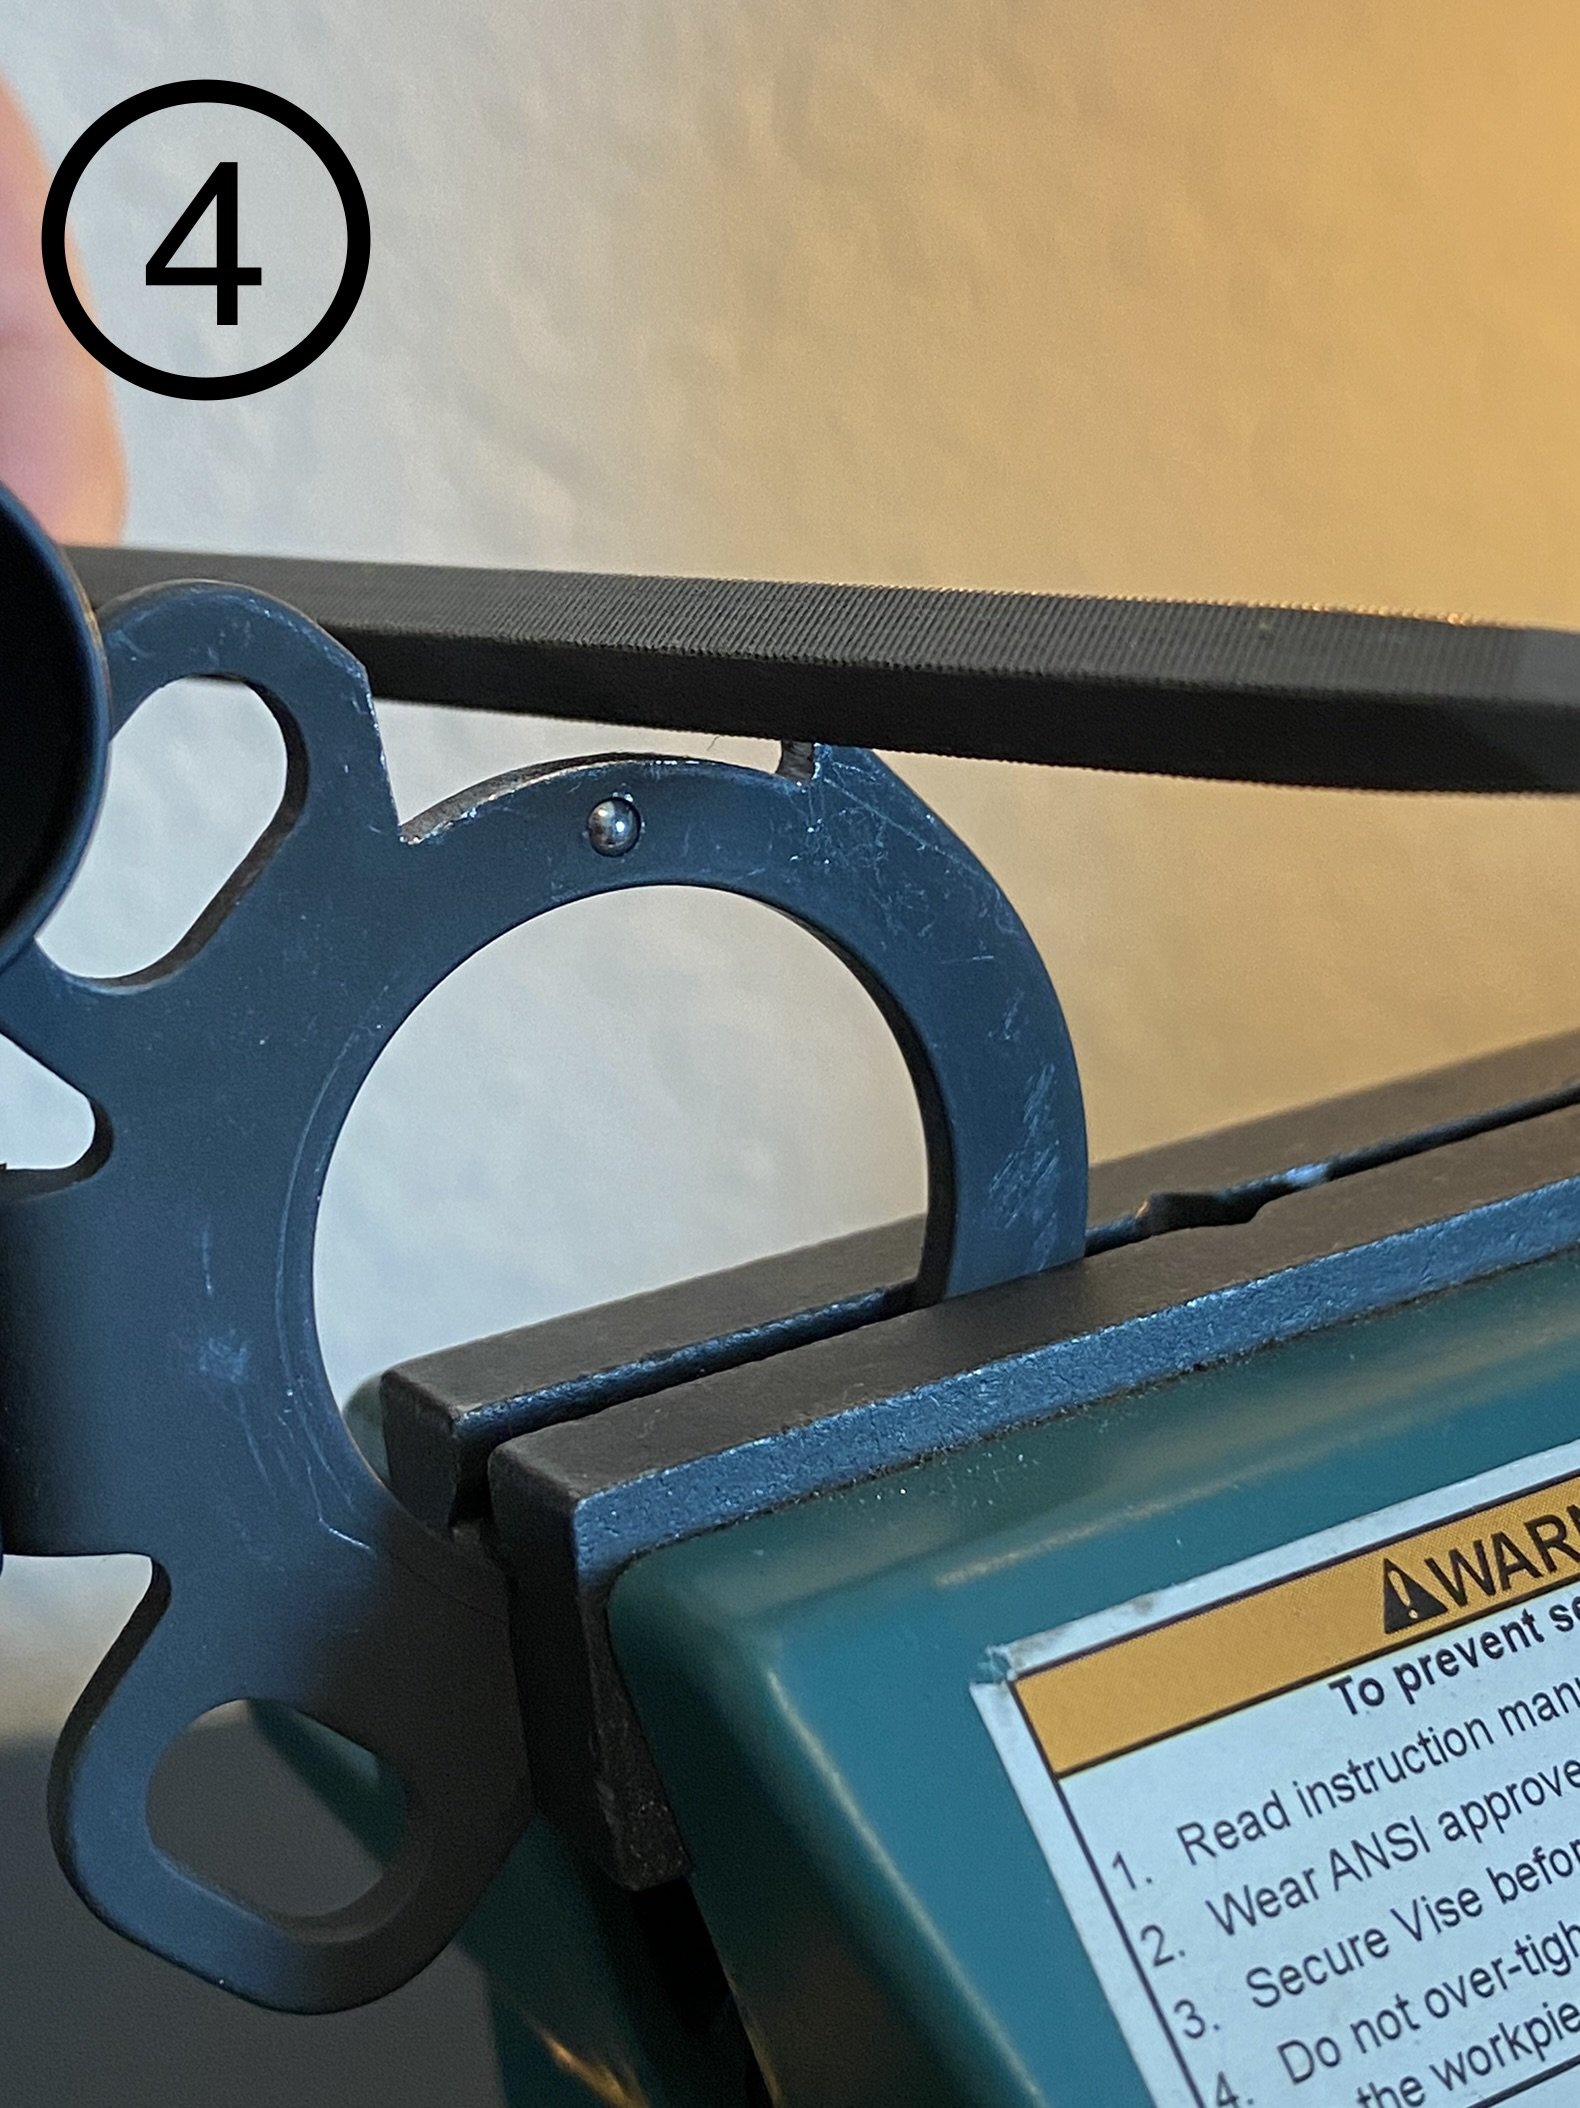
Once the rough shape is cut out, use a file to remove burrs and slowly and precisely shape the cut. Be sure to test fit often, as you do not want to make an oversized cut and have a loose fitting part [Figure 4].
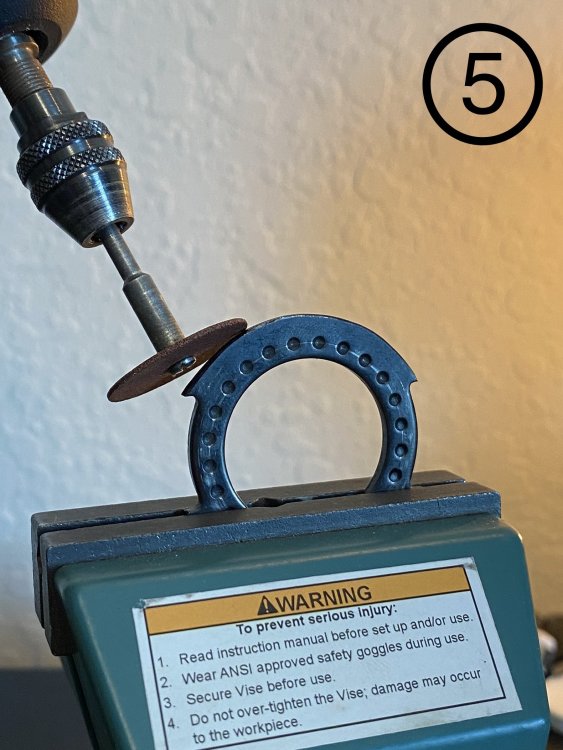
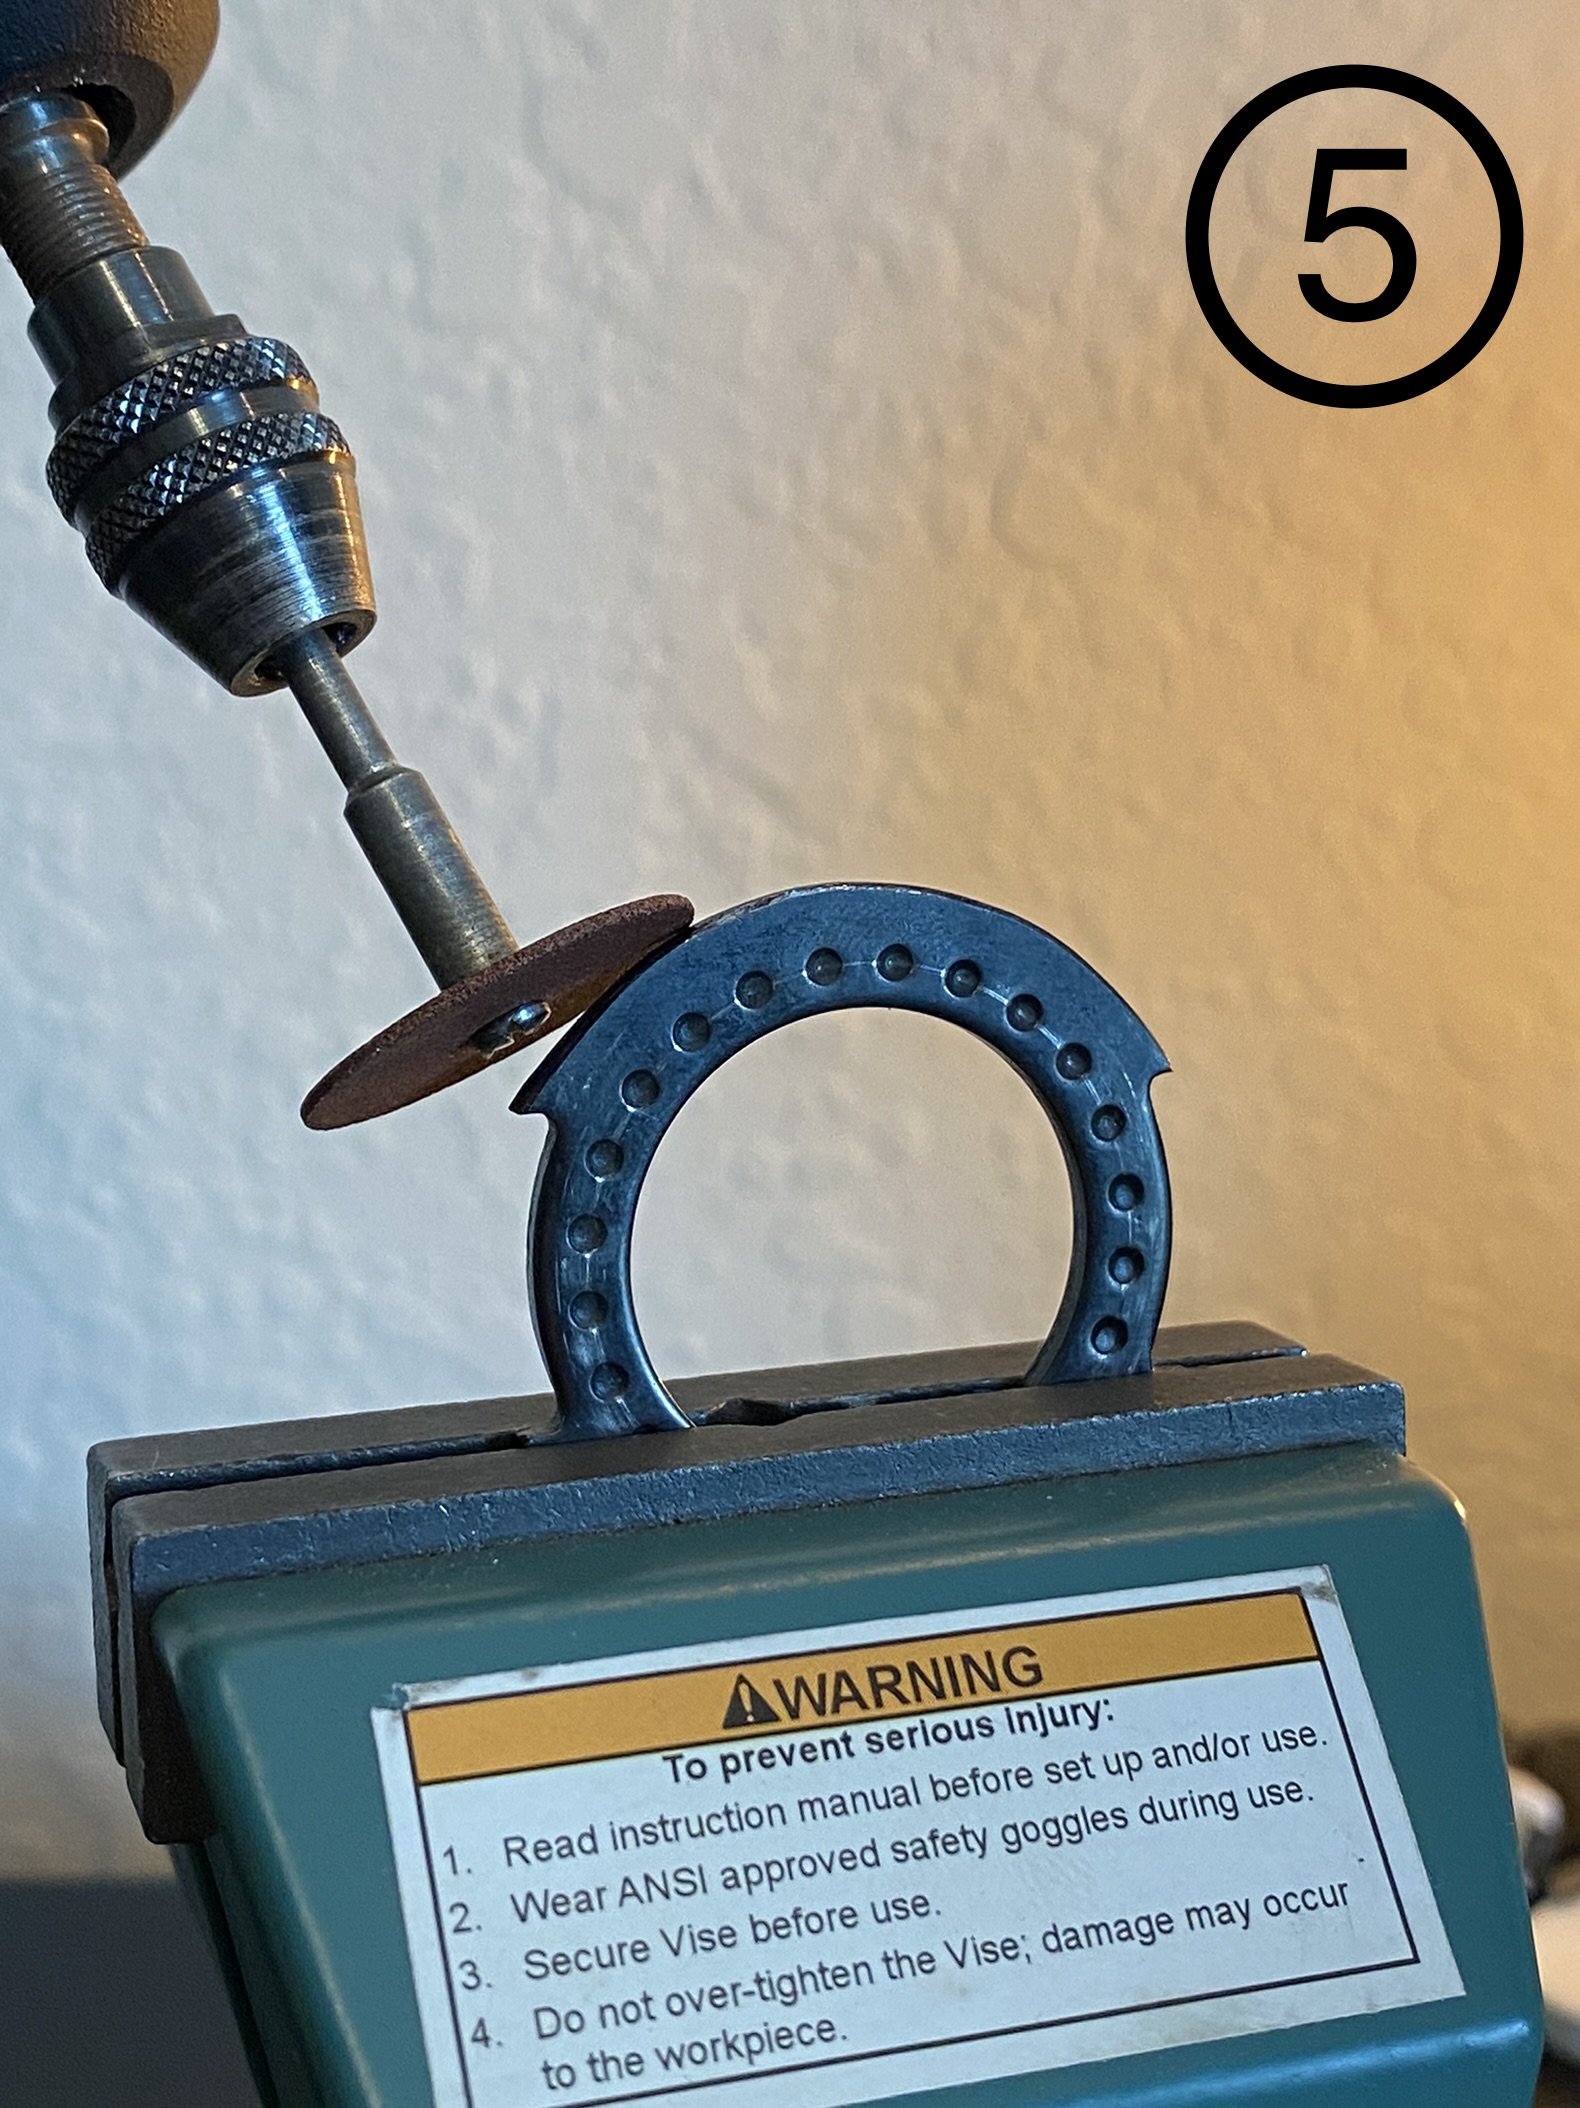
Once this part is complete, it’s time to move on to the original sling mount. This will still be required to ensure the shell tube nut has a ratcheted engagement. I chose to remove the sling mount with the dremel, but this is not required if you’d like to have additional sling mounts on your shotgun [Figure 5].
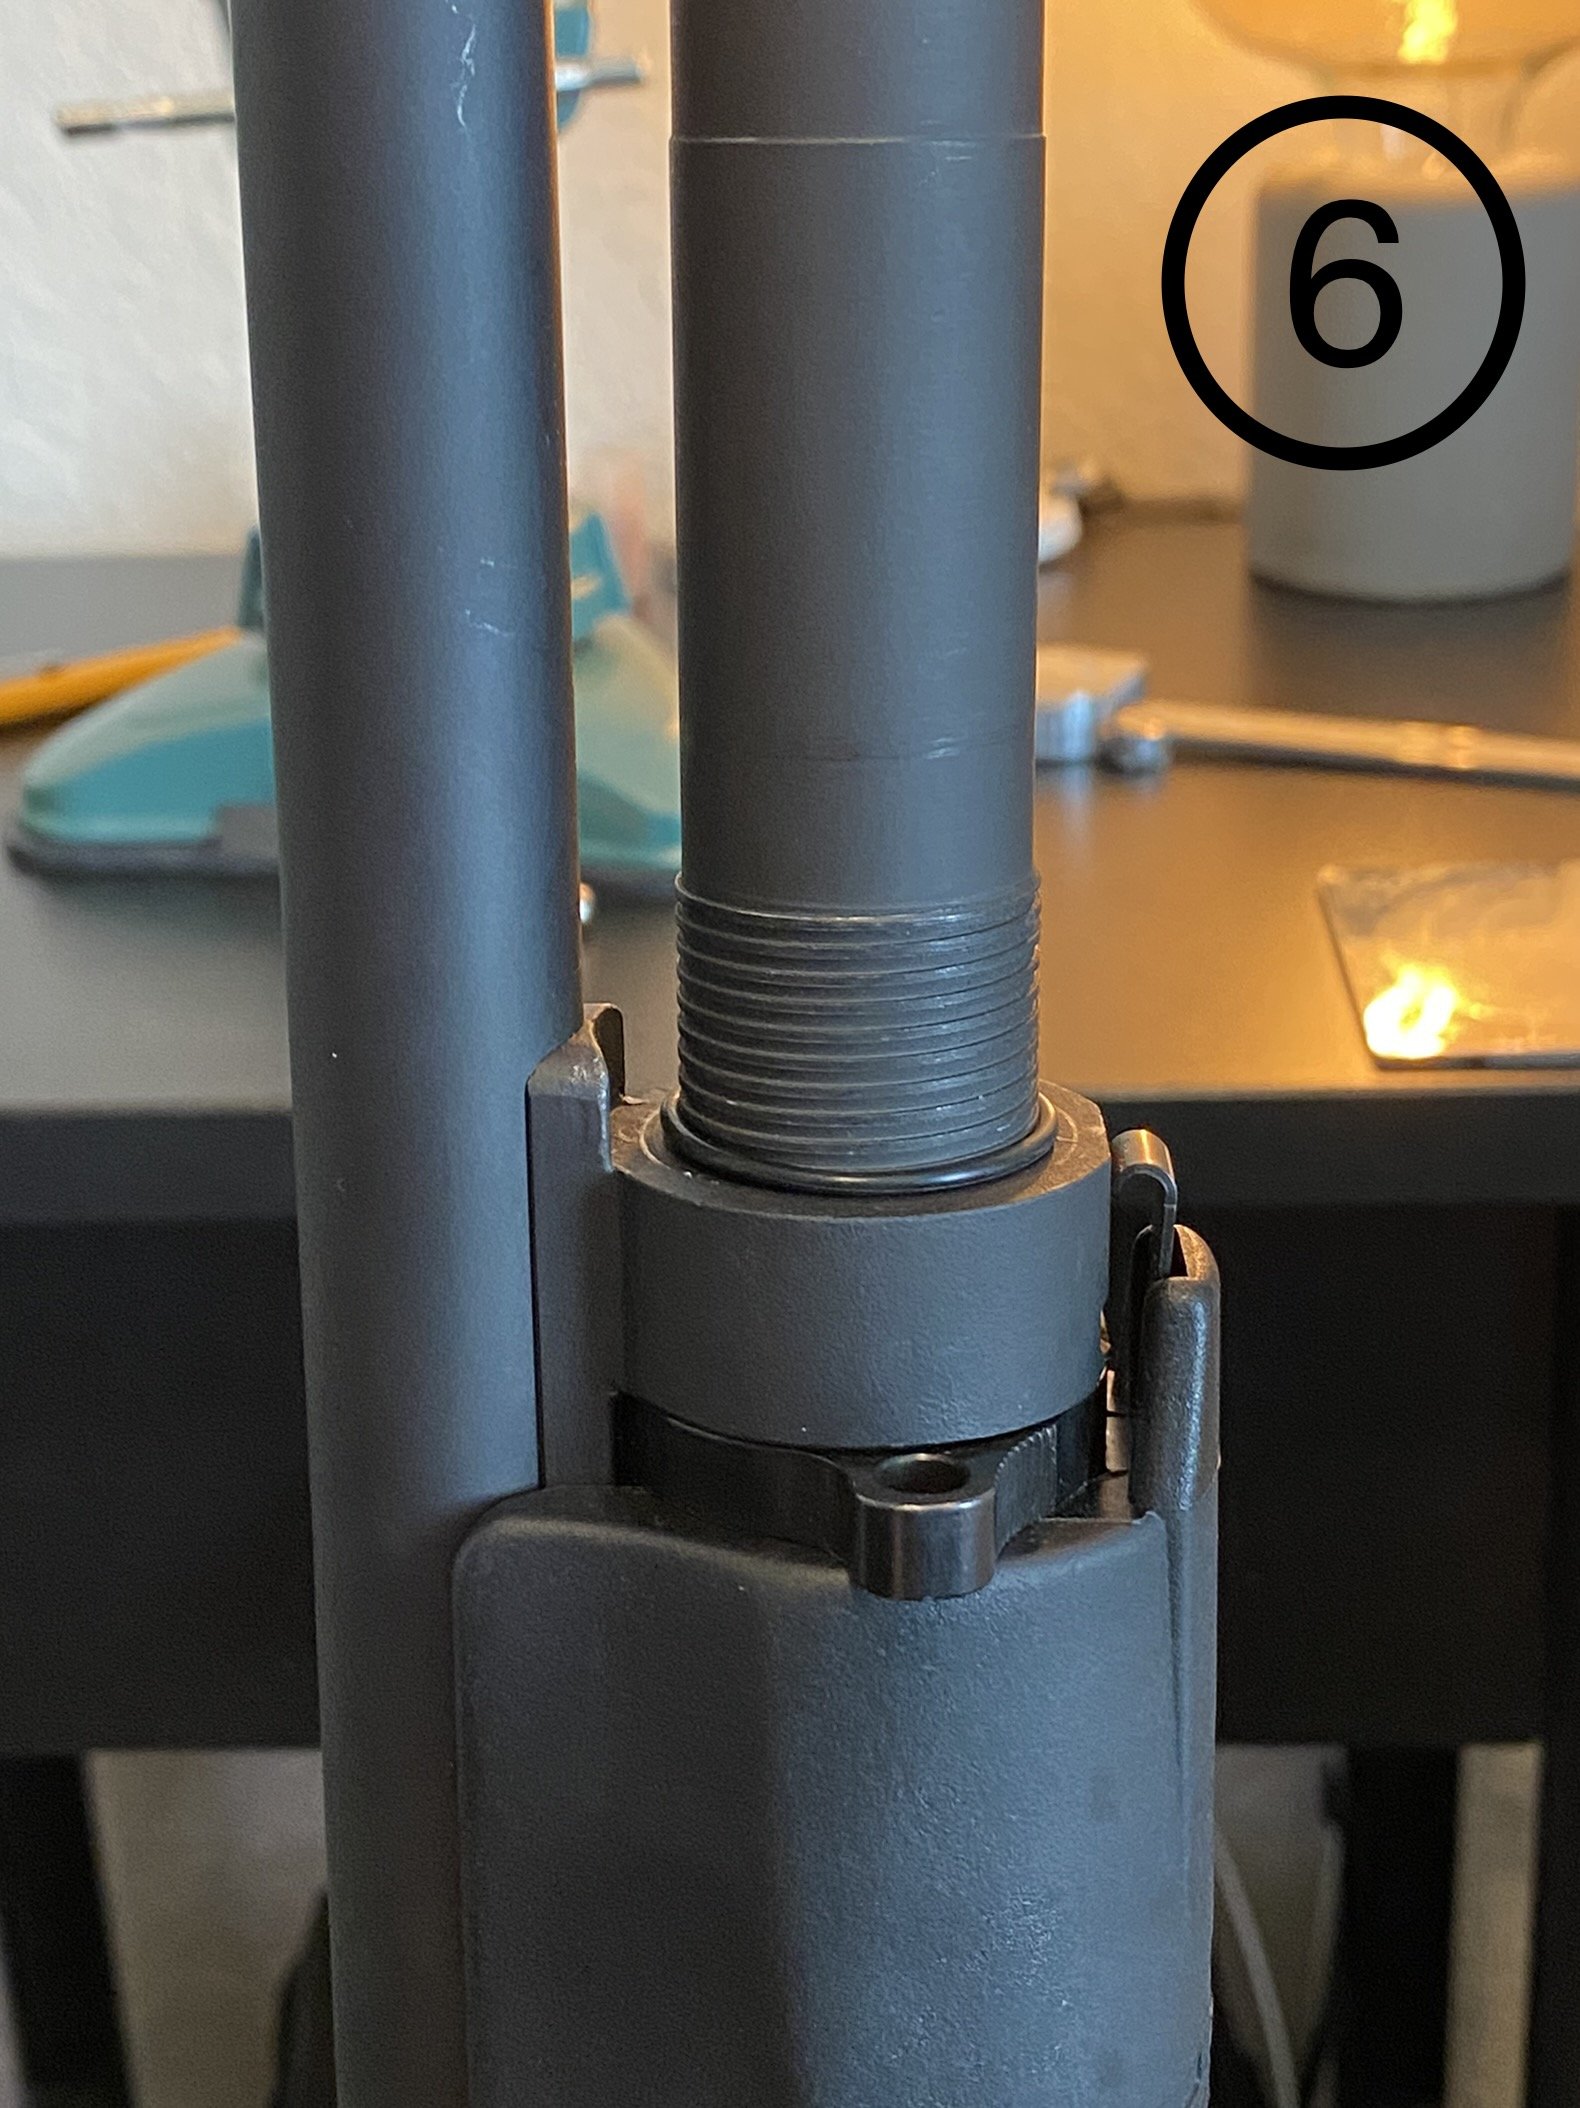
All parts should now properly fit. When test fitting, you may have noticed that the GG&G mount is loose and may rattle even when the tube nut is tightened down. This is where the o-ring is used. It will evenly fill the gap and provide for a secure fit. Slide the o-ring onto the tube as far as it will go on the threads until it butts up against the barrel block [Figure 6].
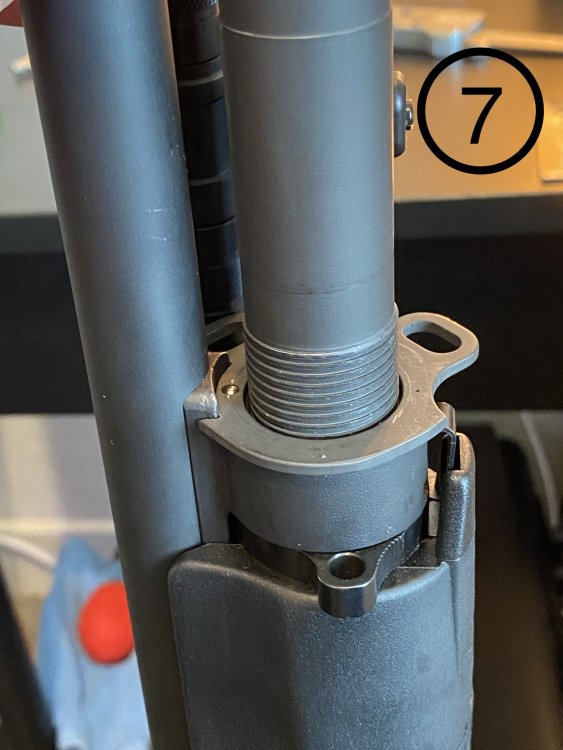
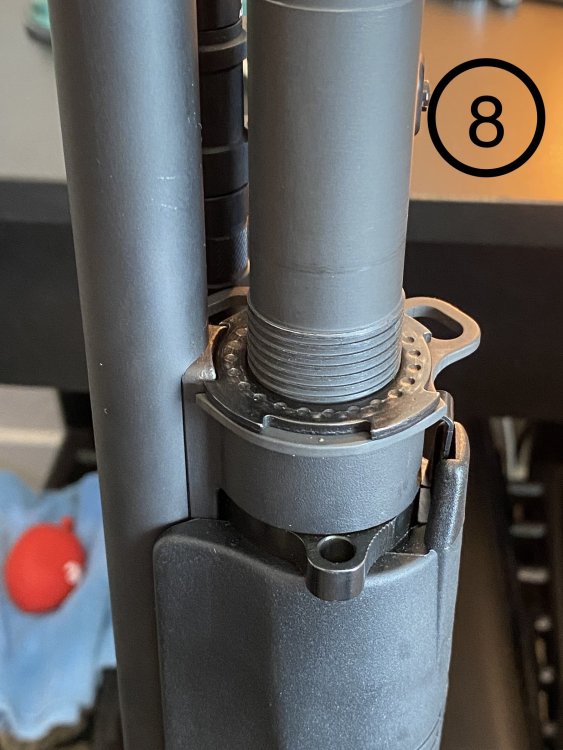
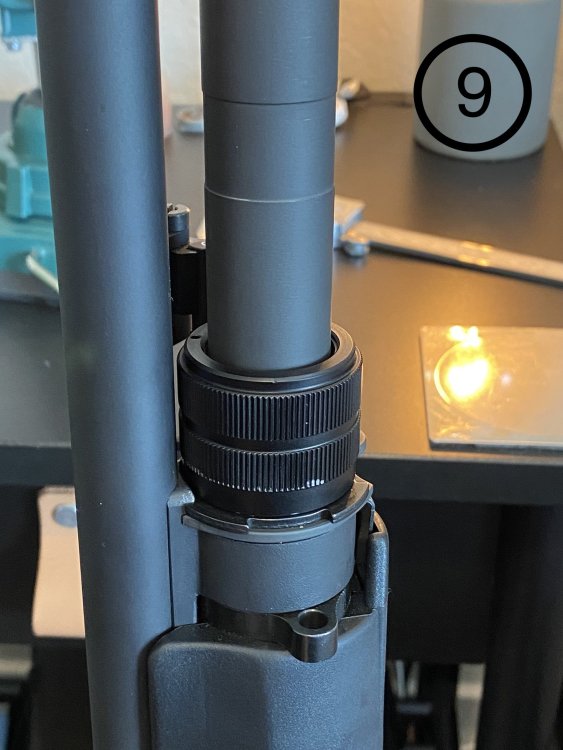
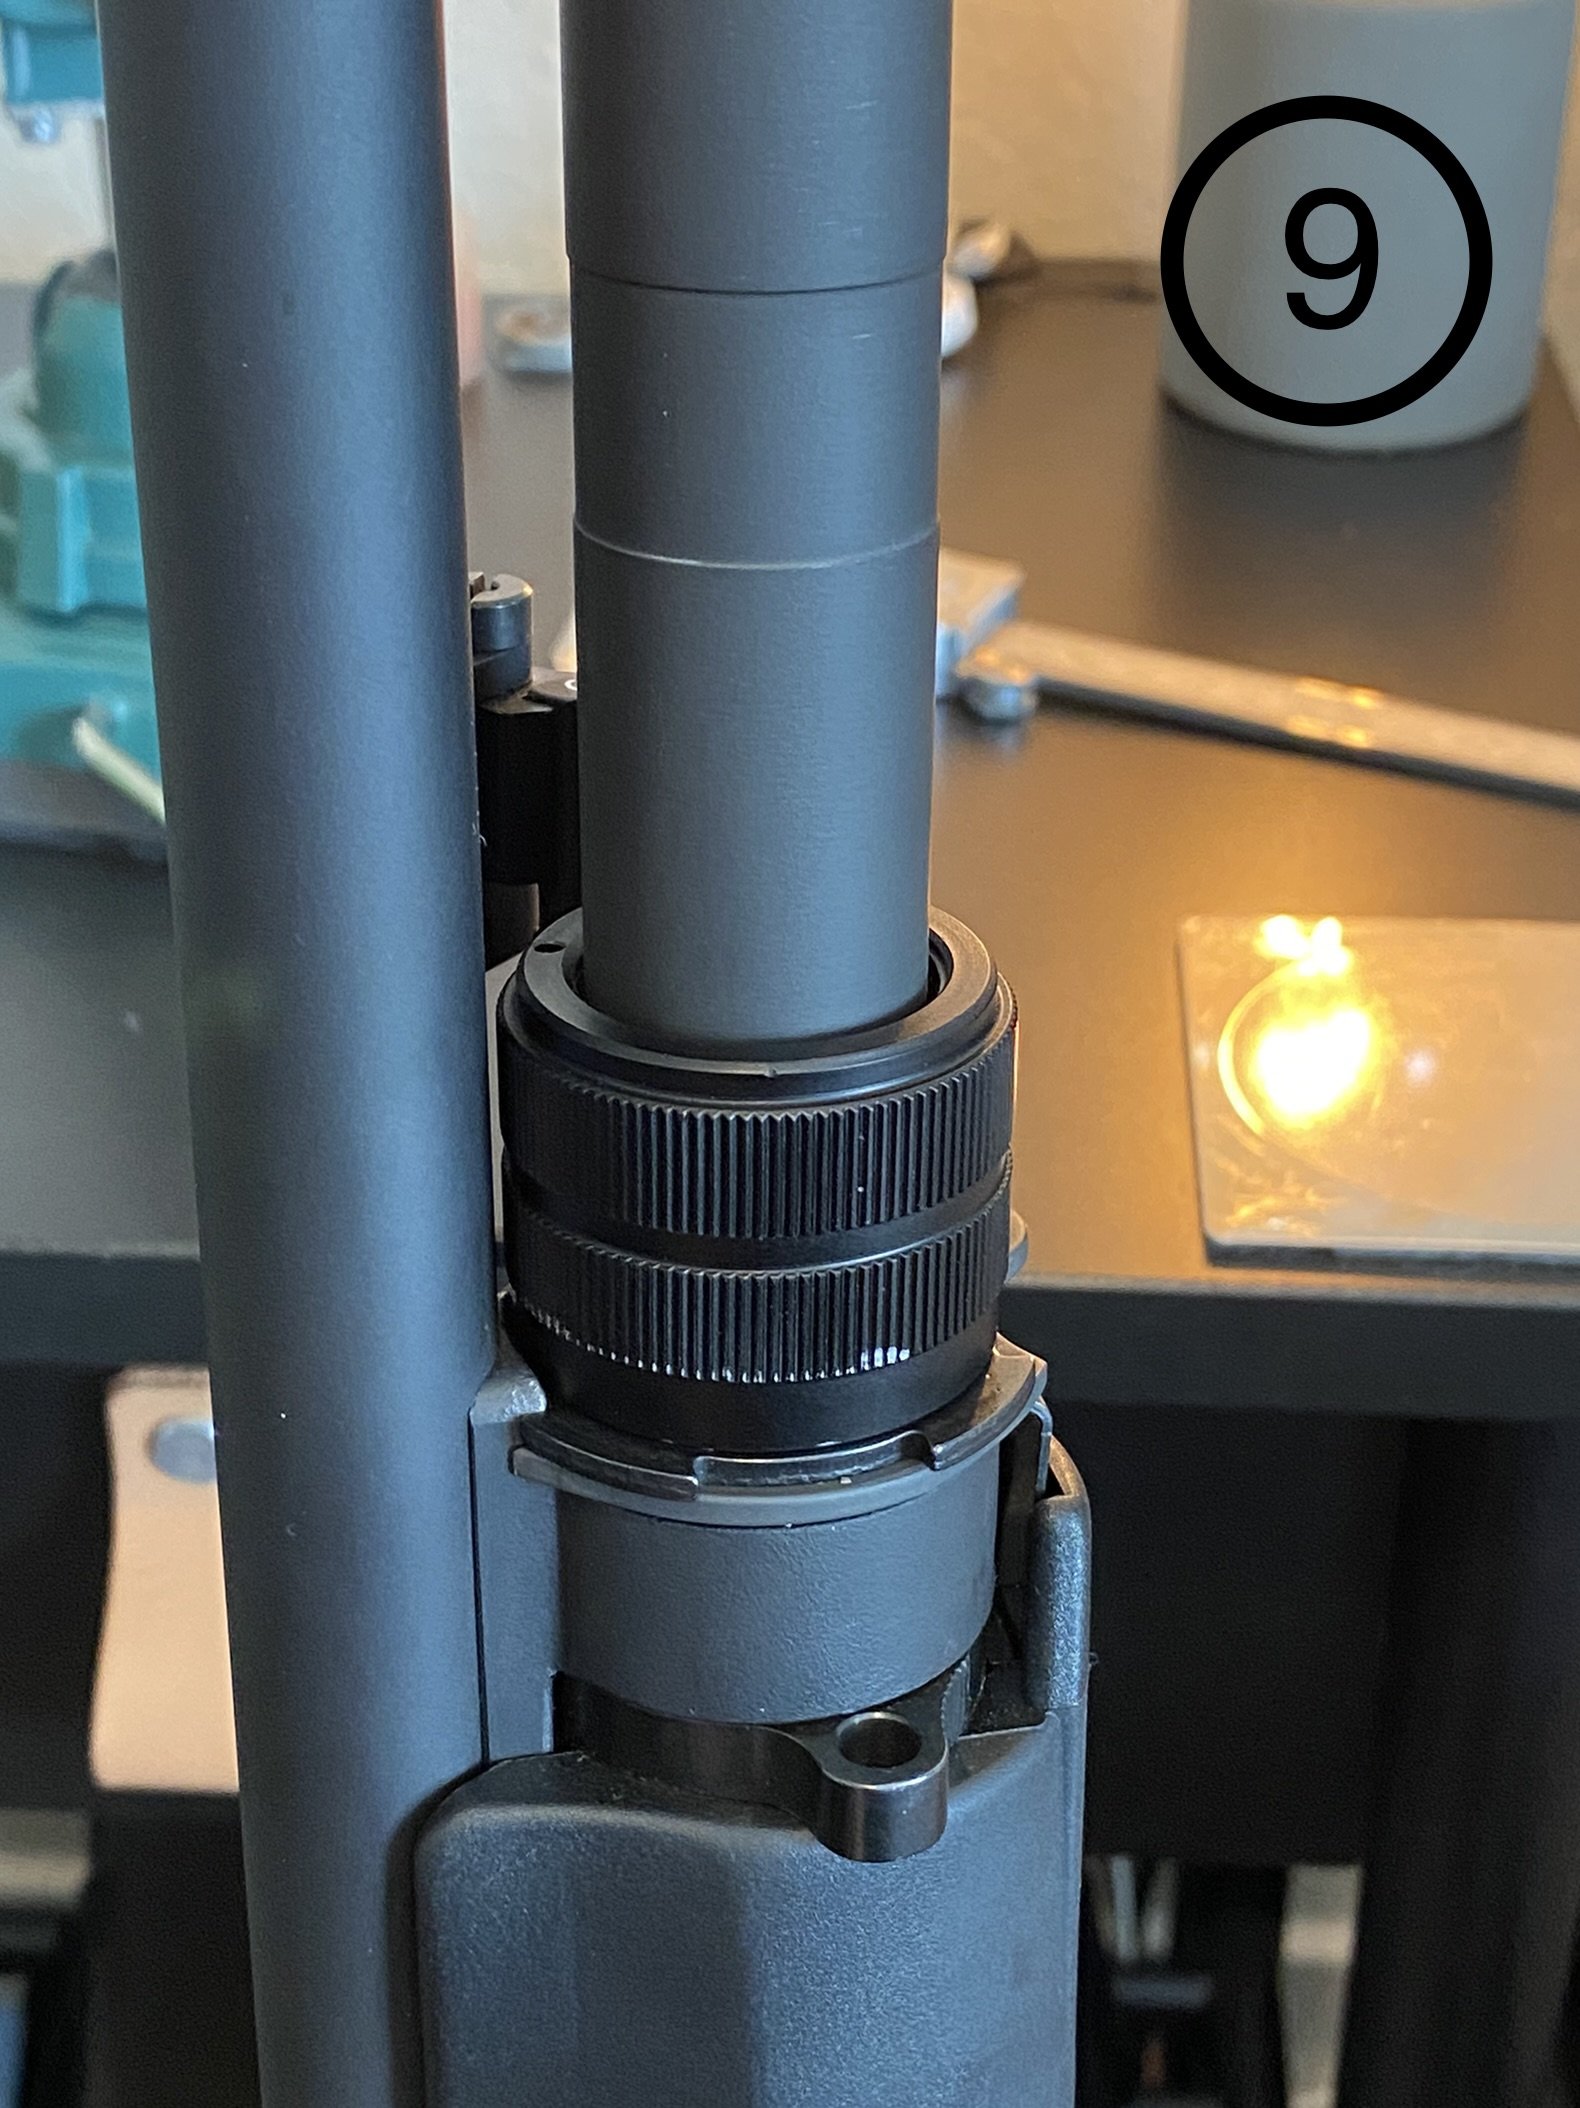
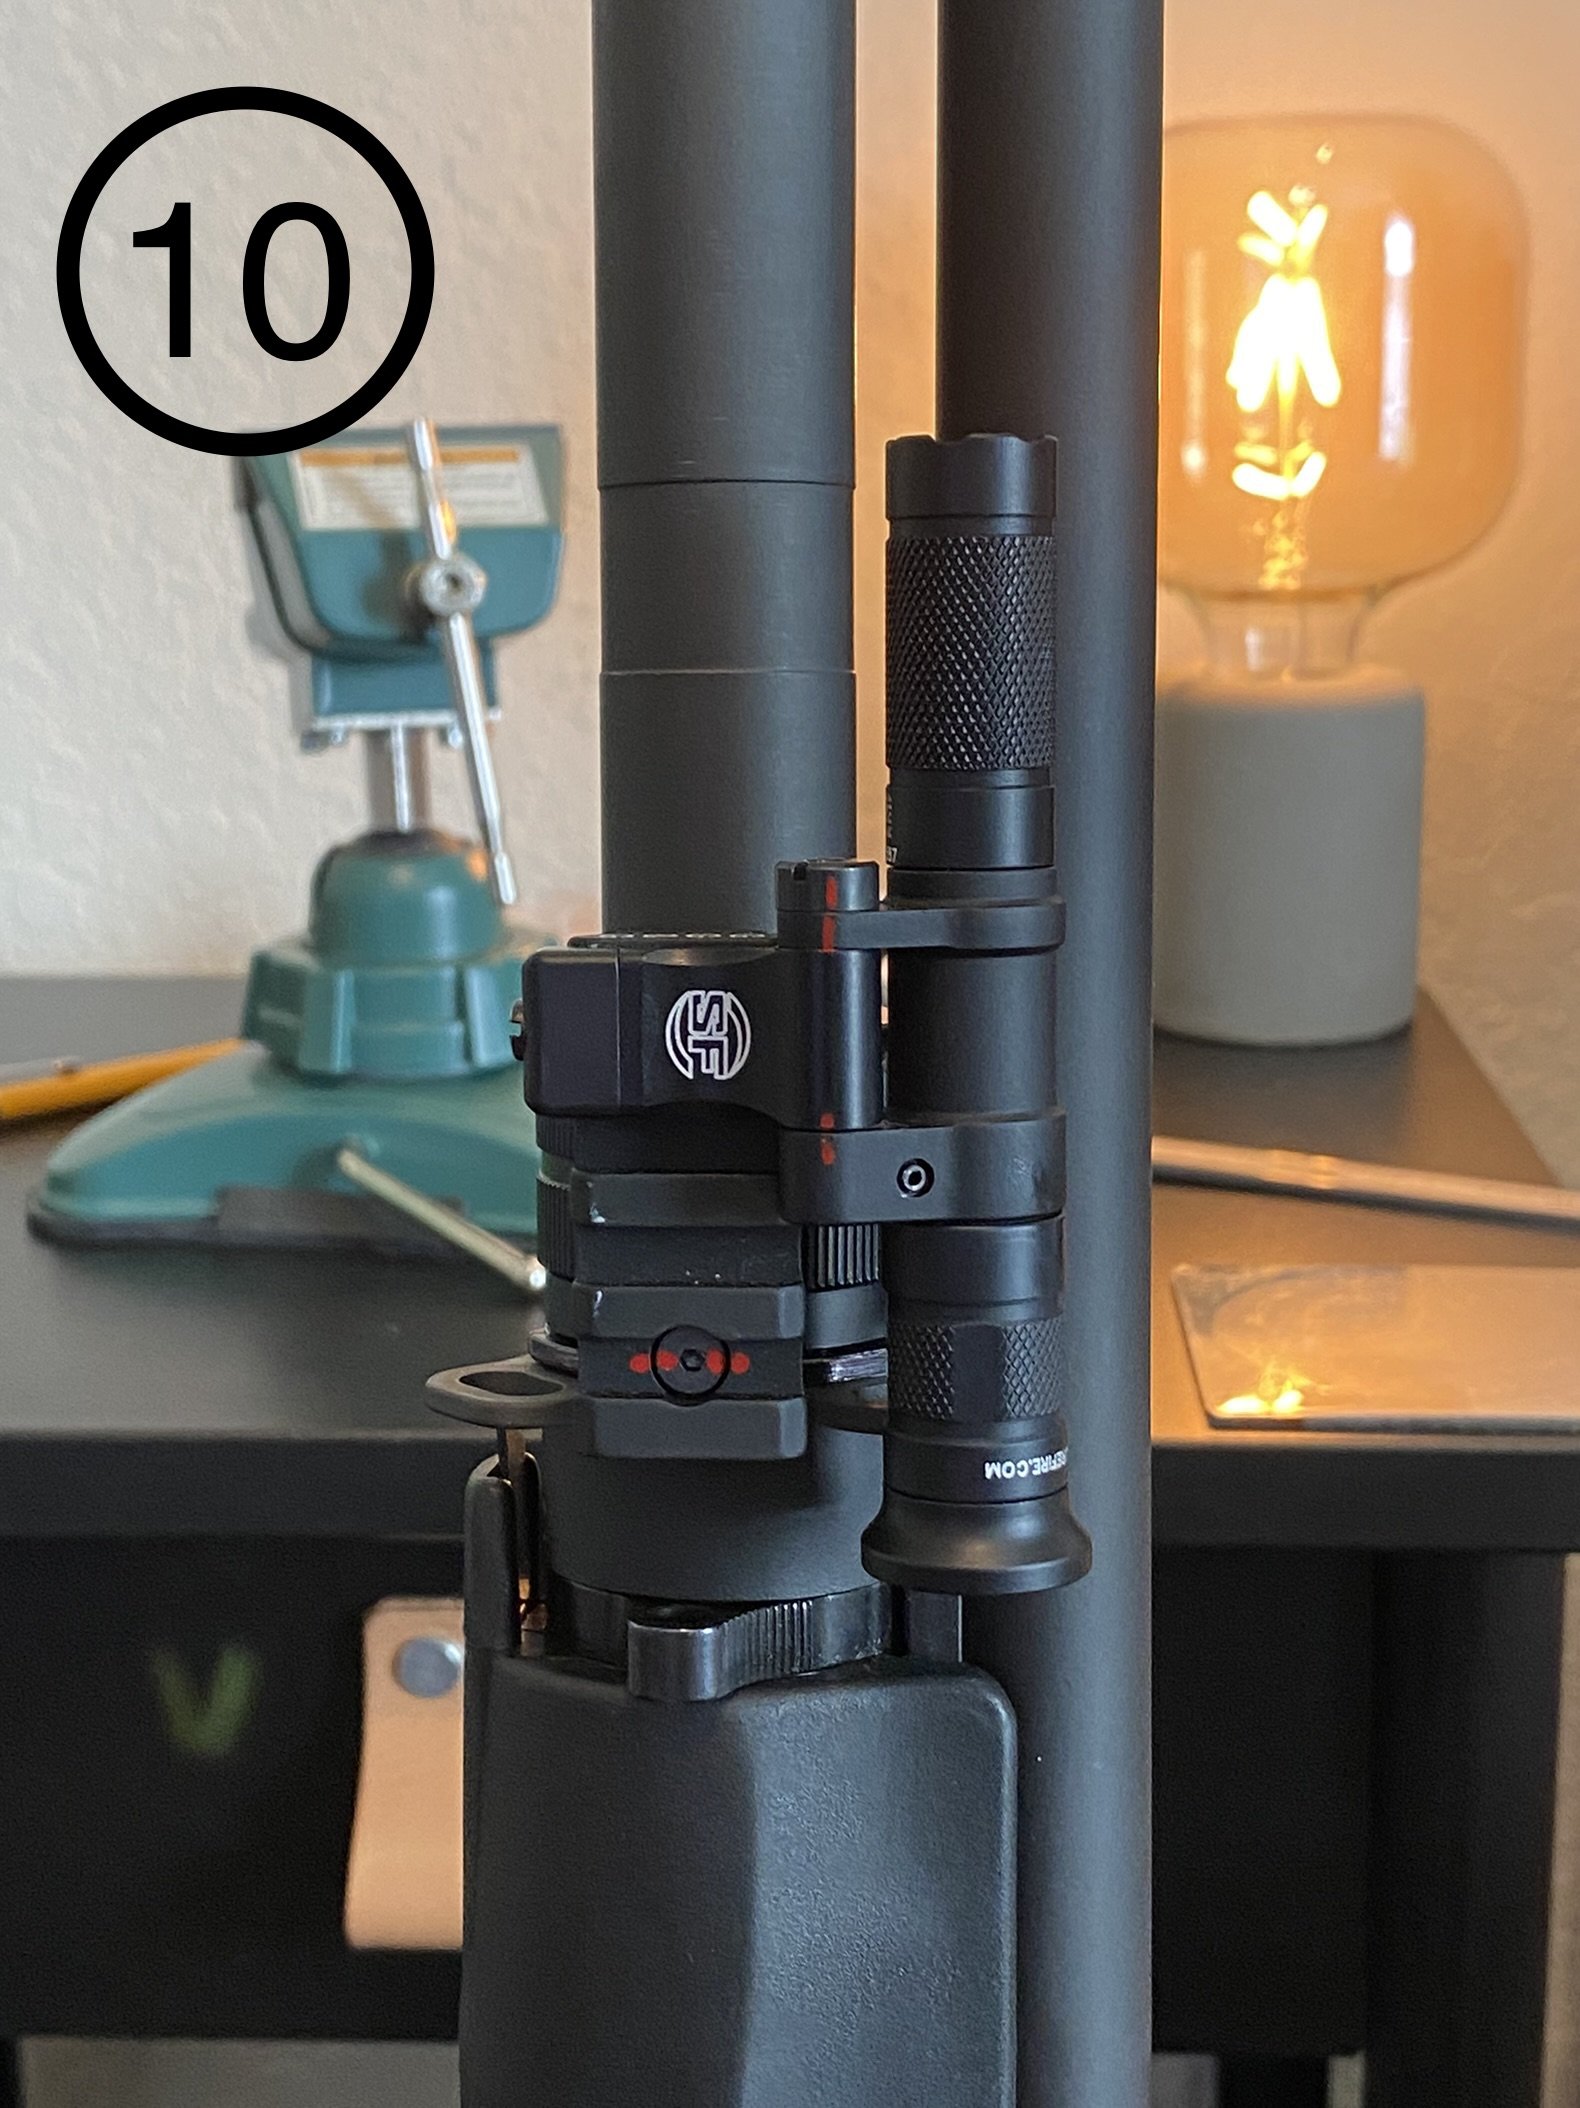
Then install the GG&G mount, then the original sling mount, and then the tube nut. Add your flashlight if choice (the lighter the better as to decrease the possibility of a malfunction due to the recoil operating system) [Figures 7-10].


-
1
-
2
-


M3/Supernova collapsible stock QD socket
in Benelli
Posted
I noticed this hole in the stock that appears to be made for a QD socket, however I can’t find anything specific about adding one. If anyone knows which (if any) QD mount will fit even if modification is necessary I’d appreciate some advice.