

Defcoms
-
Posts
5 -
Joined
-
Last visited
-
Days Won
1
Posts posted by Defcoms
-
-
On 12/8/2022 at 2:08 PM, StrangerDanger said:
Nice work. I wish I had that skillset.
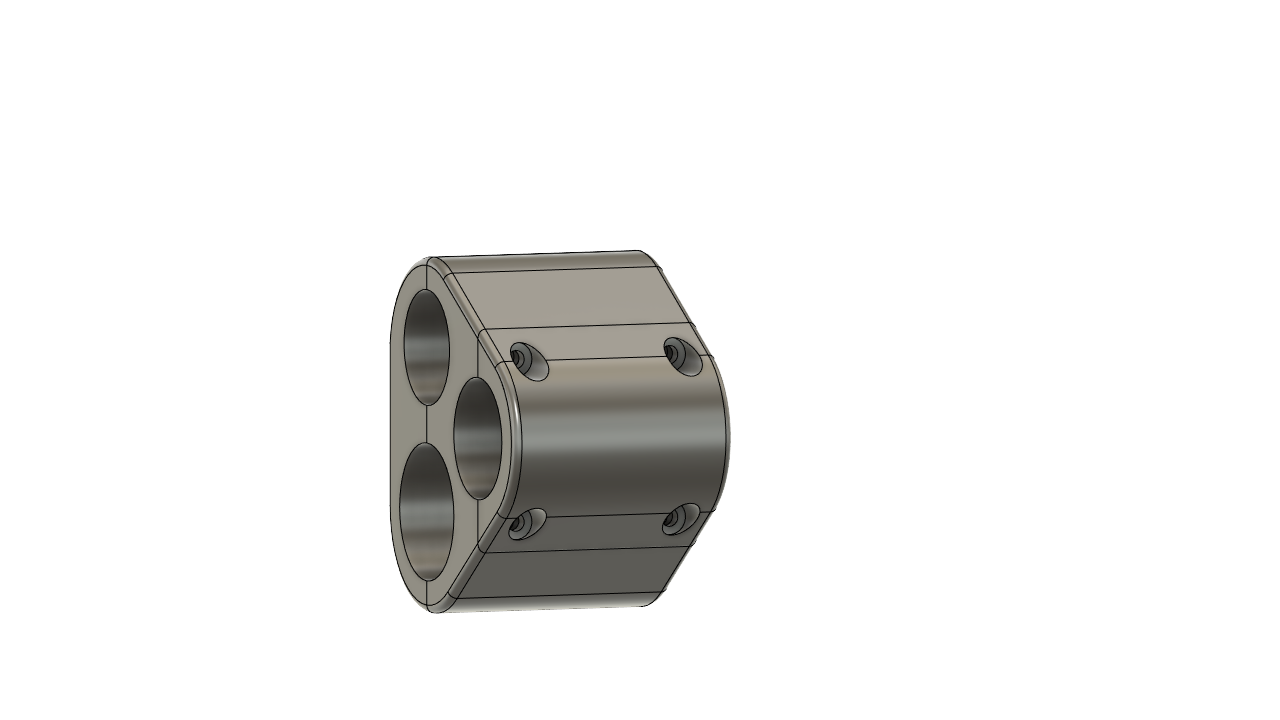
The only real issue I see with it is clamping to the magazine tube and barrel impede field stripping. This is why the mounts from IWC and Ava Tactical mounted to the barrel ring so the mount would stay attached to the barrel assembly.
Building a handguard with an integrated pressure switch for the light might be fire. Particularly something like the Unity Tactical HotButton.
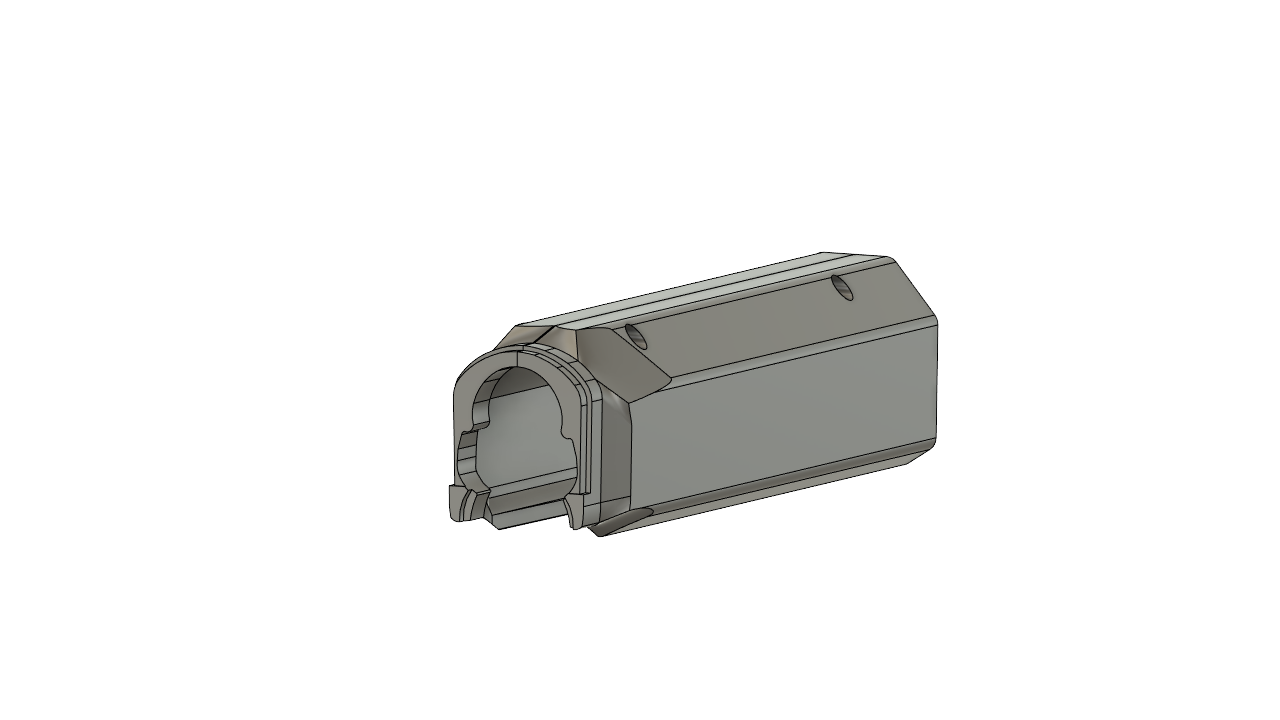
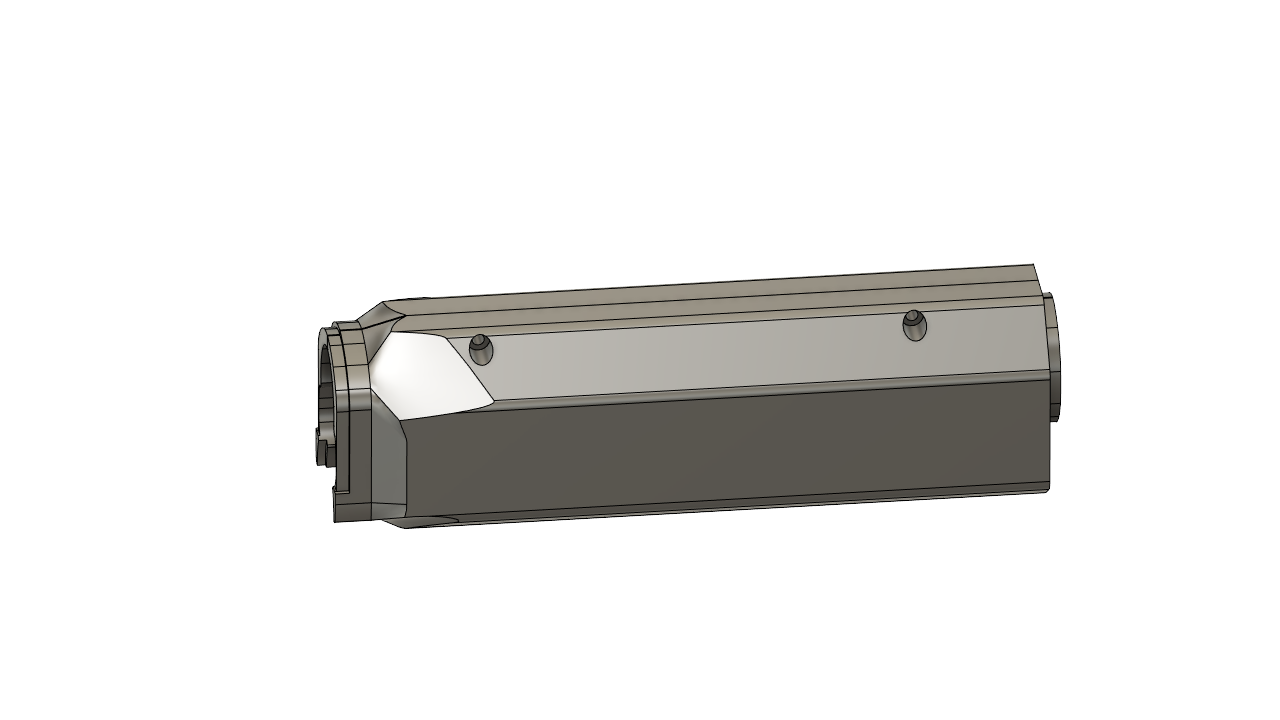
Thanks for the feed back. I will look more into changing the design. I got some ideas to do away with the screws so they can be striped off in the field without a screw driver.
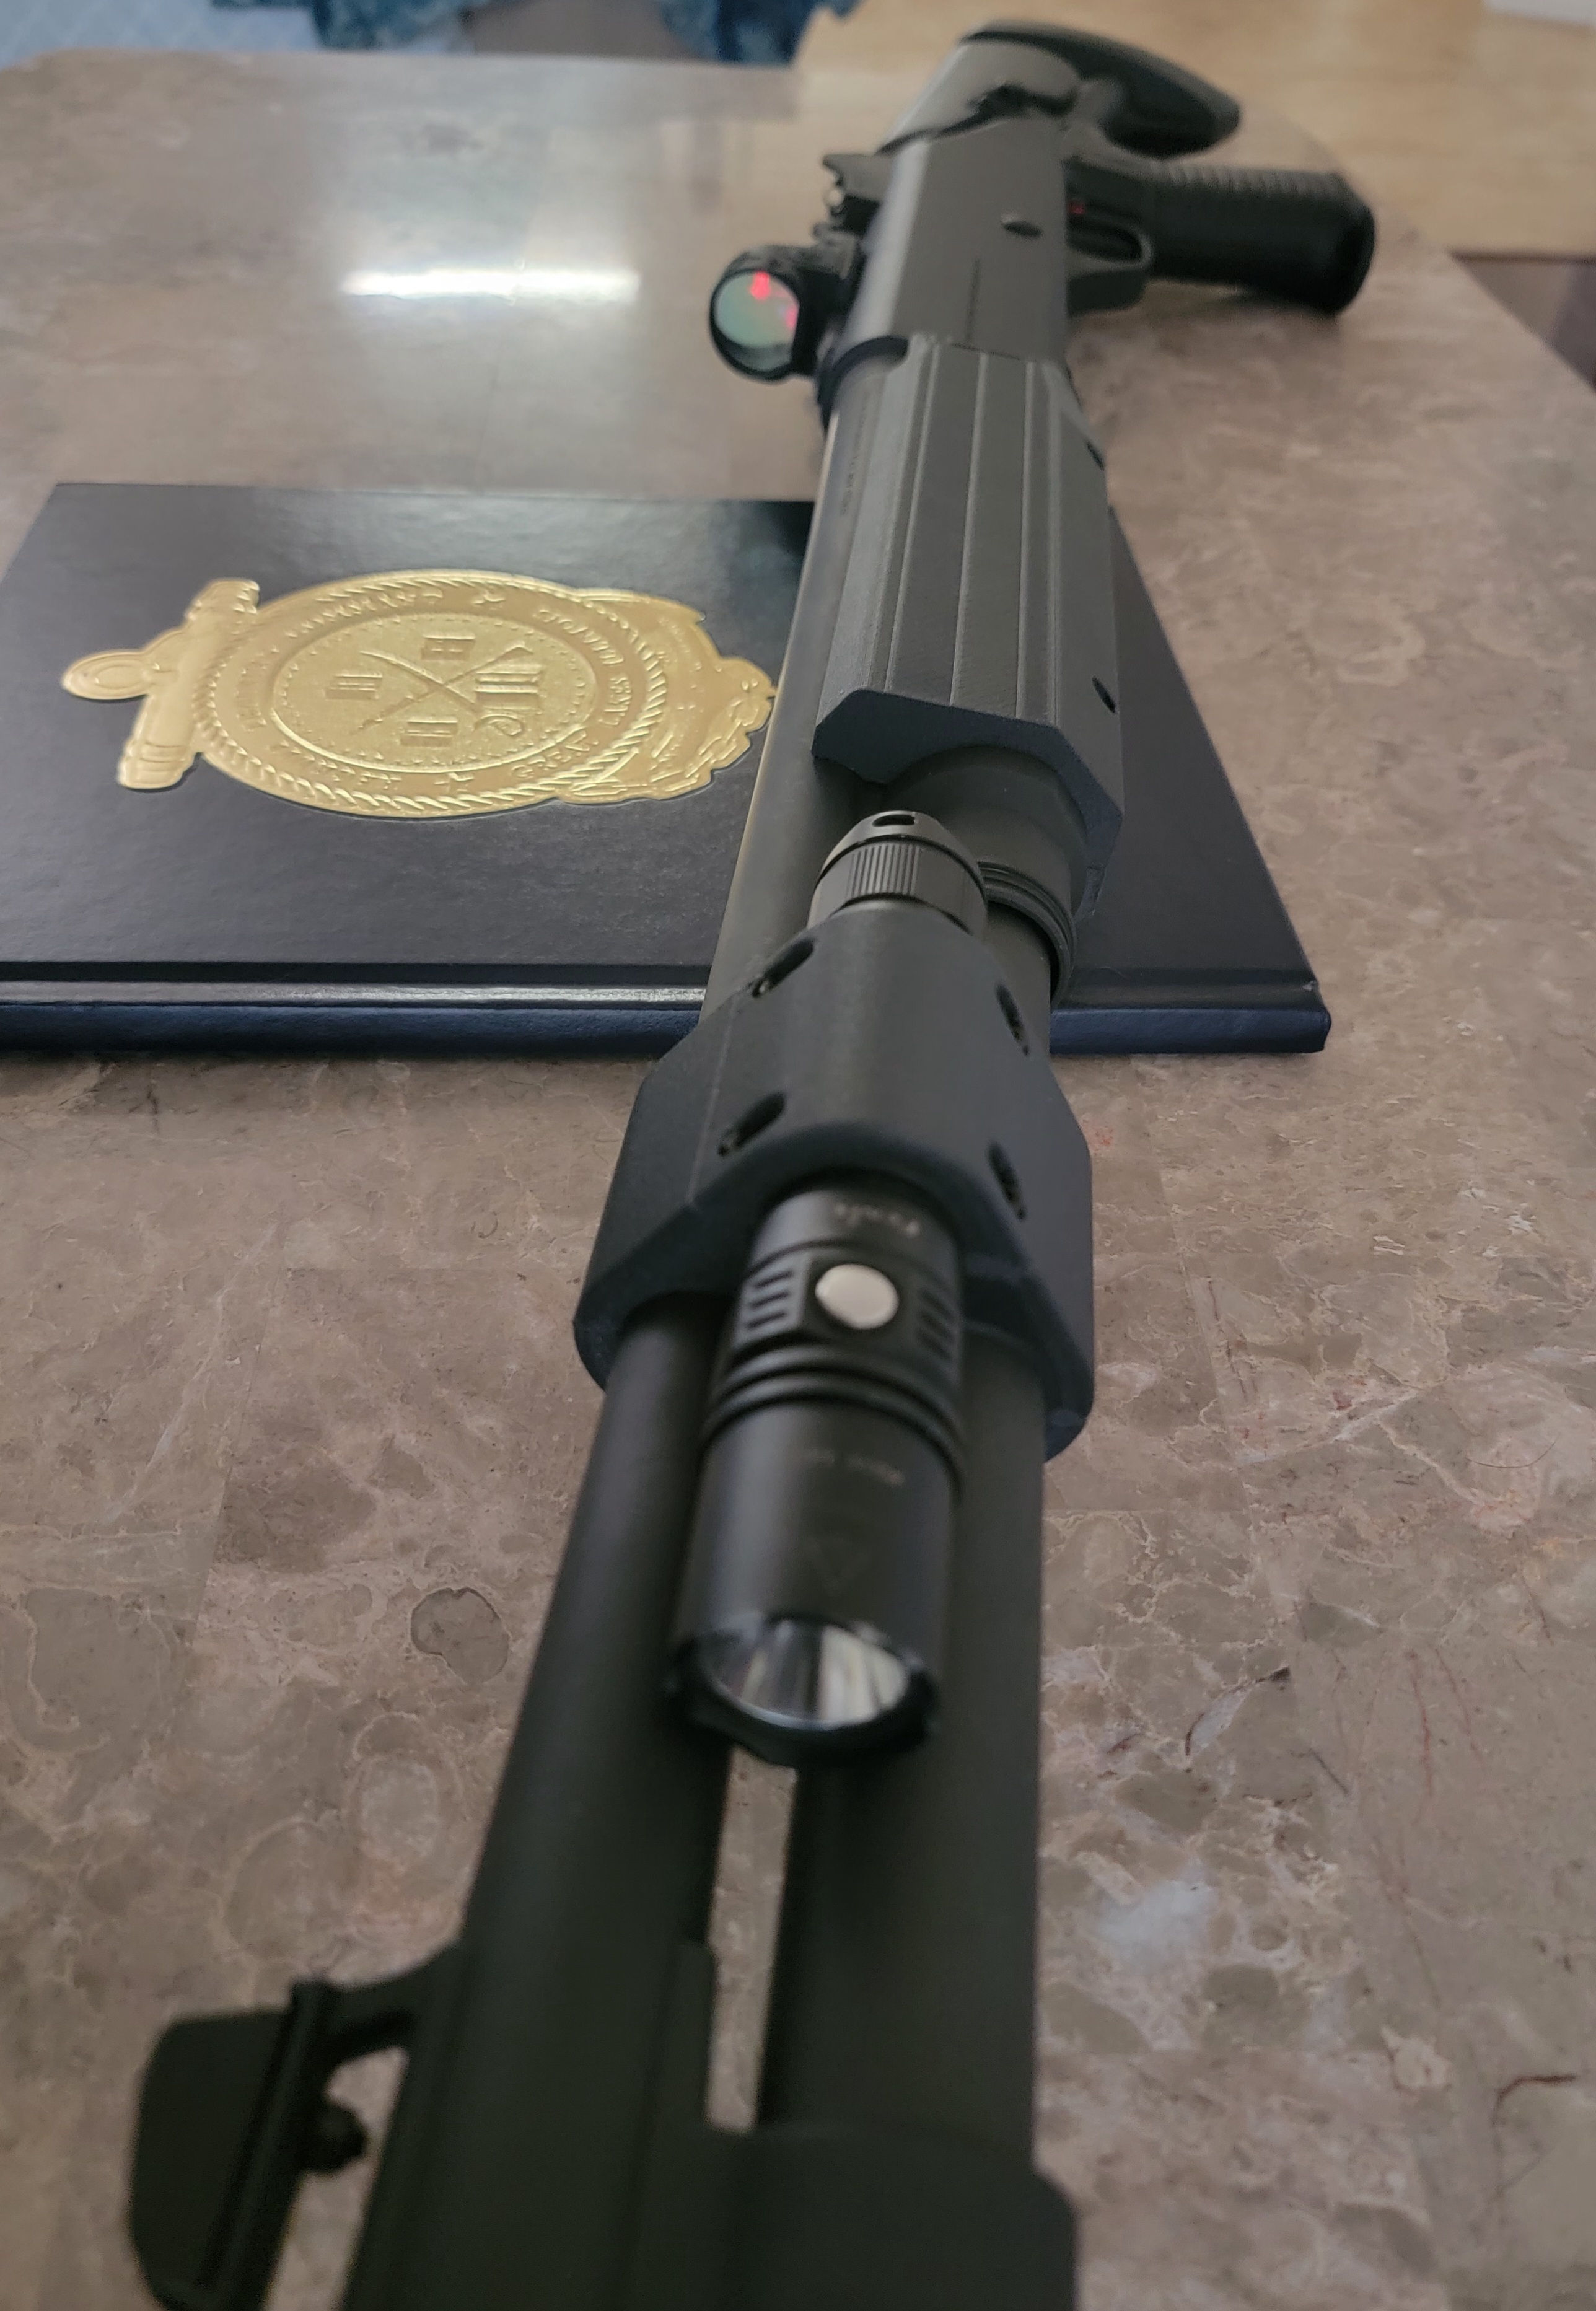
That pressure switch looks pretty awesome. I may pick one up and a new light and look at adding it into the design. I will look and see if I can find a online diagram of it so I can start tinkering.
-
 1
1
-
-
53 minutes ago, Scout_21 said:
Nice work! But why couldn't you do the same clamshell method of handguard assembly like the oem guard instead of needing screws to hold it together?
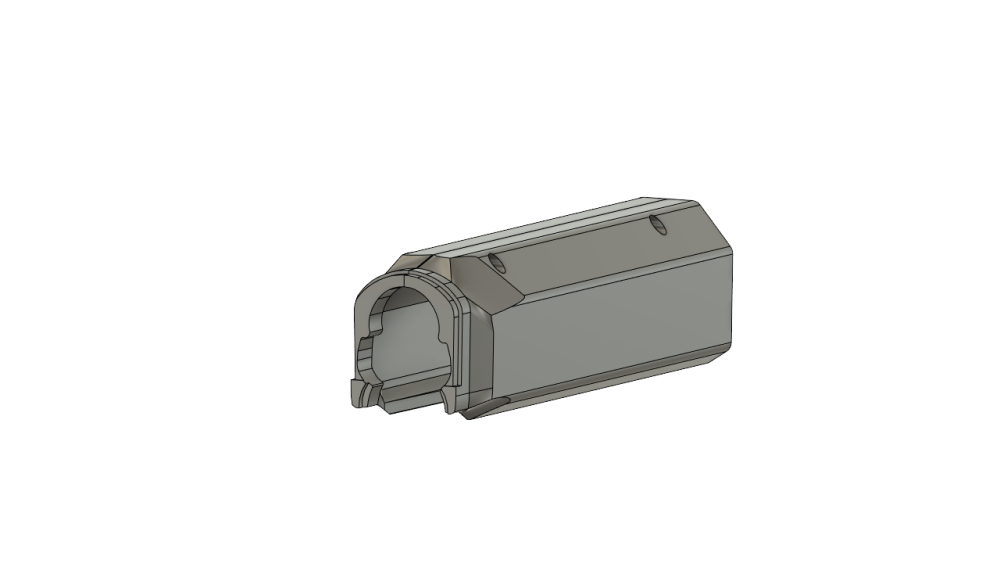
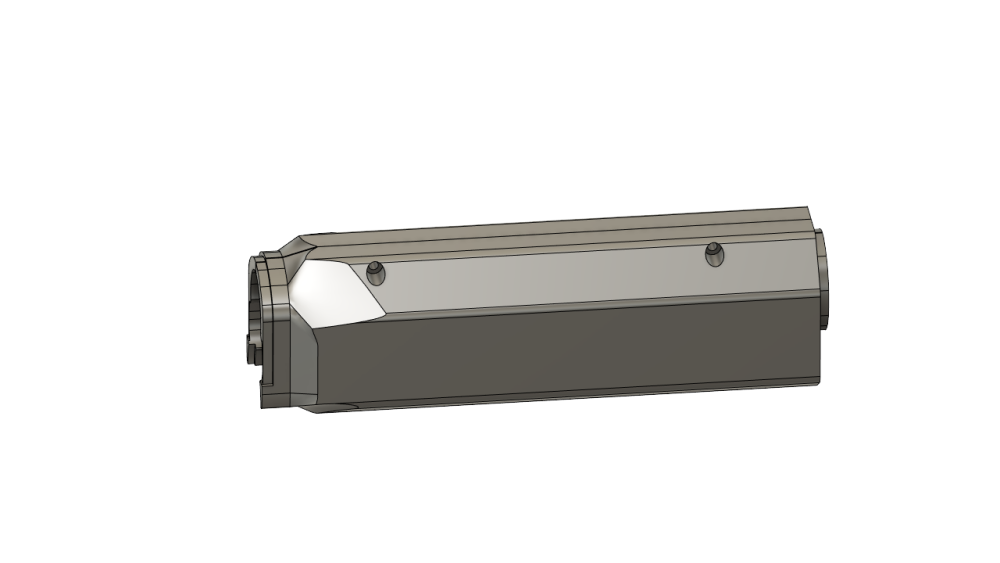
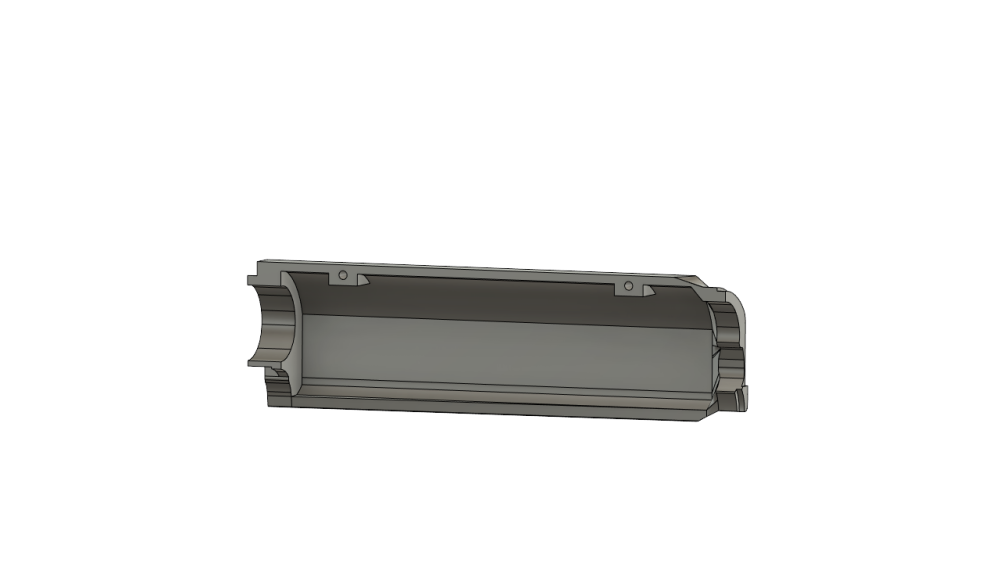
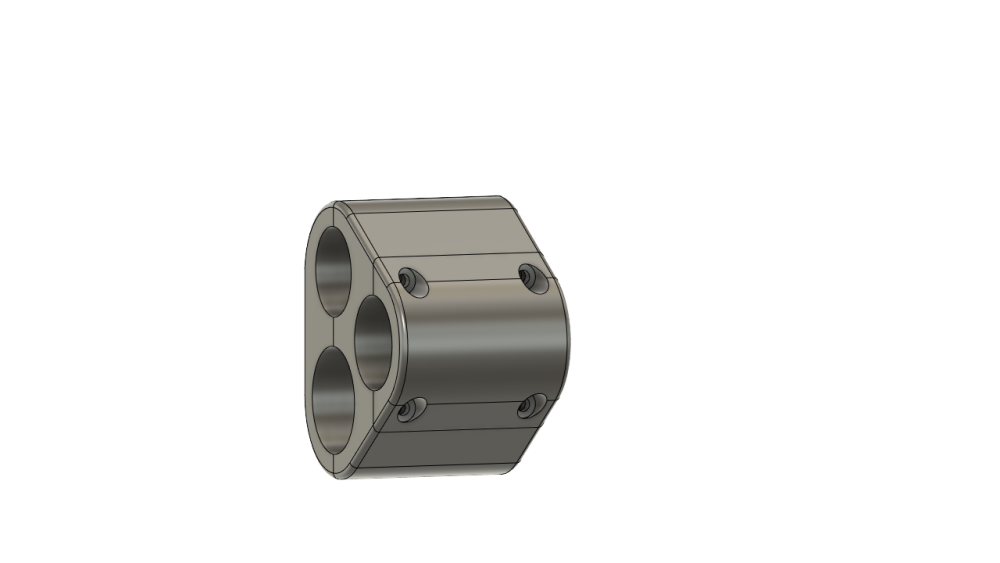
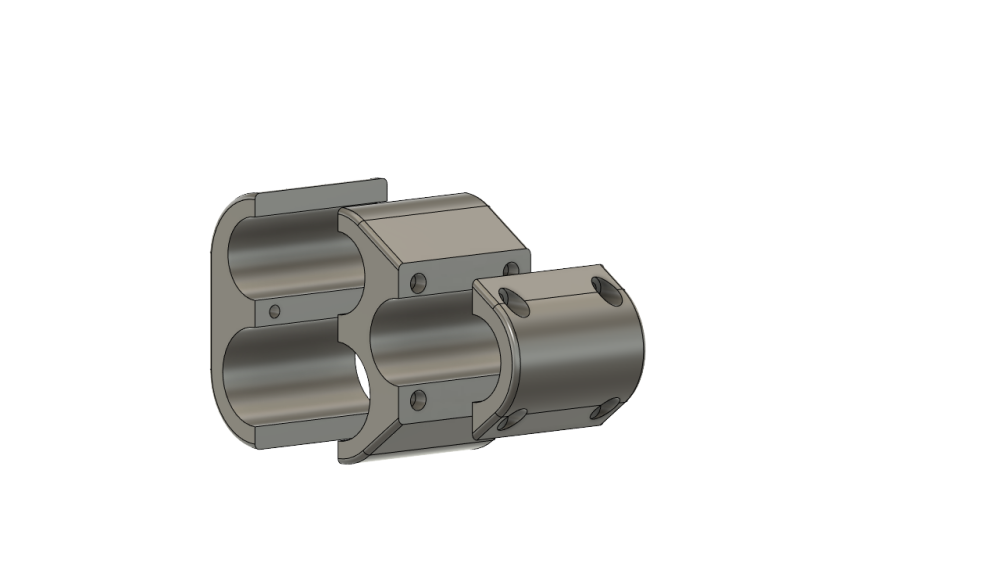
It's a similar clamshell design the machine screws just secure the two halves from separating on the bottom joint. The oem handguards have a indent and groove along the lip of the bottom. I tried this way on another design that was thinner and I didn't like how thin the the material ended up and how much flex was in the handguards. It seemed like a easy spot for layer separation or cracking so I made the outer wall thicker and added the screws. I can do away with the screws and use a peg on one side and hole on the other where the screws are at now.
-
38 minutes ago, Jill said:
Looks really cool! Have you fired with it yet, does everything hold up well after some use?
I have not fired it yet. I just got it finished a few days ago and I haven't had a chance to go to the range yet.
-
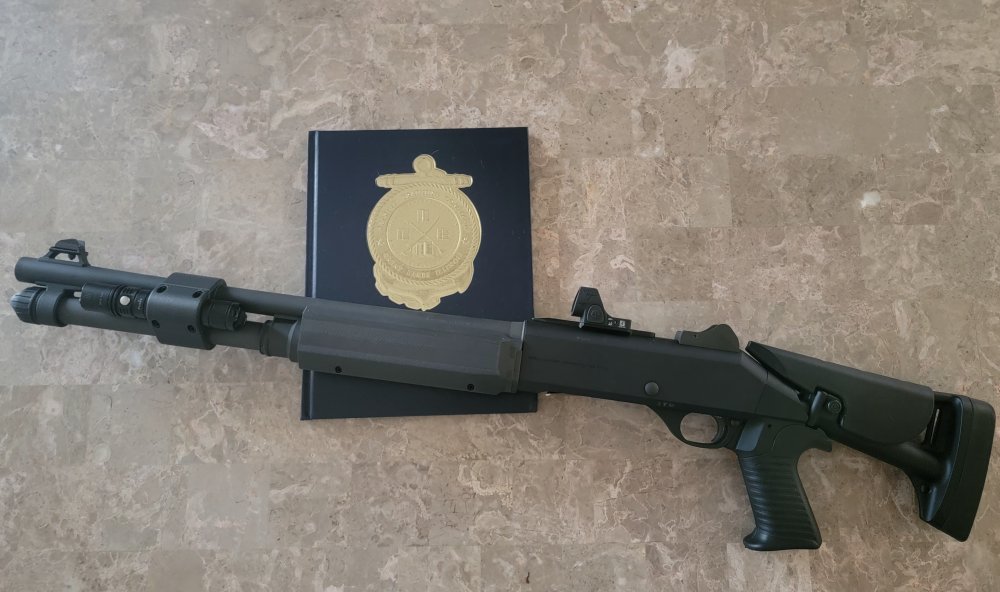
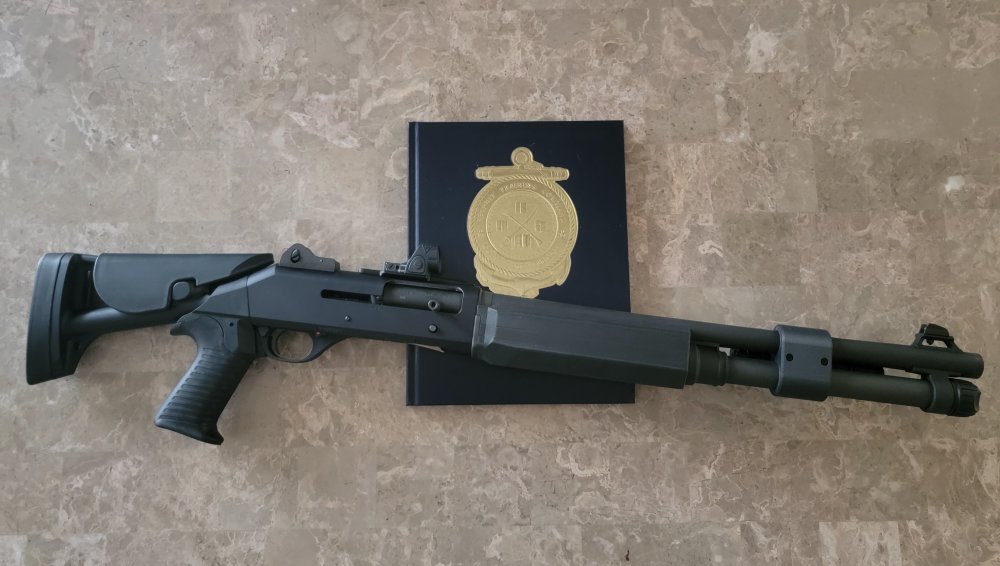
Wanted to share a 2 parts I have been working on for the M4. I designed these and printed them in Nylon Carbon Fiber PA12-CF. I am still tweaking the design and looking for some feedback. They install the same as the factory handguards but do have 2 m3 socket cap screws that secure the 2 halves together using heat inserts. The flashlight mount is for a Fenix PD35 Tac but can be sized for any light.


-
 4
4
-
1
-


M4 3D Printed Handguard & Tactical Light Mount
in Benelli
Posted · Edited by Defcoms
Well I made it to the range and fired about 50 slugs throught it. The handguards worked well and had no issues. I haven't had a chance to start working on a new design yet, work keeps getting in the way 😢. I will post when I have a update.
Edit:
I haven't ordered a Unity Tactical Hot Button yet but looking at them online it looks like it would be very easy to add it to the handguard. I was thinking of maybe flush mounting it and having a cable channel. Could someone post a picture of the backside of the button straight on with a dime or penny sitting in the center of it so I can reference the size. The thickness of the plate would be helpful as well.