

benelliwerkes
-
Posts
808 -
Joined
-
Last visited
-
Days Won
24
Posts posted by benelliwerkes
-
-
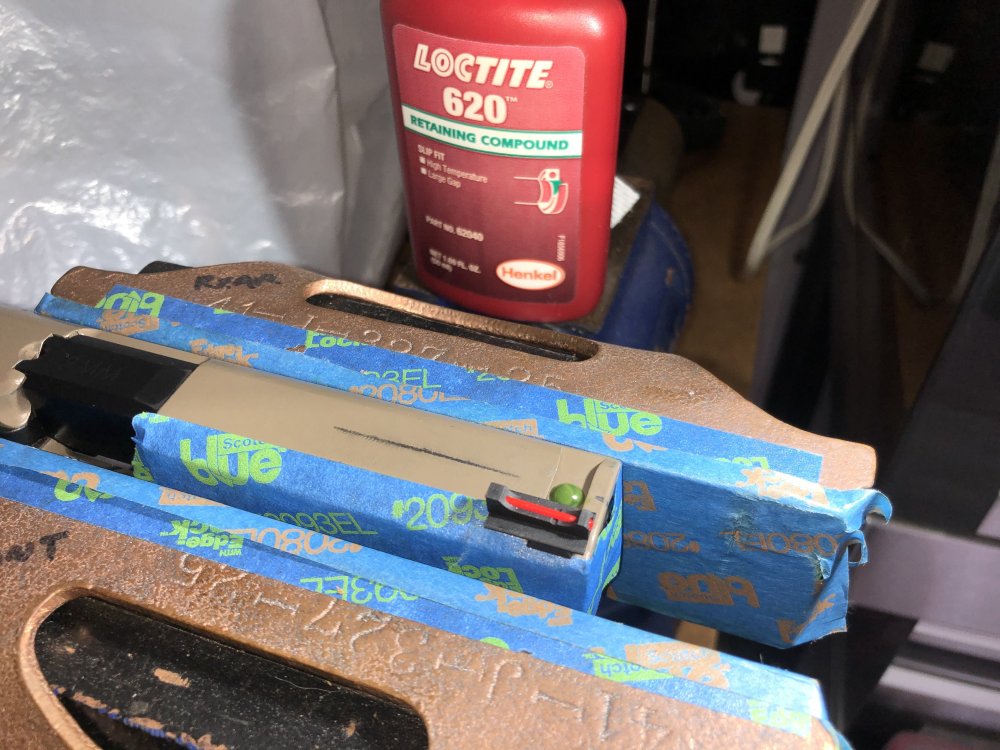
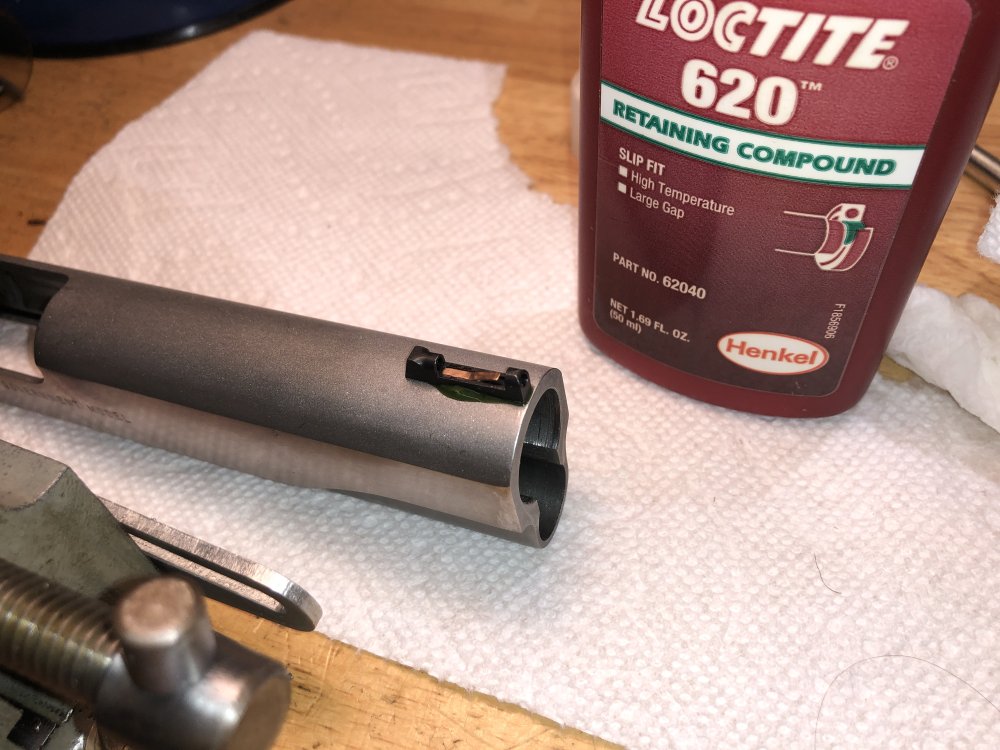
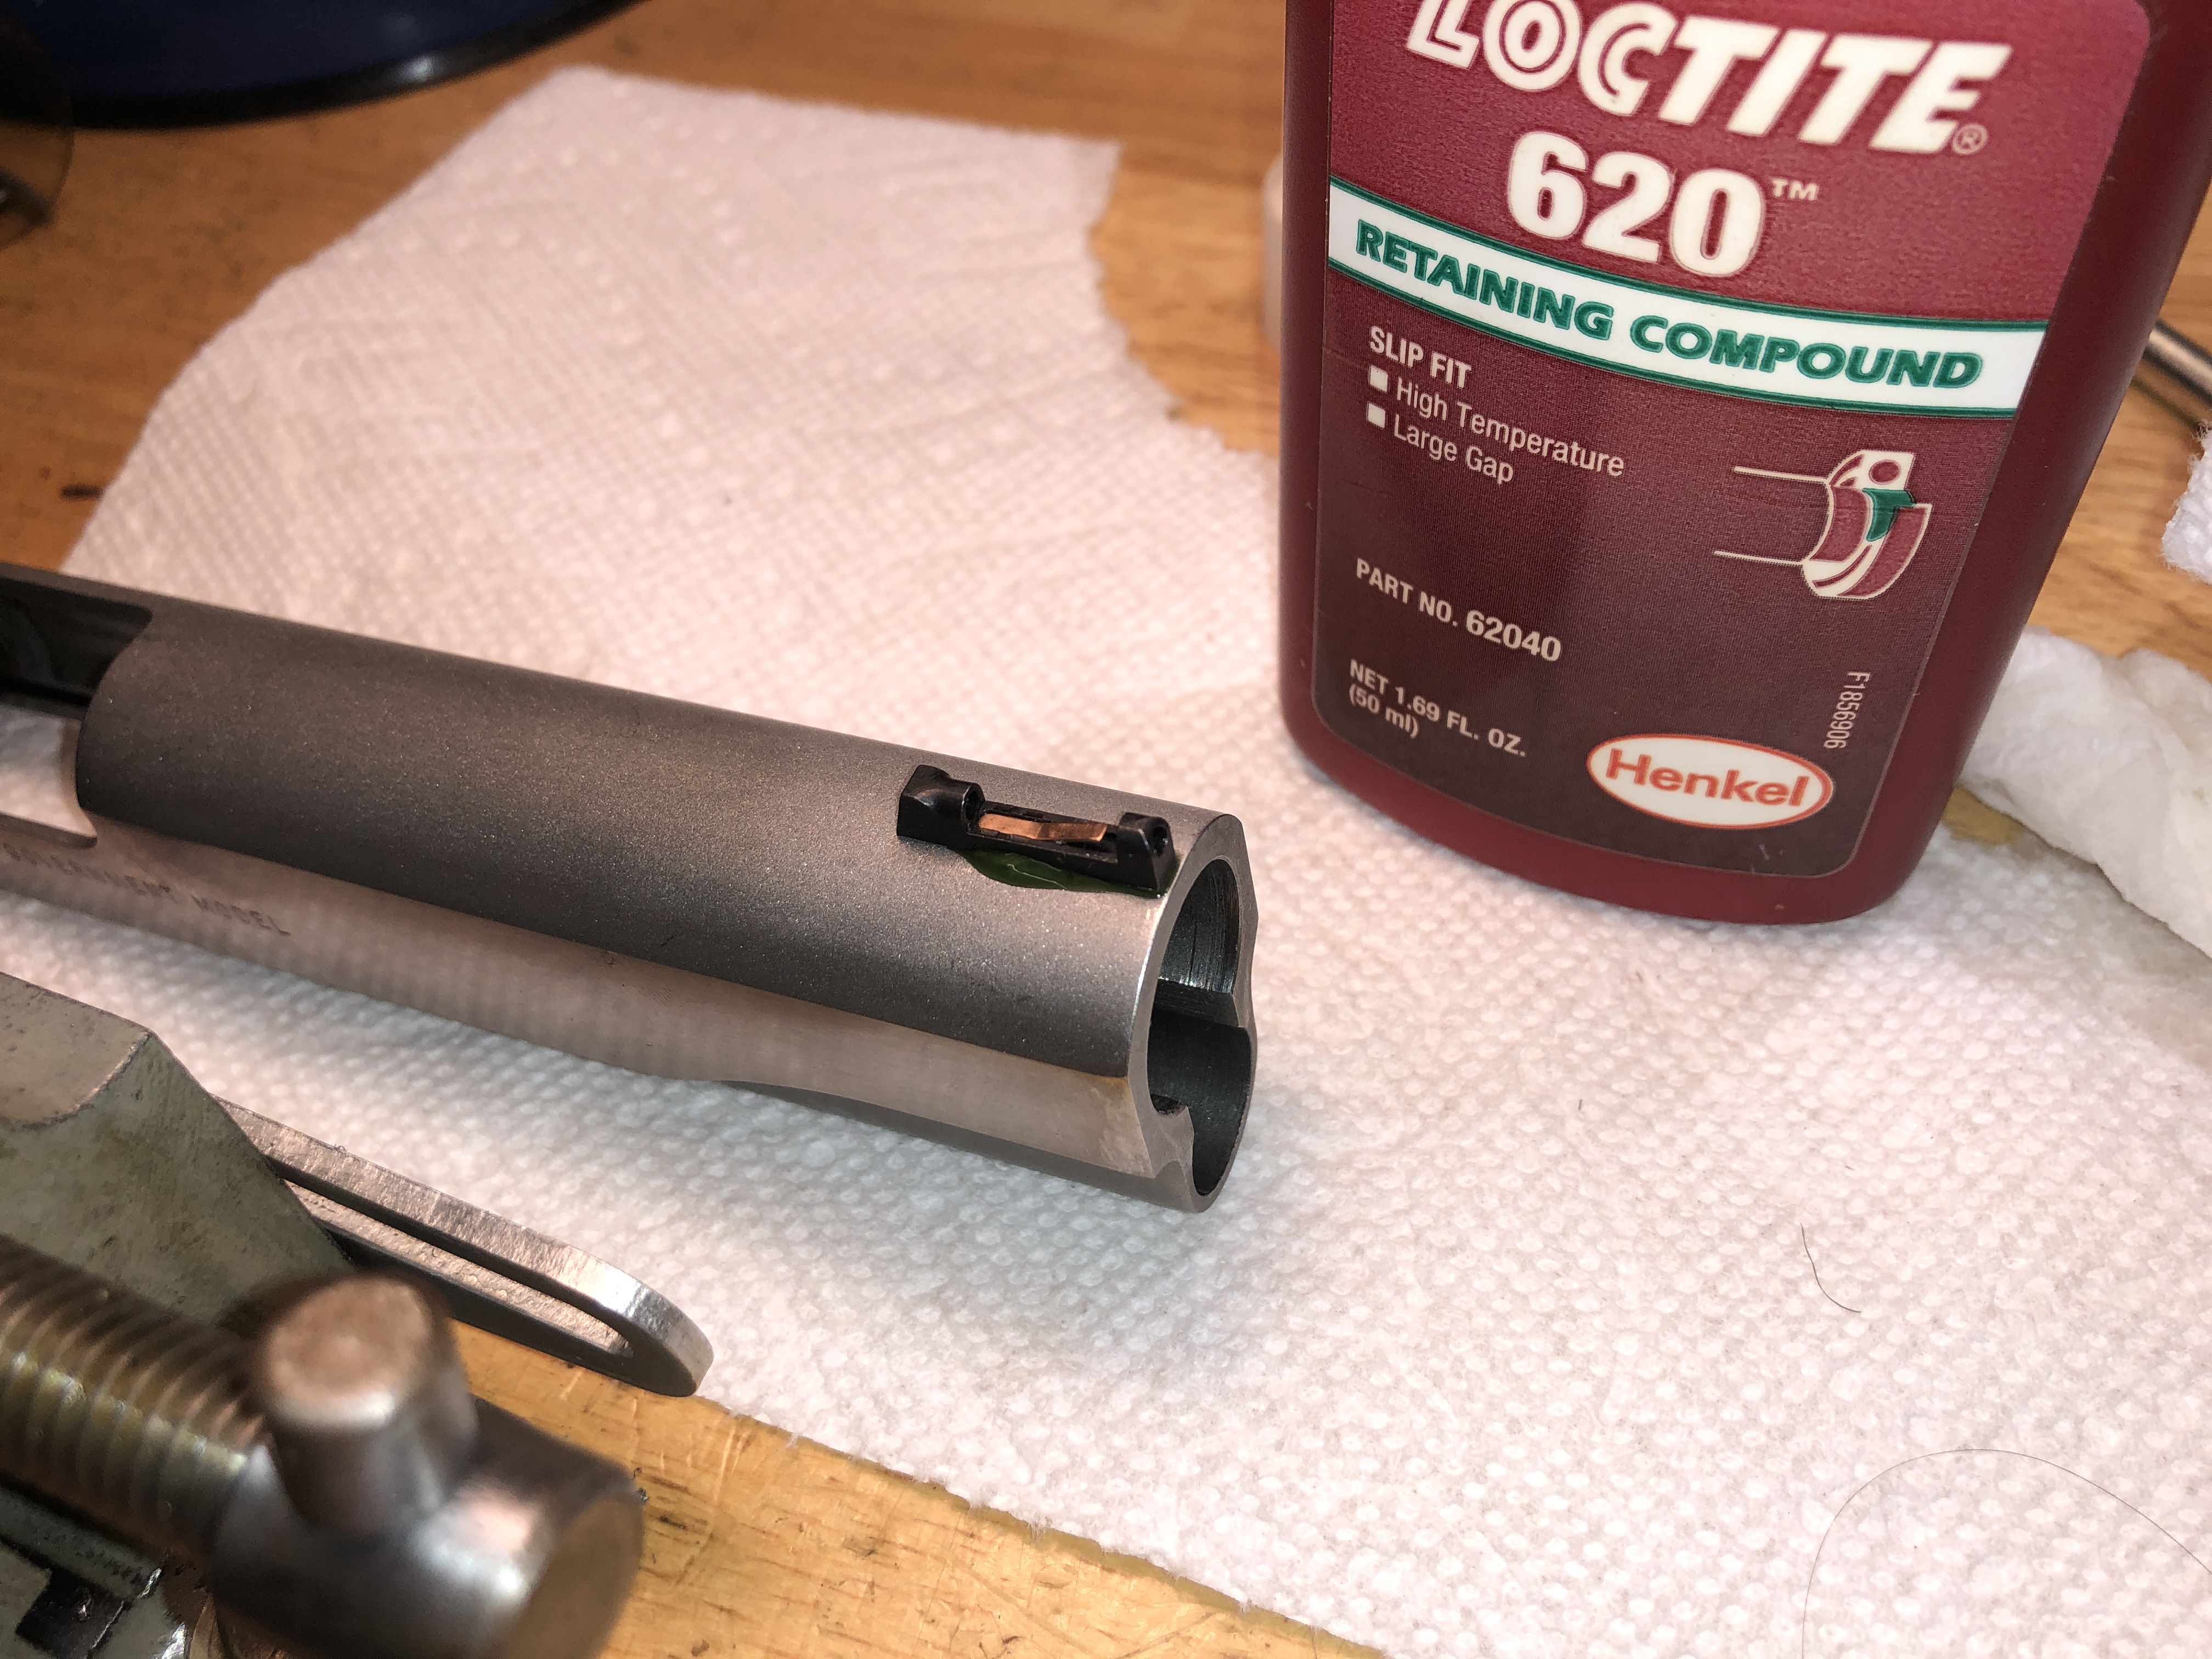
Try some Loctite 620.
-
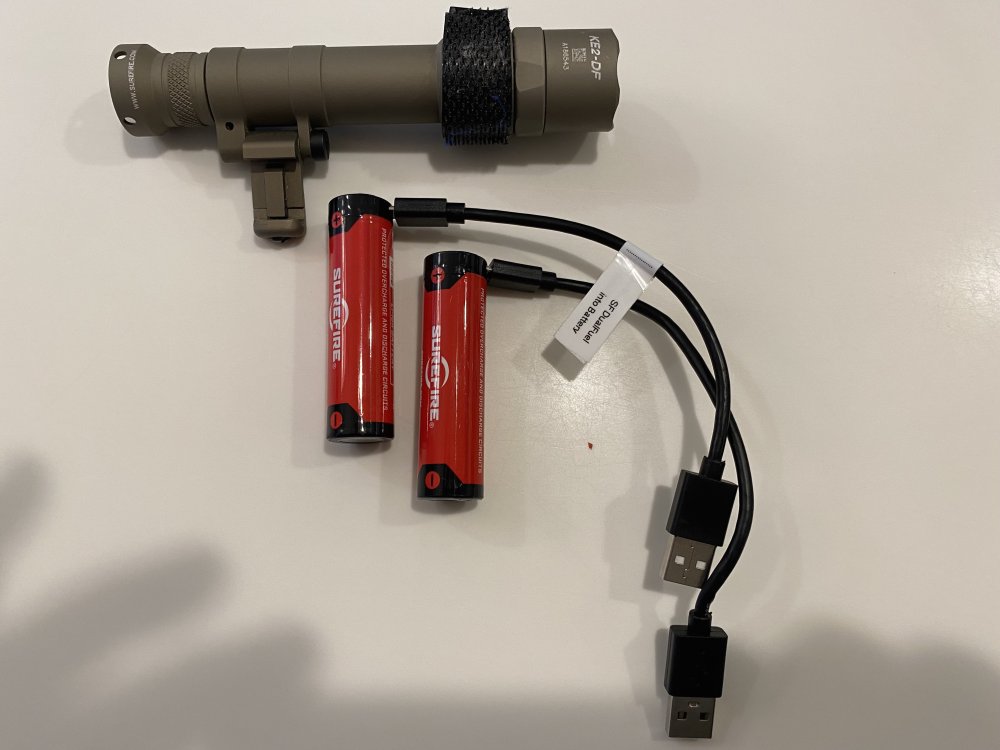
I have several of them, super reliable. Also you can purchase extra SureFire batteries on Amazon for a pittance. Multiple back-ups are handy.
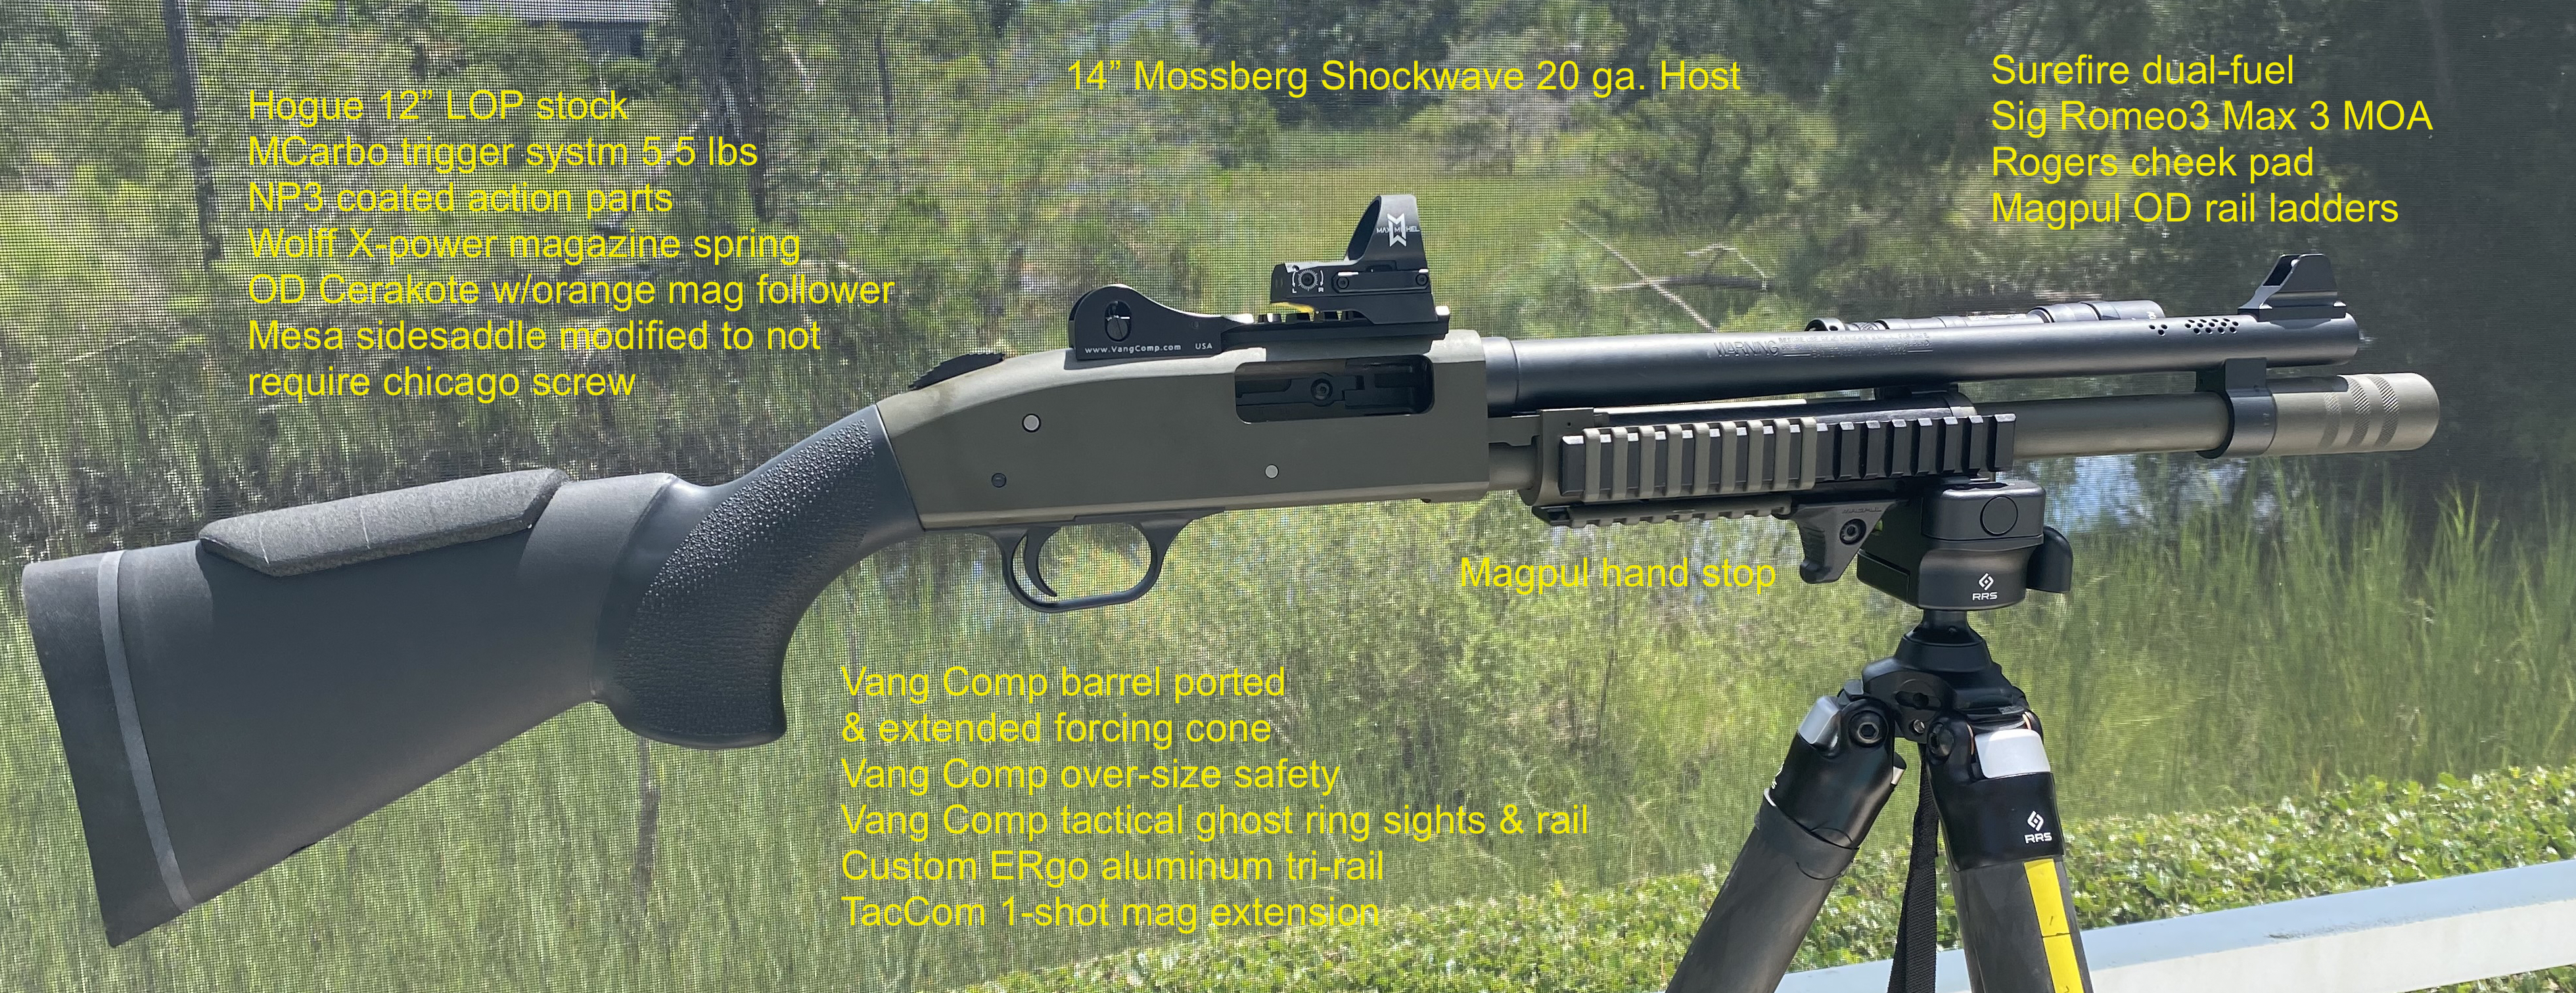
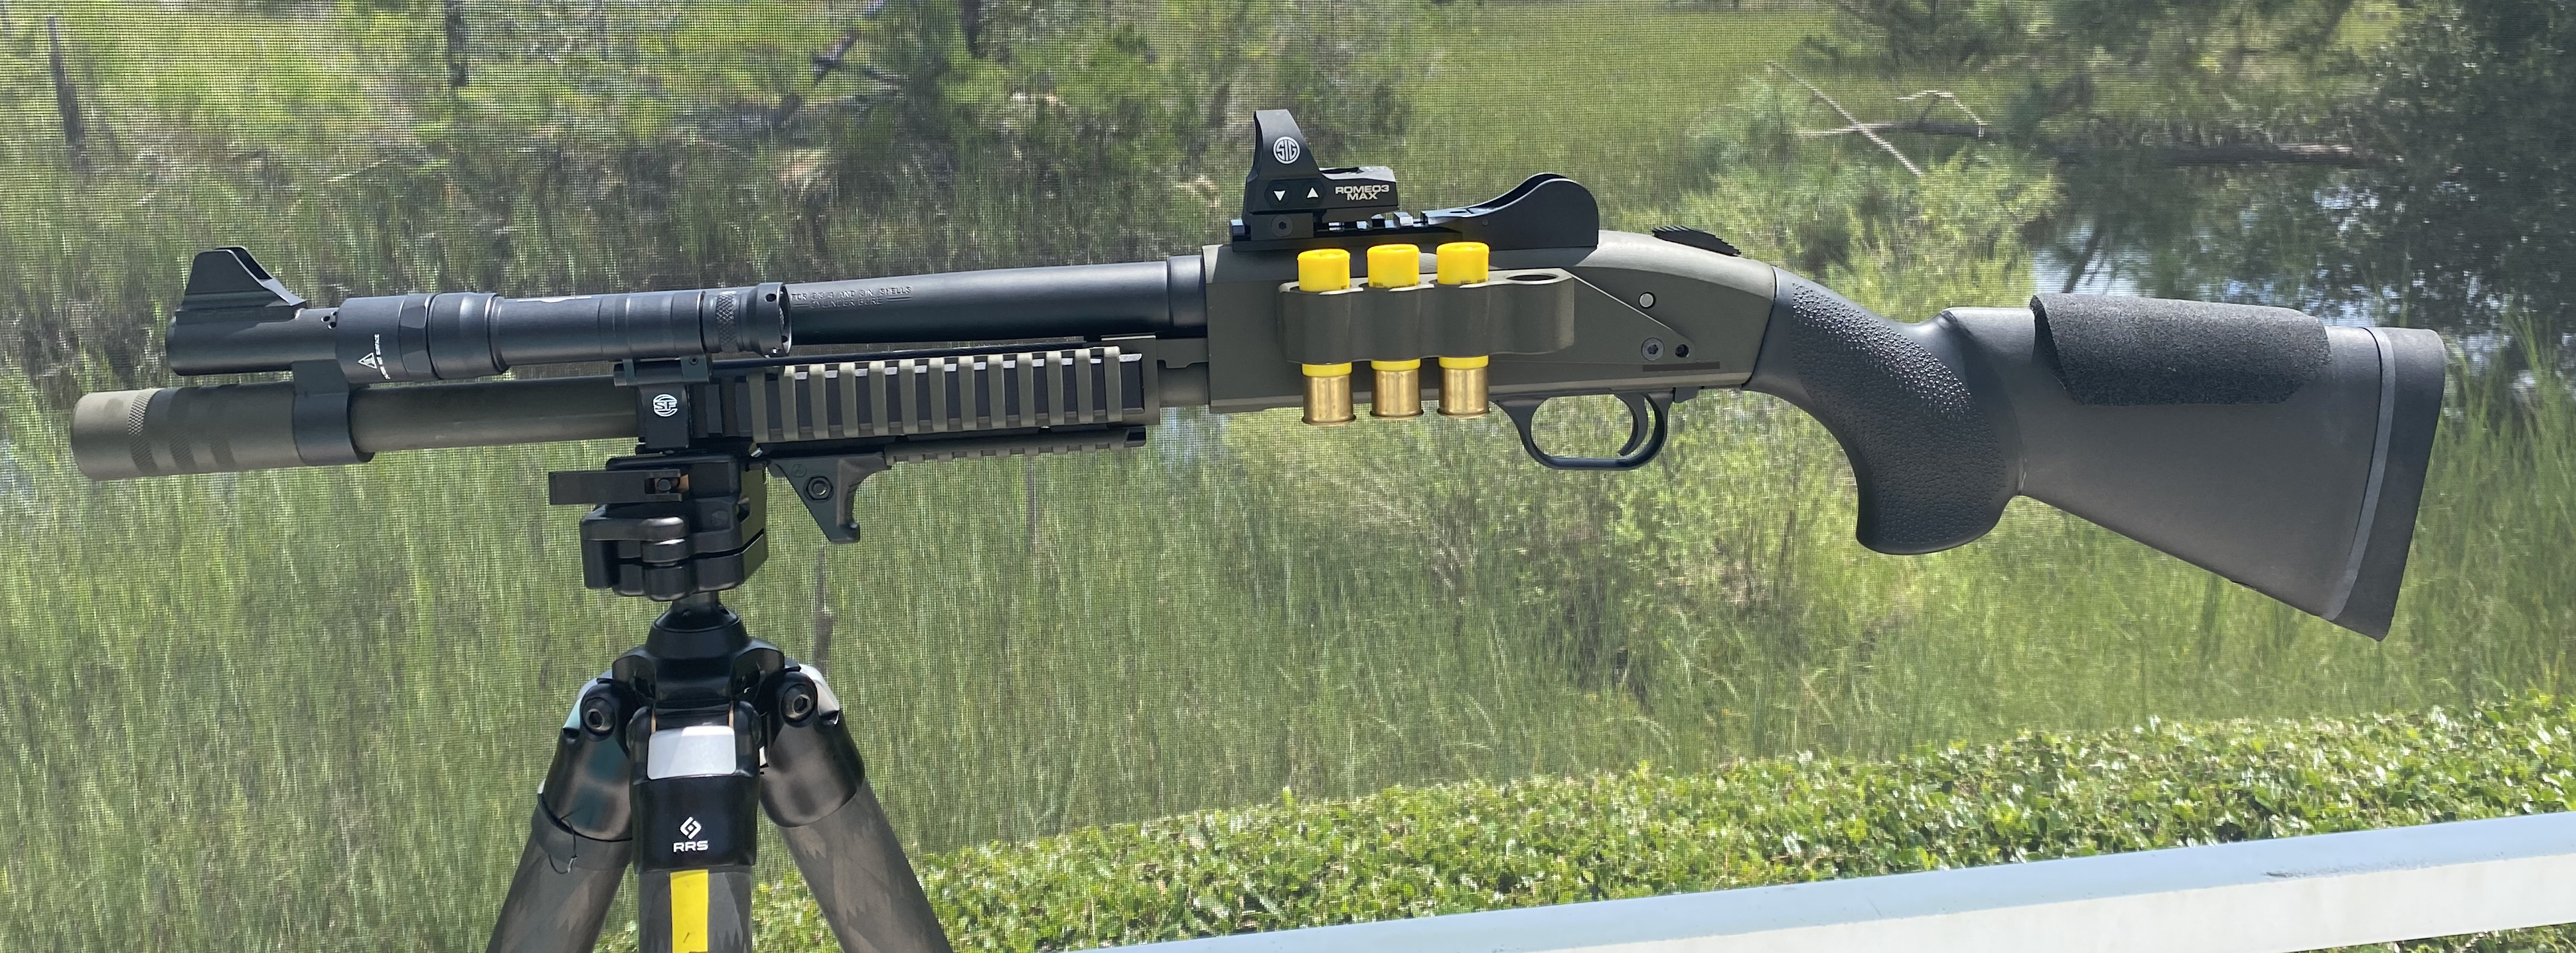
I have one on a Mossberg 20 ga. SBS and some I free carry as they throw a long light down range.

-
 1
1
-
-
-
okay........the commentary was mostly inspired by someone mentioning they were losing time getting the mechanical safety off with Brand X v. Y.
Lesson of the Day: do not put your finger ON the trigger in anticipation of engaging an identified target.
IF an individual truly believes an identified target may require servicing then it's important to understand the fundamental concept of human reaction times and safe muzzle direction.
The same reaction time is required to pull the trigger, when your finger is OFF the trigger outside the trigger guard AND muzzle pointed in a safe direction (read "not directly at the target) as the reaction time required to pull the trigger when your finger is already resting on the trigger with the muzzle pointed directly at a target. A safe muzzle direction, safety OFF prior to engaging a target, is infinitely more safe to all parties involved, than the alternative of finger on the trigger with safety off / on with muzzle pointed directly at a engagement target.......the principle is evident every time one observes several LEO's surrounding a perp on the ground with weapons drawn with sights on target.....this is the repeated error of unintended discharges is seen much too often.
-
The primary safety on any firearm is muzzle direction. Revolvers don't have safeties. IF you think you will be engaging the trigger, take the safety OFF , do not put your finger off the trigger (as it is no faster to pull the trigger with your finger on the trigger than outside the trigger guard, either action is one reaction time), and keep the muzzle in a safe direction until any need to engage an identified target.
-
1
-
-
How does it shoot?
-
.................
-
1
-
 1
1
-
-
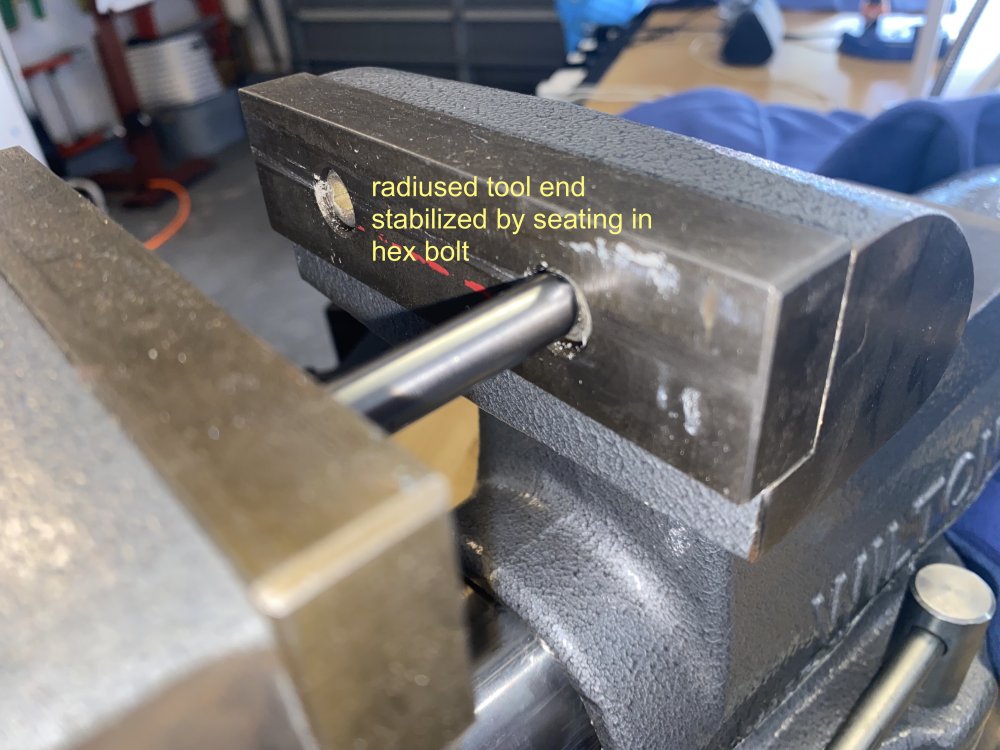
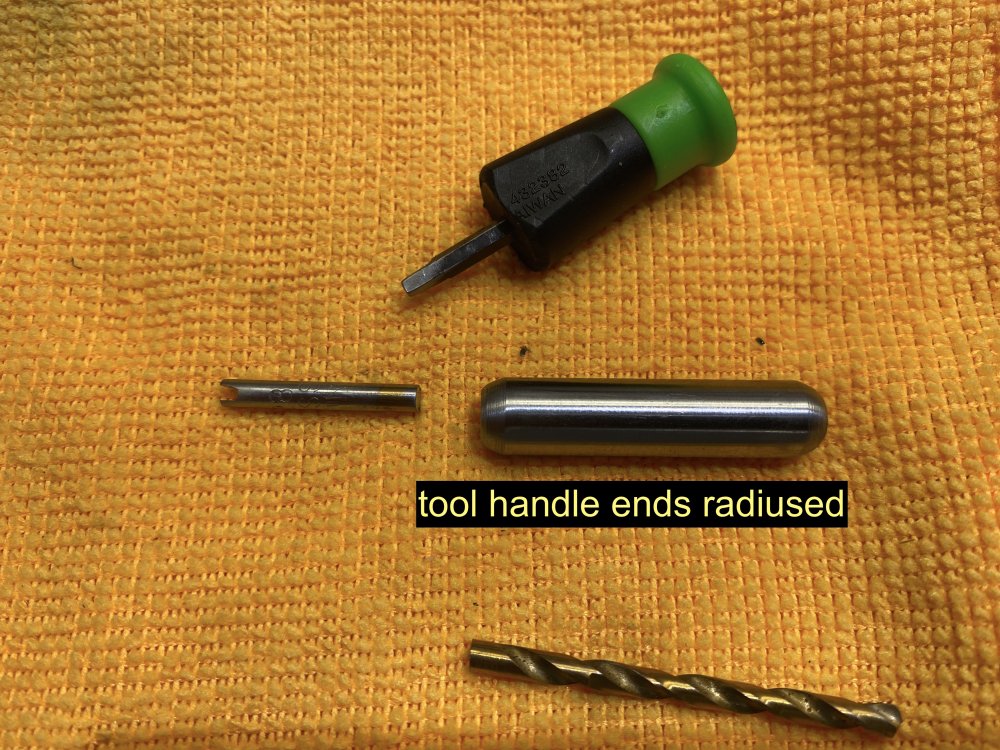
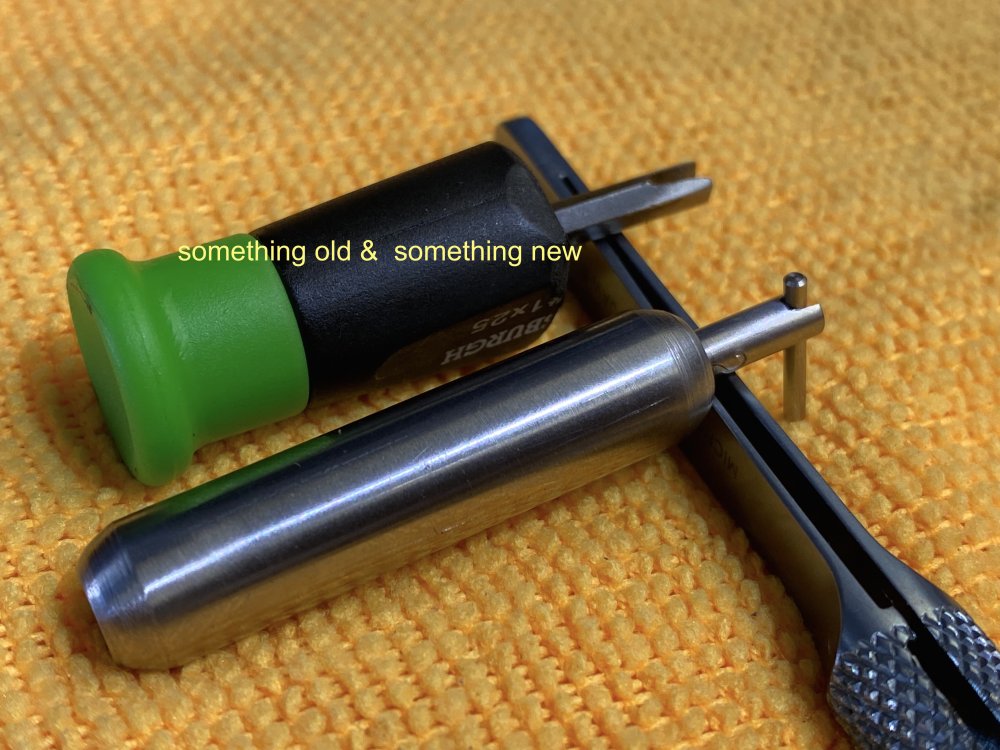
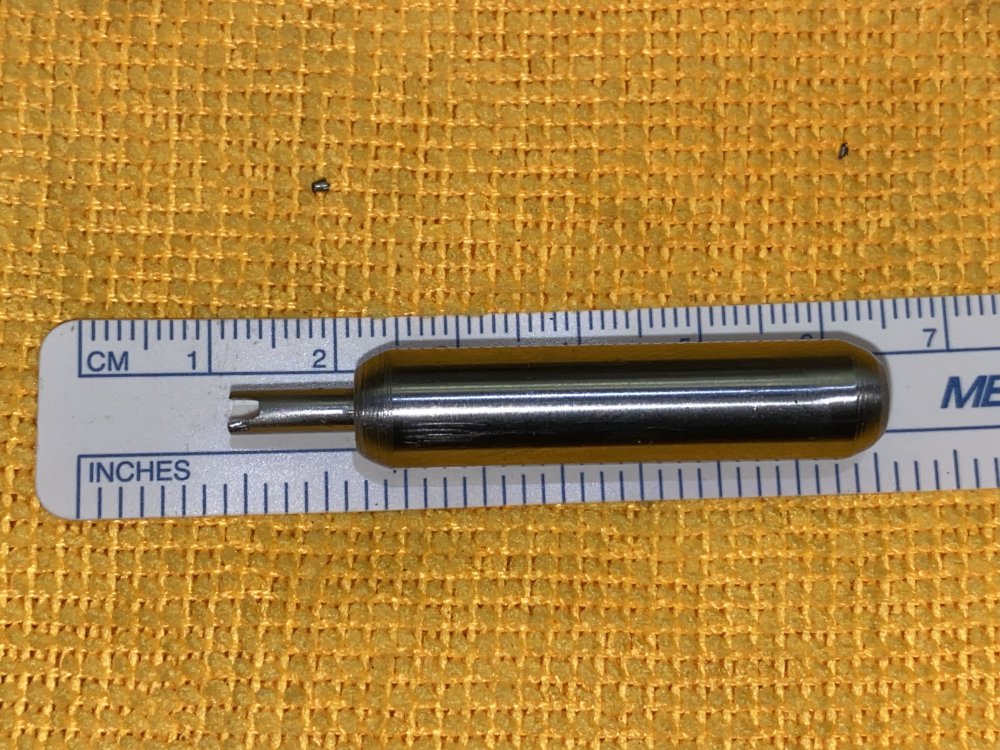
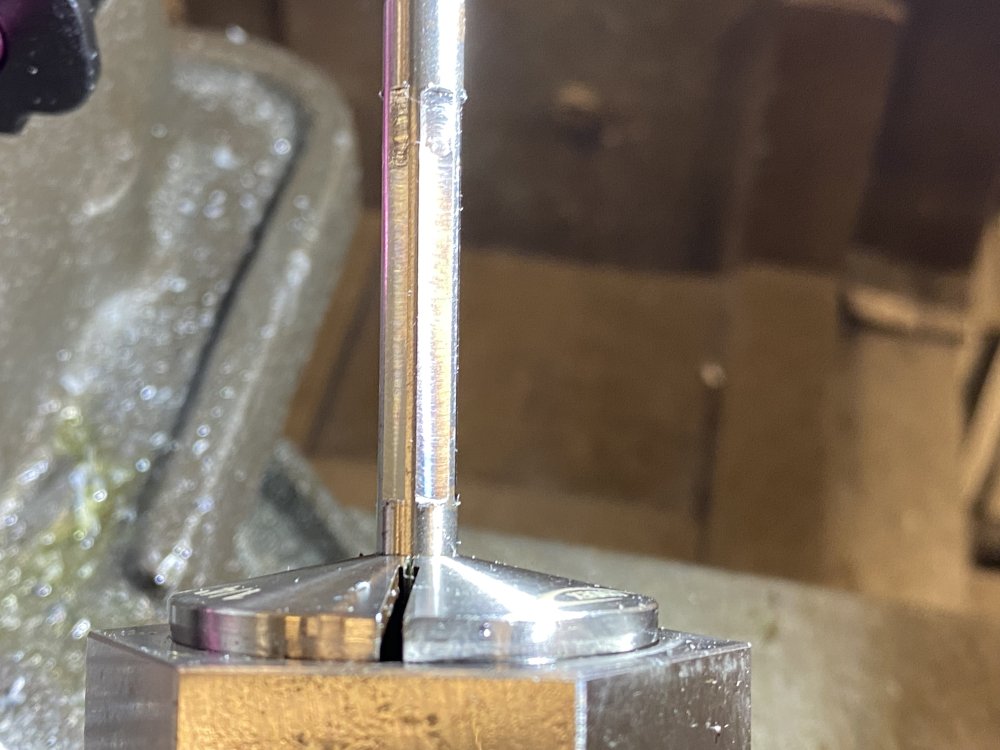
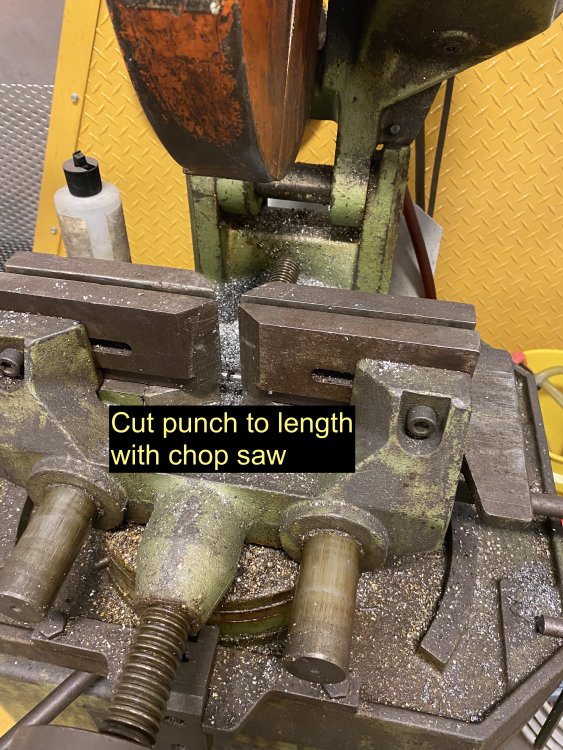
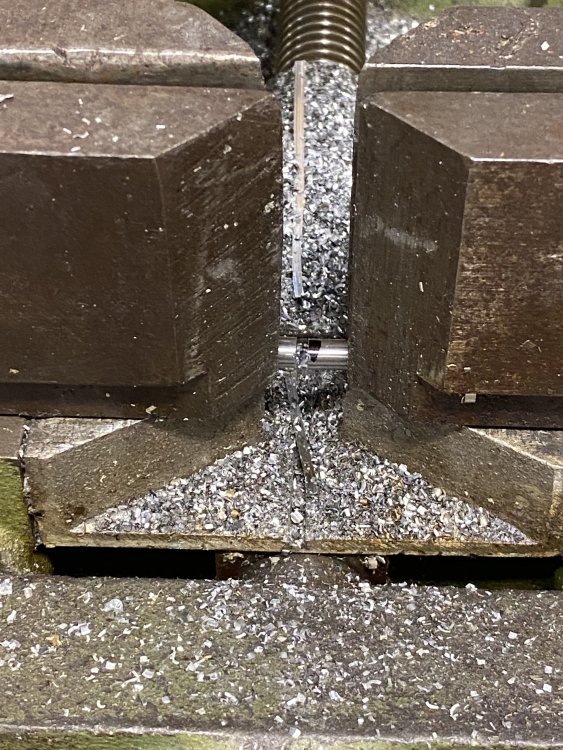
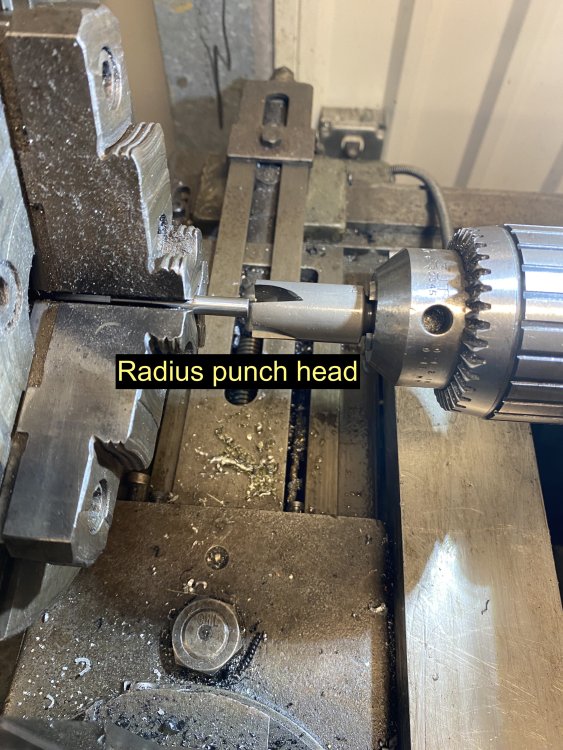
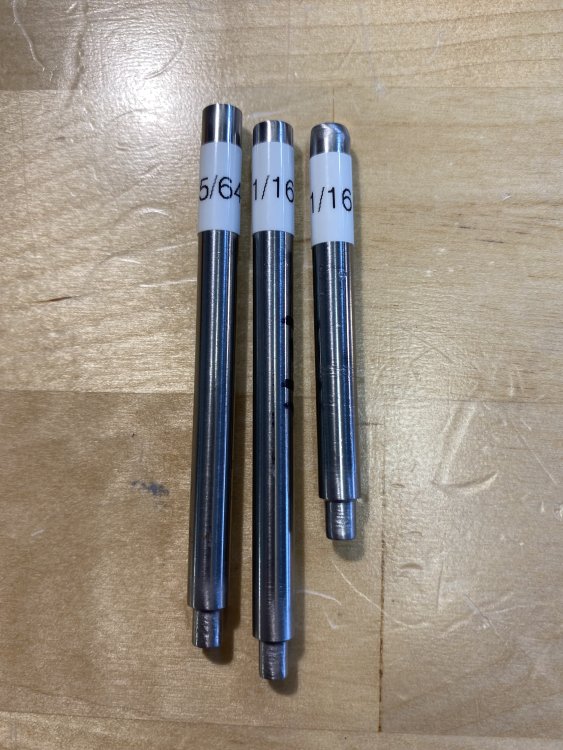
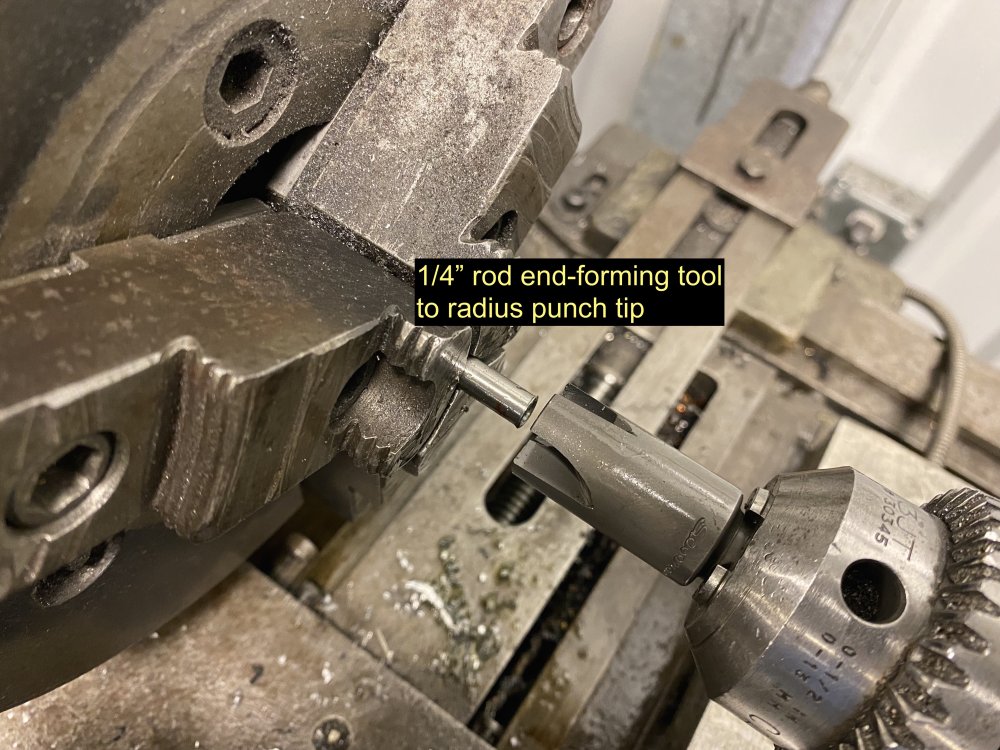
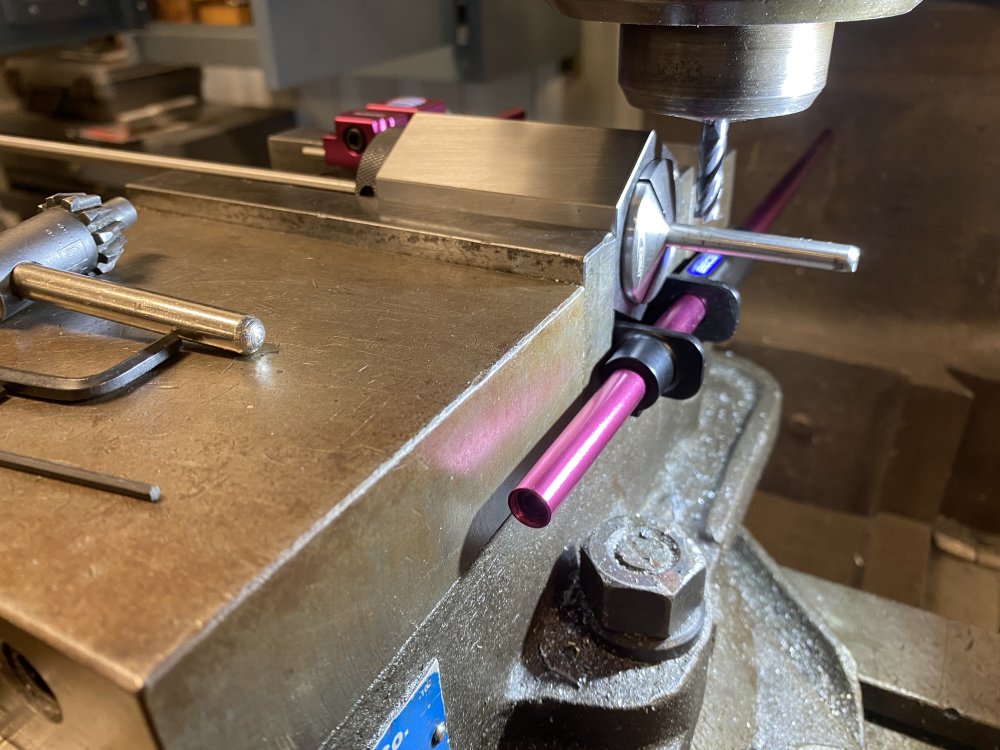
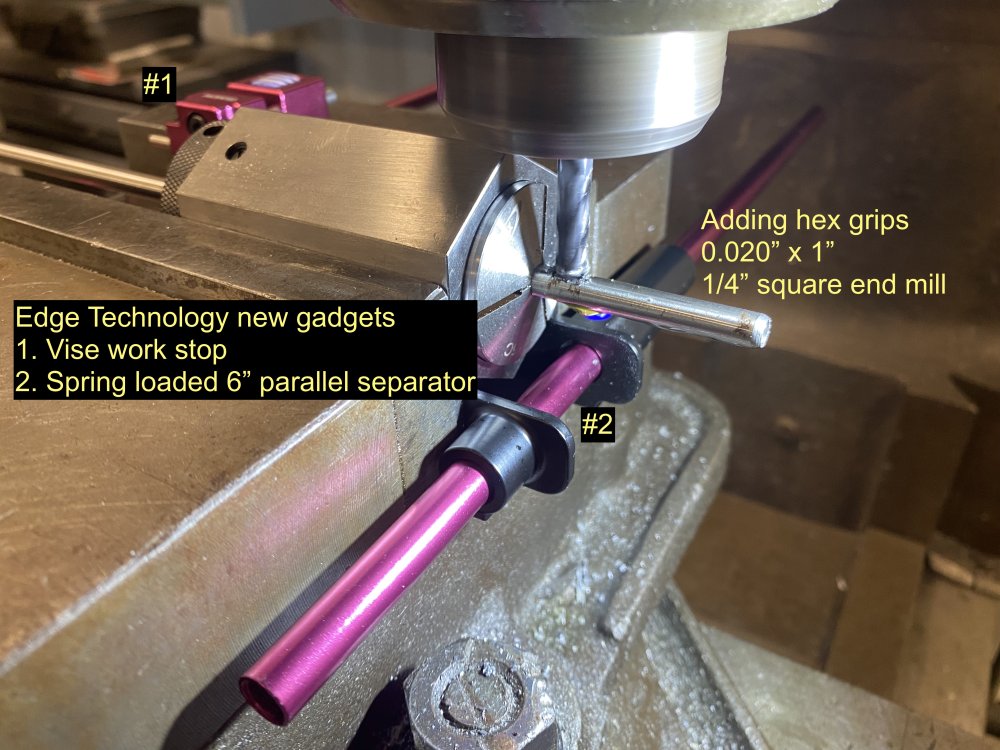
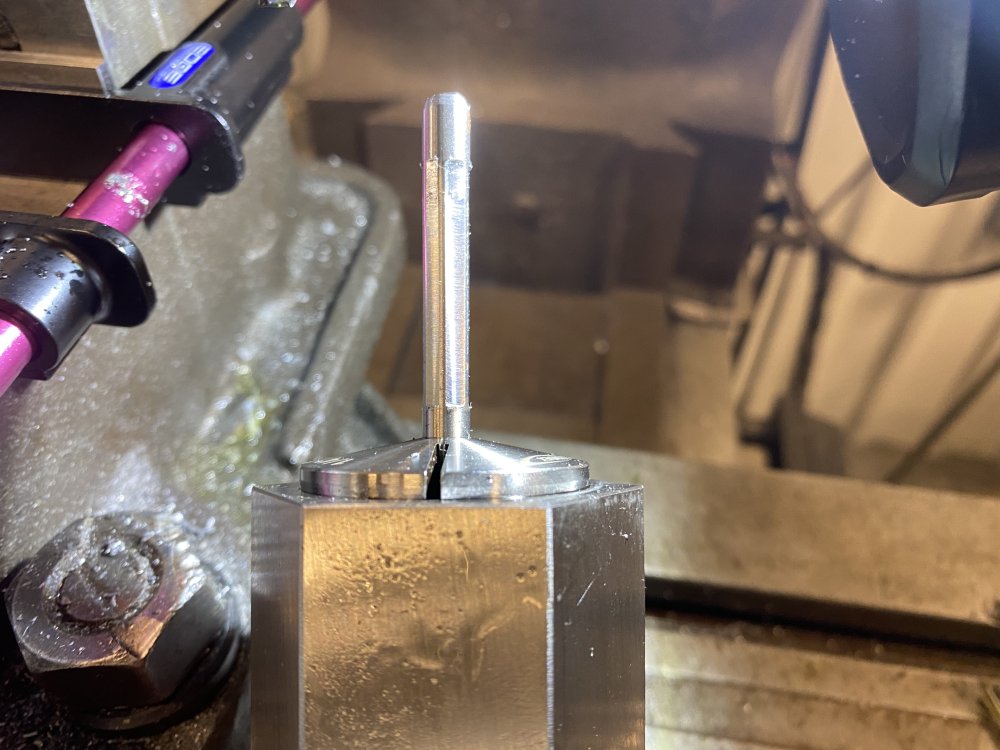
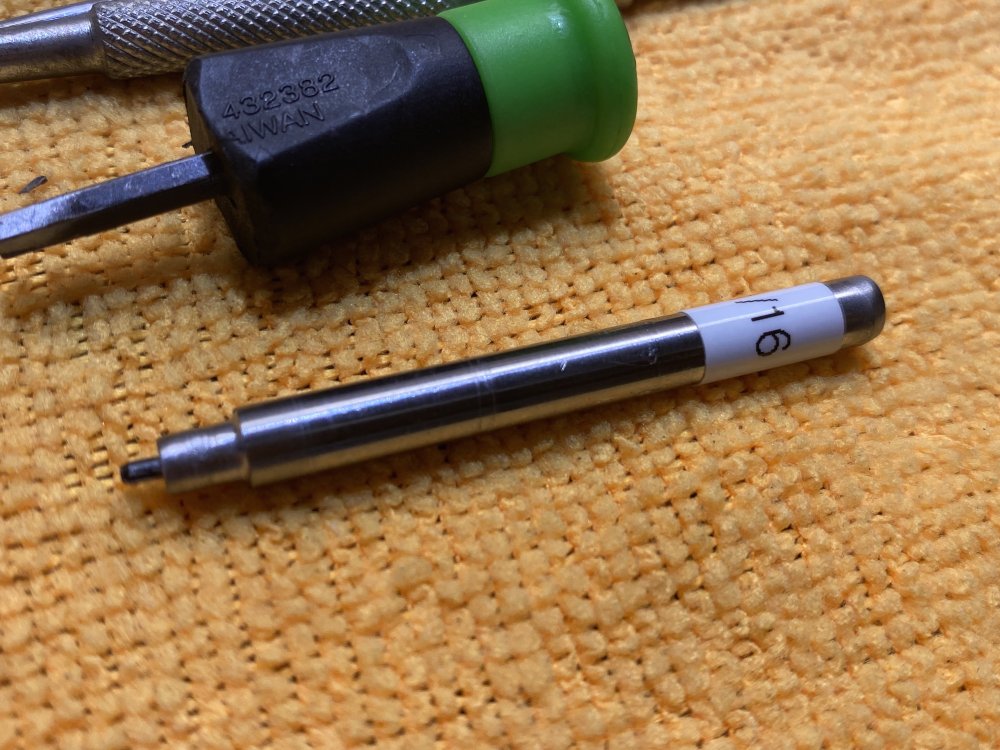
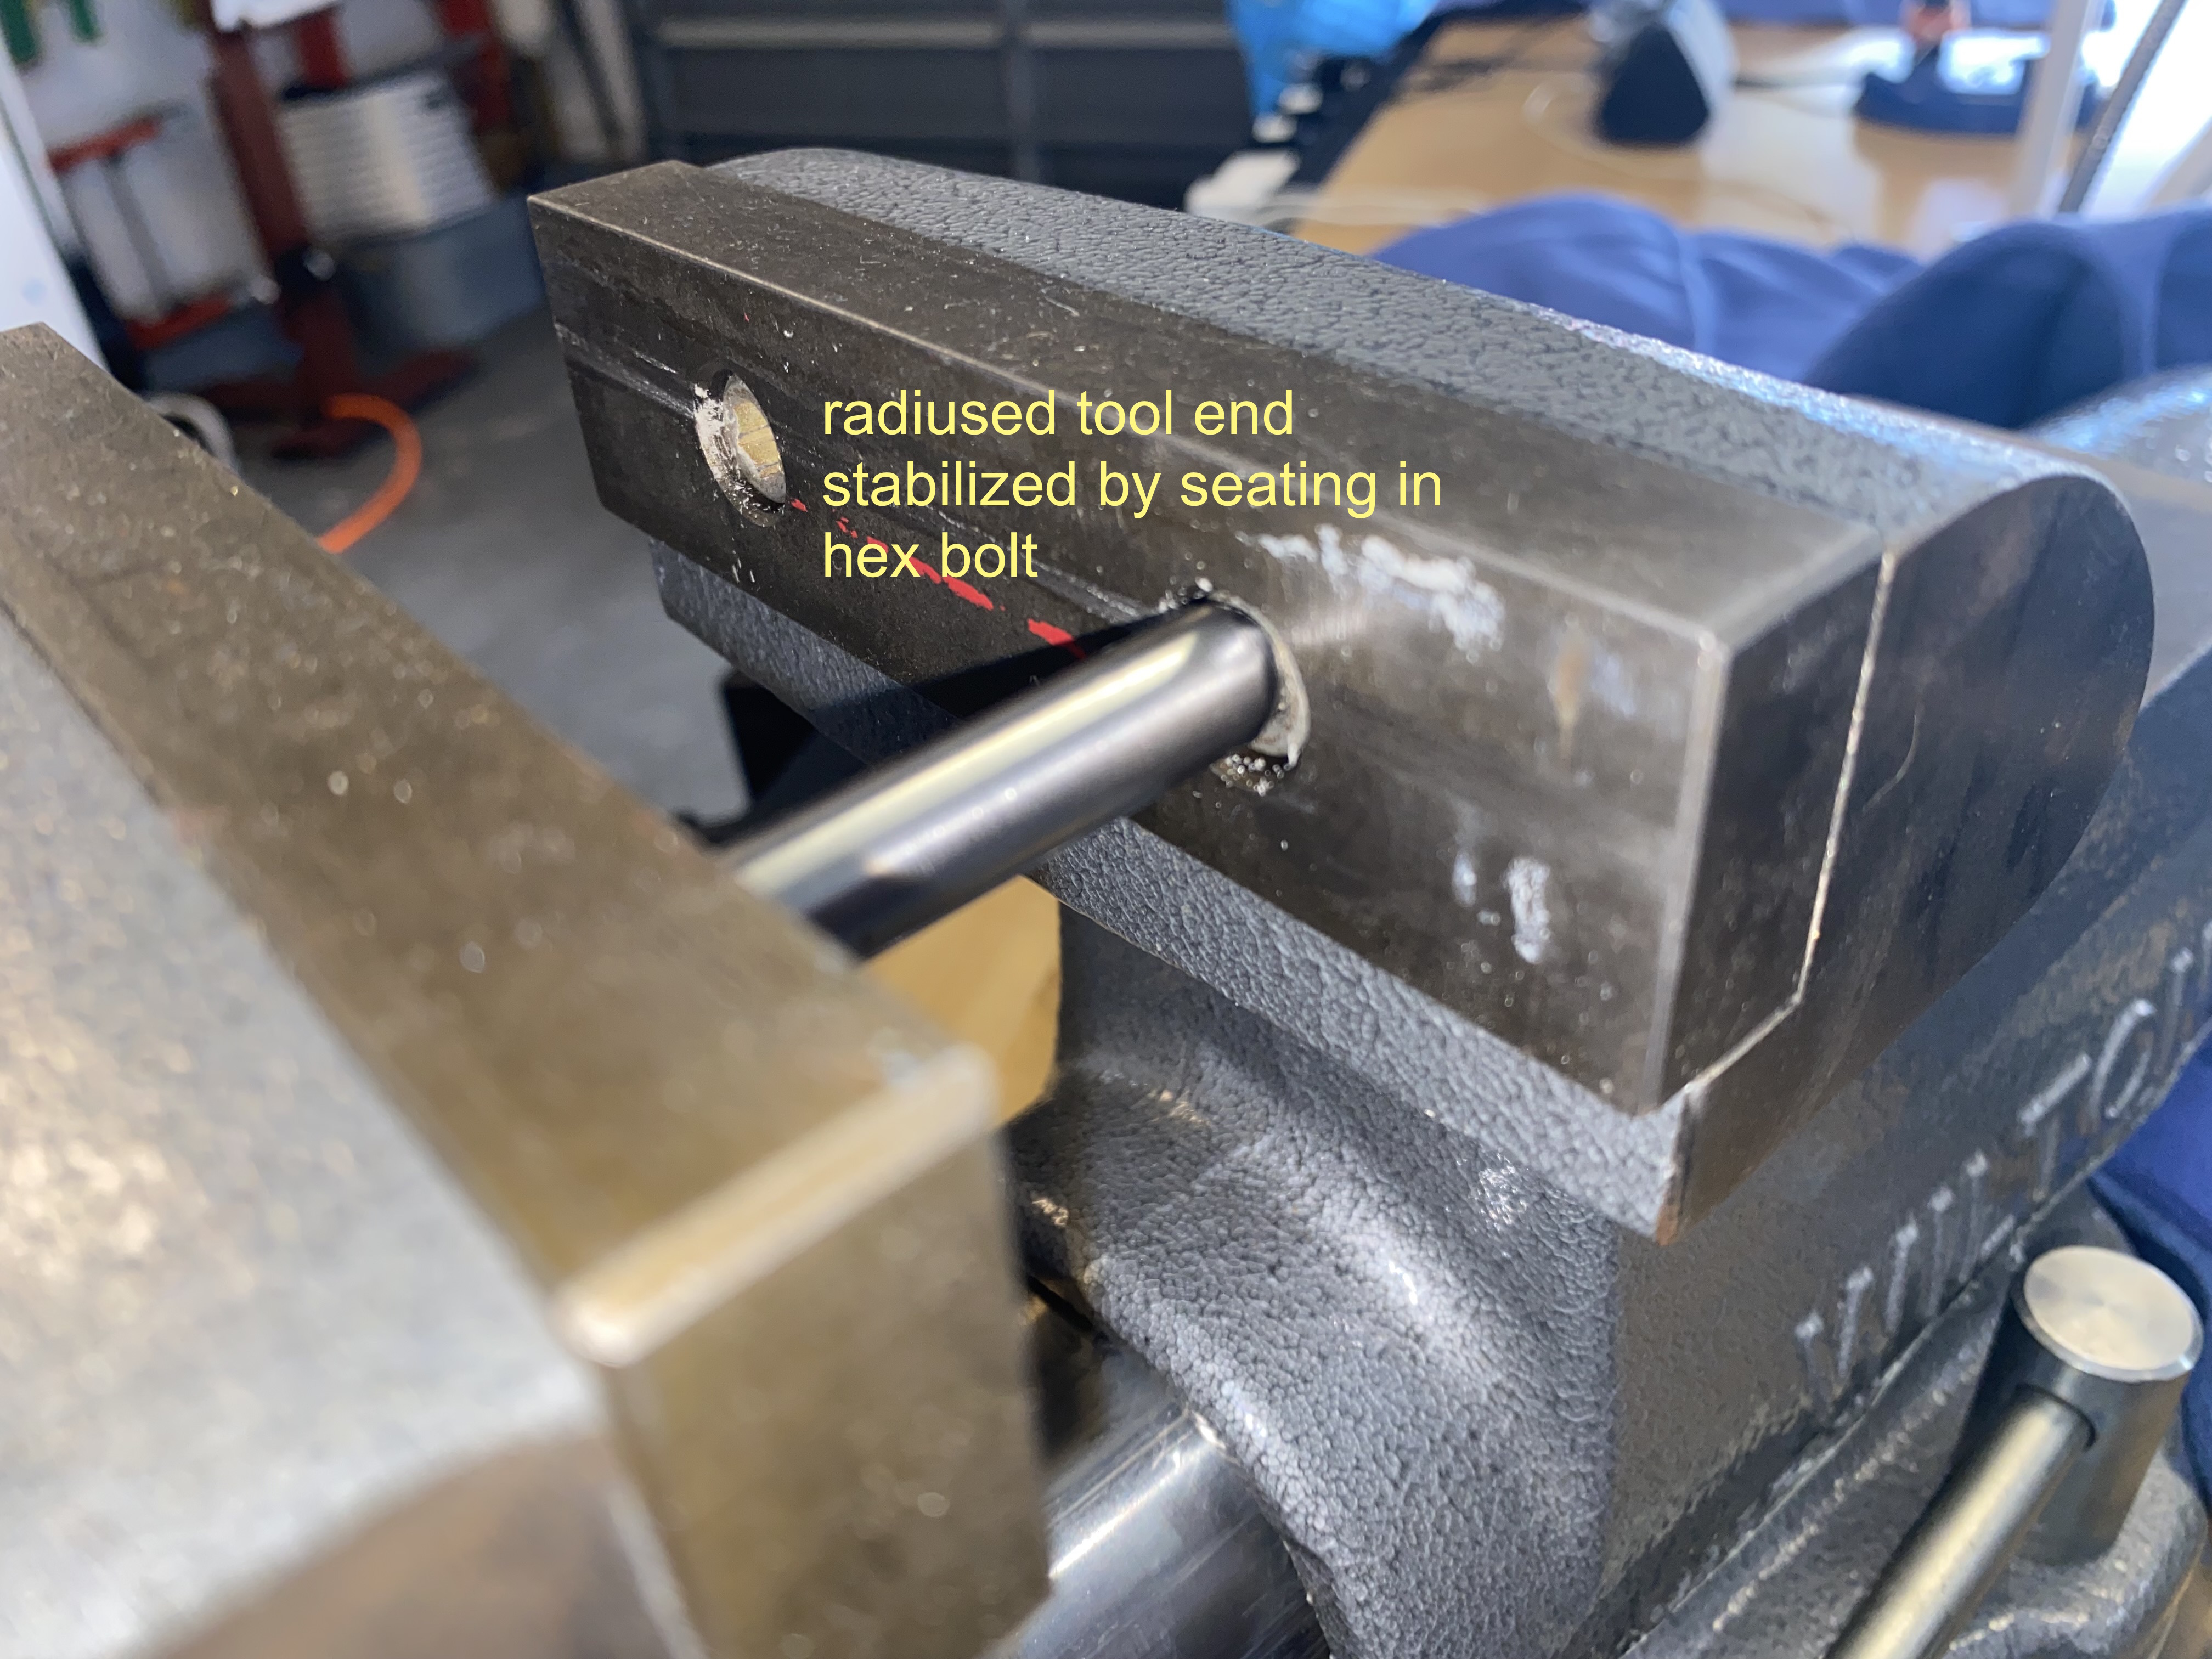
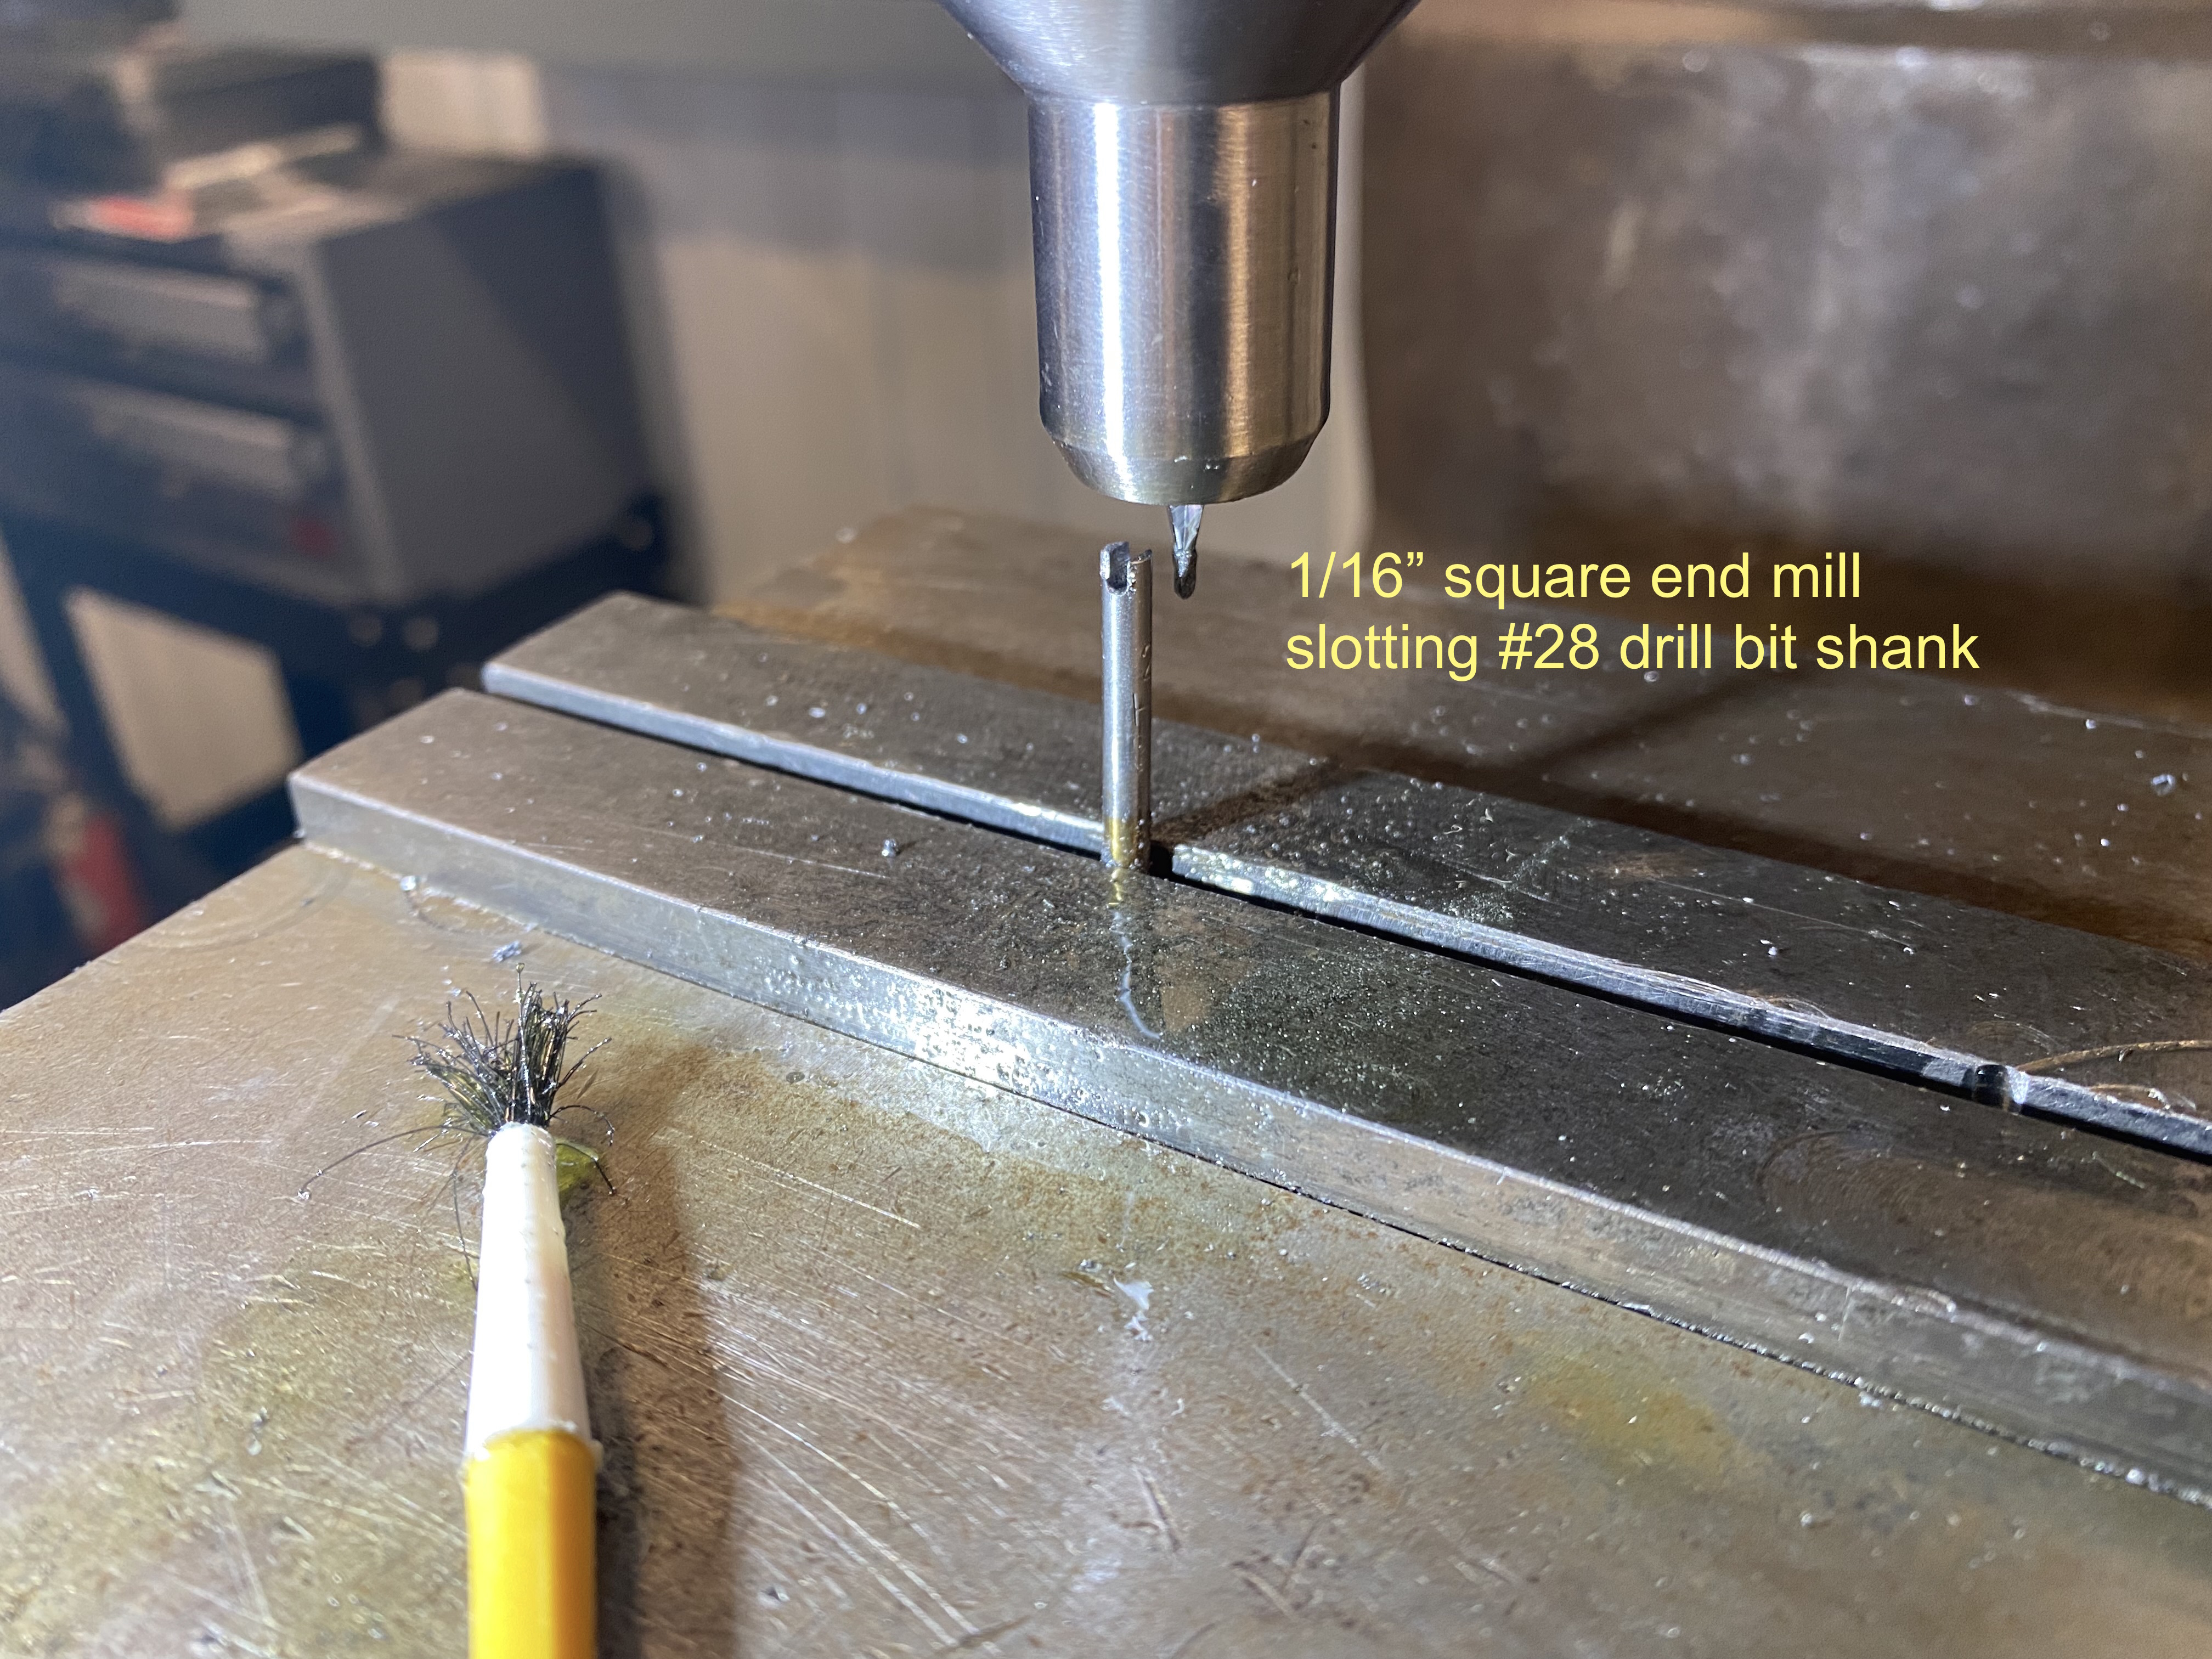
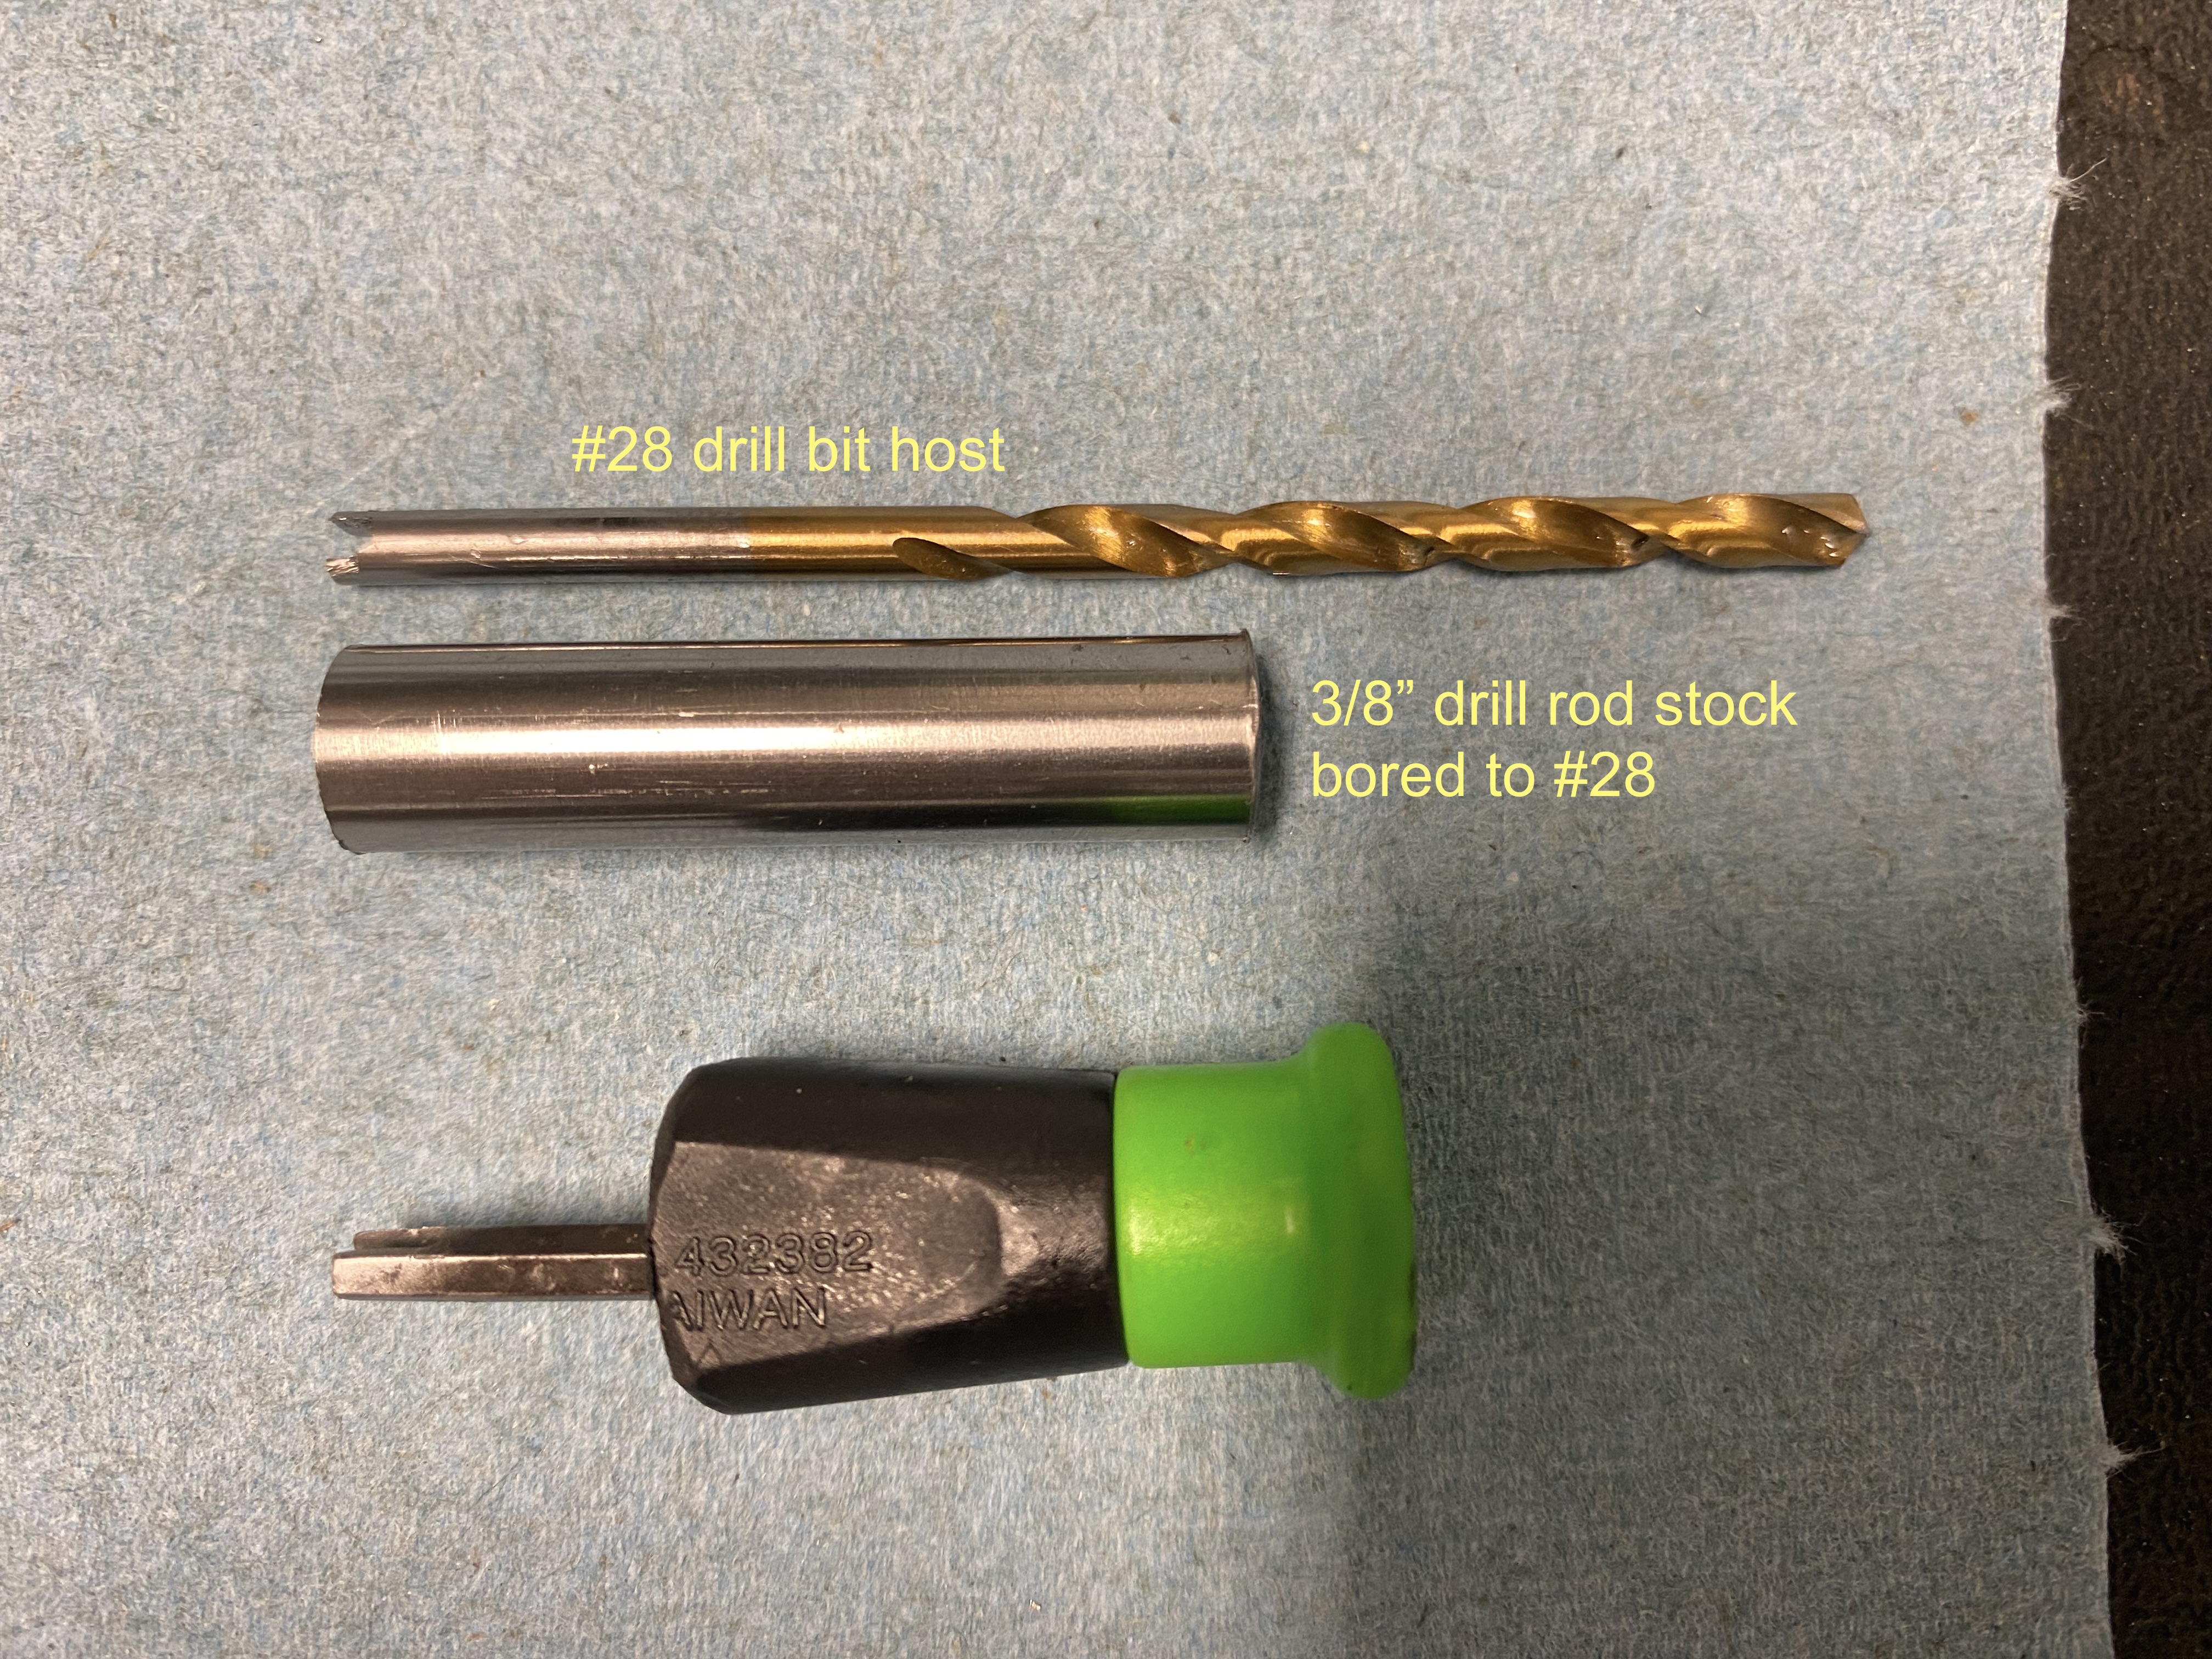
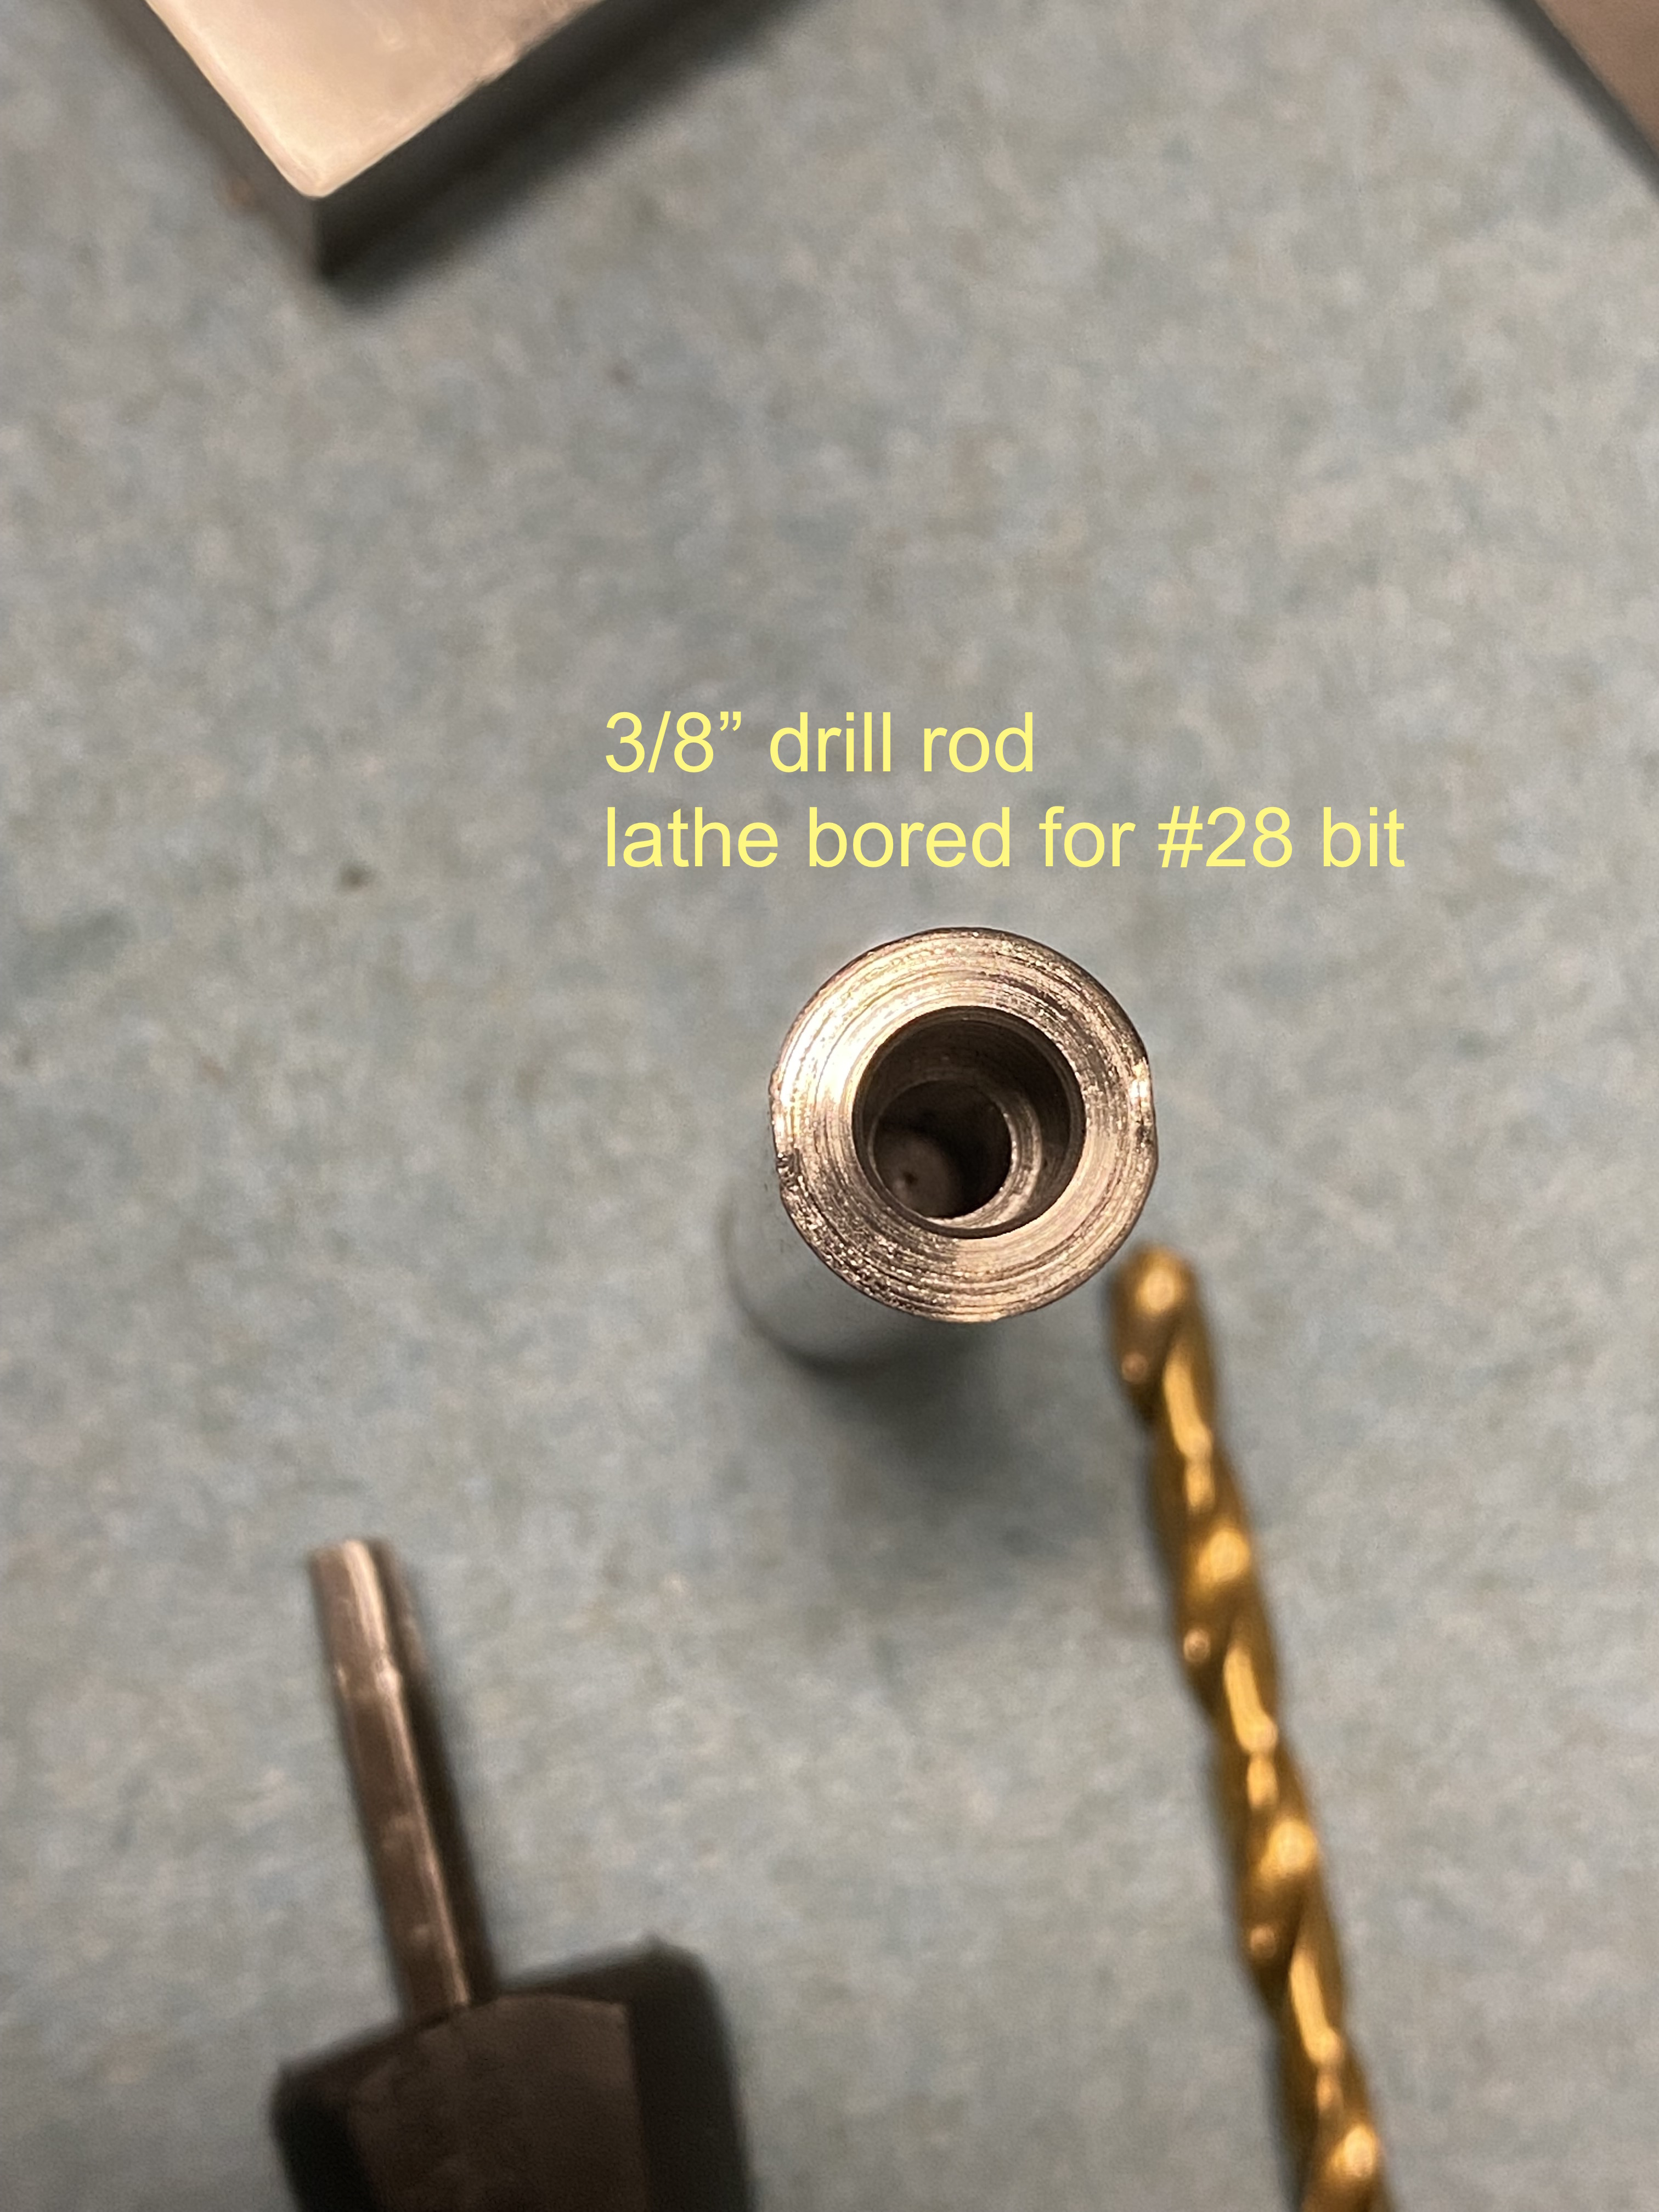
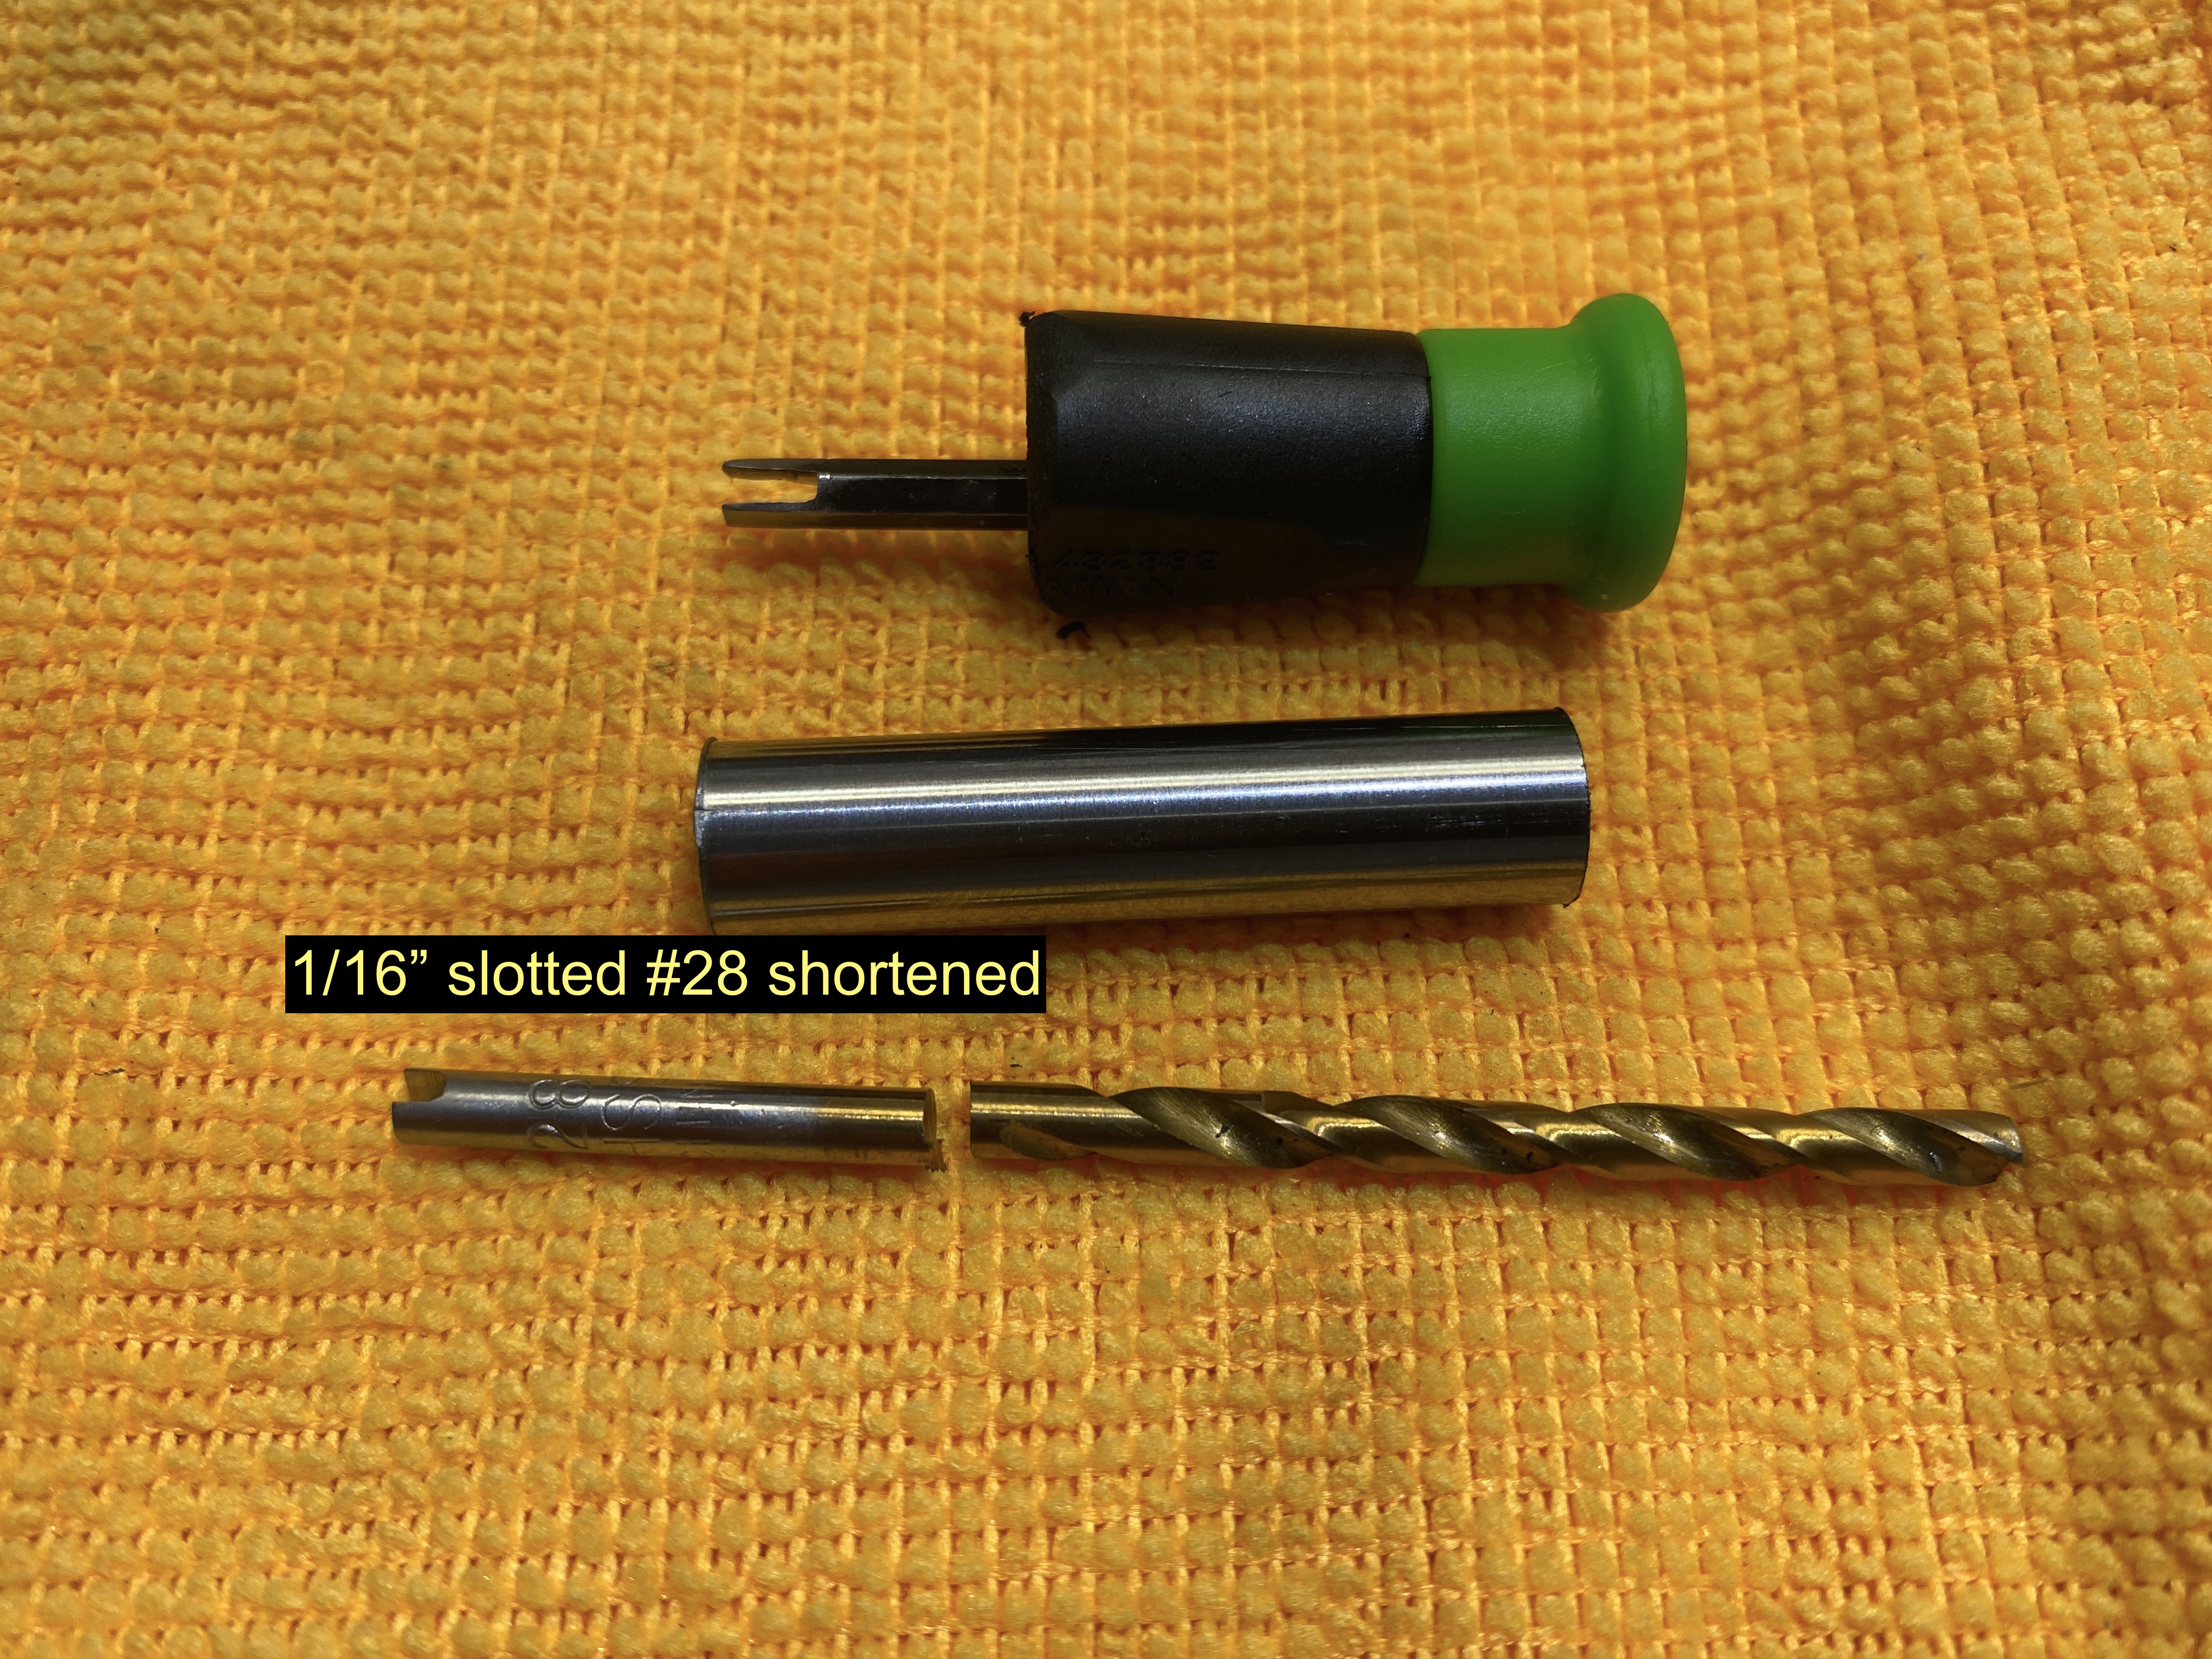
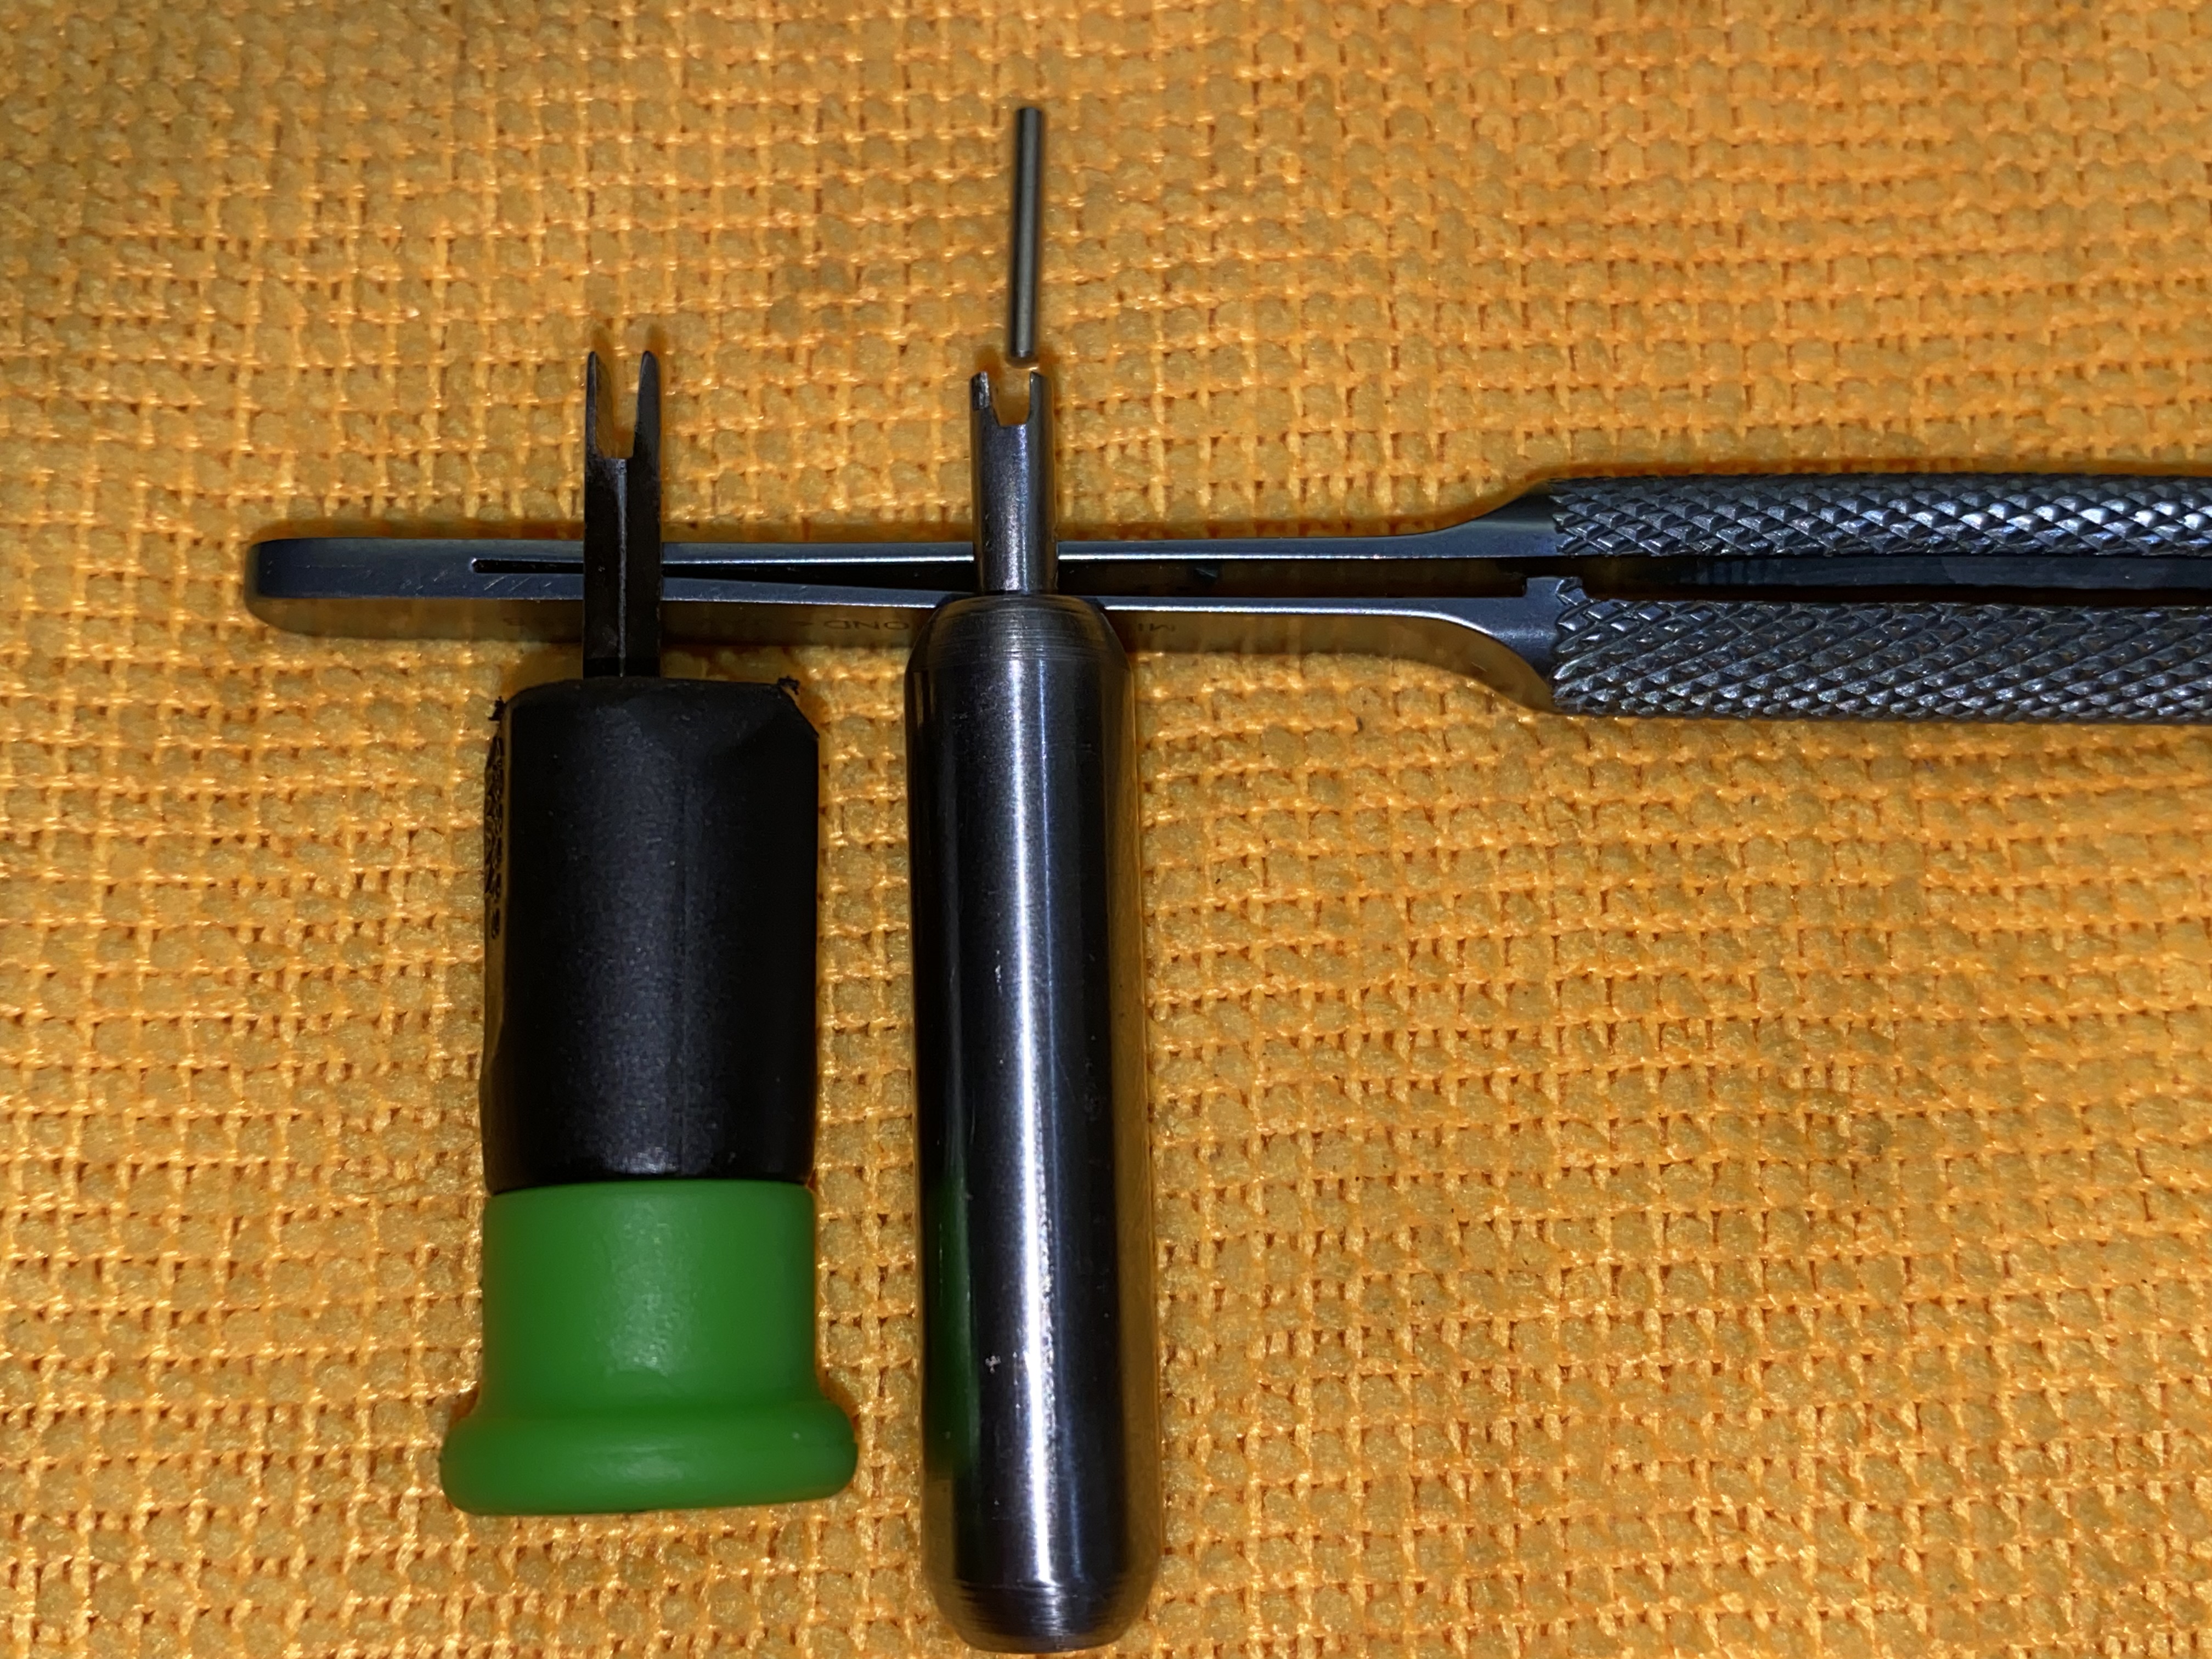
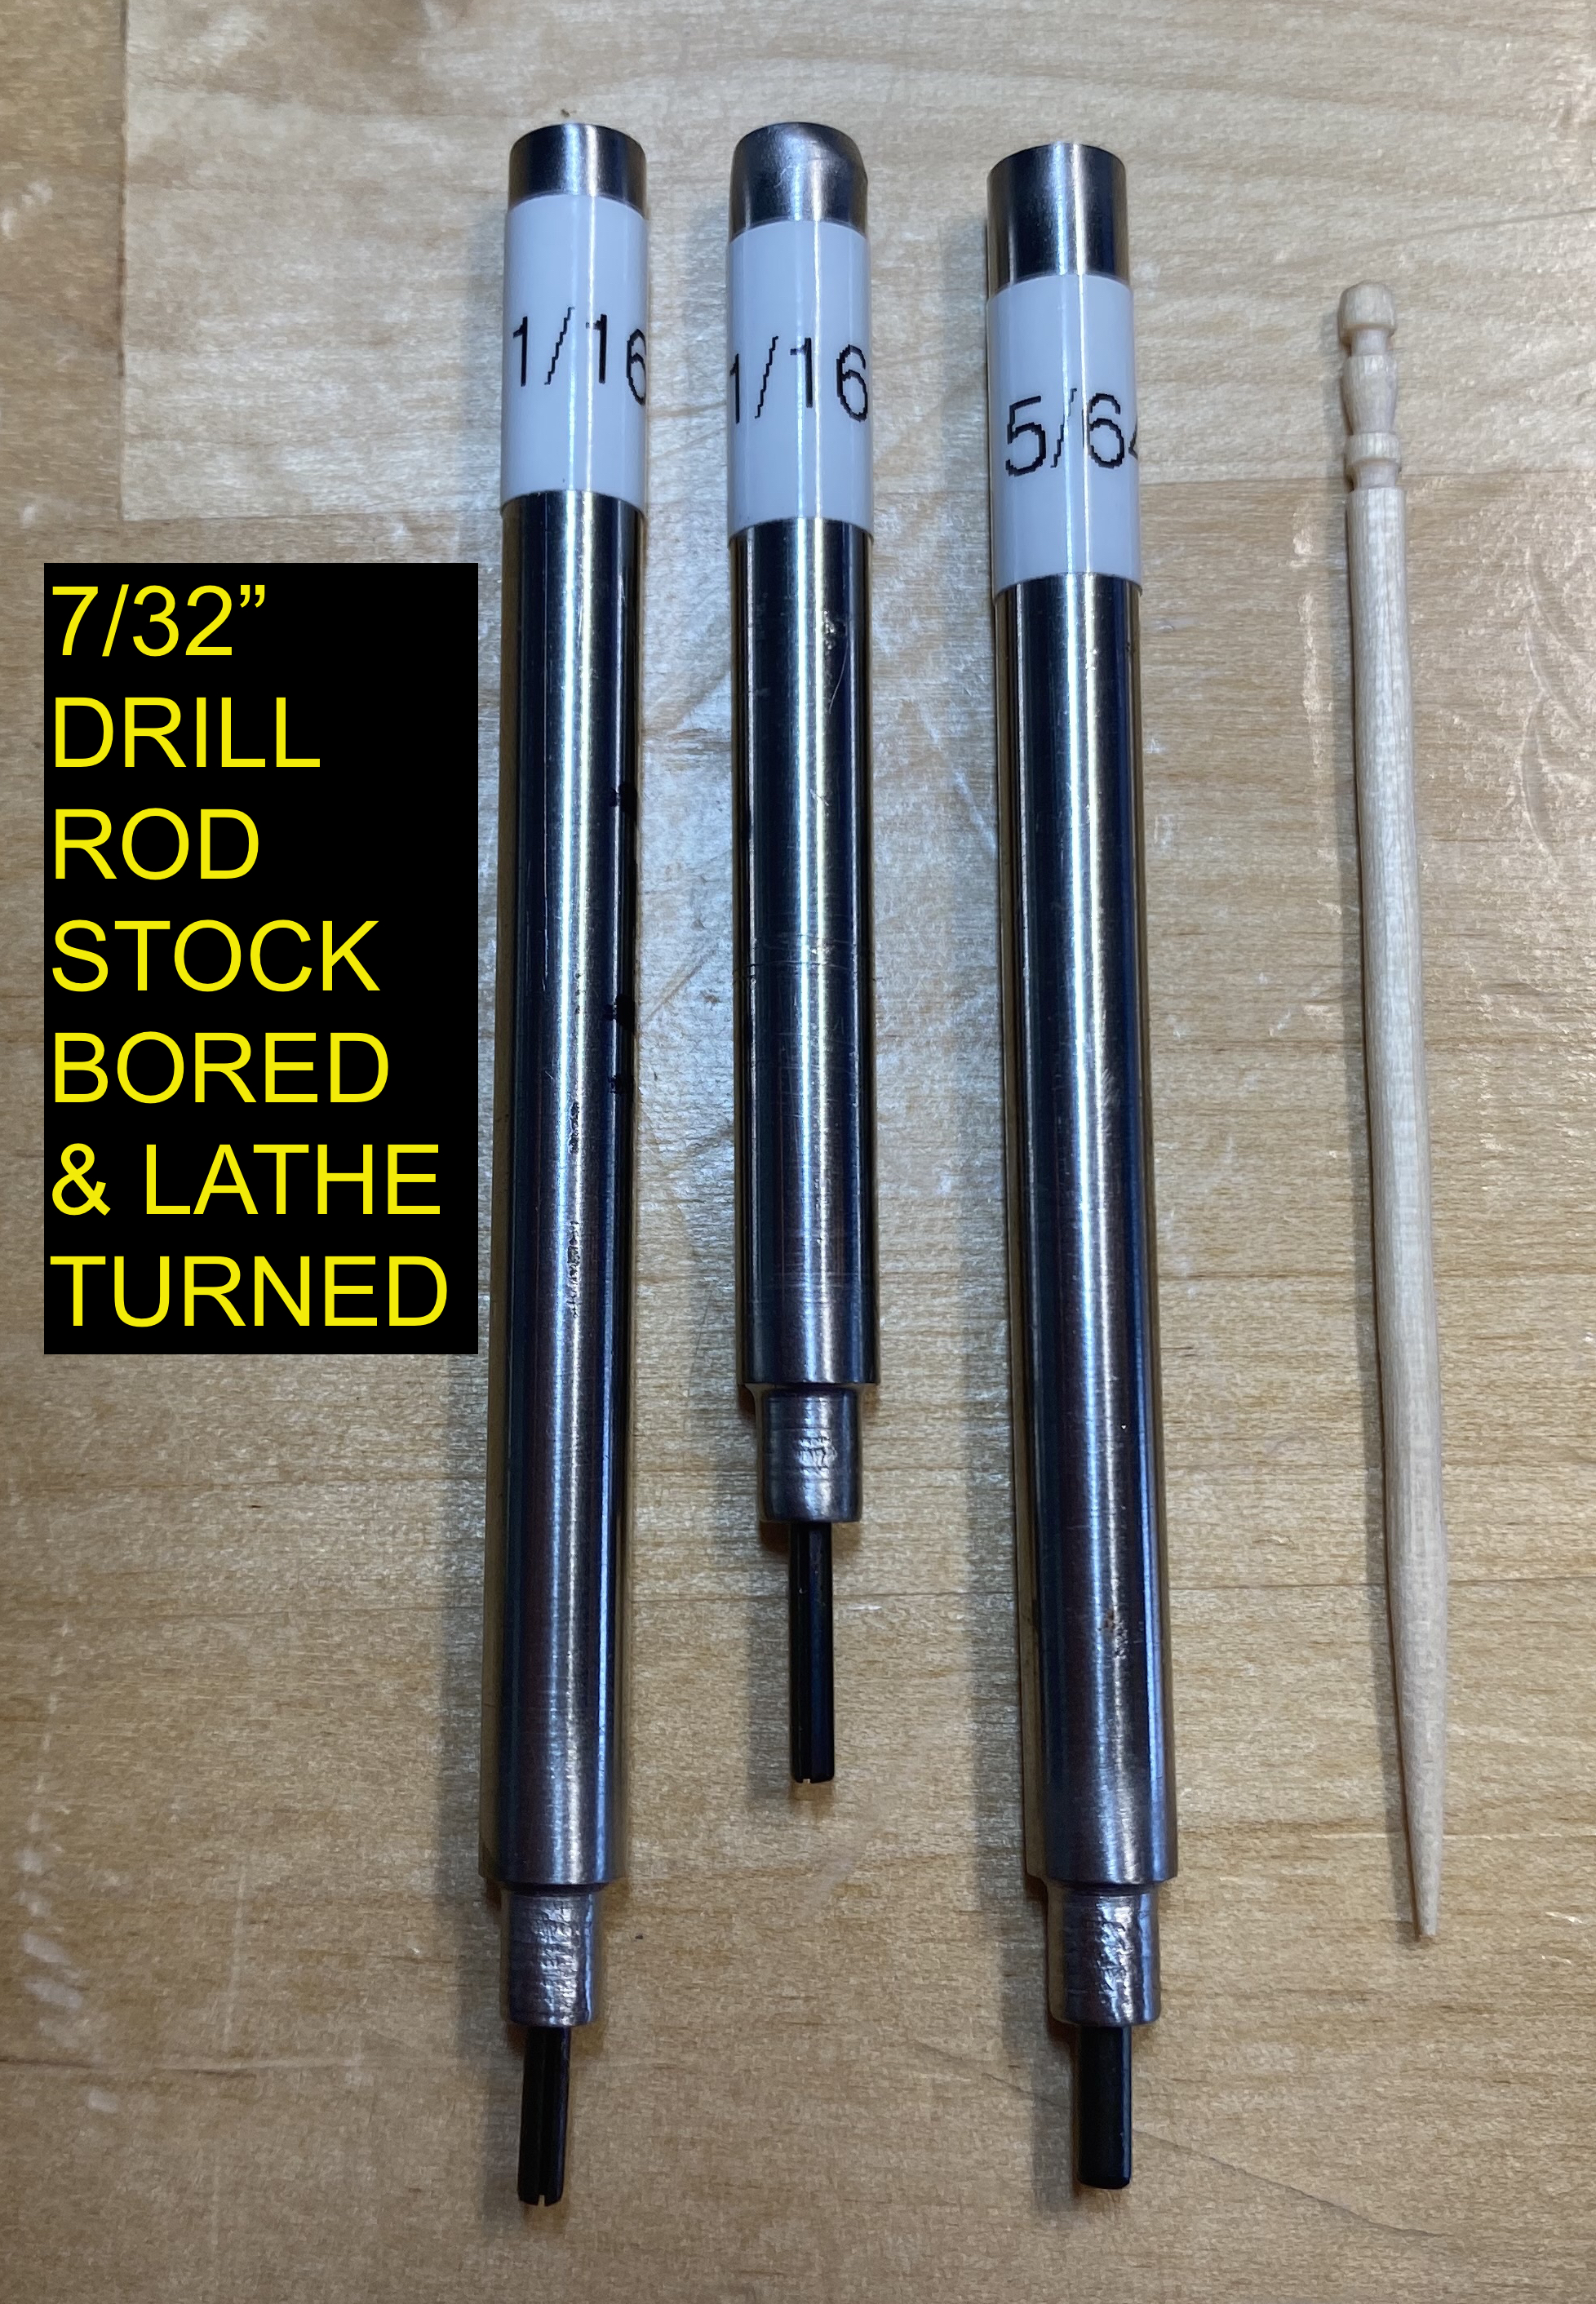
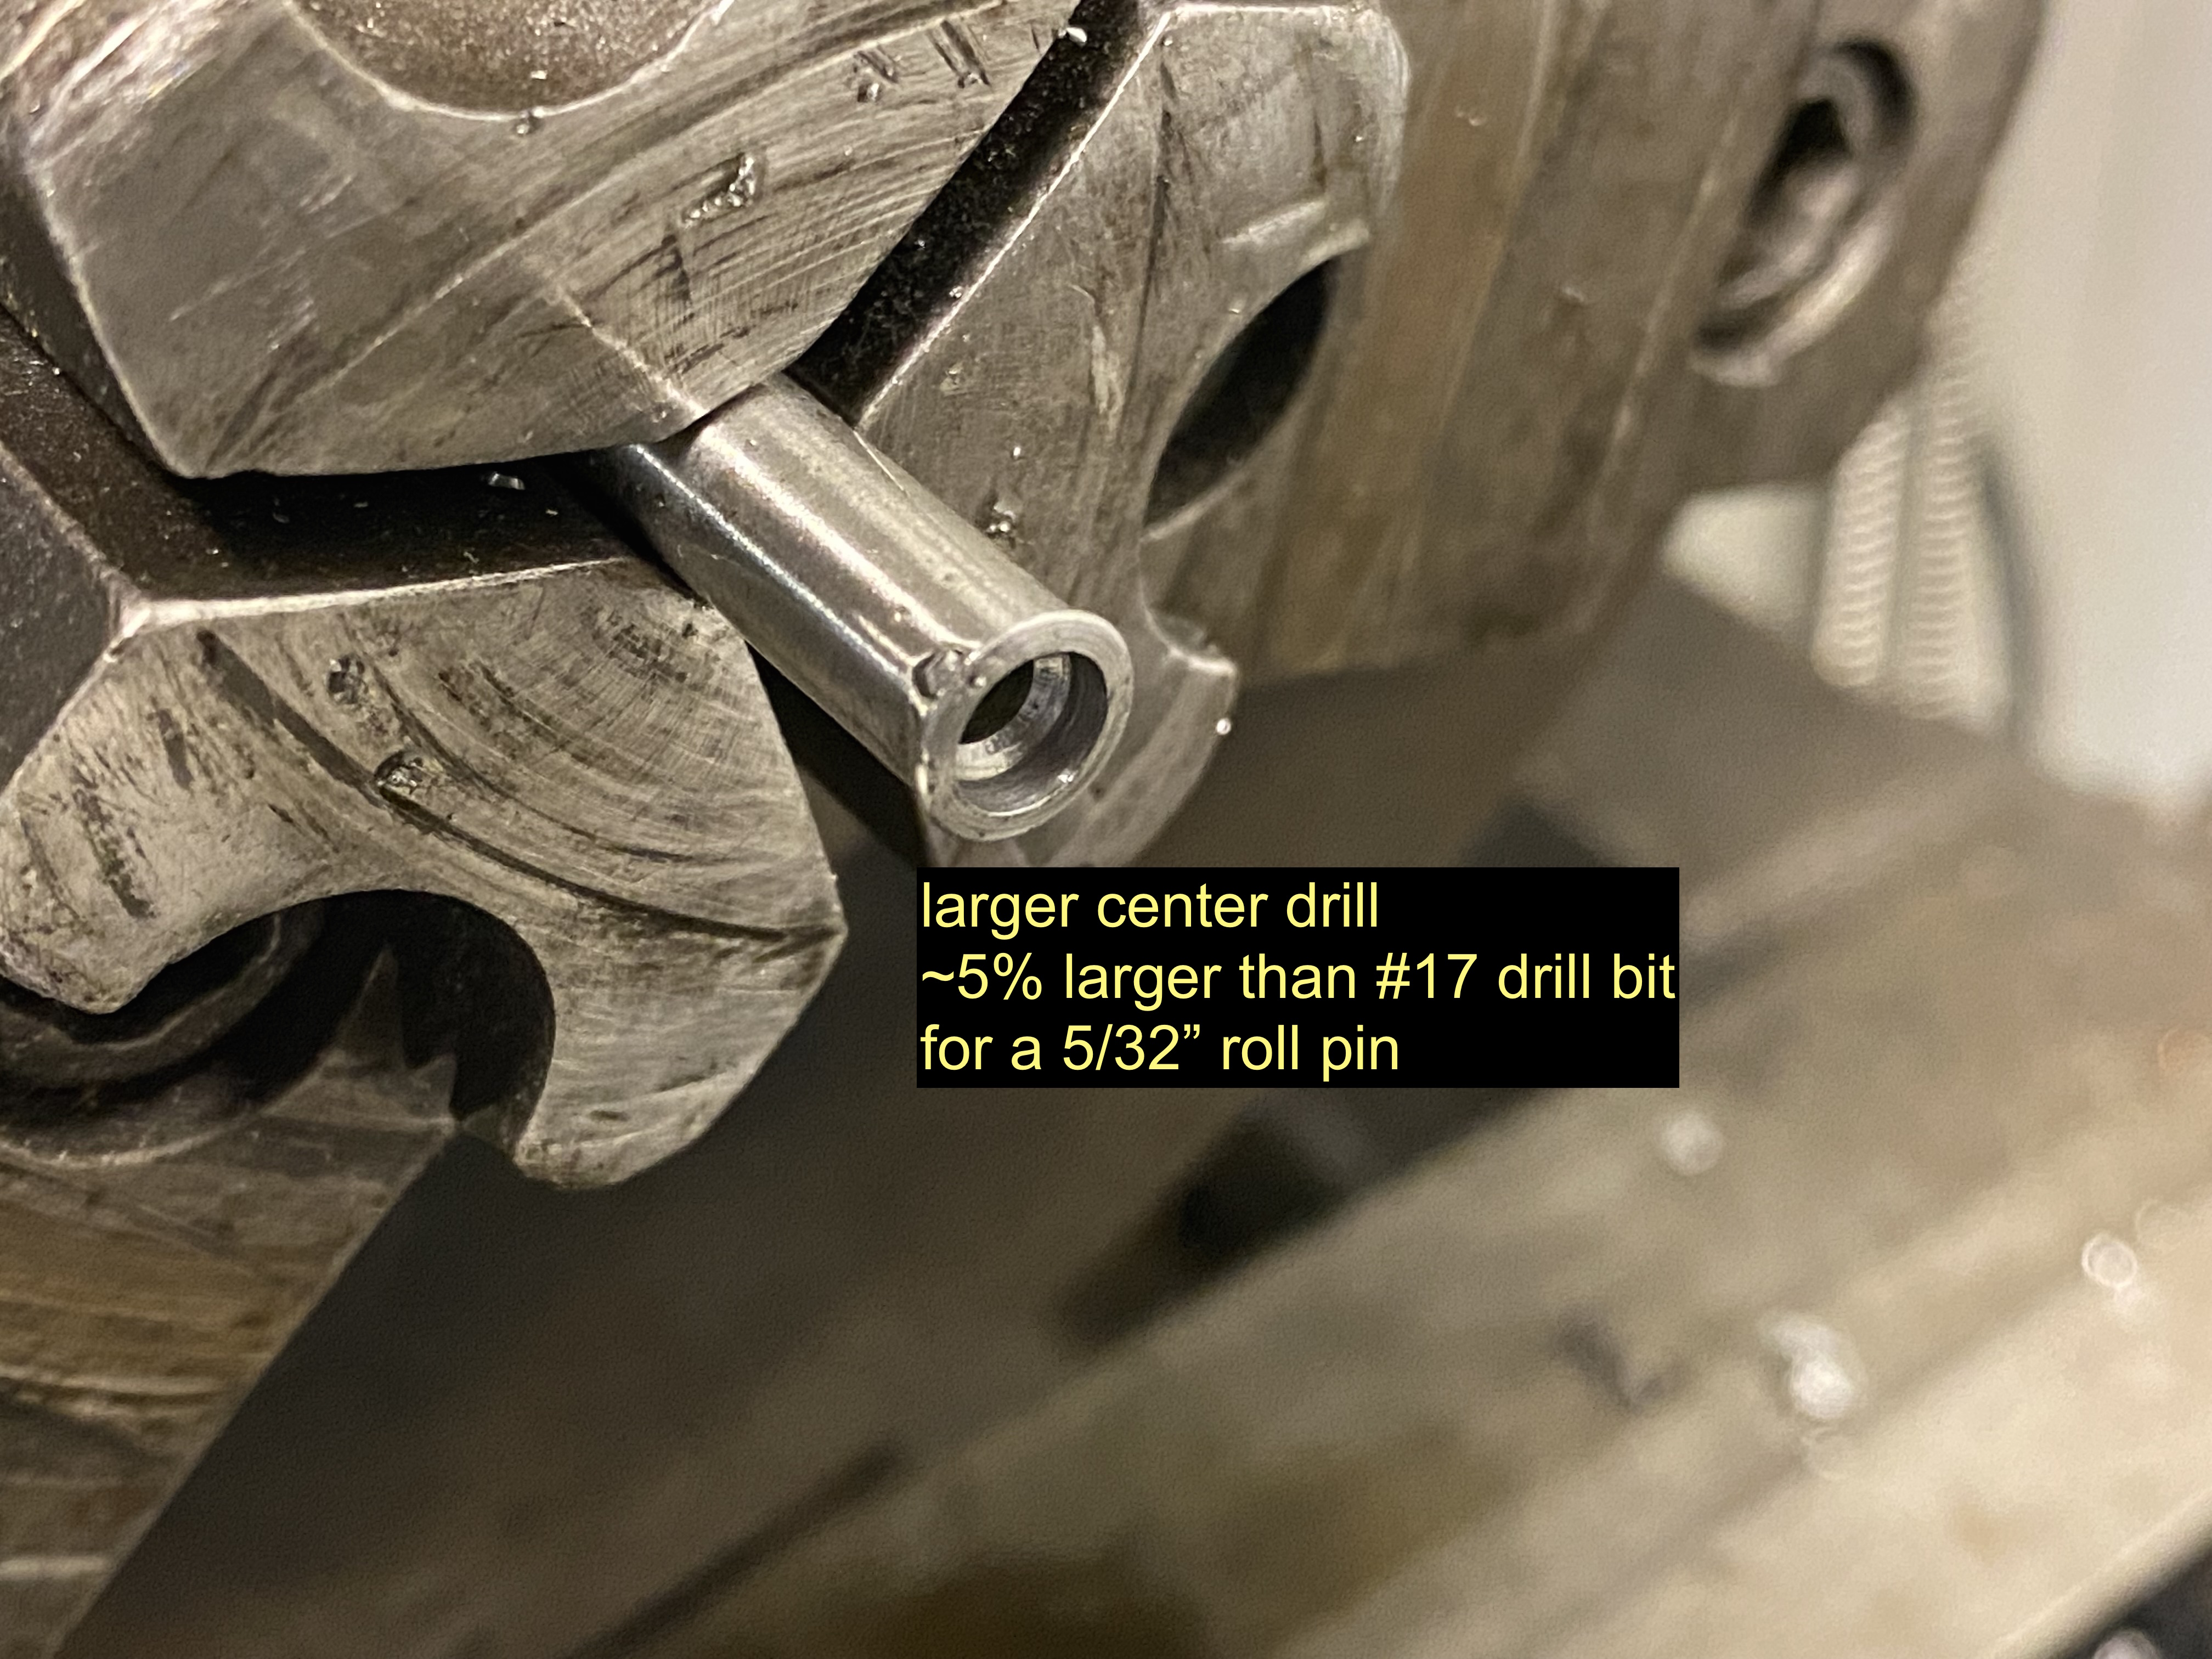
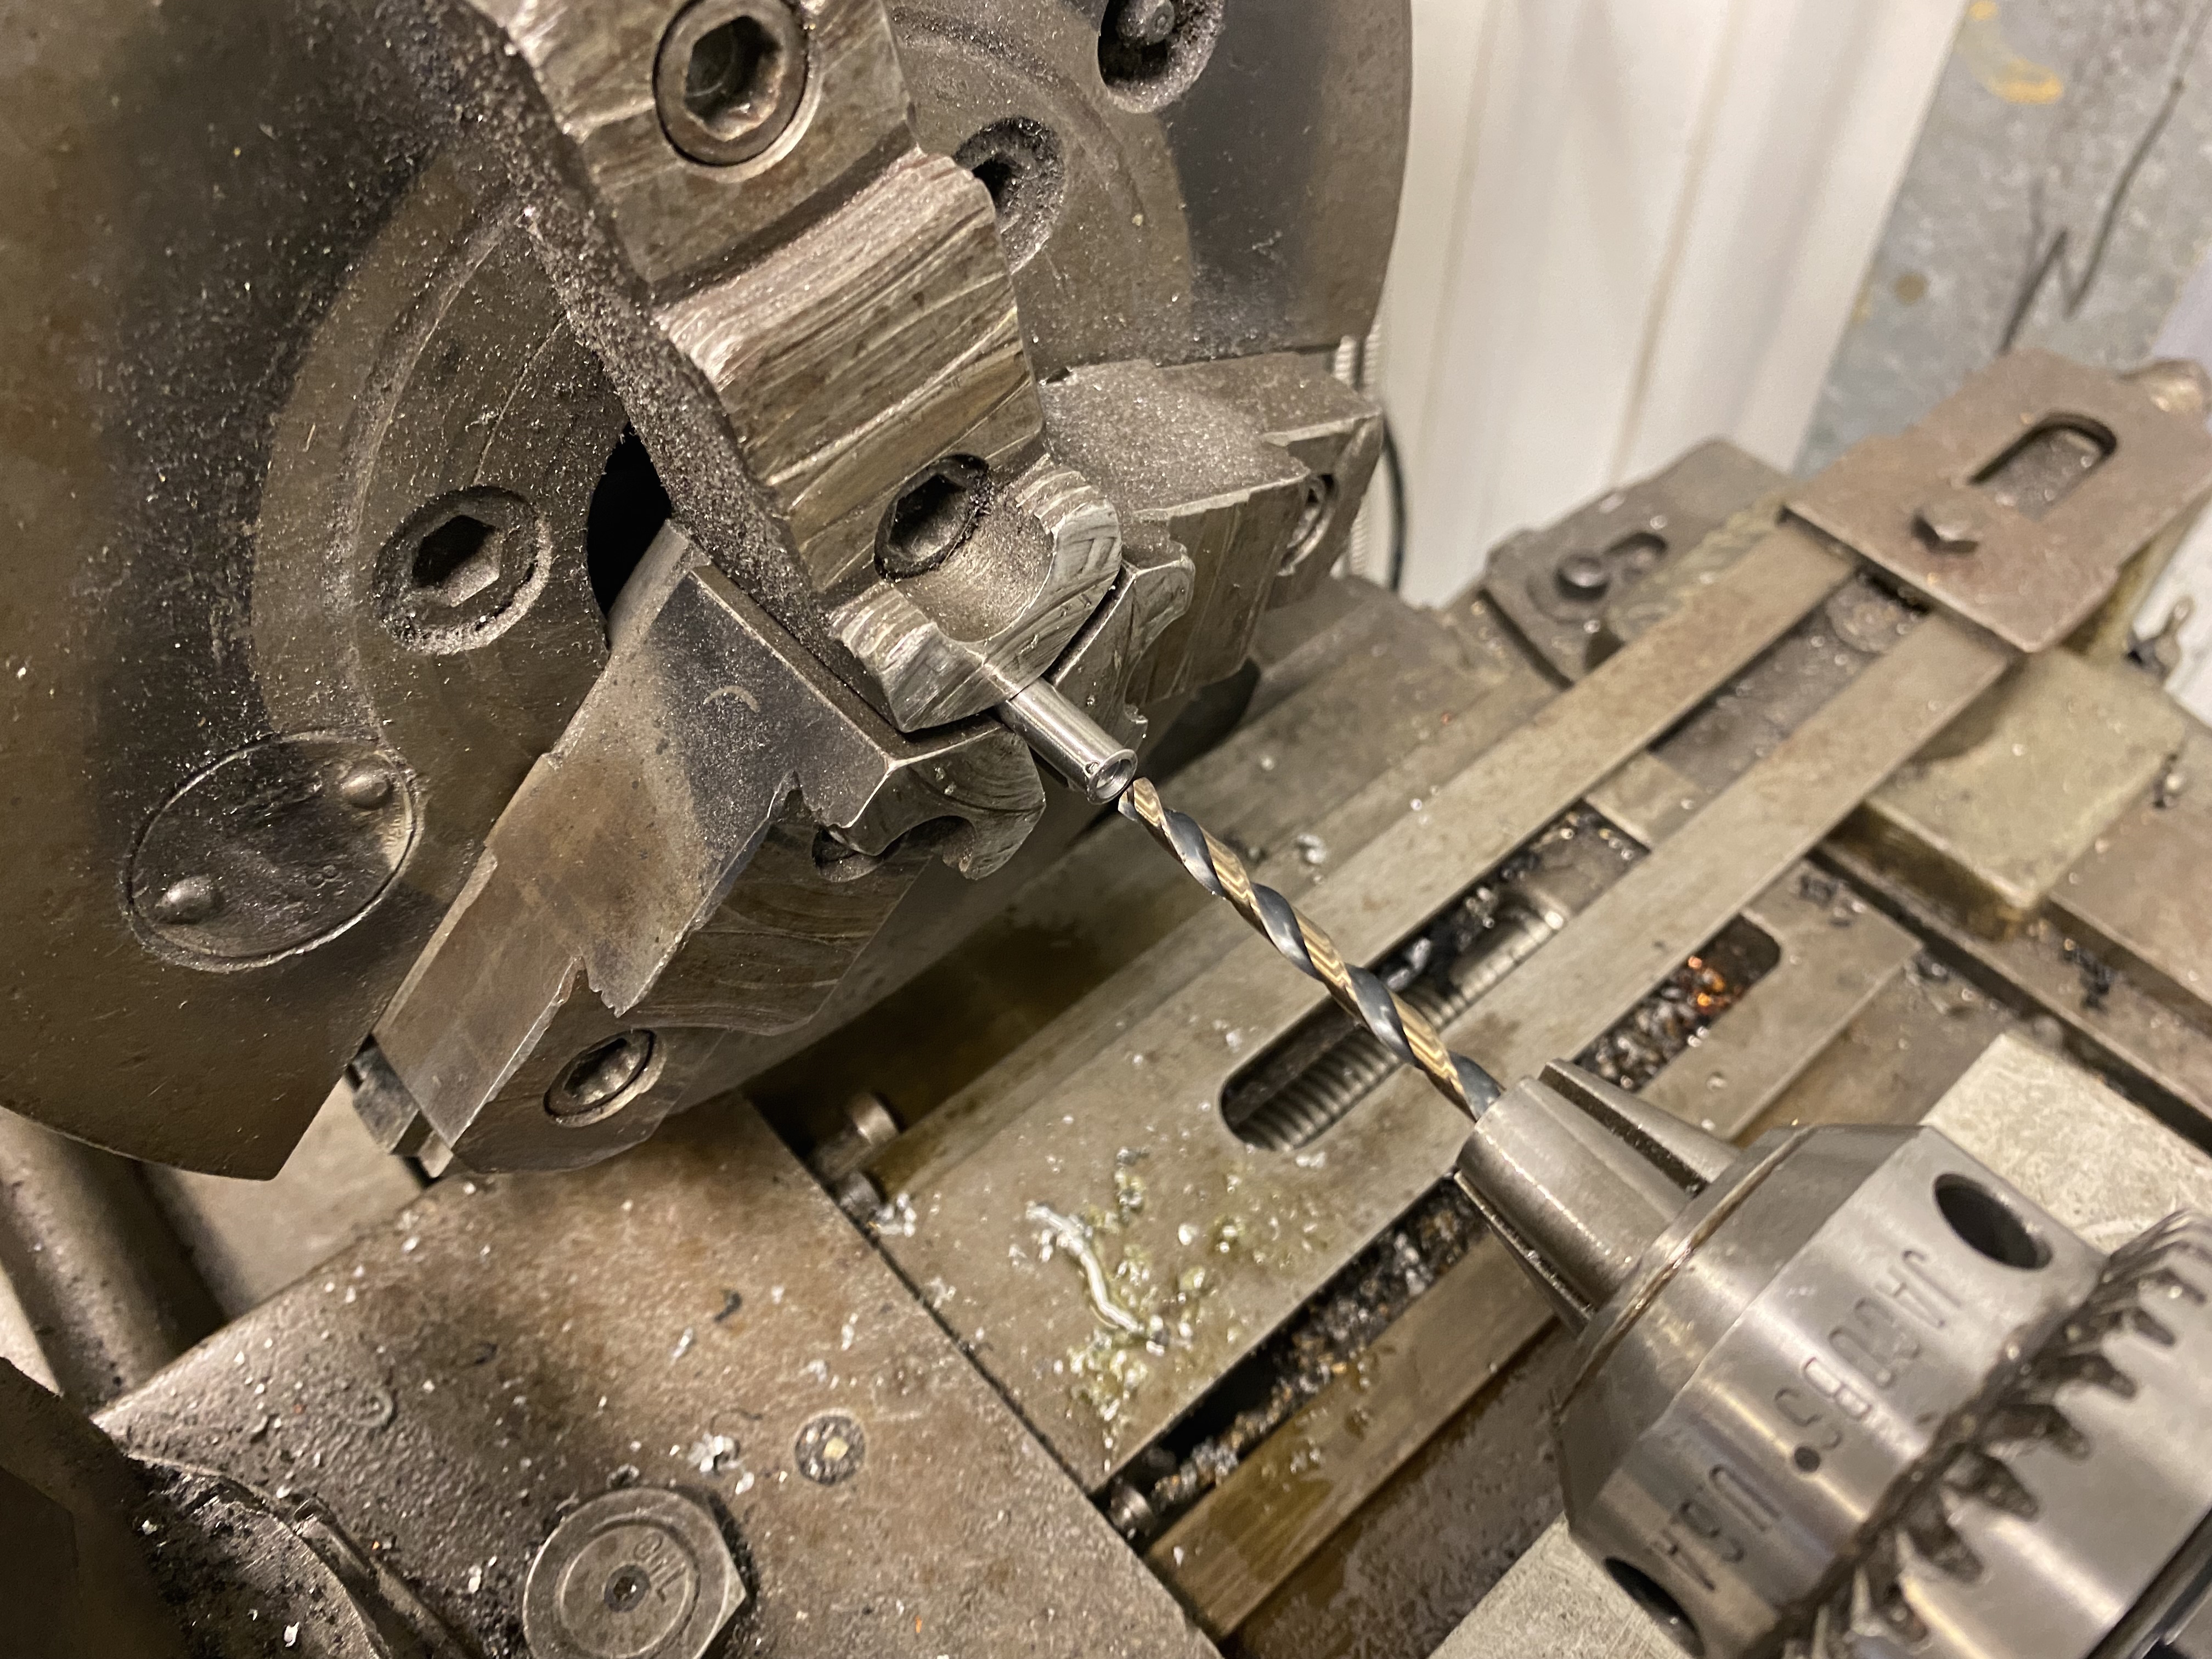
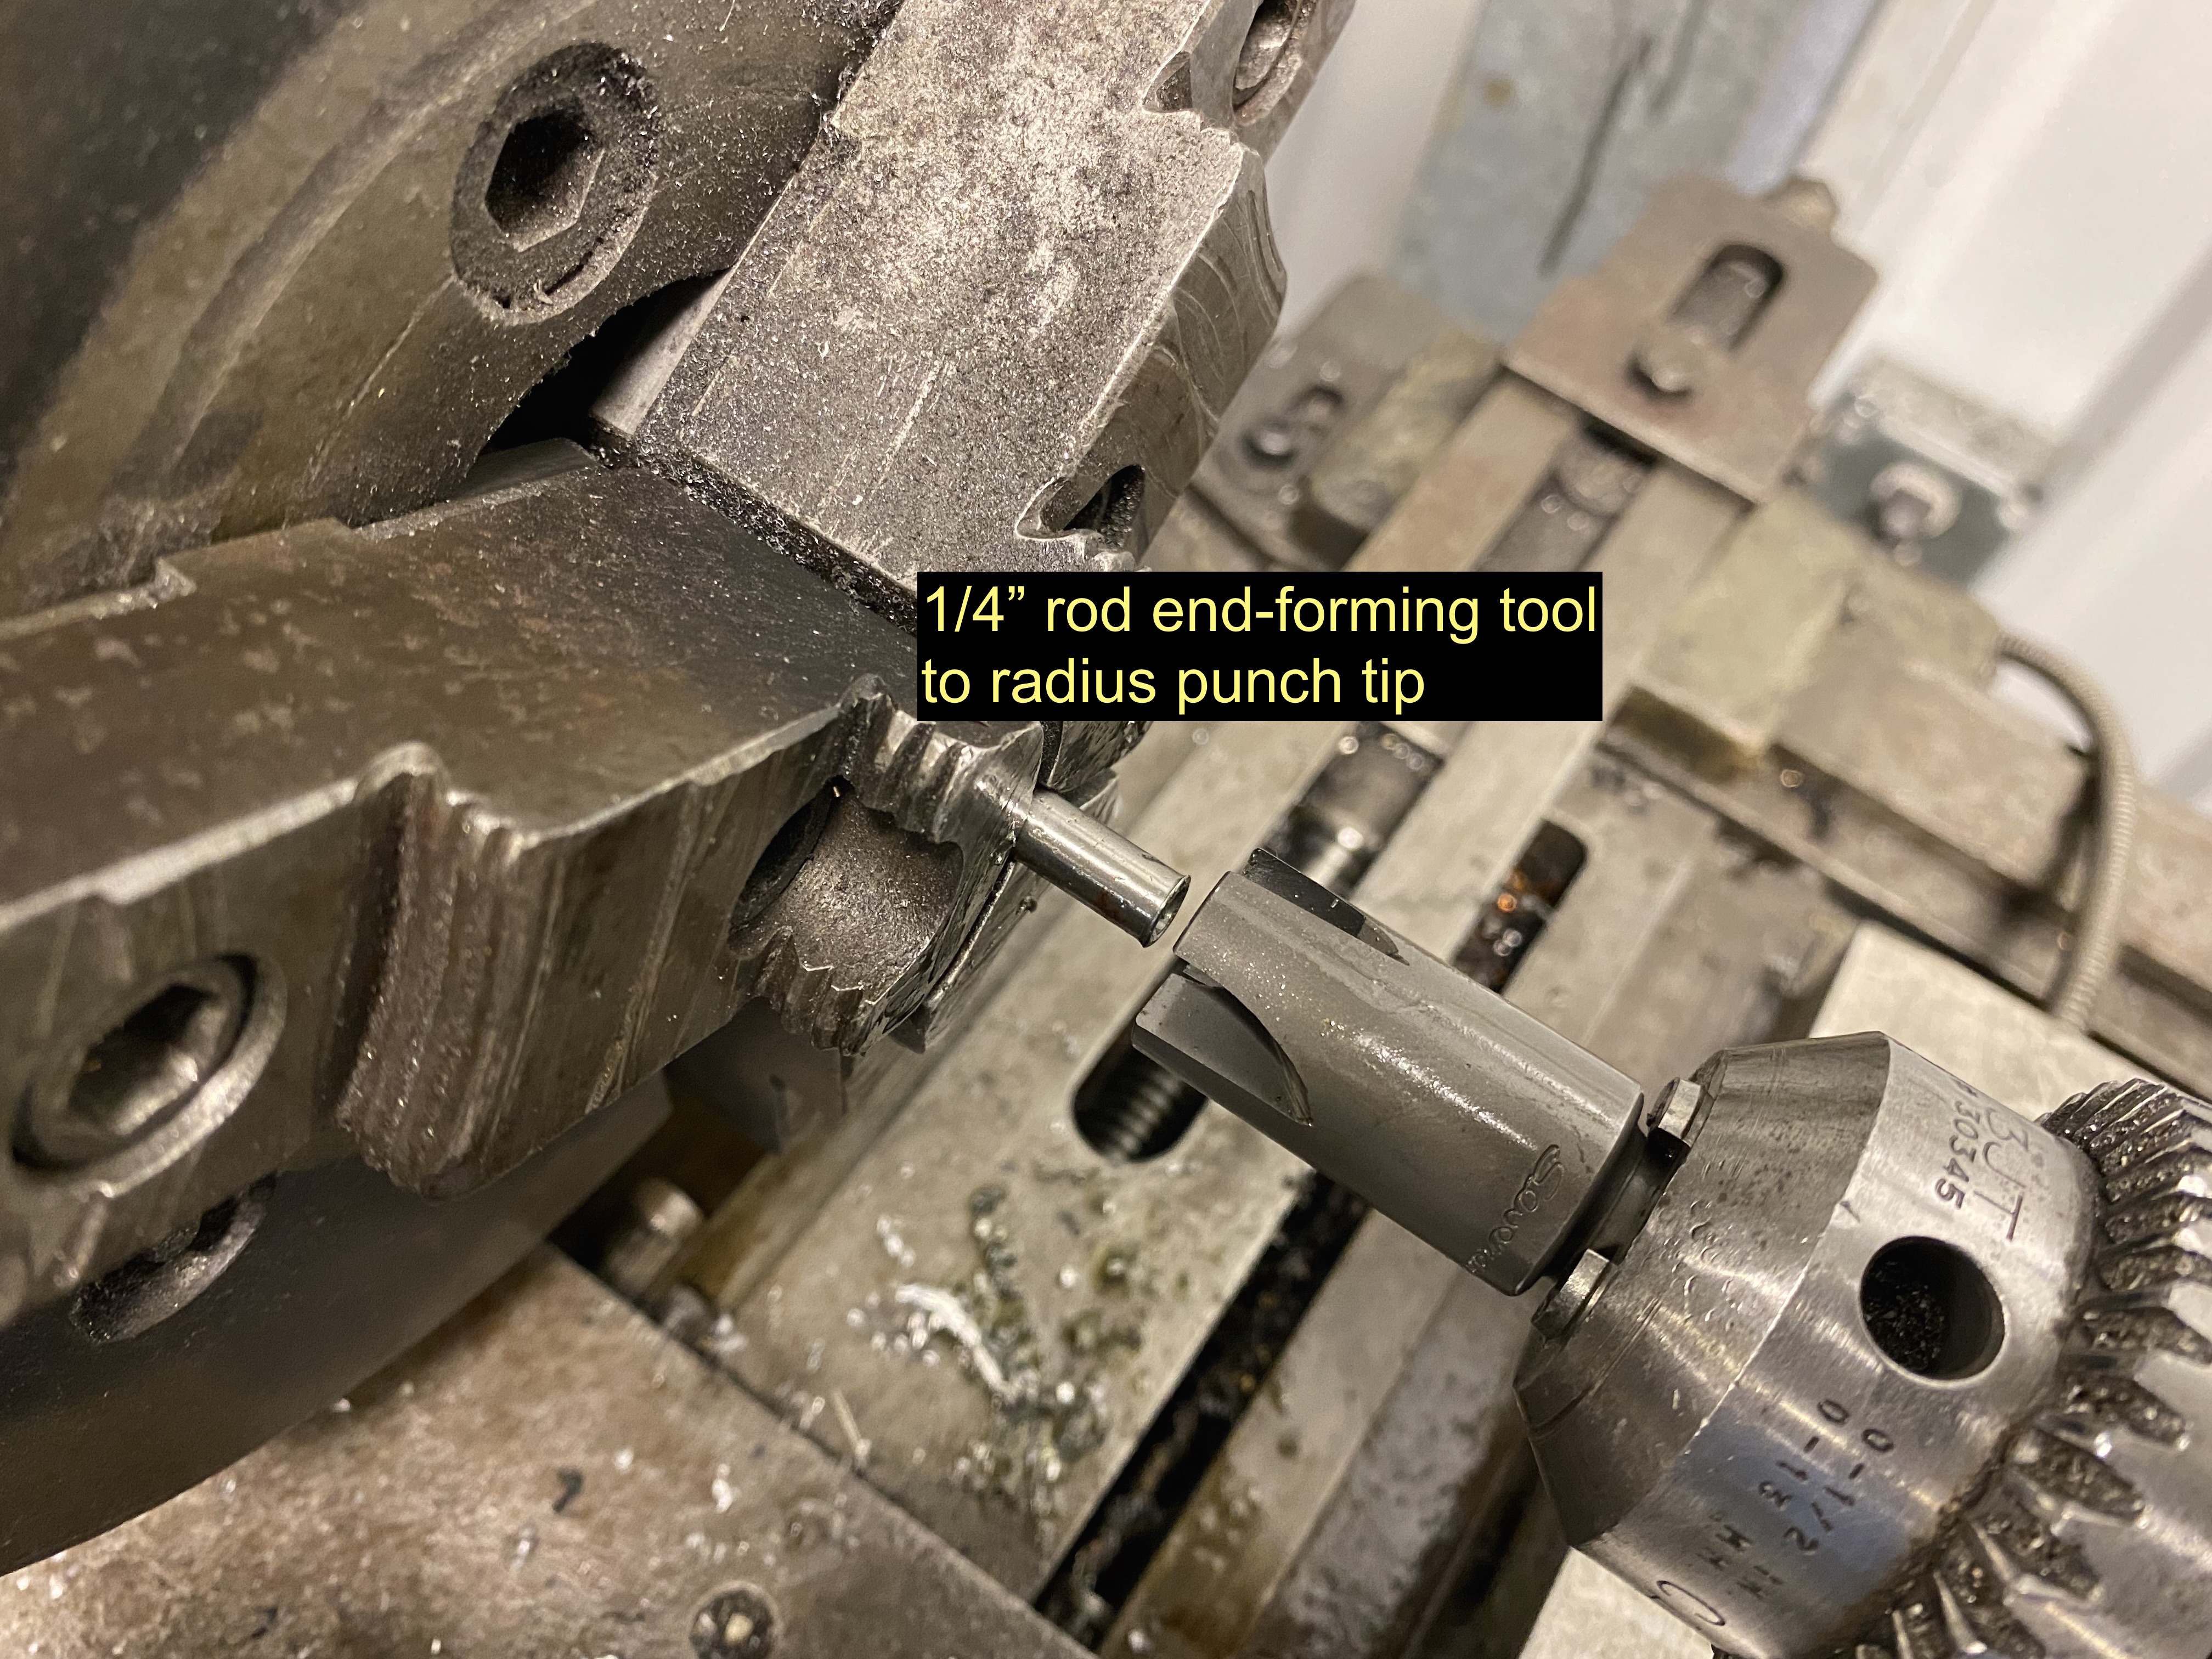
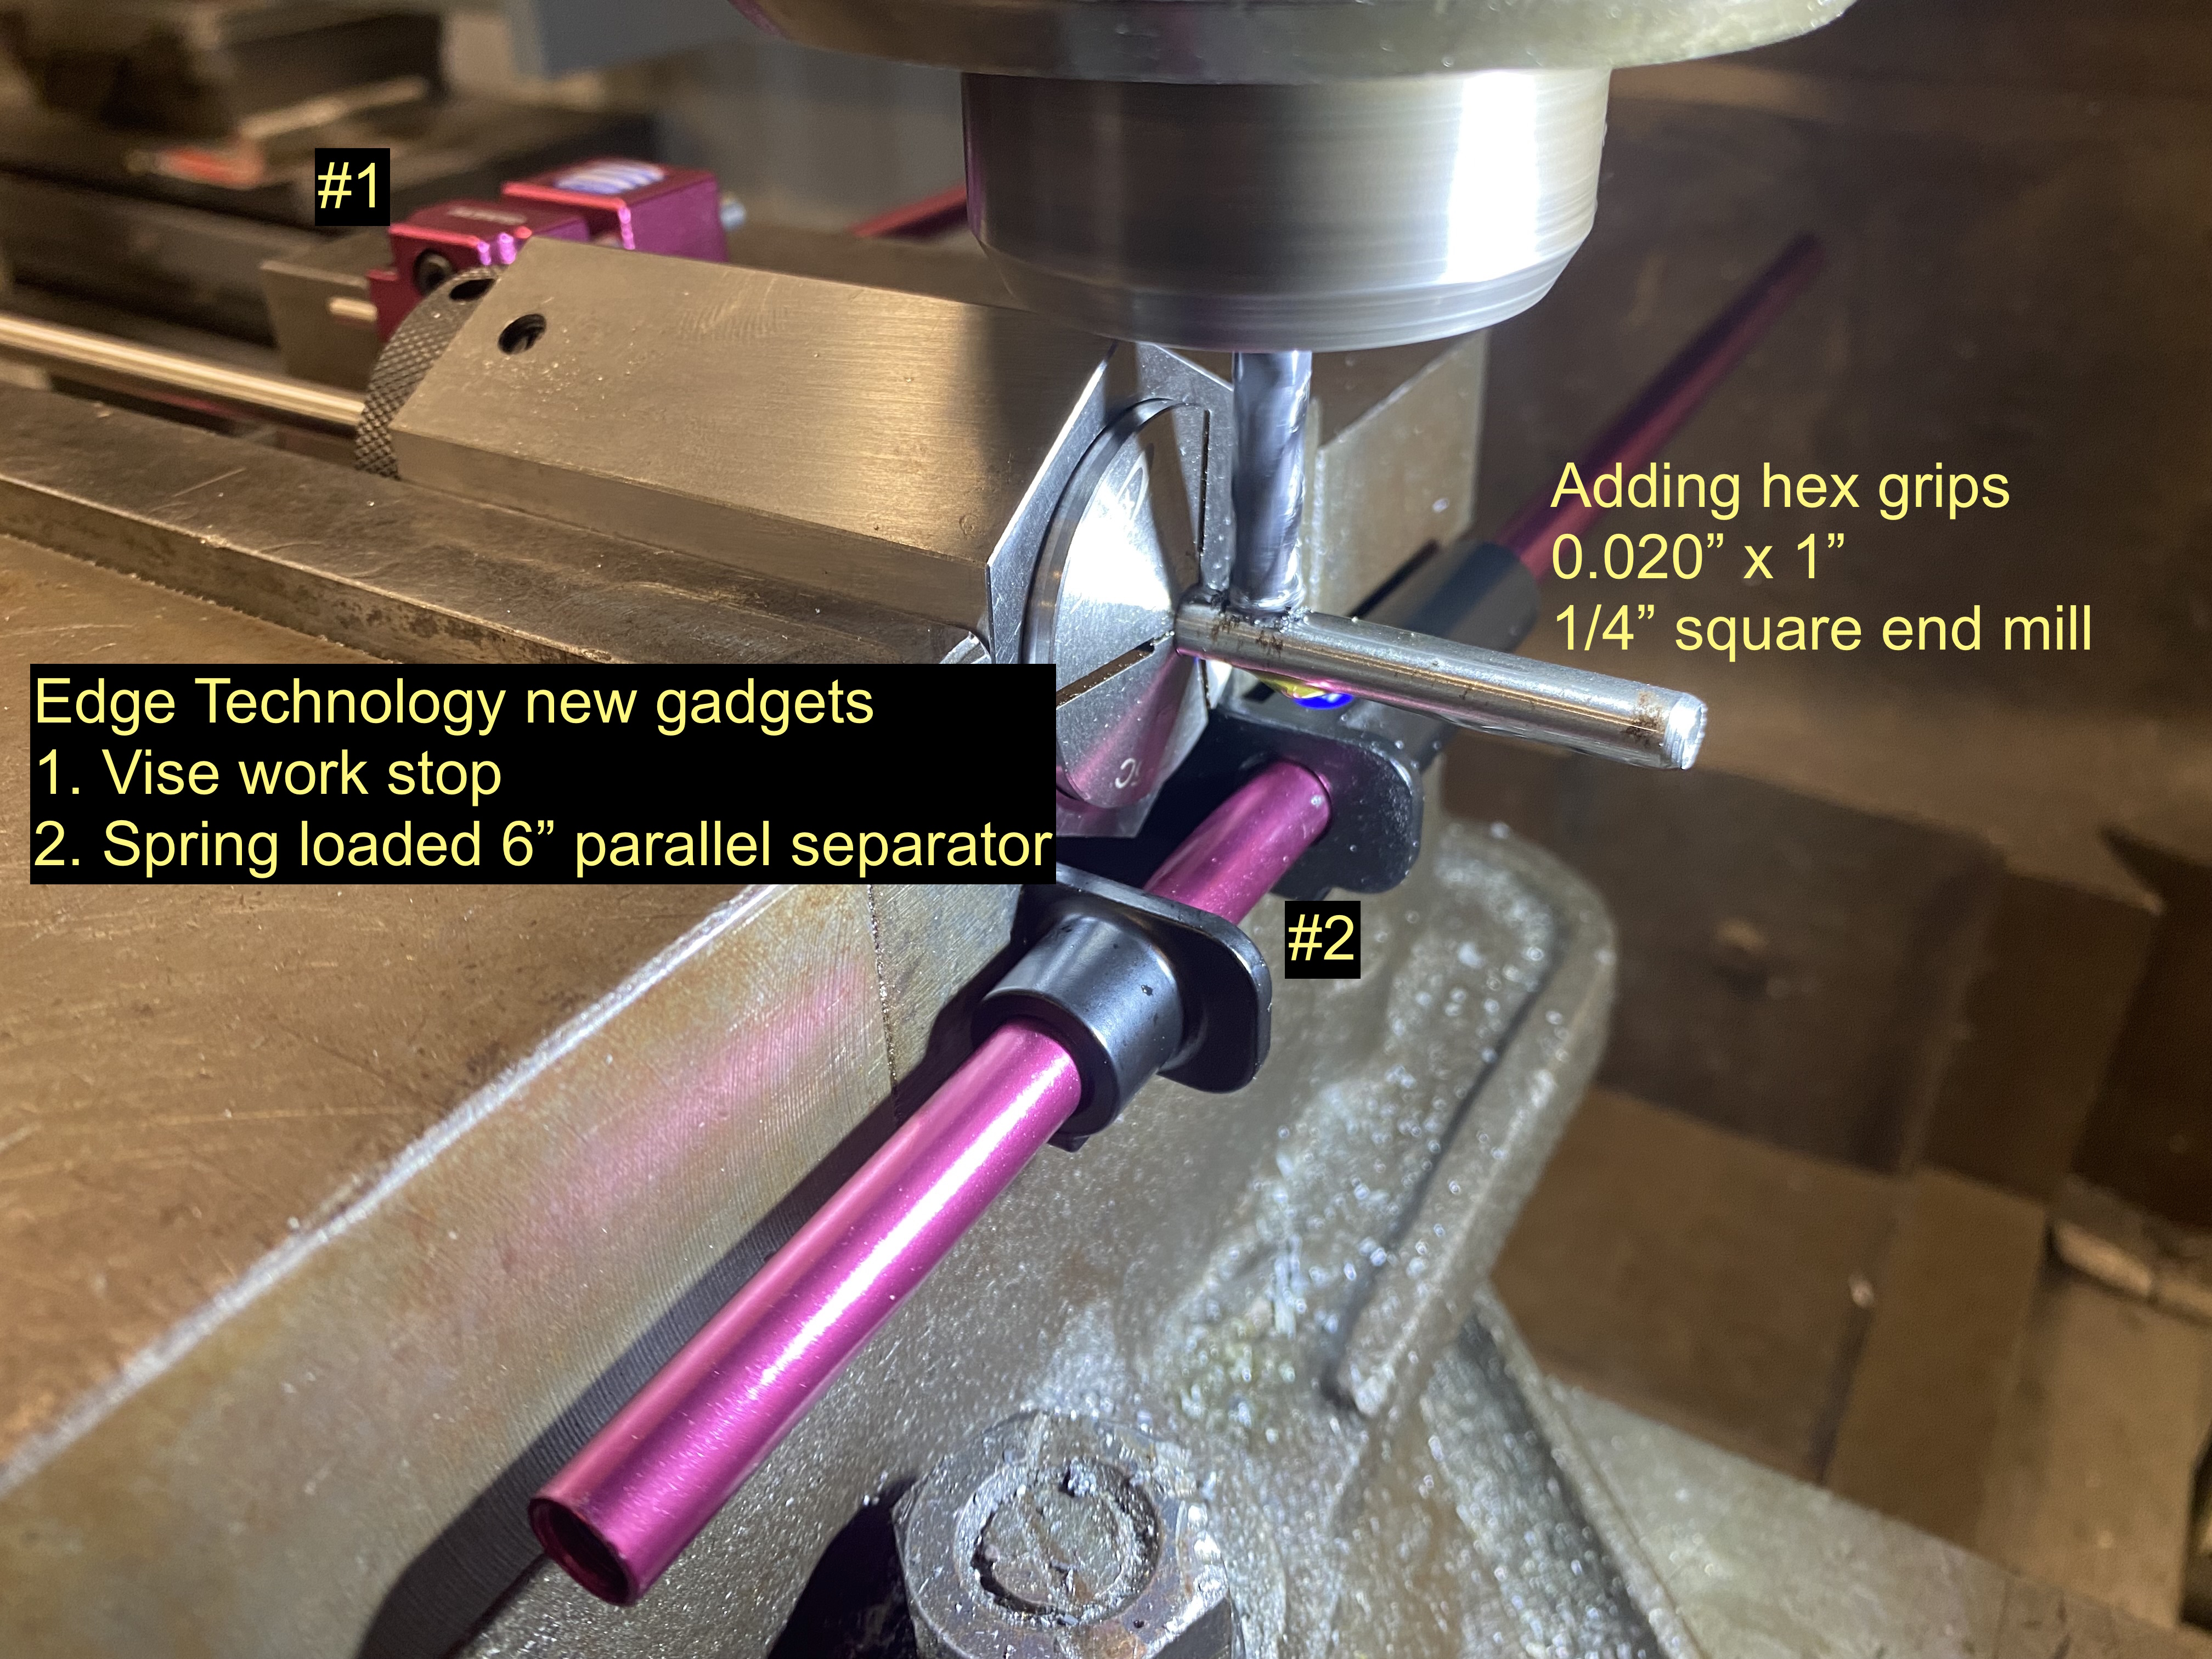
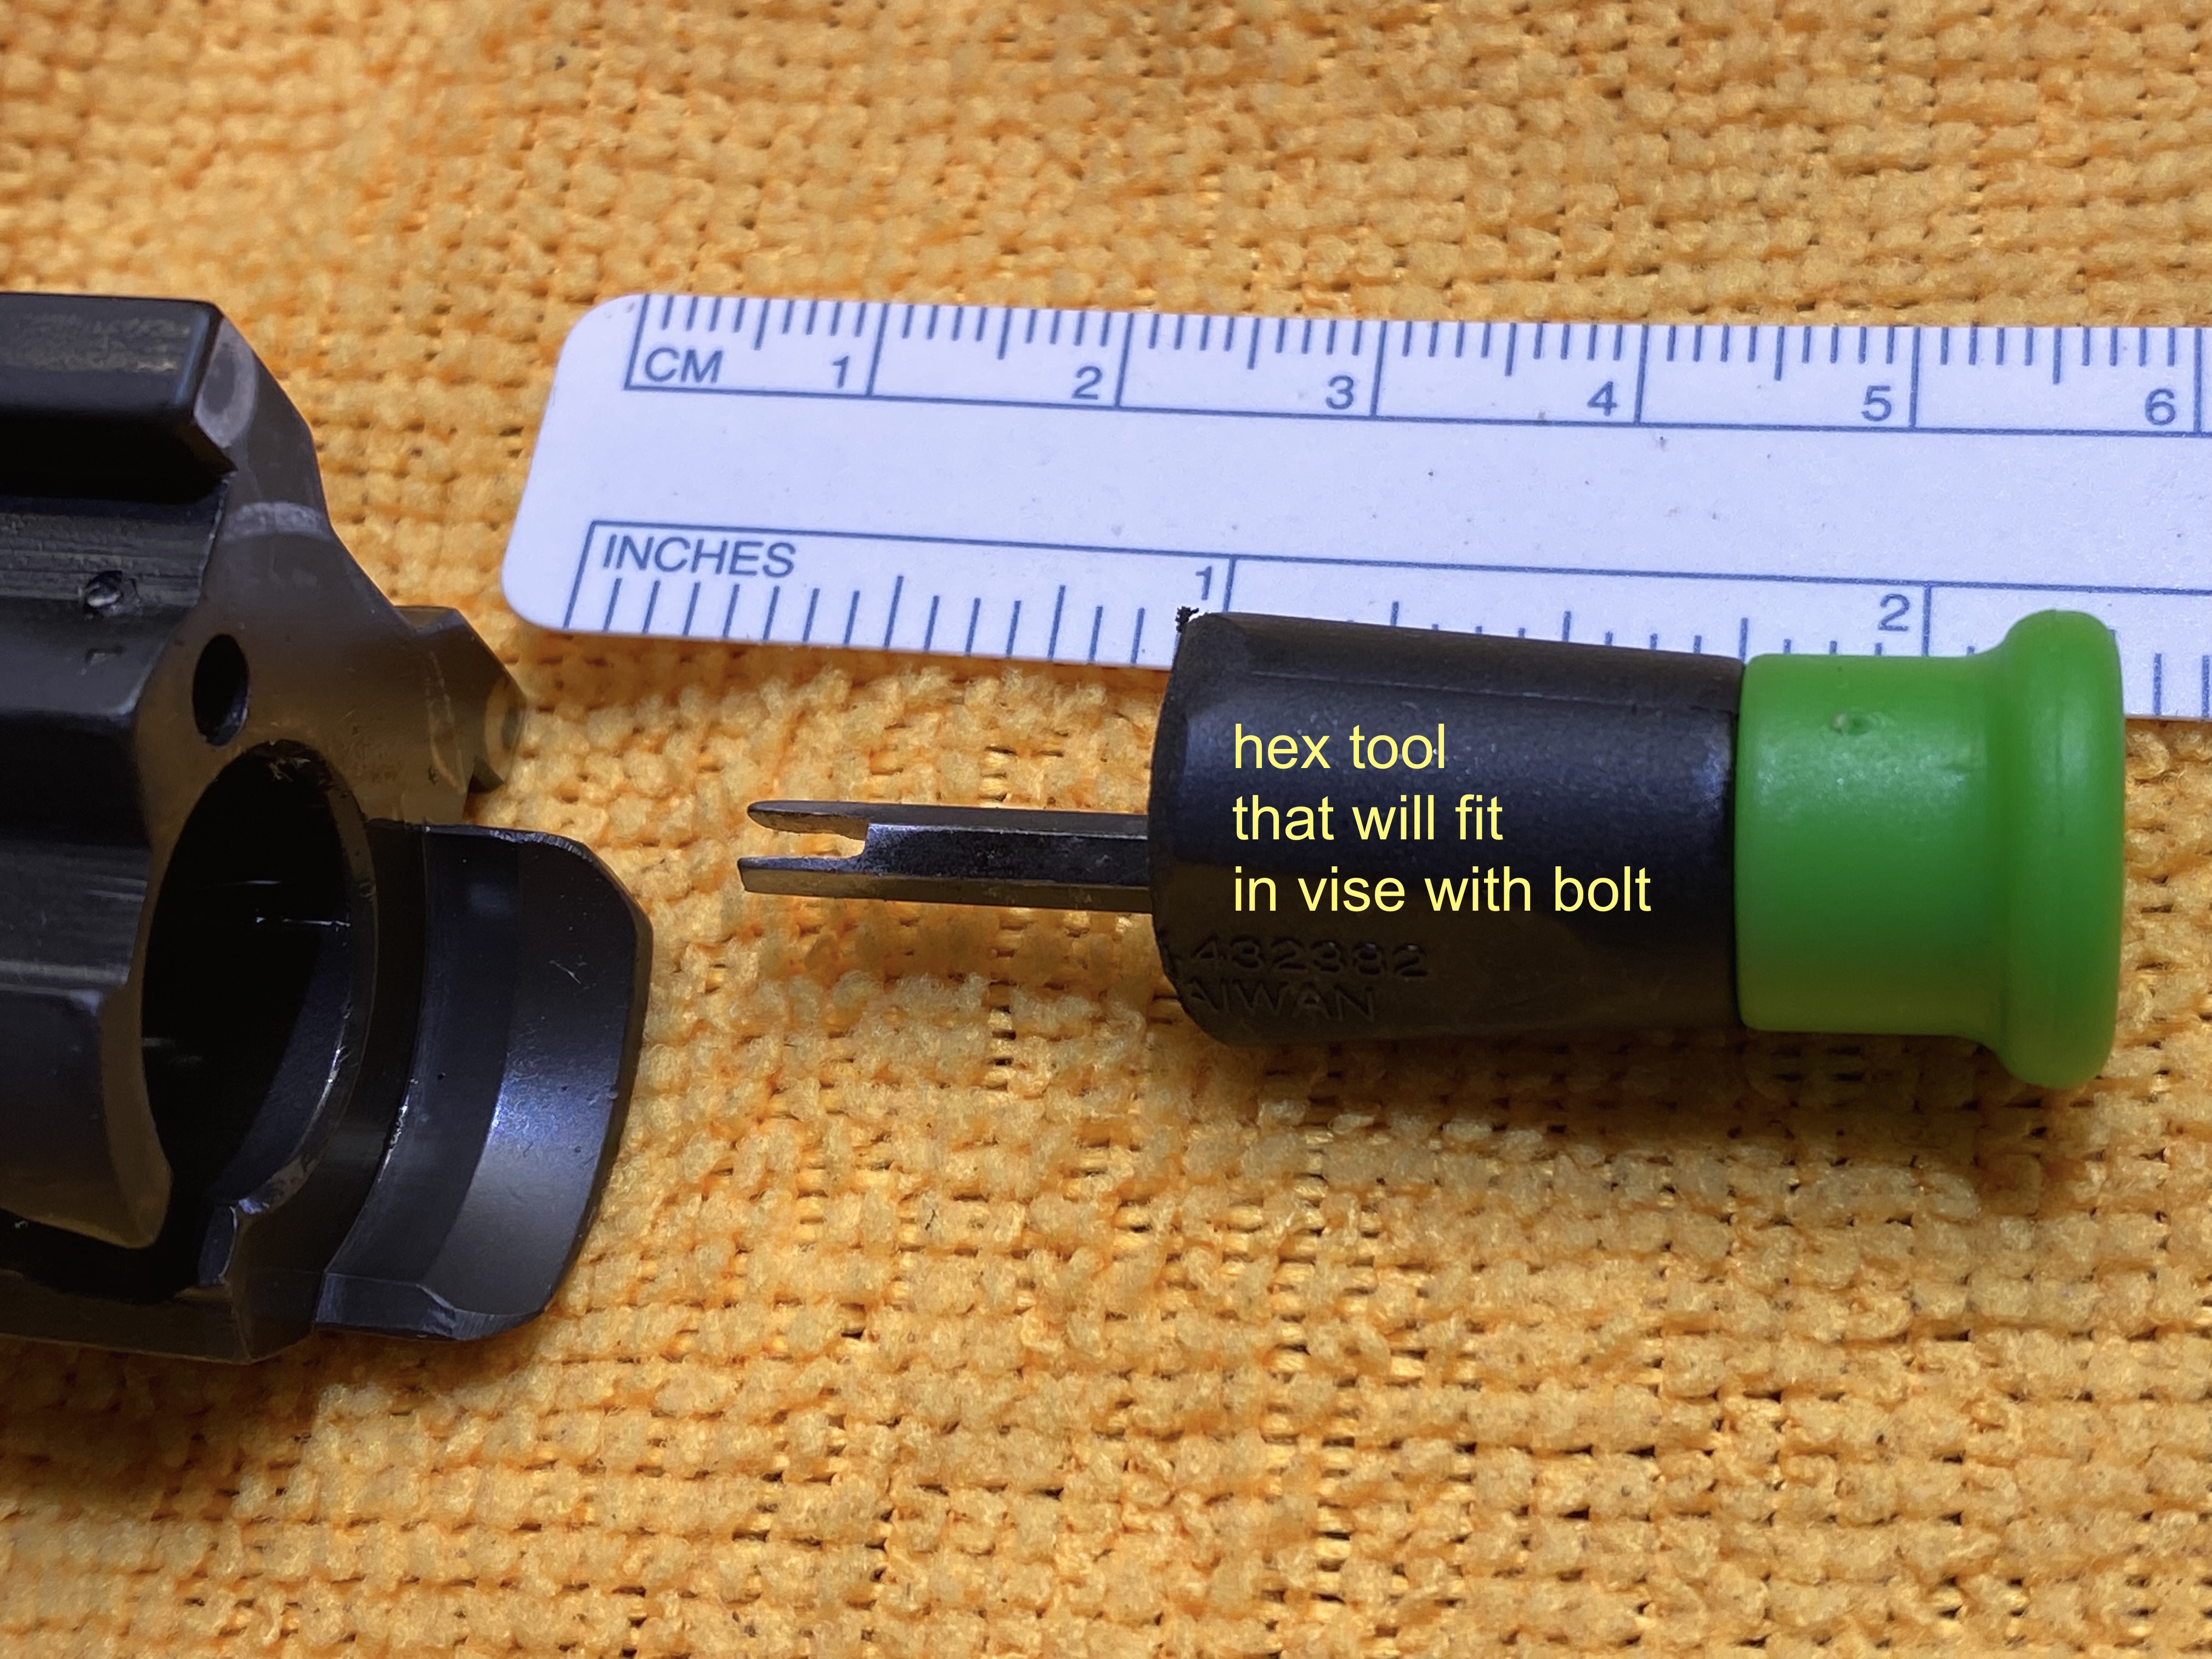
In deference to SD I did label it and tuck in to to a labeled drawer. That polymer tool shown above was a Flintstone appearing workhorse but I finally got around to making a more refined tool today worthy for the tool box. Used a shortened #28 drill bit shank slotted with 1/16" square end mill to press fit into a 3/8" drill rod tool shaft cut to length, ends radiused for aesthetics on the slotted end and to be functional fitting into vise jaw hex fastener to stabilize the tool to prevent it sliding down the vise jaw face.


-
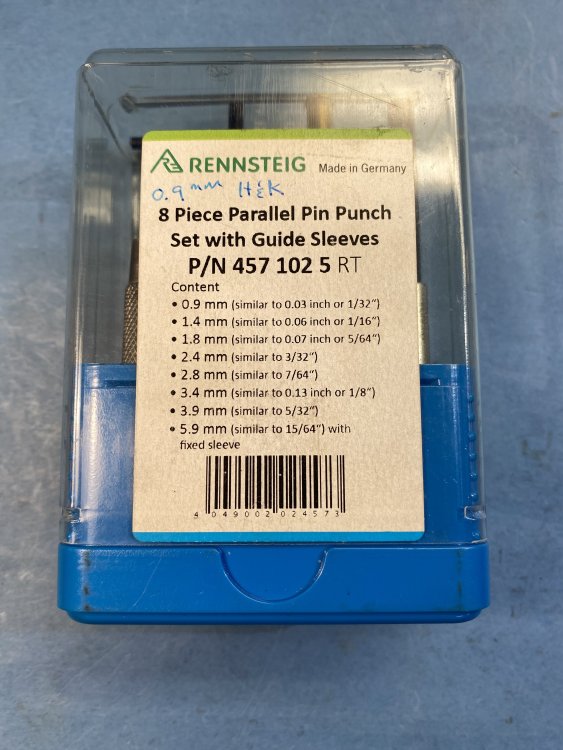
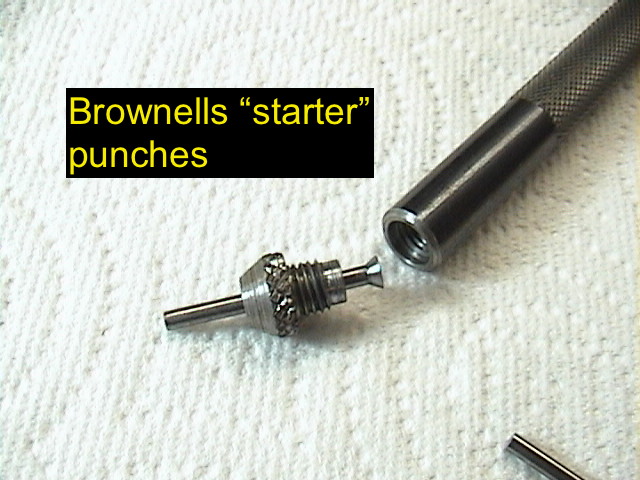
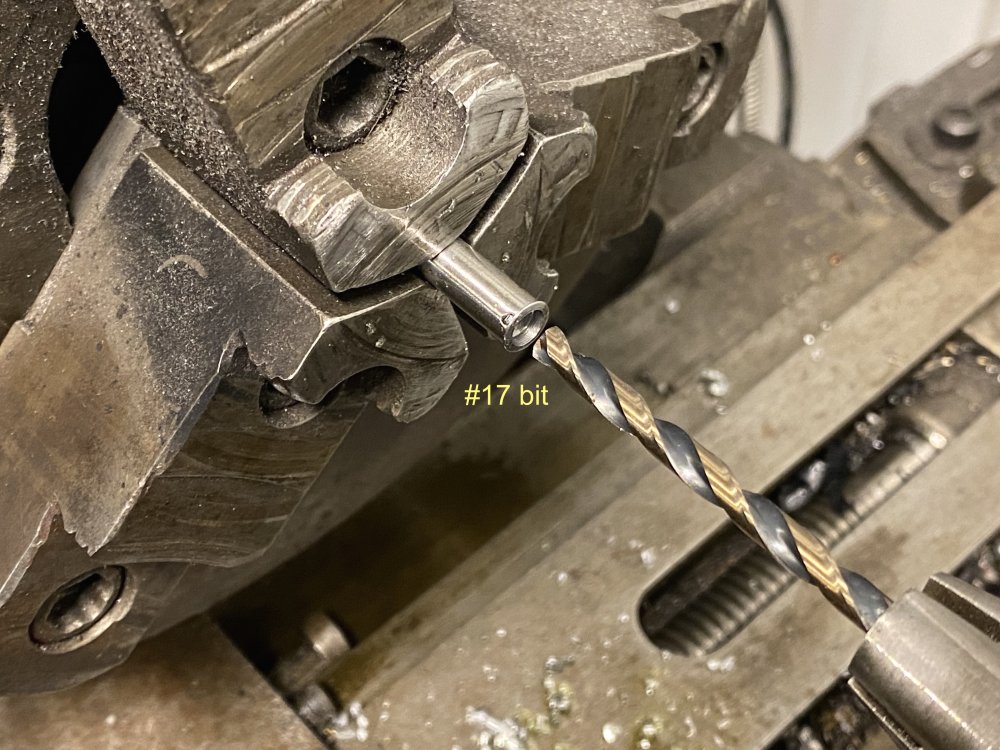
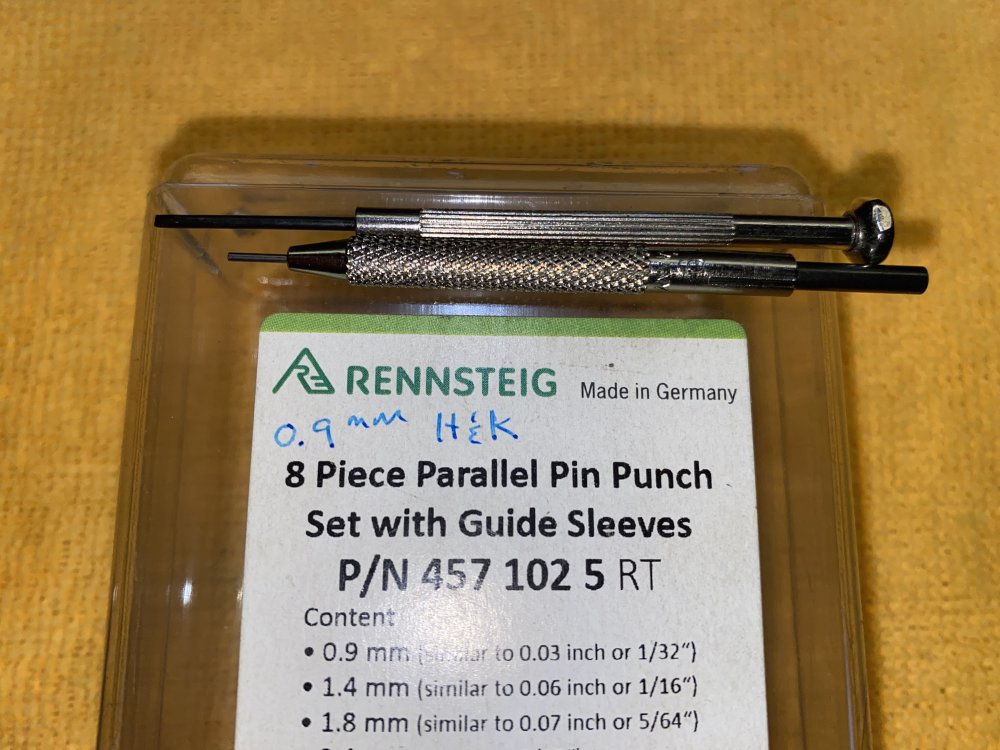
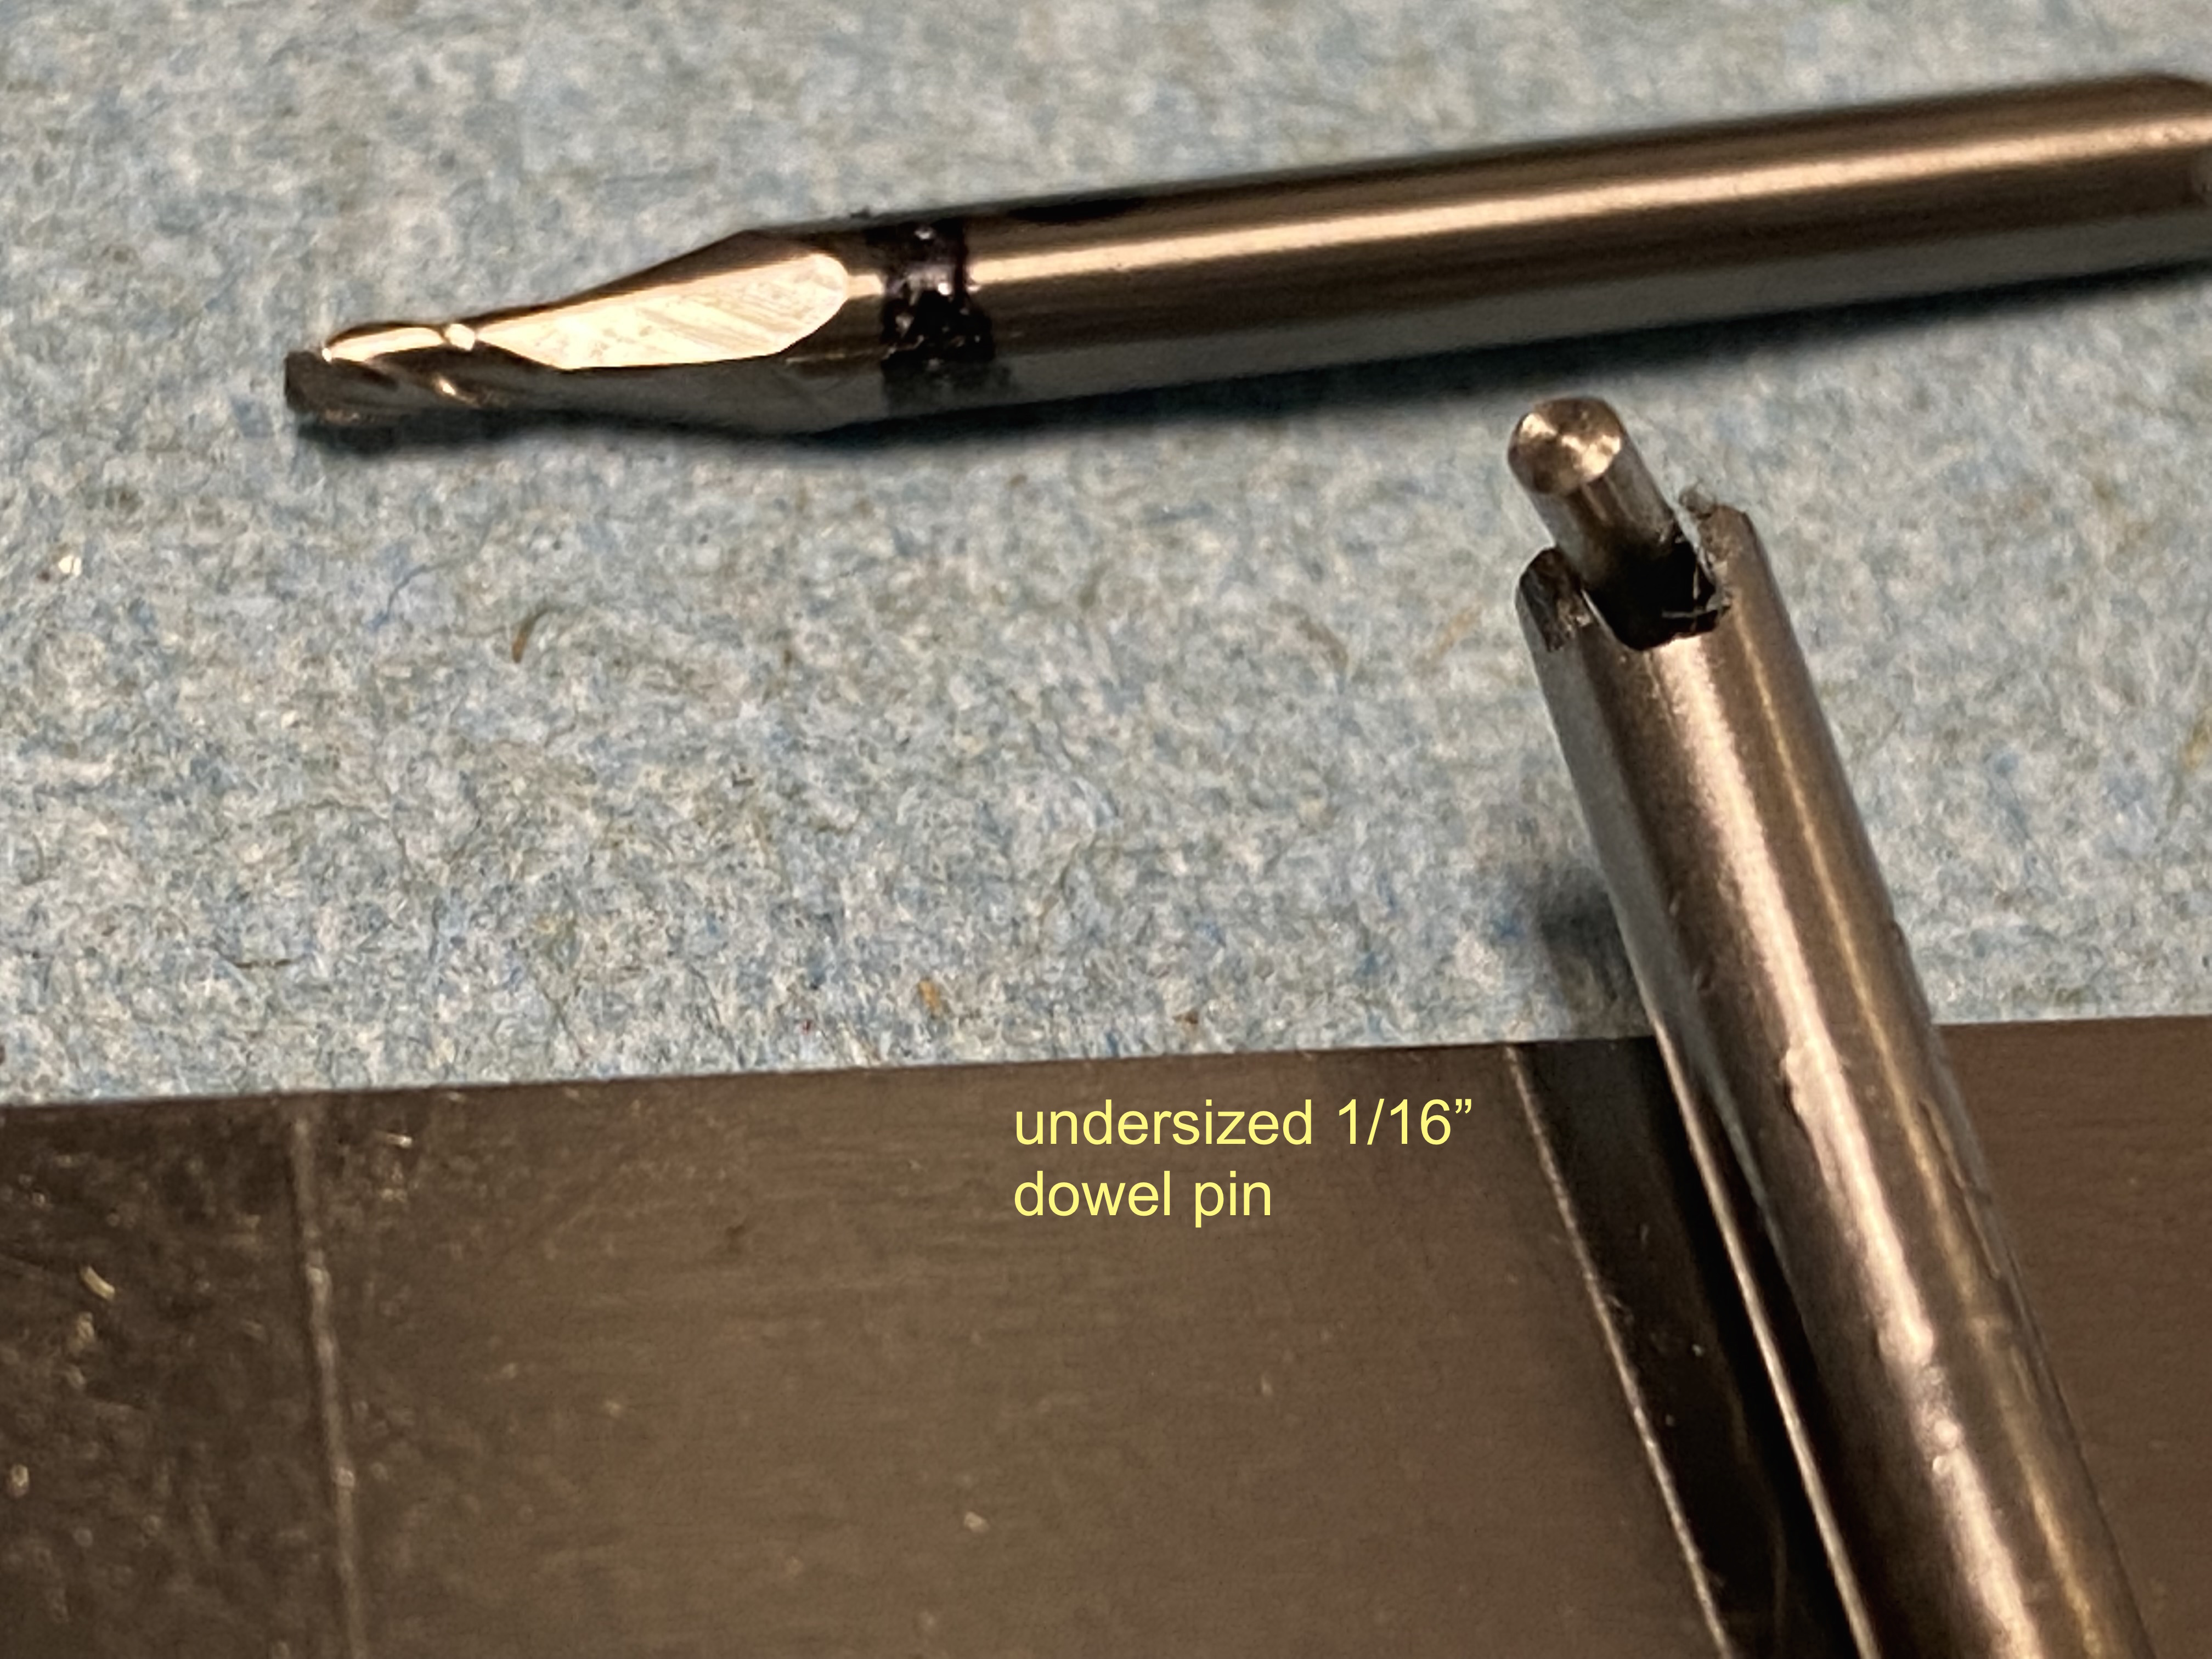
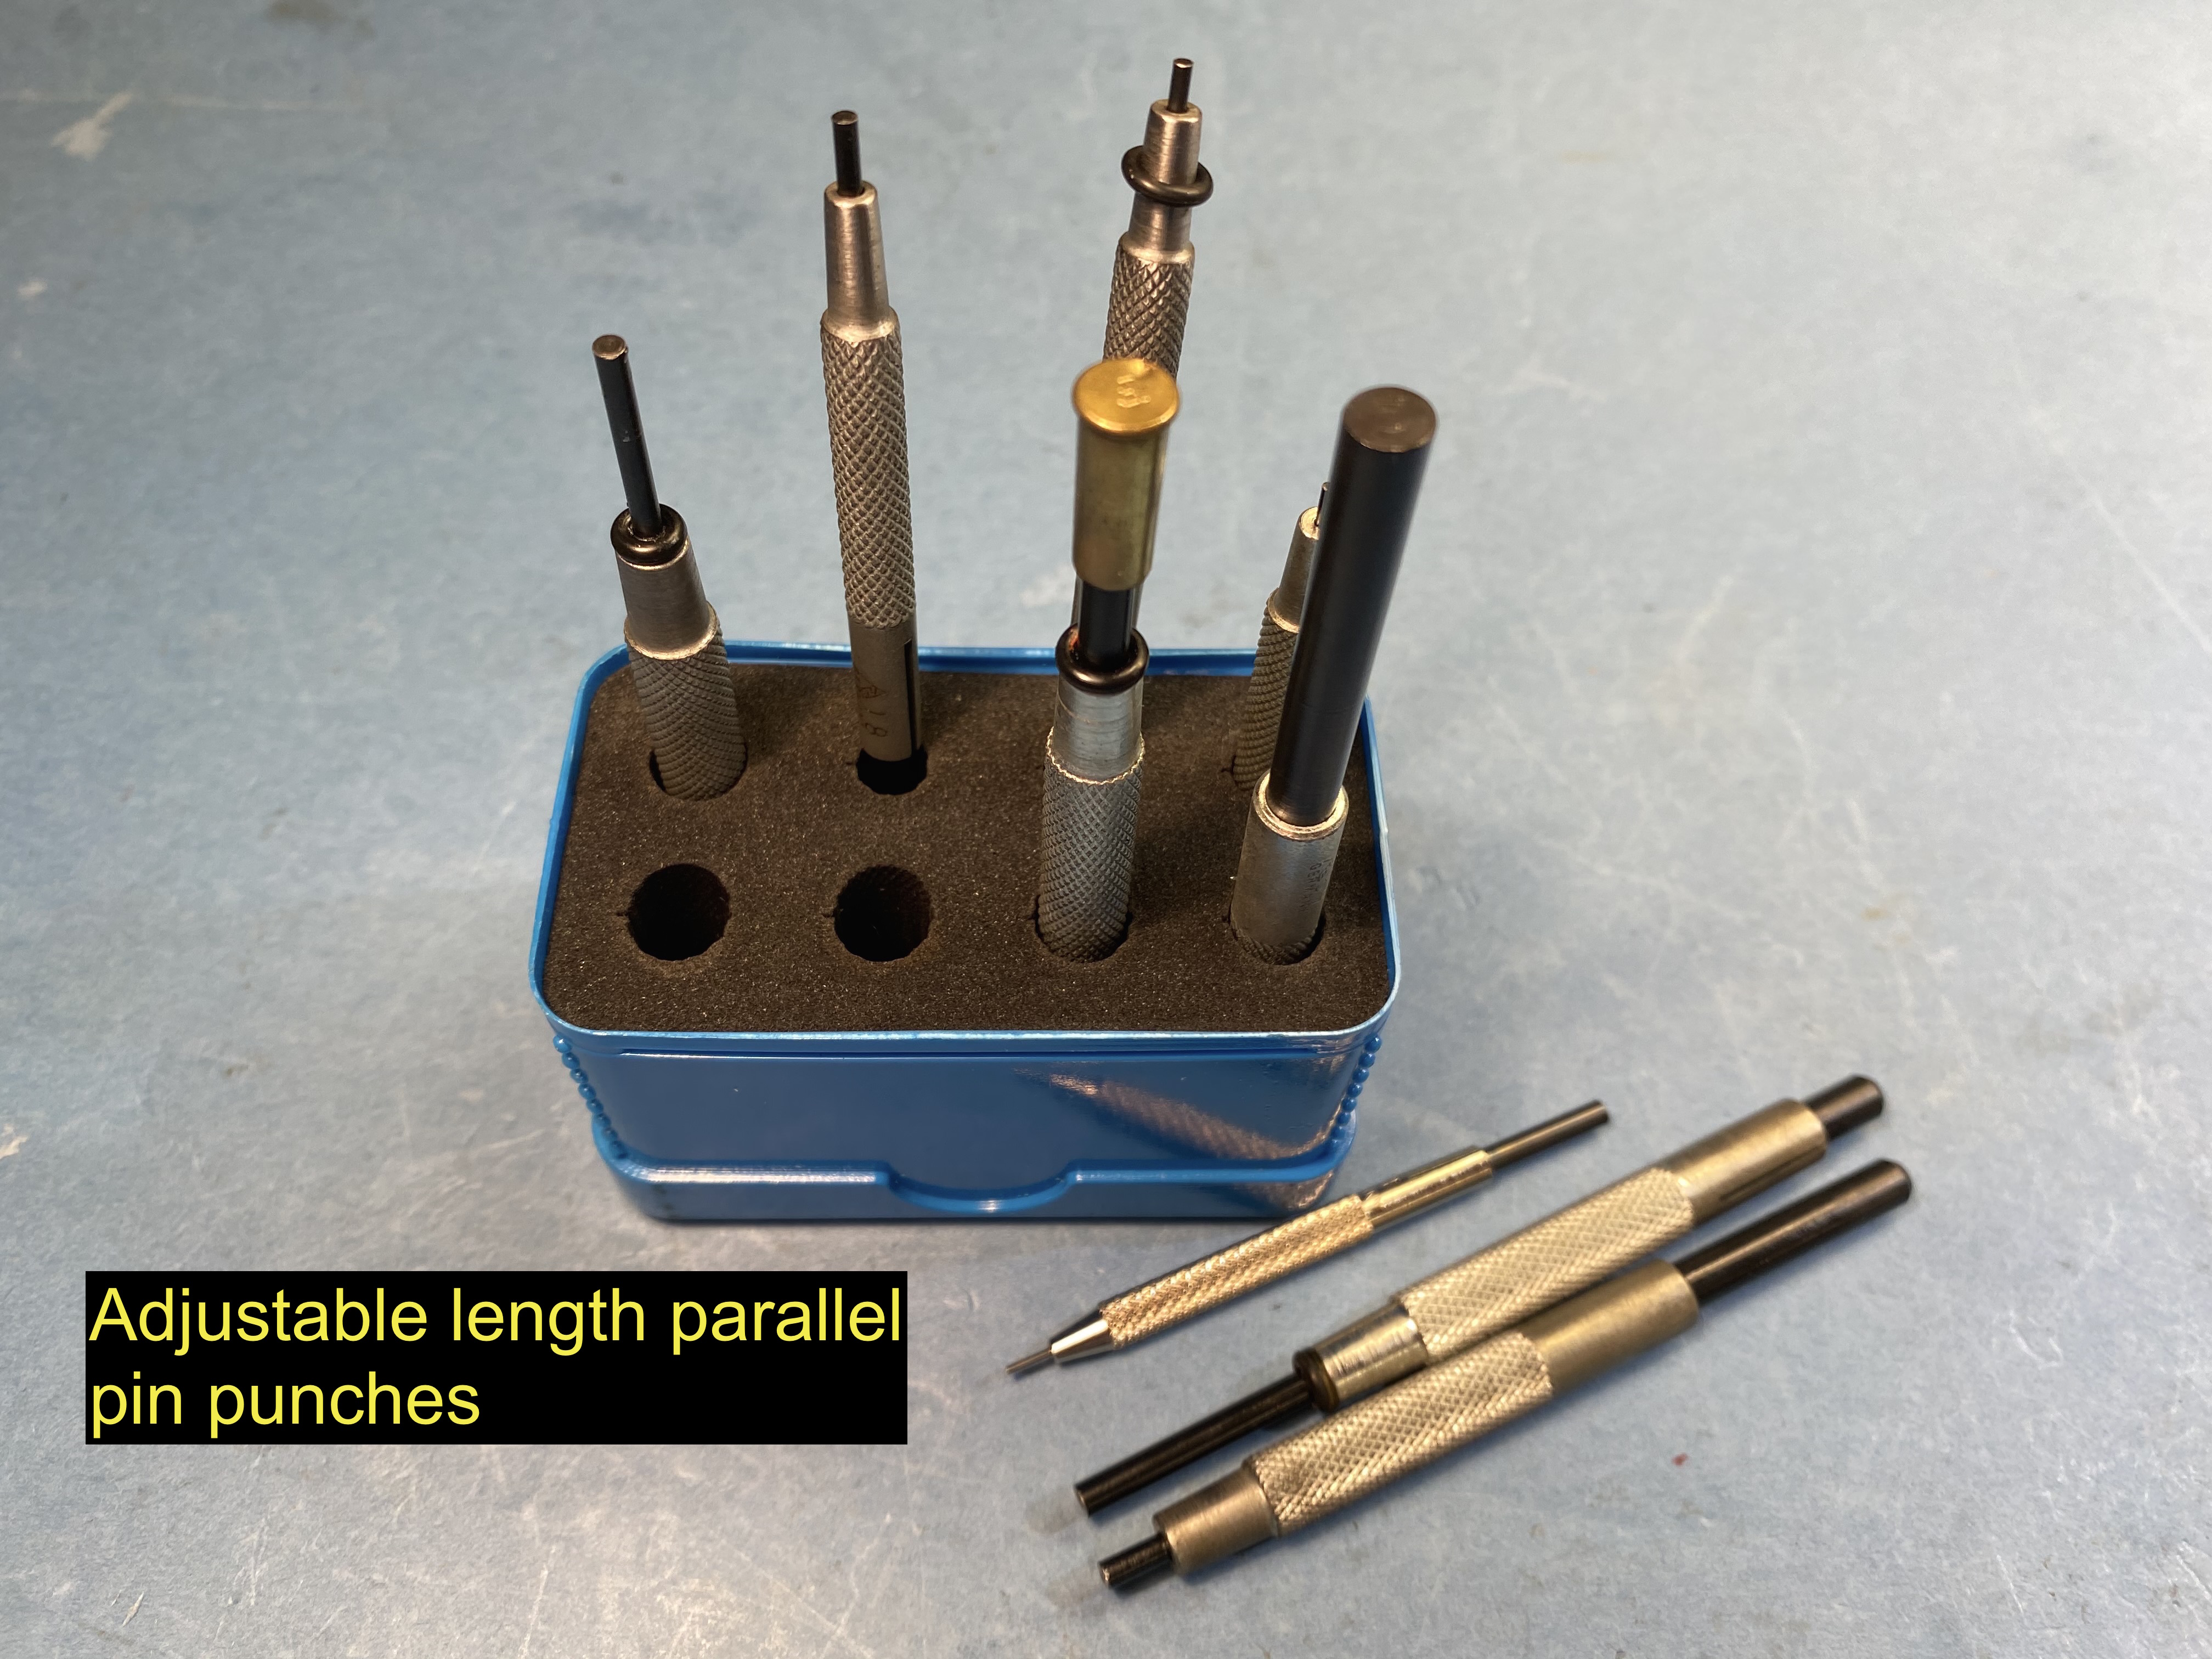
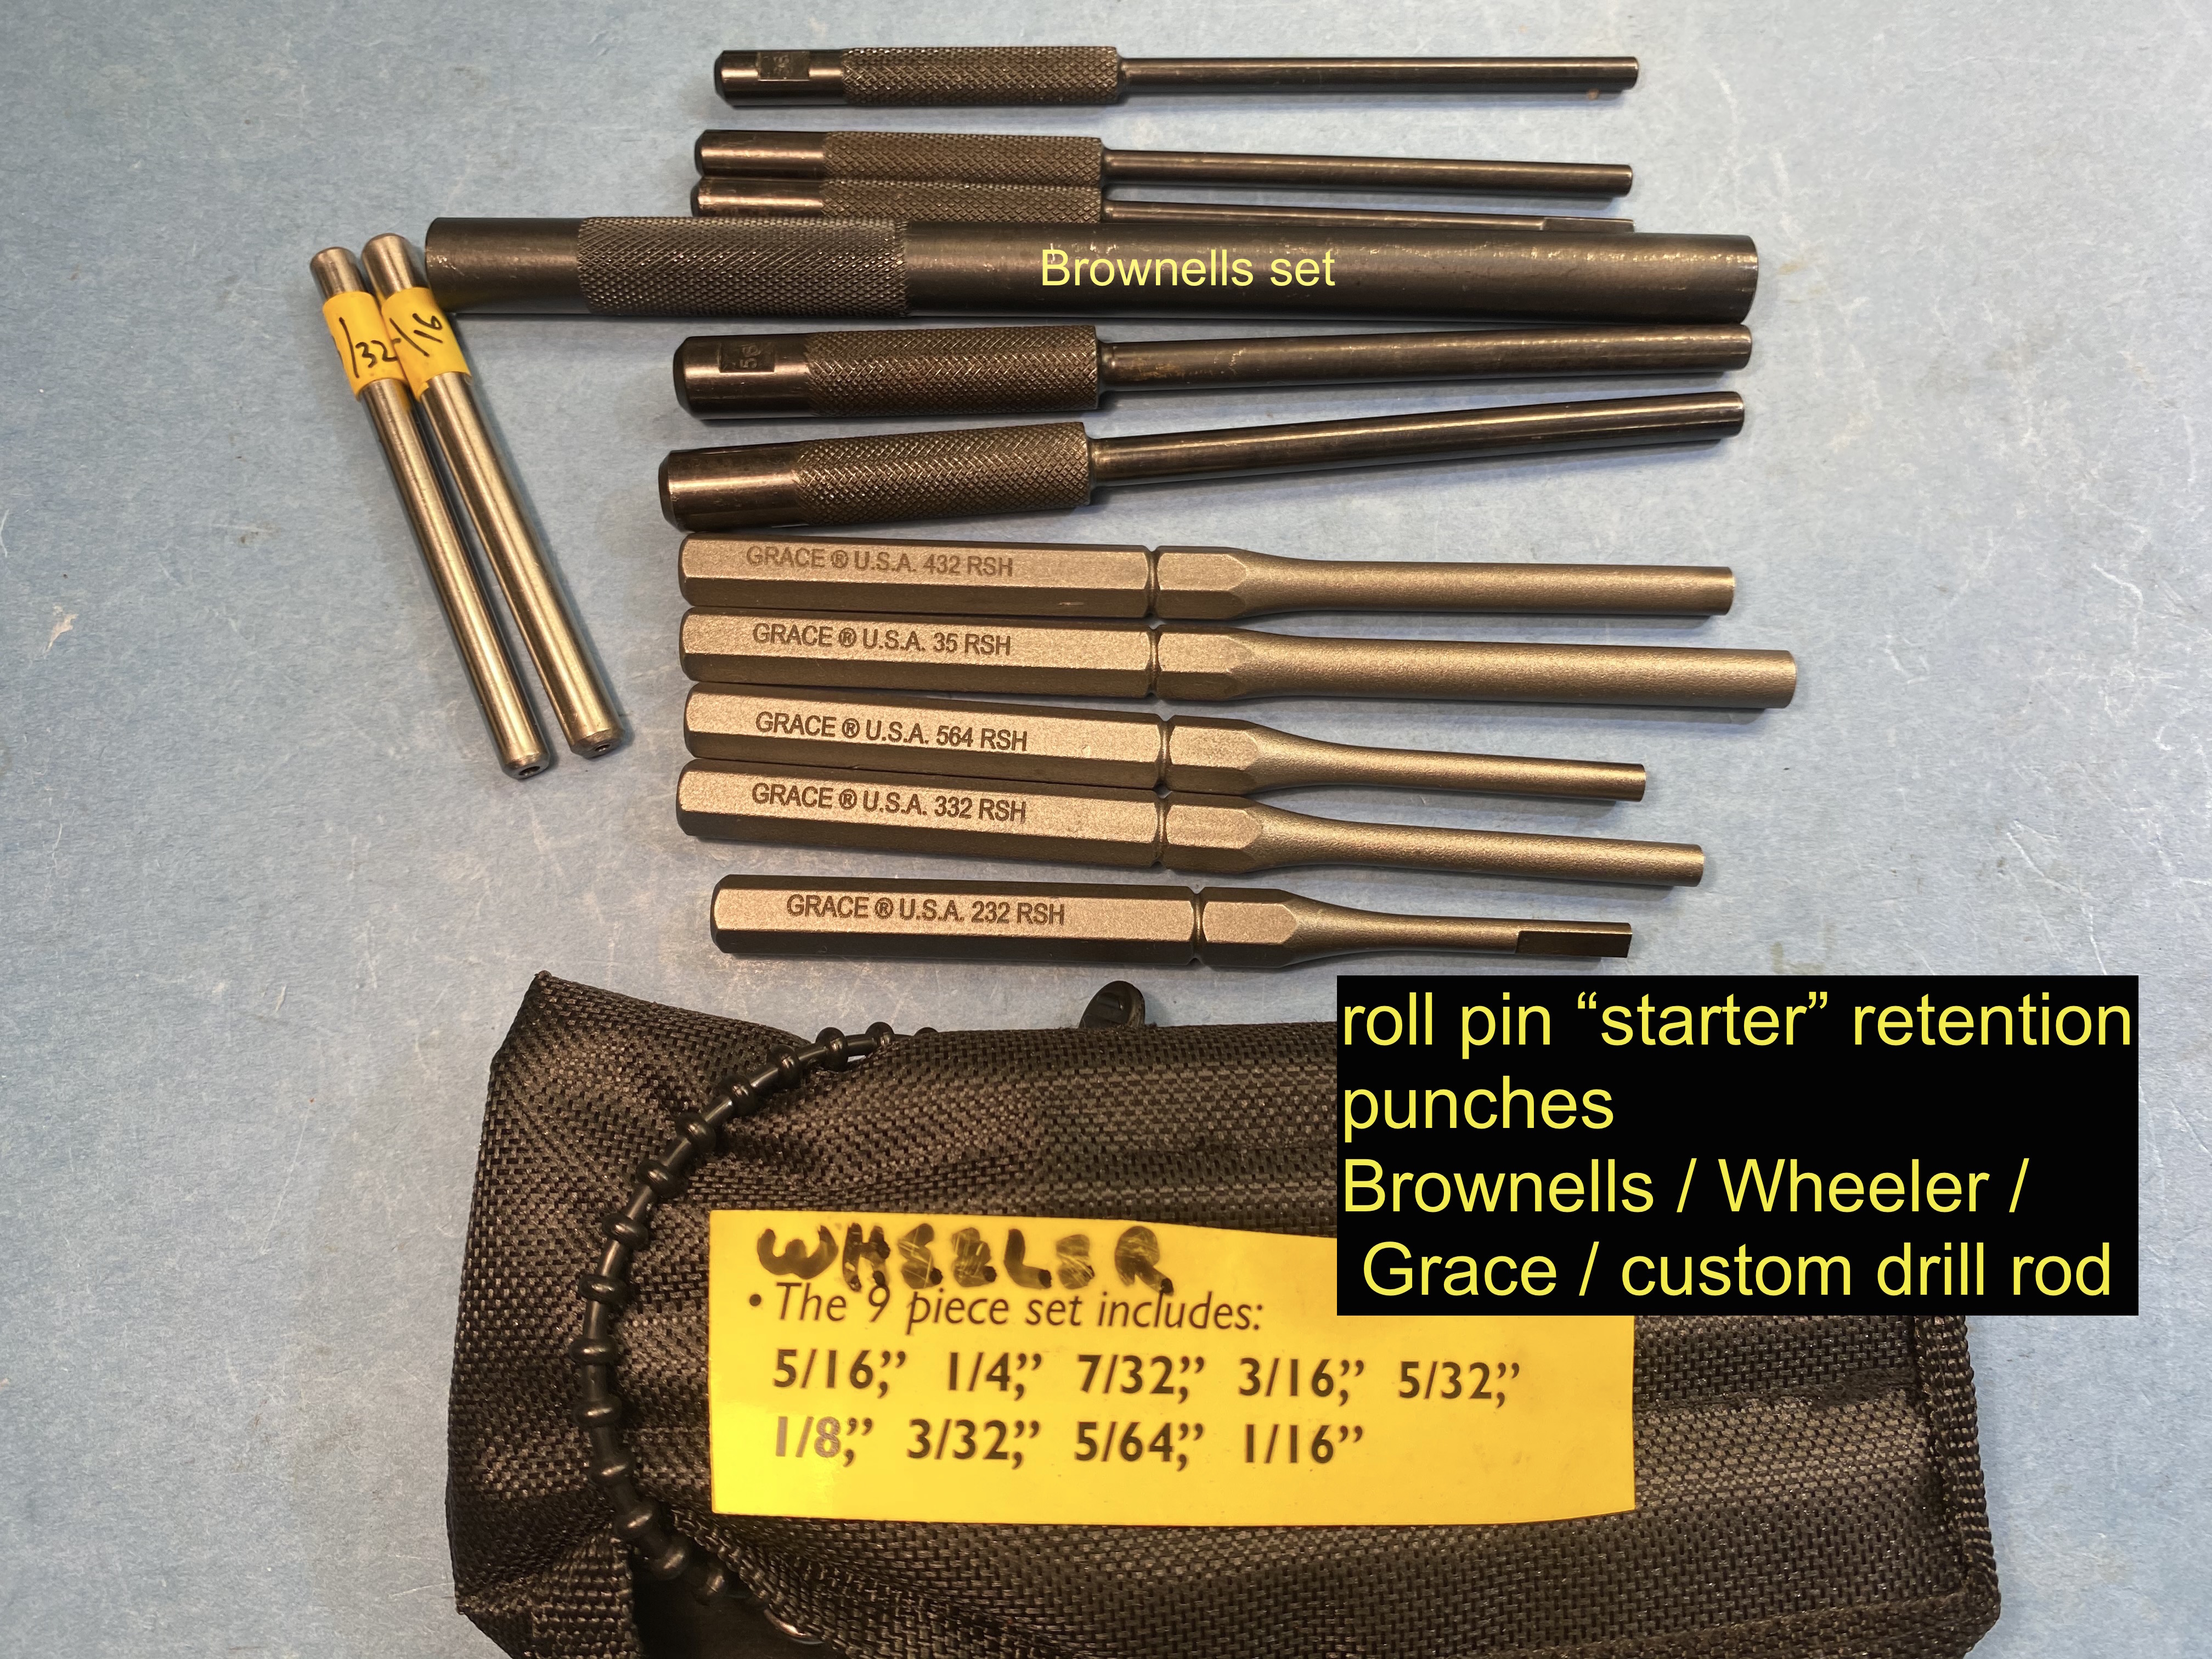
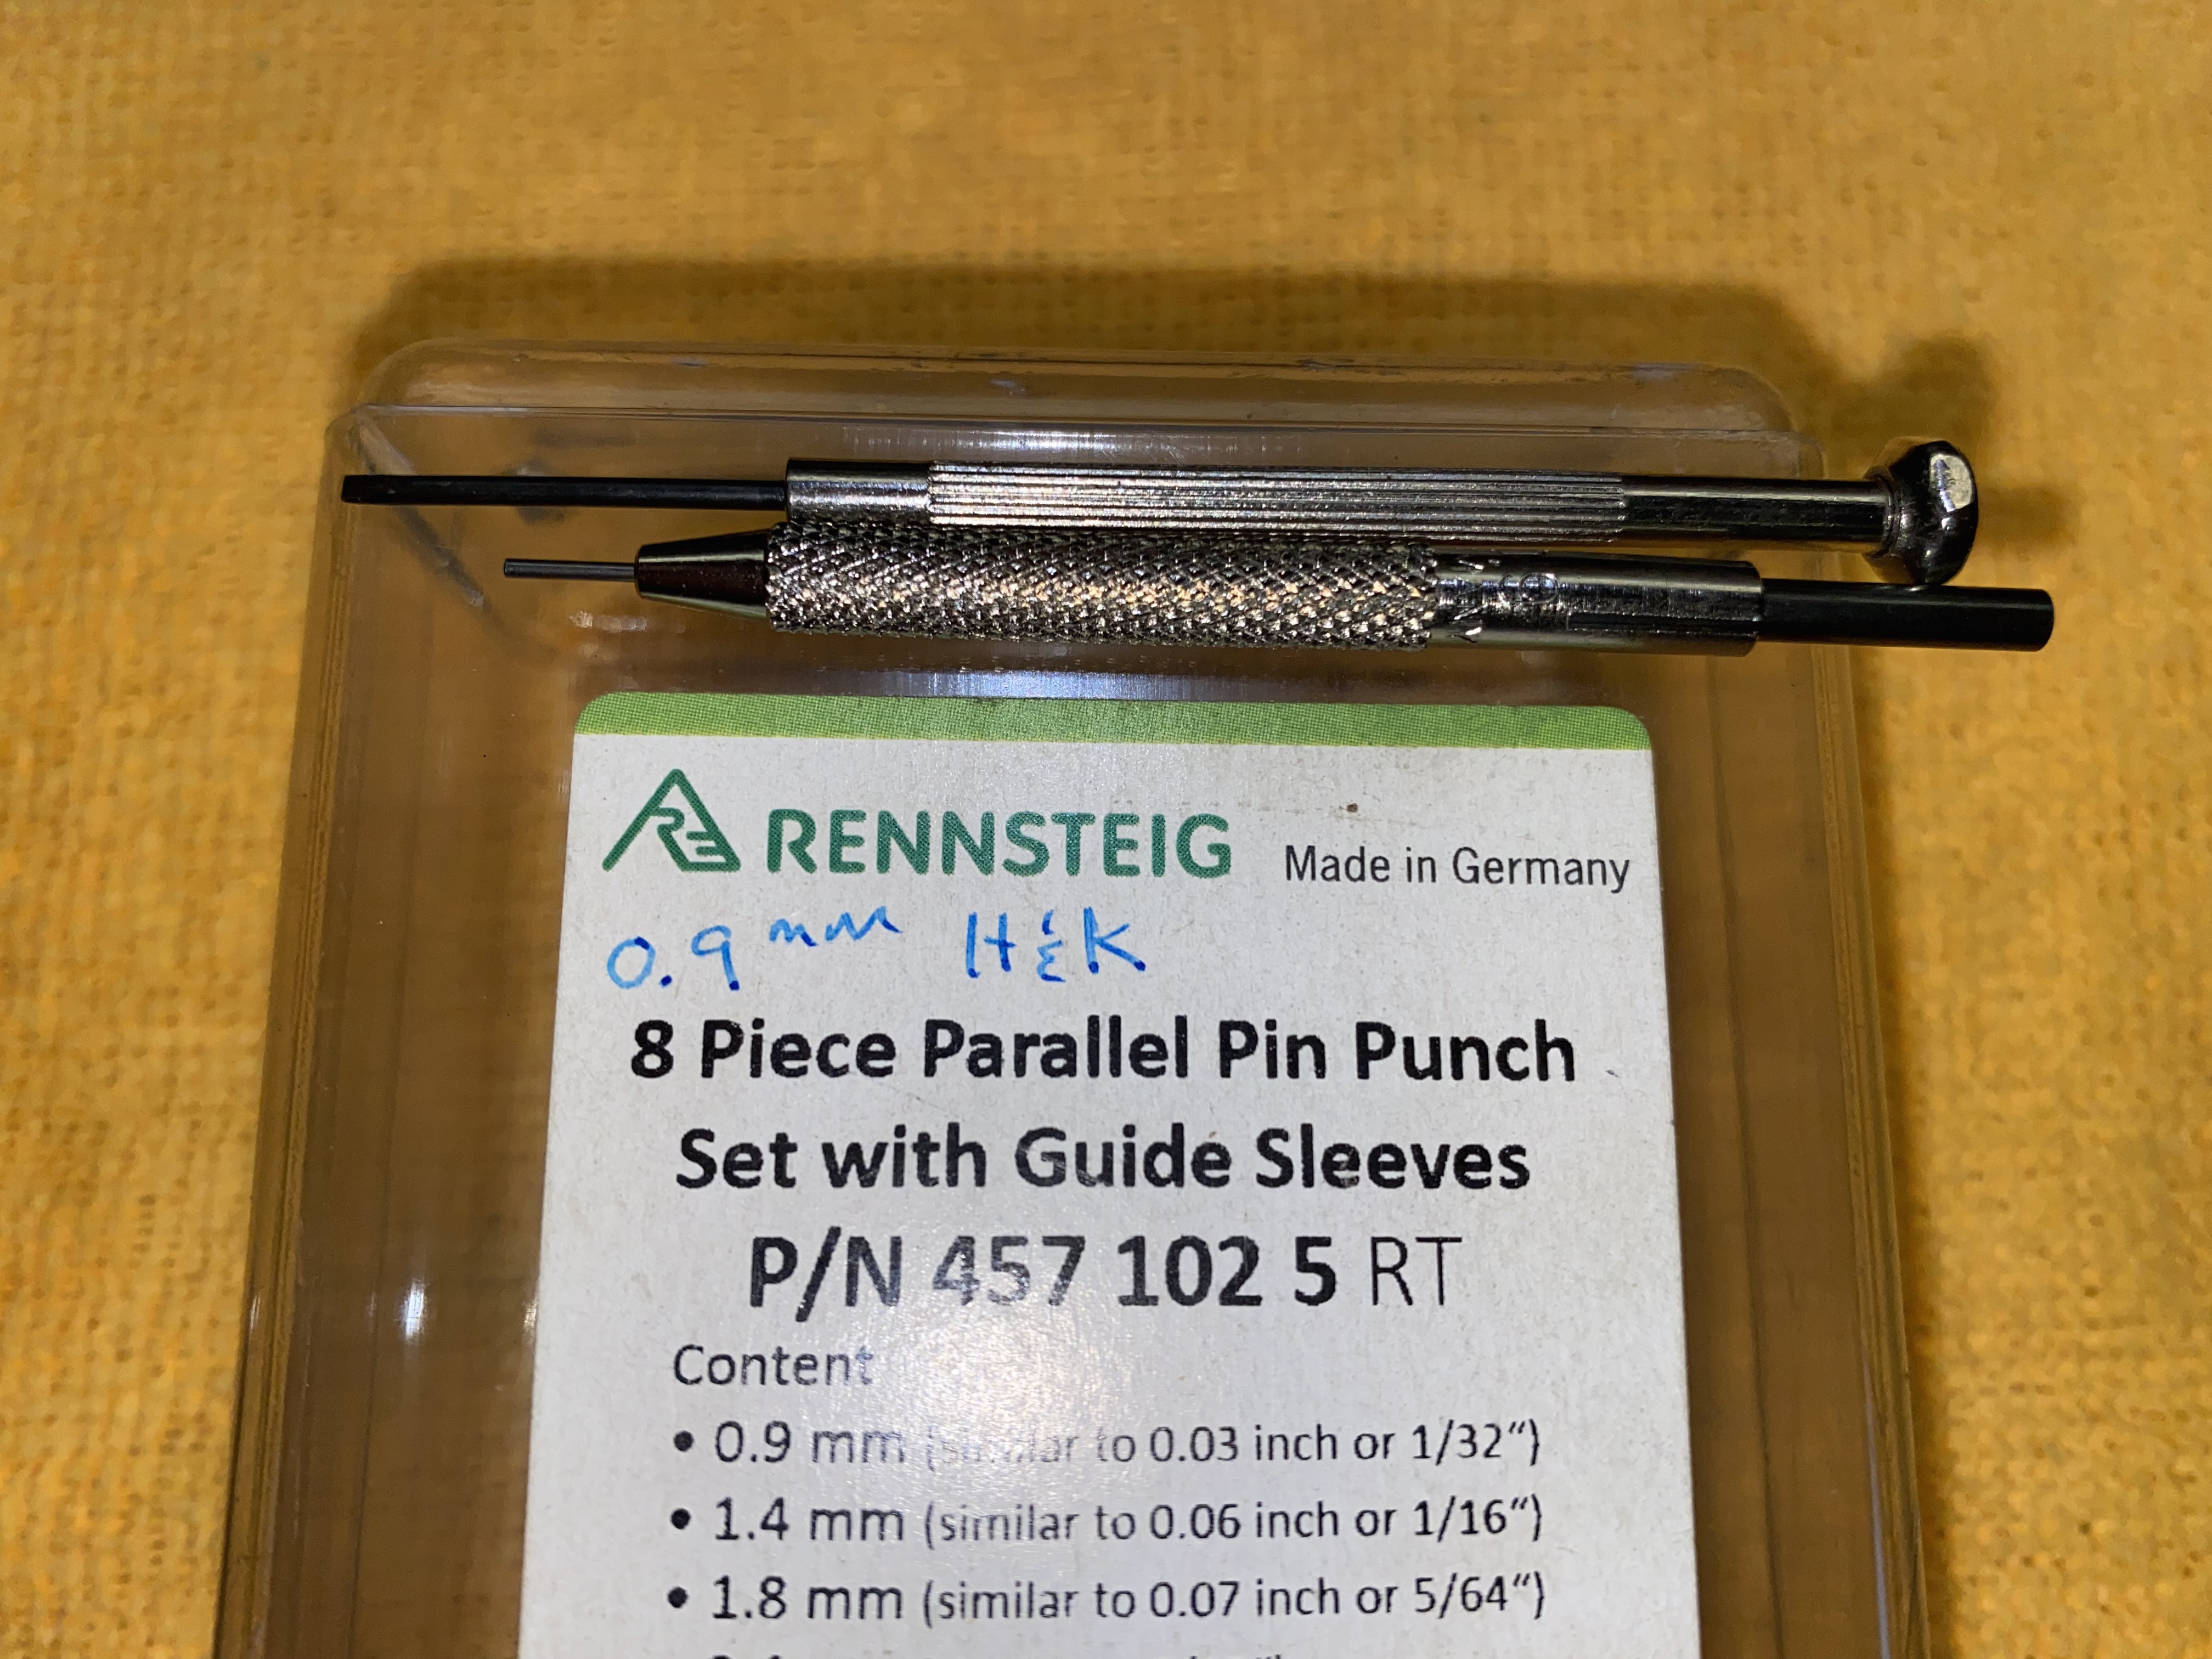
This set of parallel punches is unique in that the shaft slides along the length of the punch, so only a minimal amount of small diameter punch is unsupported that limits the likelihood of bending or breaking punches like SD mentioned. The Brownells set is useful sometimes, but as in this retaining pin situation, the shaft diameter was too large to fit in the narrow confines of the bolt access.
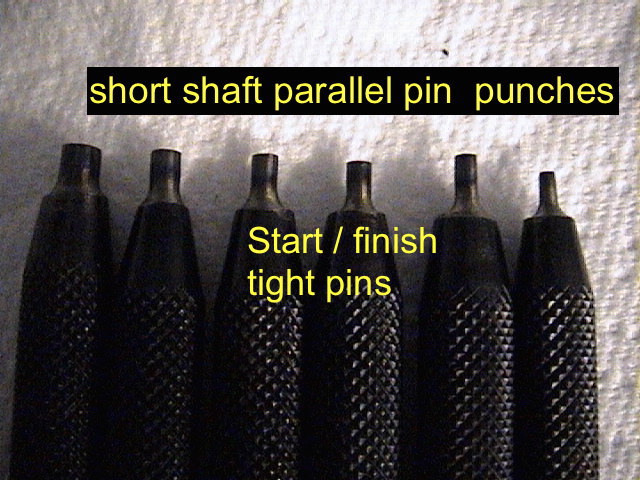
For starting and finishing some pins where a tapered "starter" punch can not be used for whatever reason, I made a set of short shaft punches and hardened the tips which avoids bending and breakage.


-
1
-
3
-
-
............make the punches from drill rod stock. The common roll pin holders are tool long for a lot of situations.
Nothing worse than working with a crummy tool in the hand.


-
1
-
-
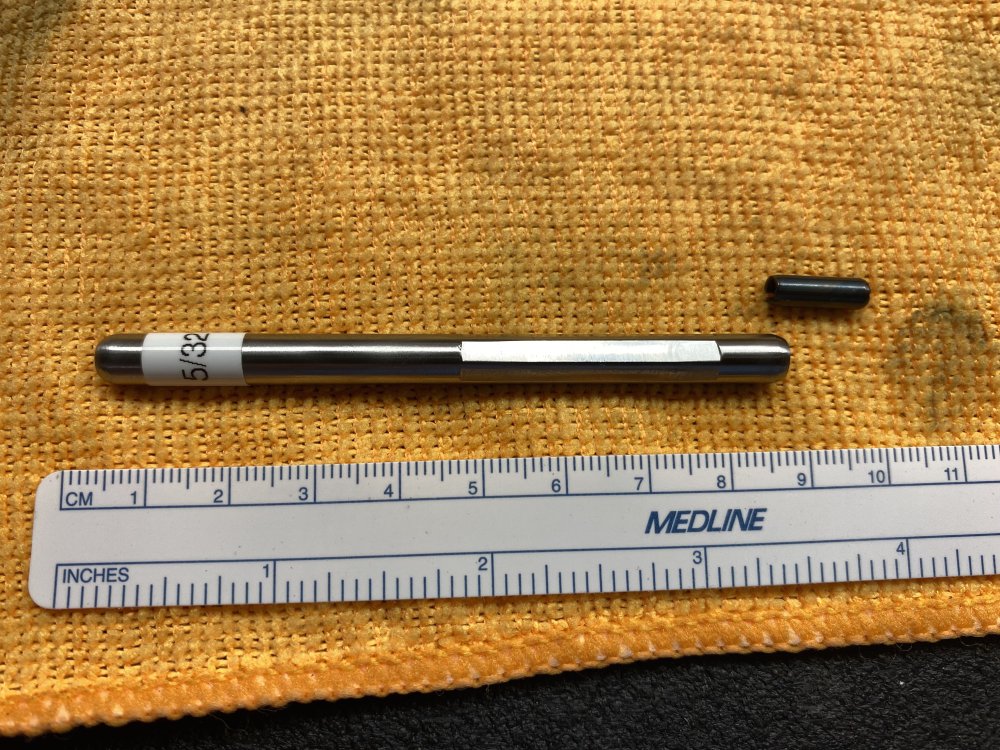
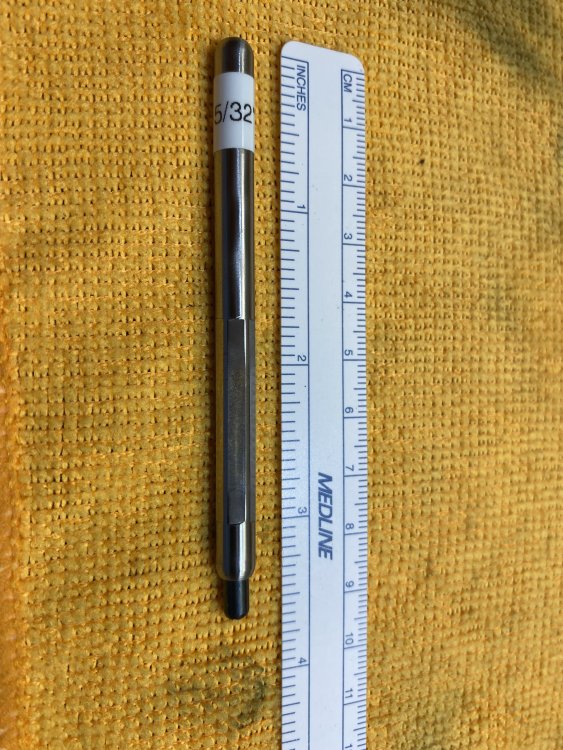
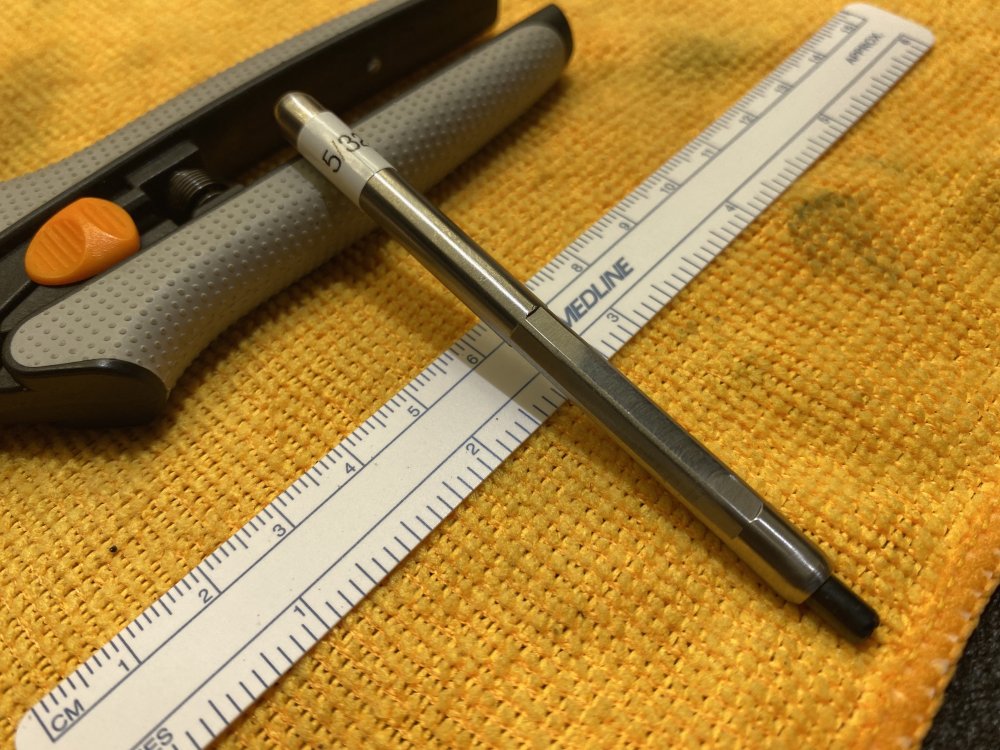
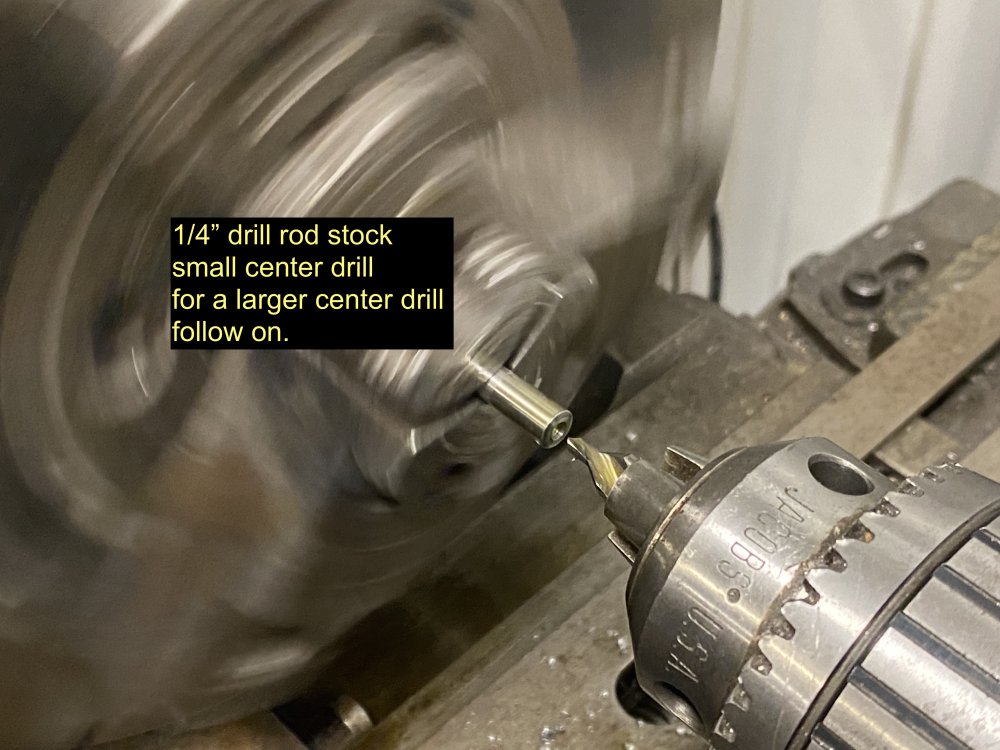
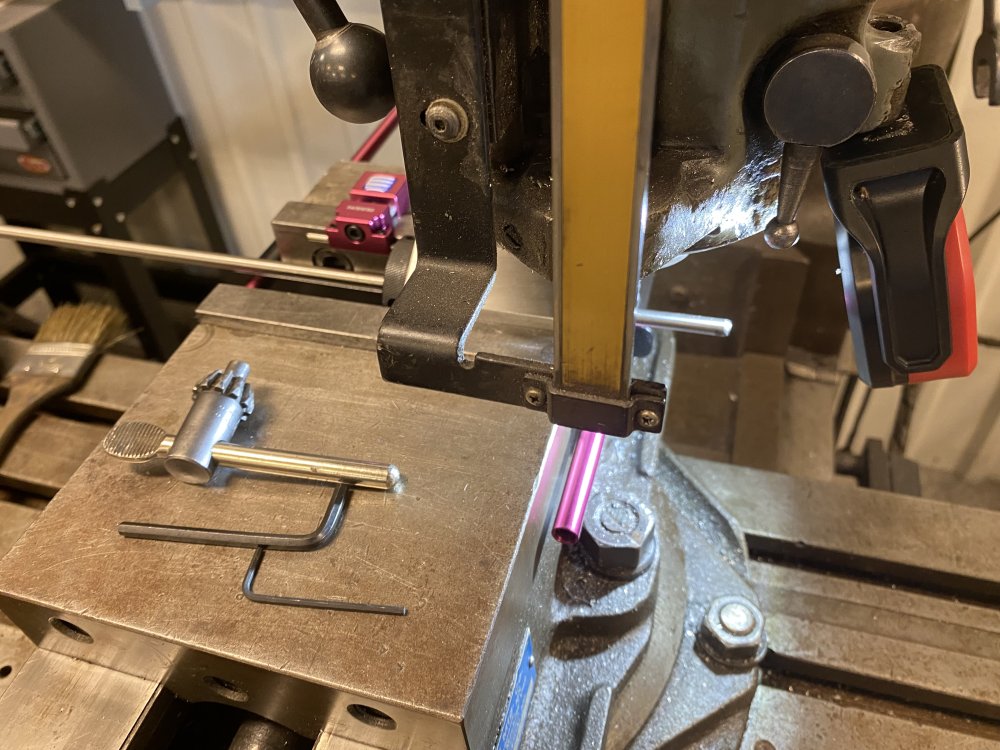
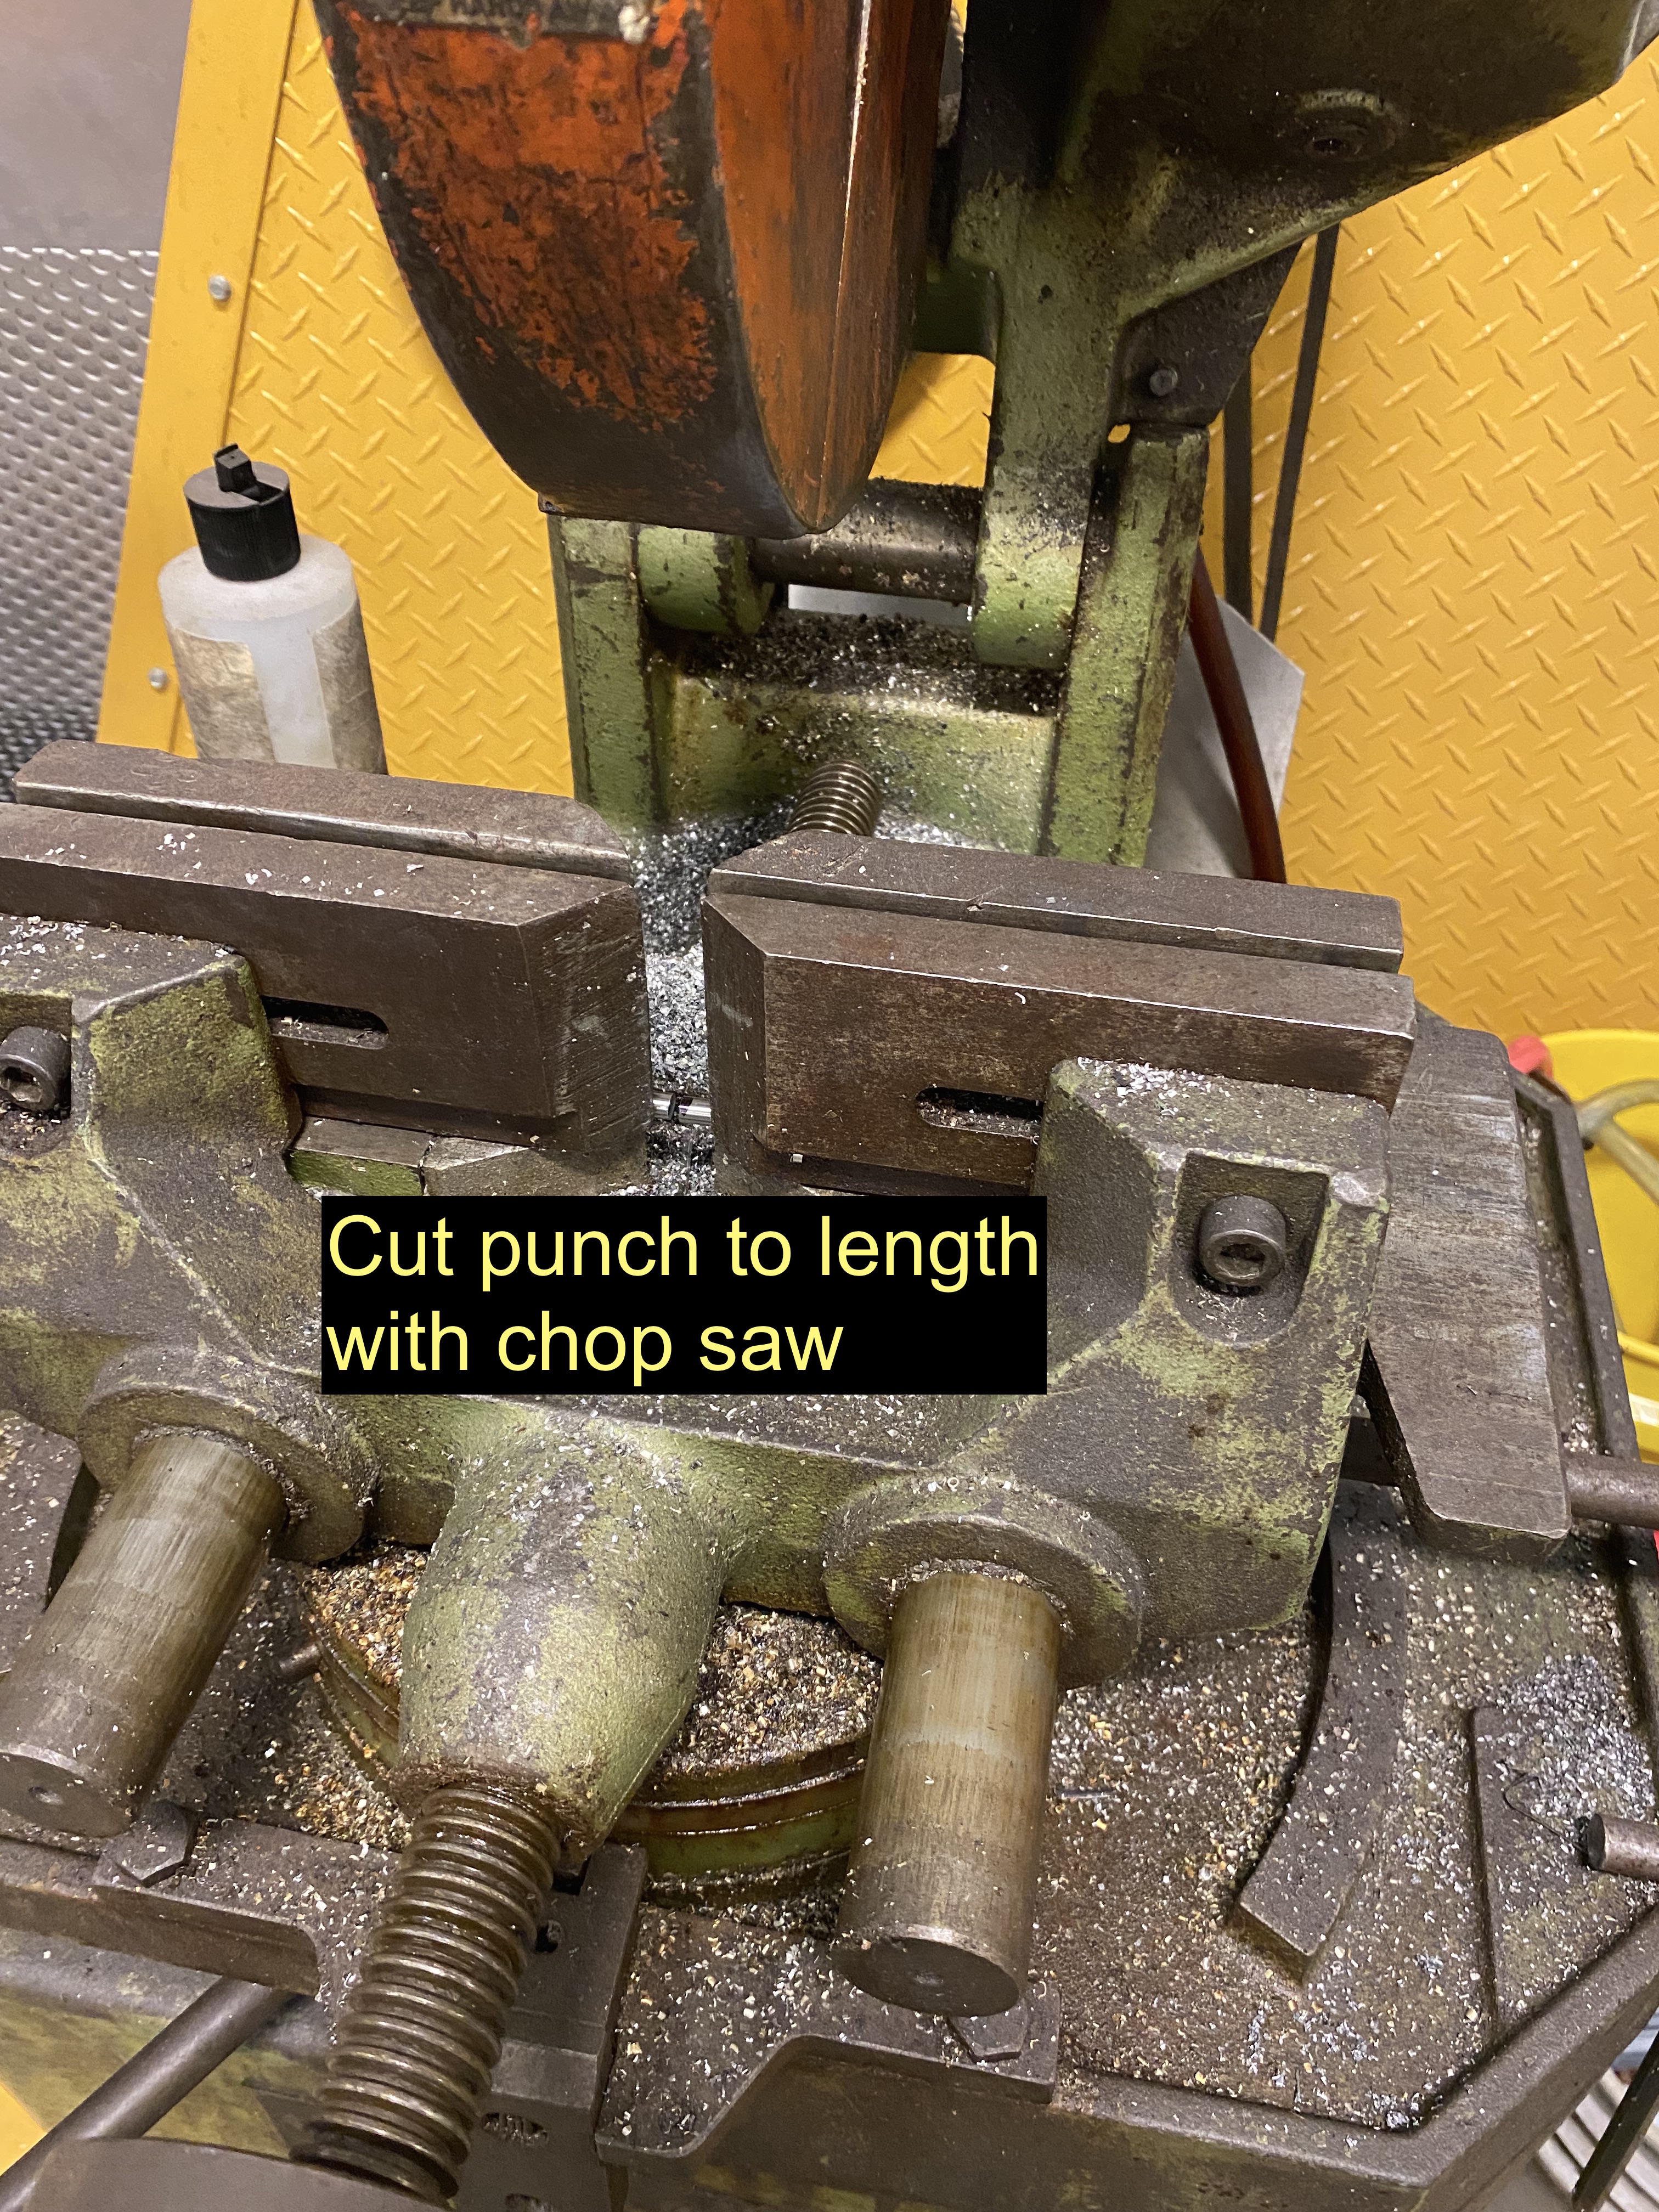
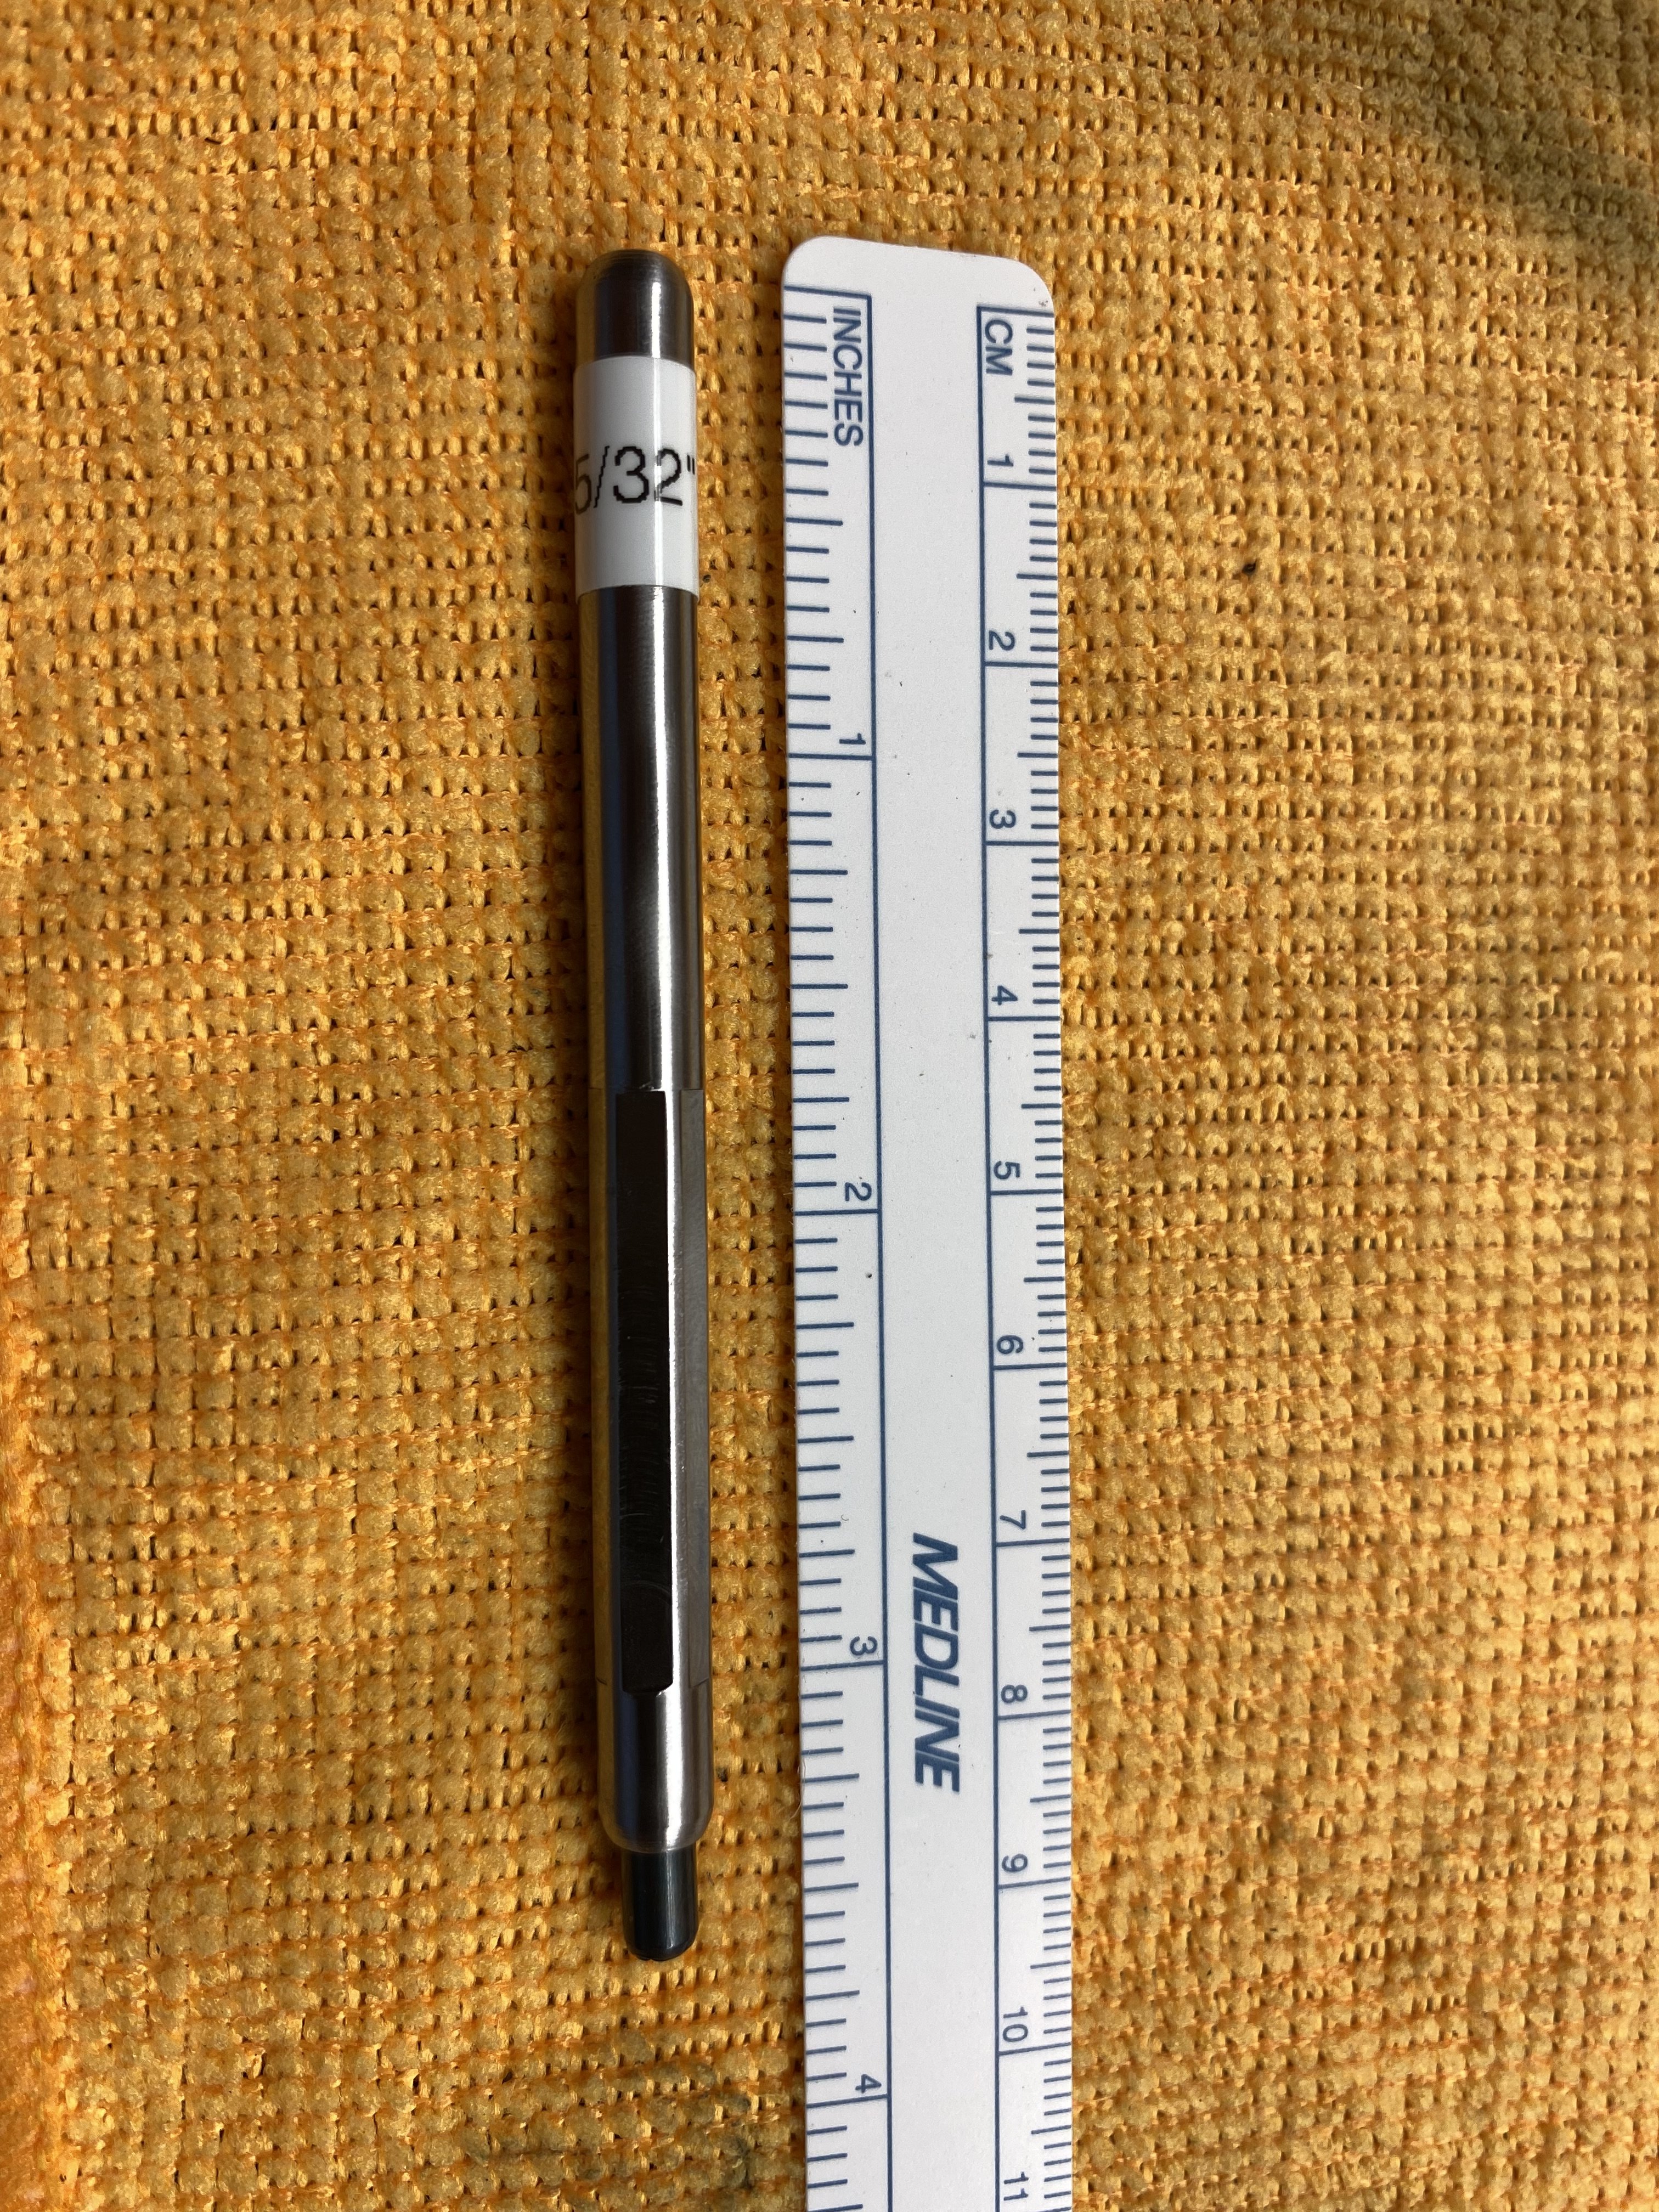
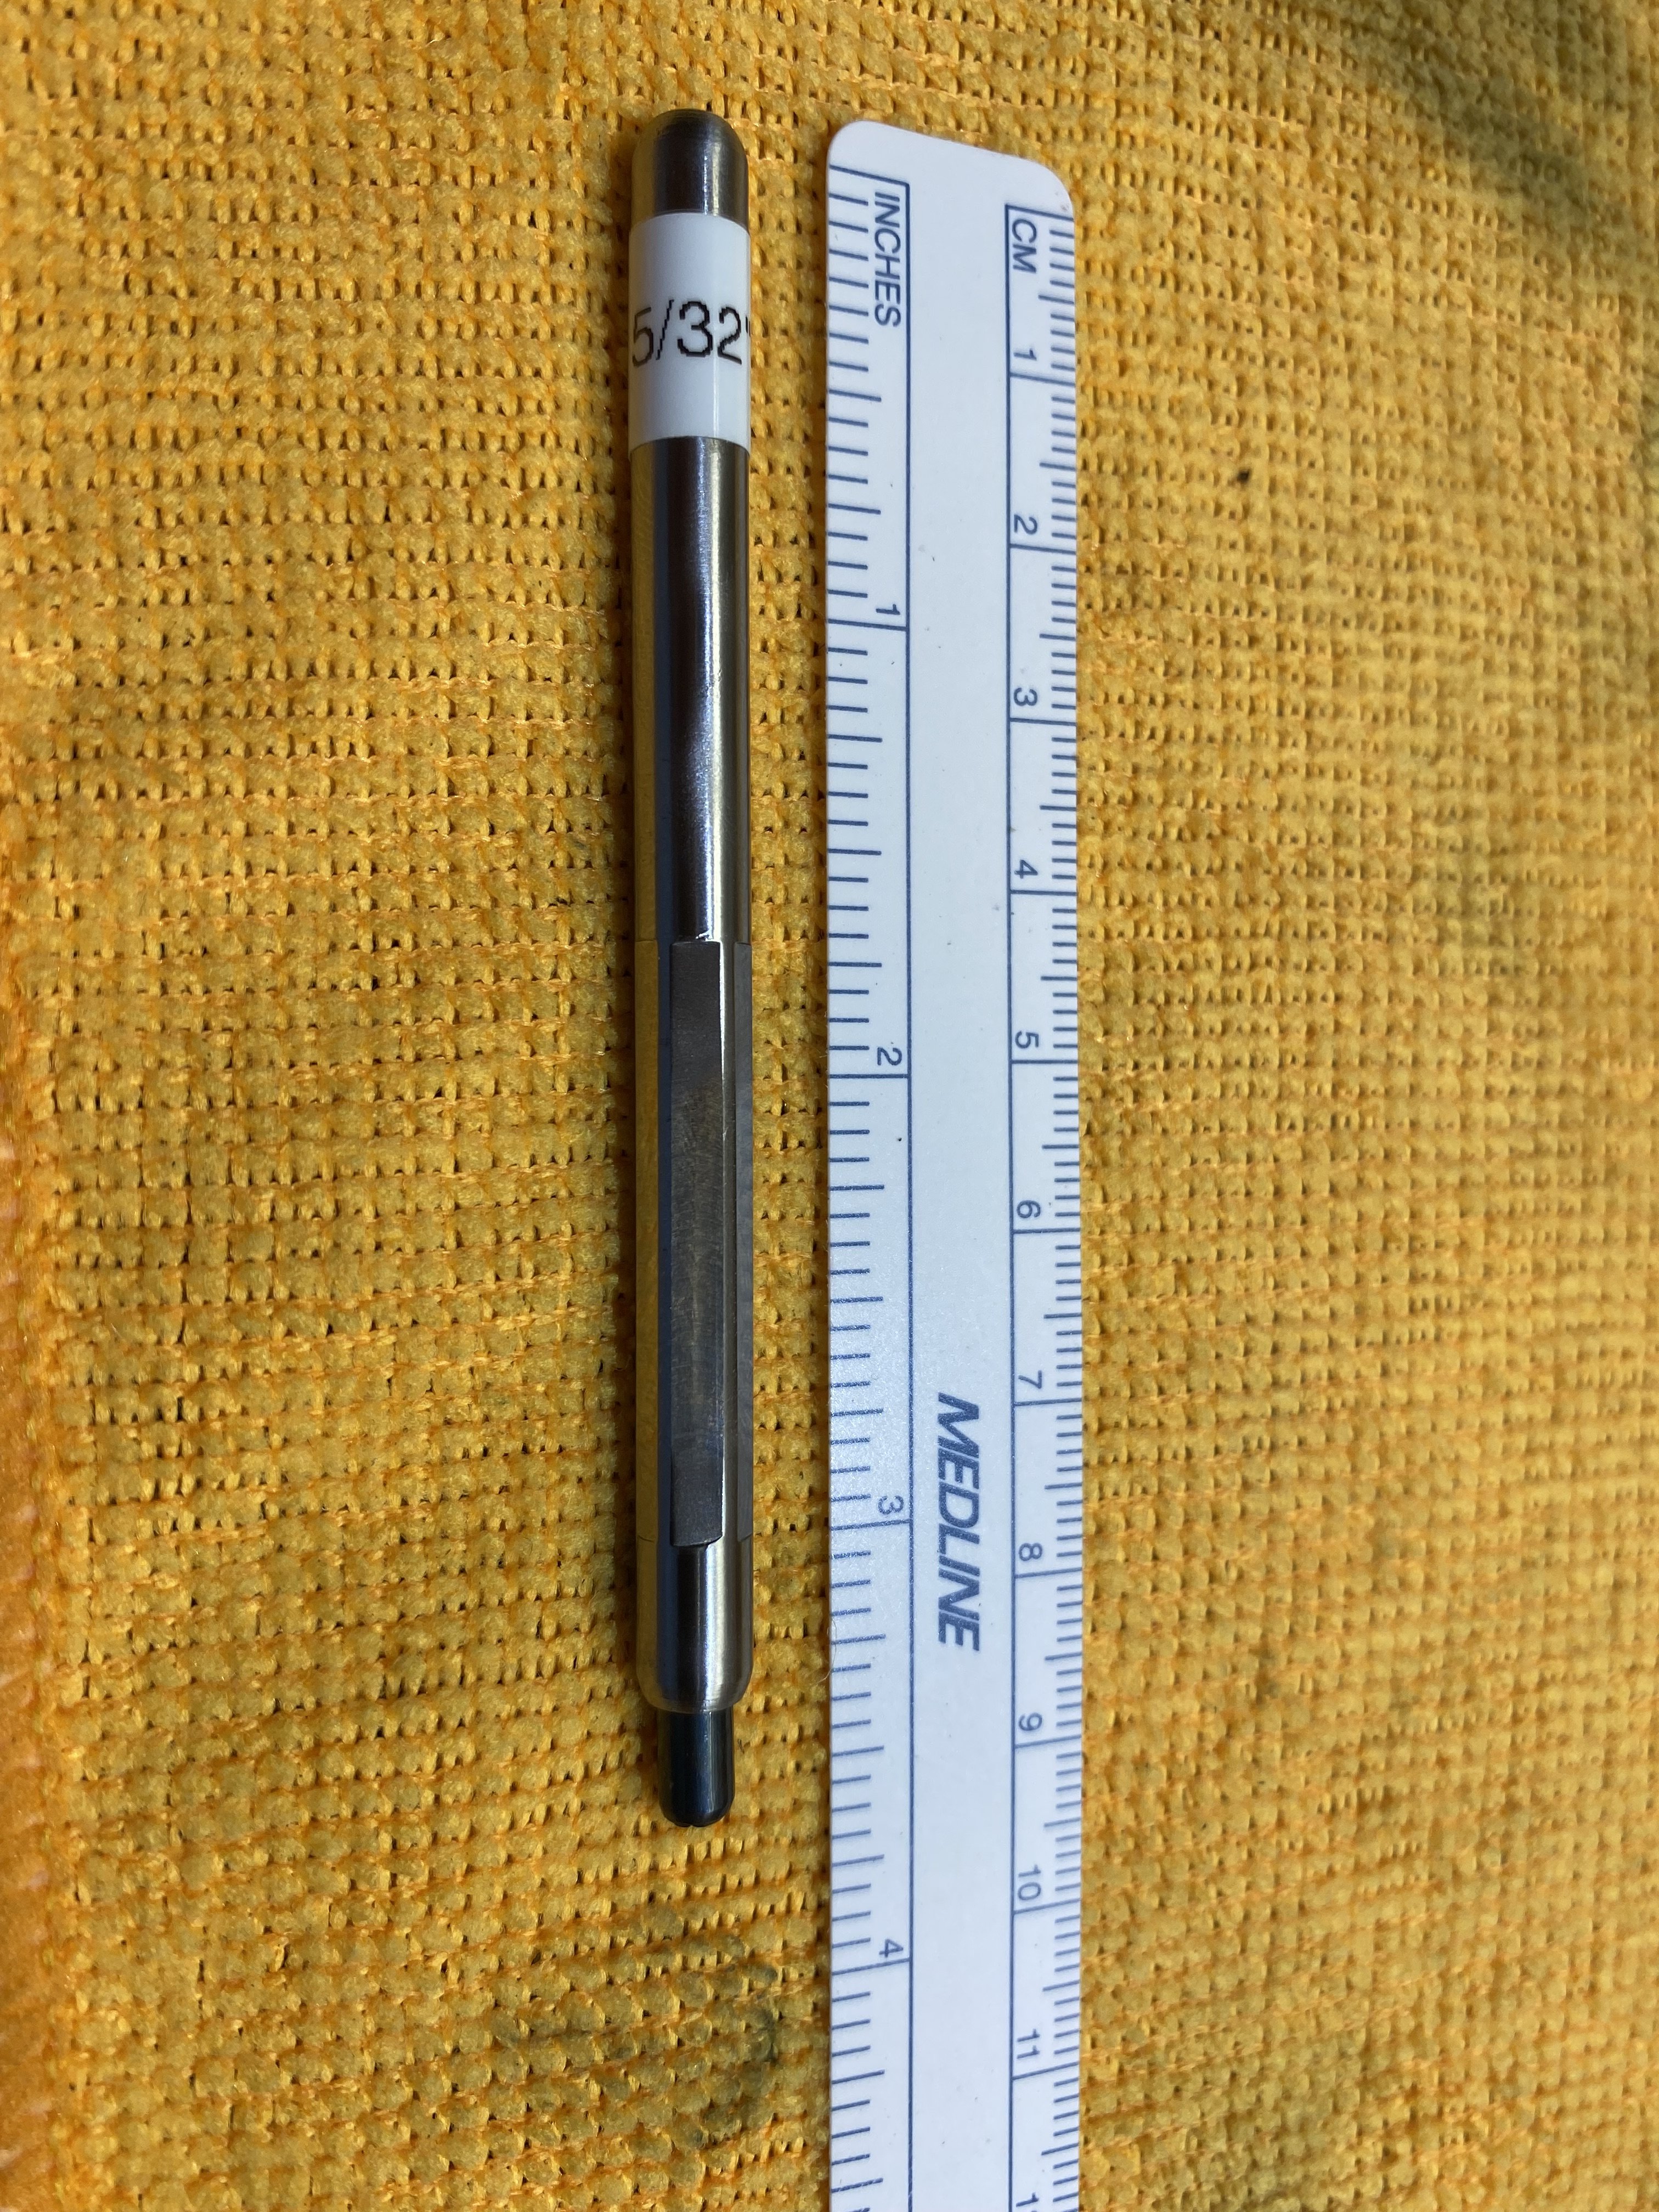
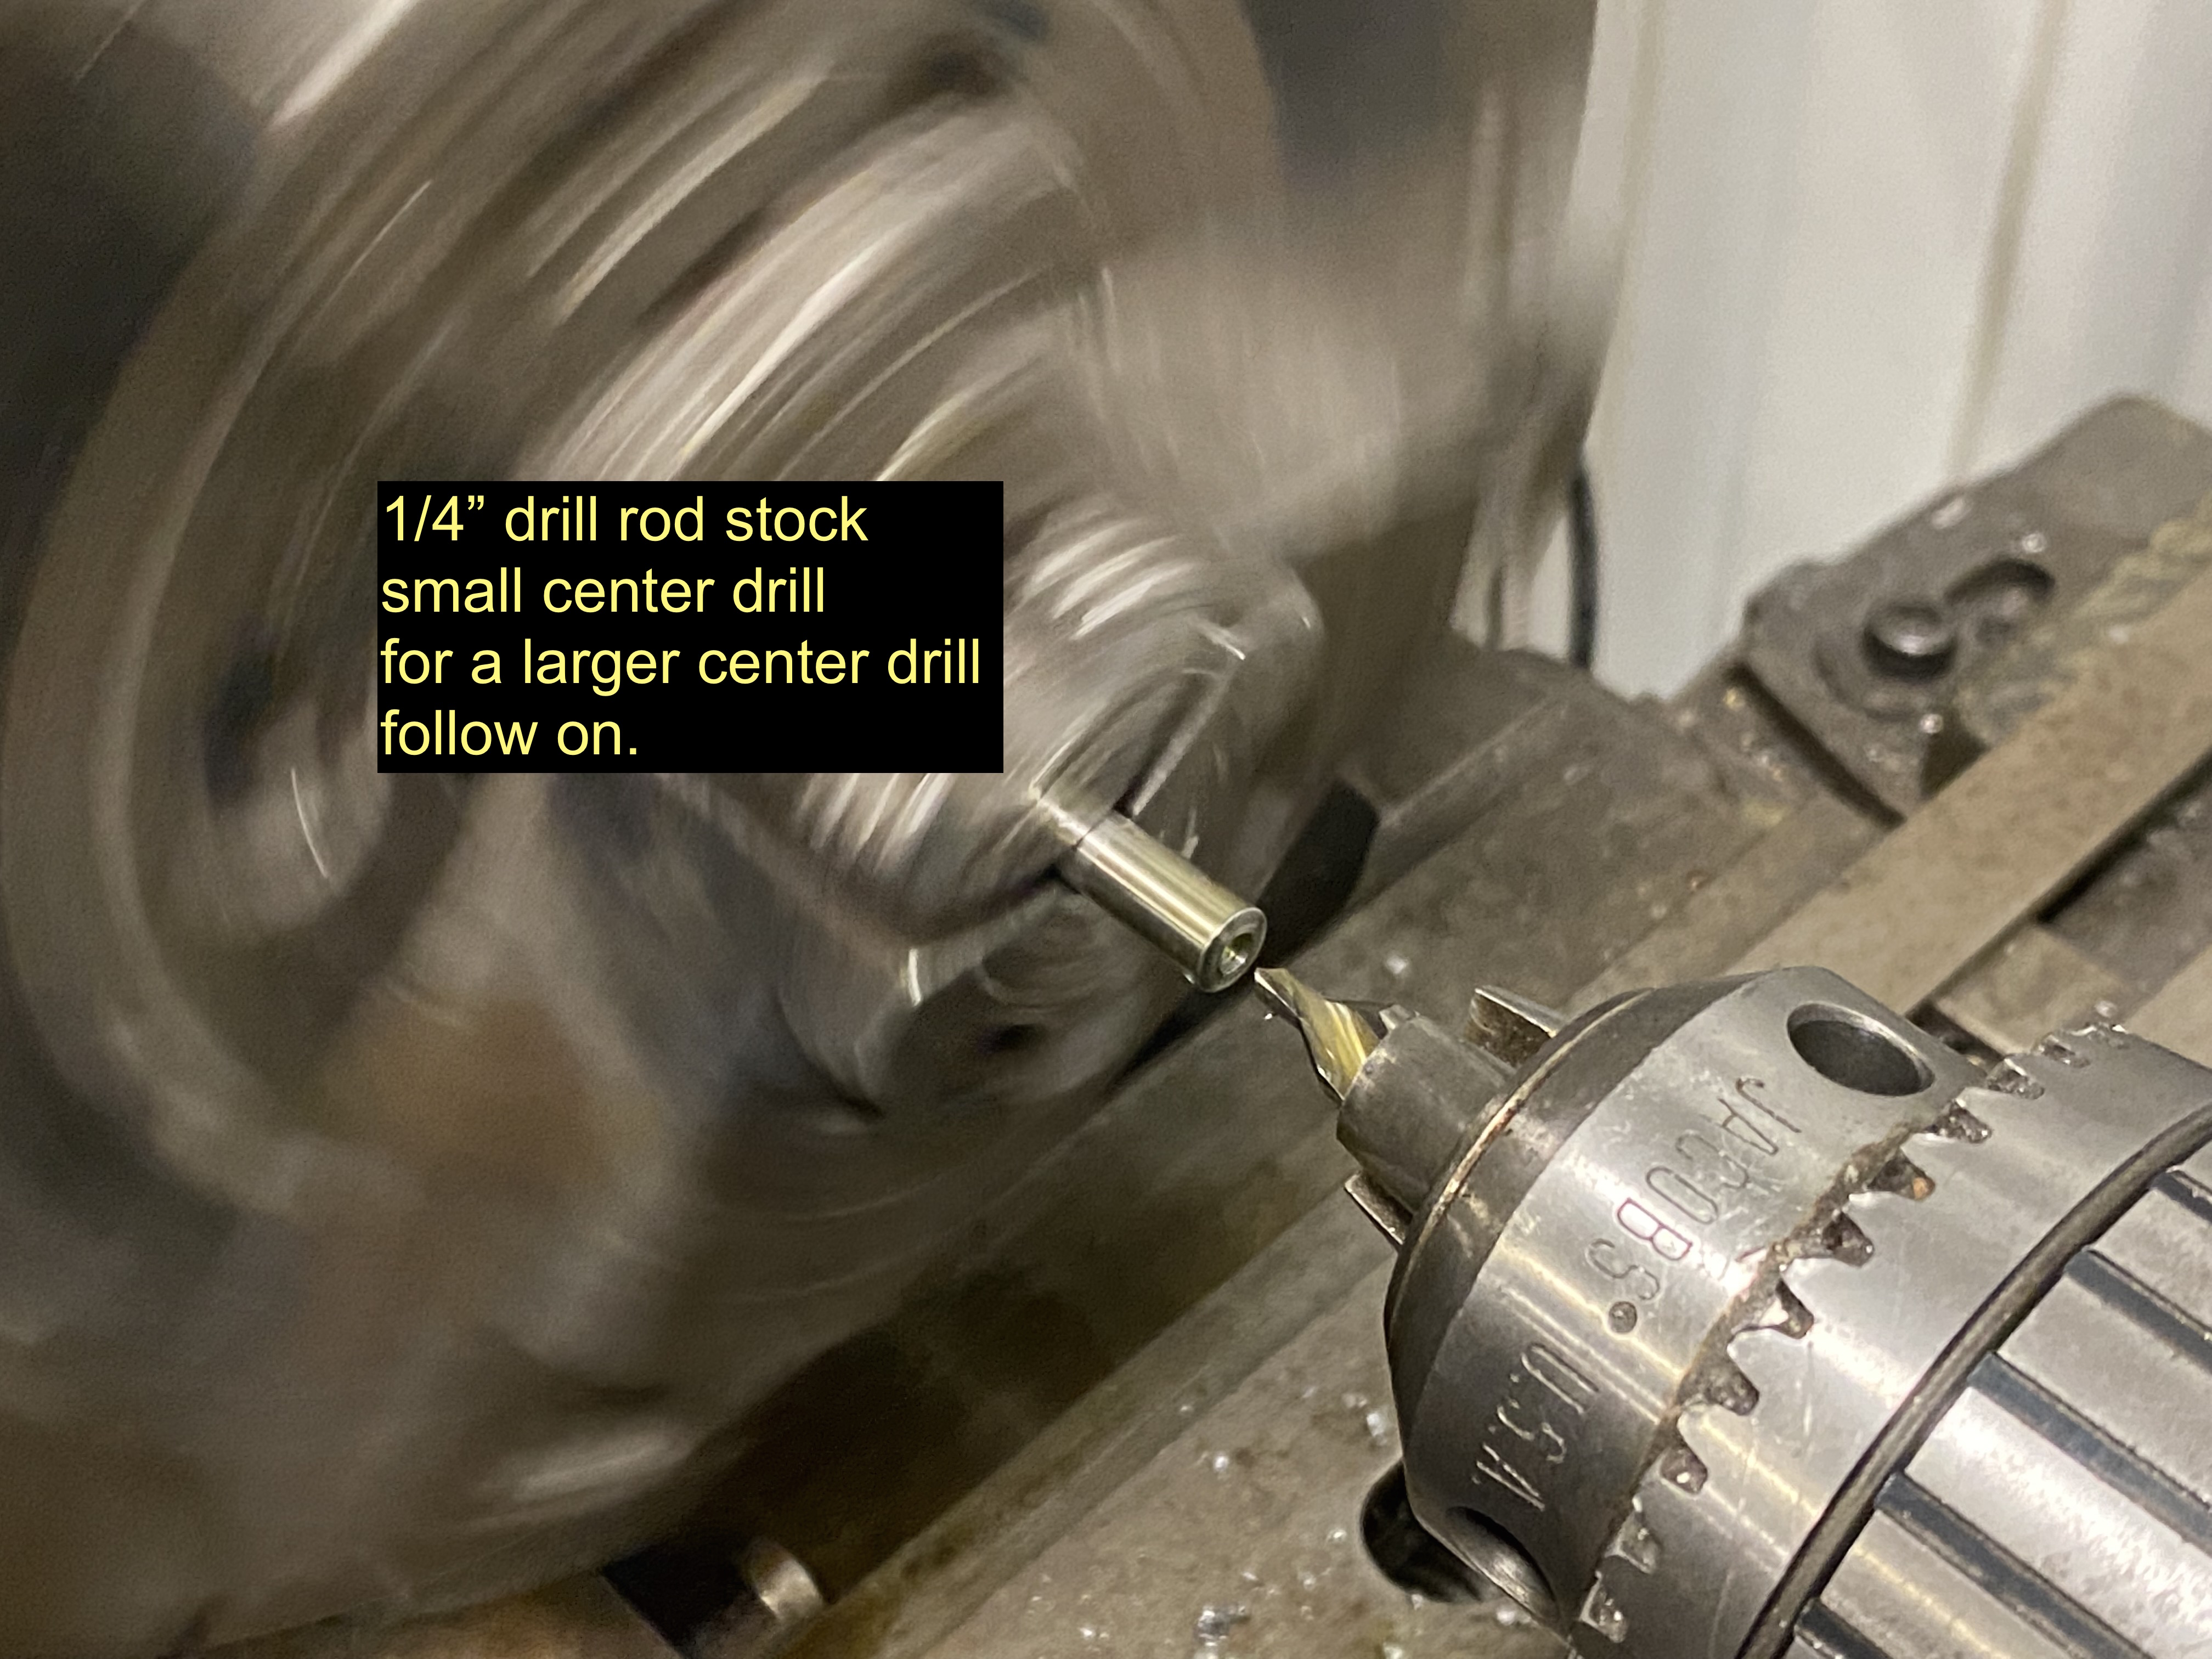
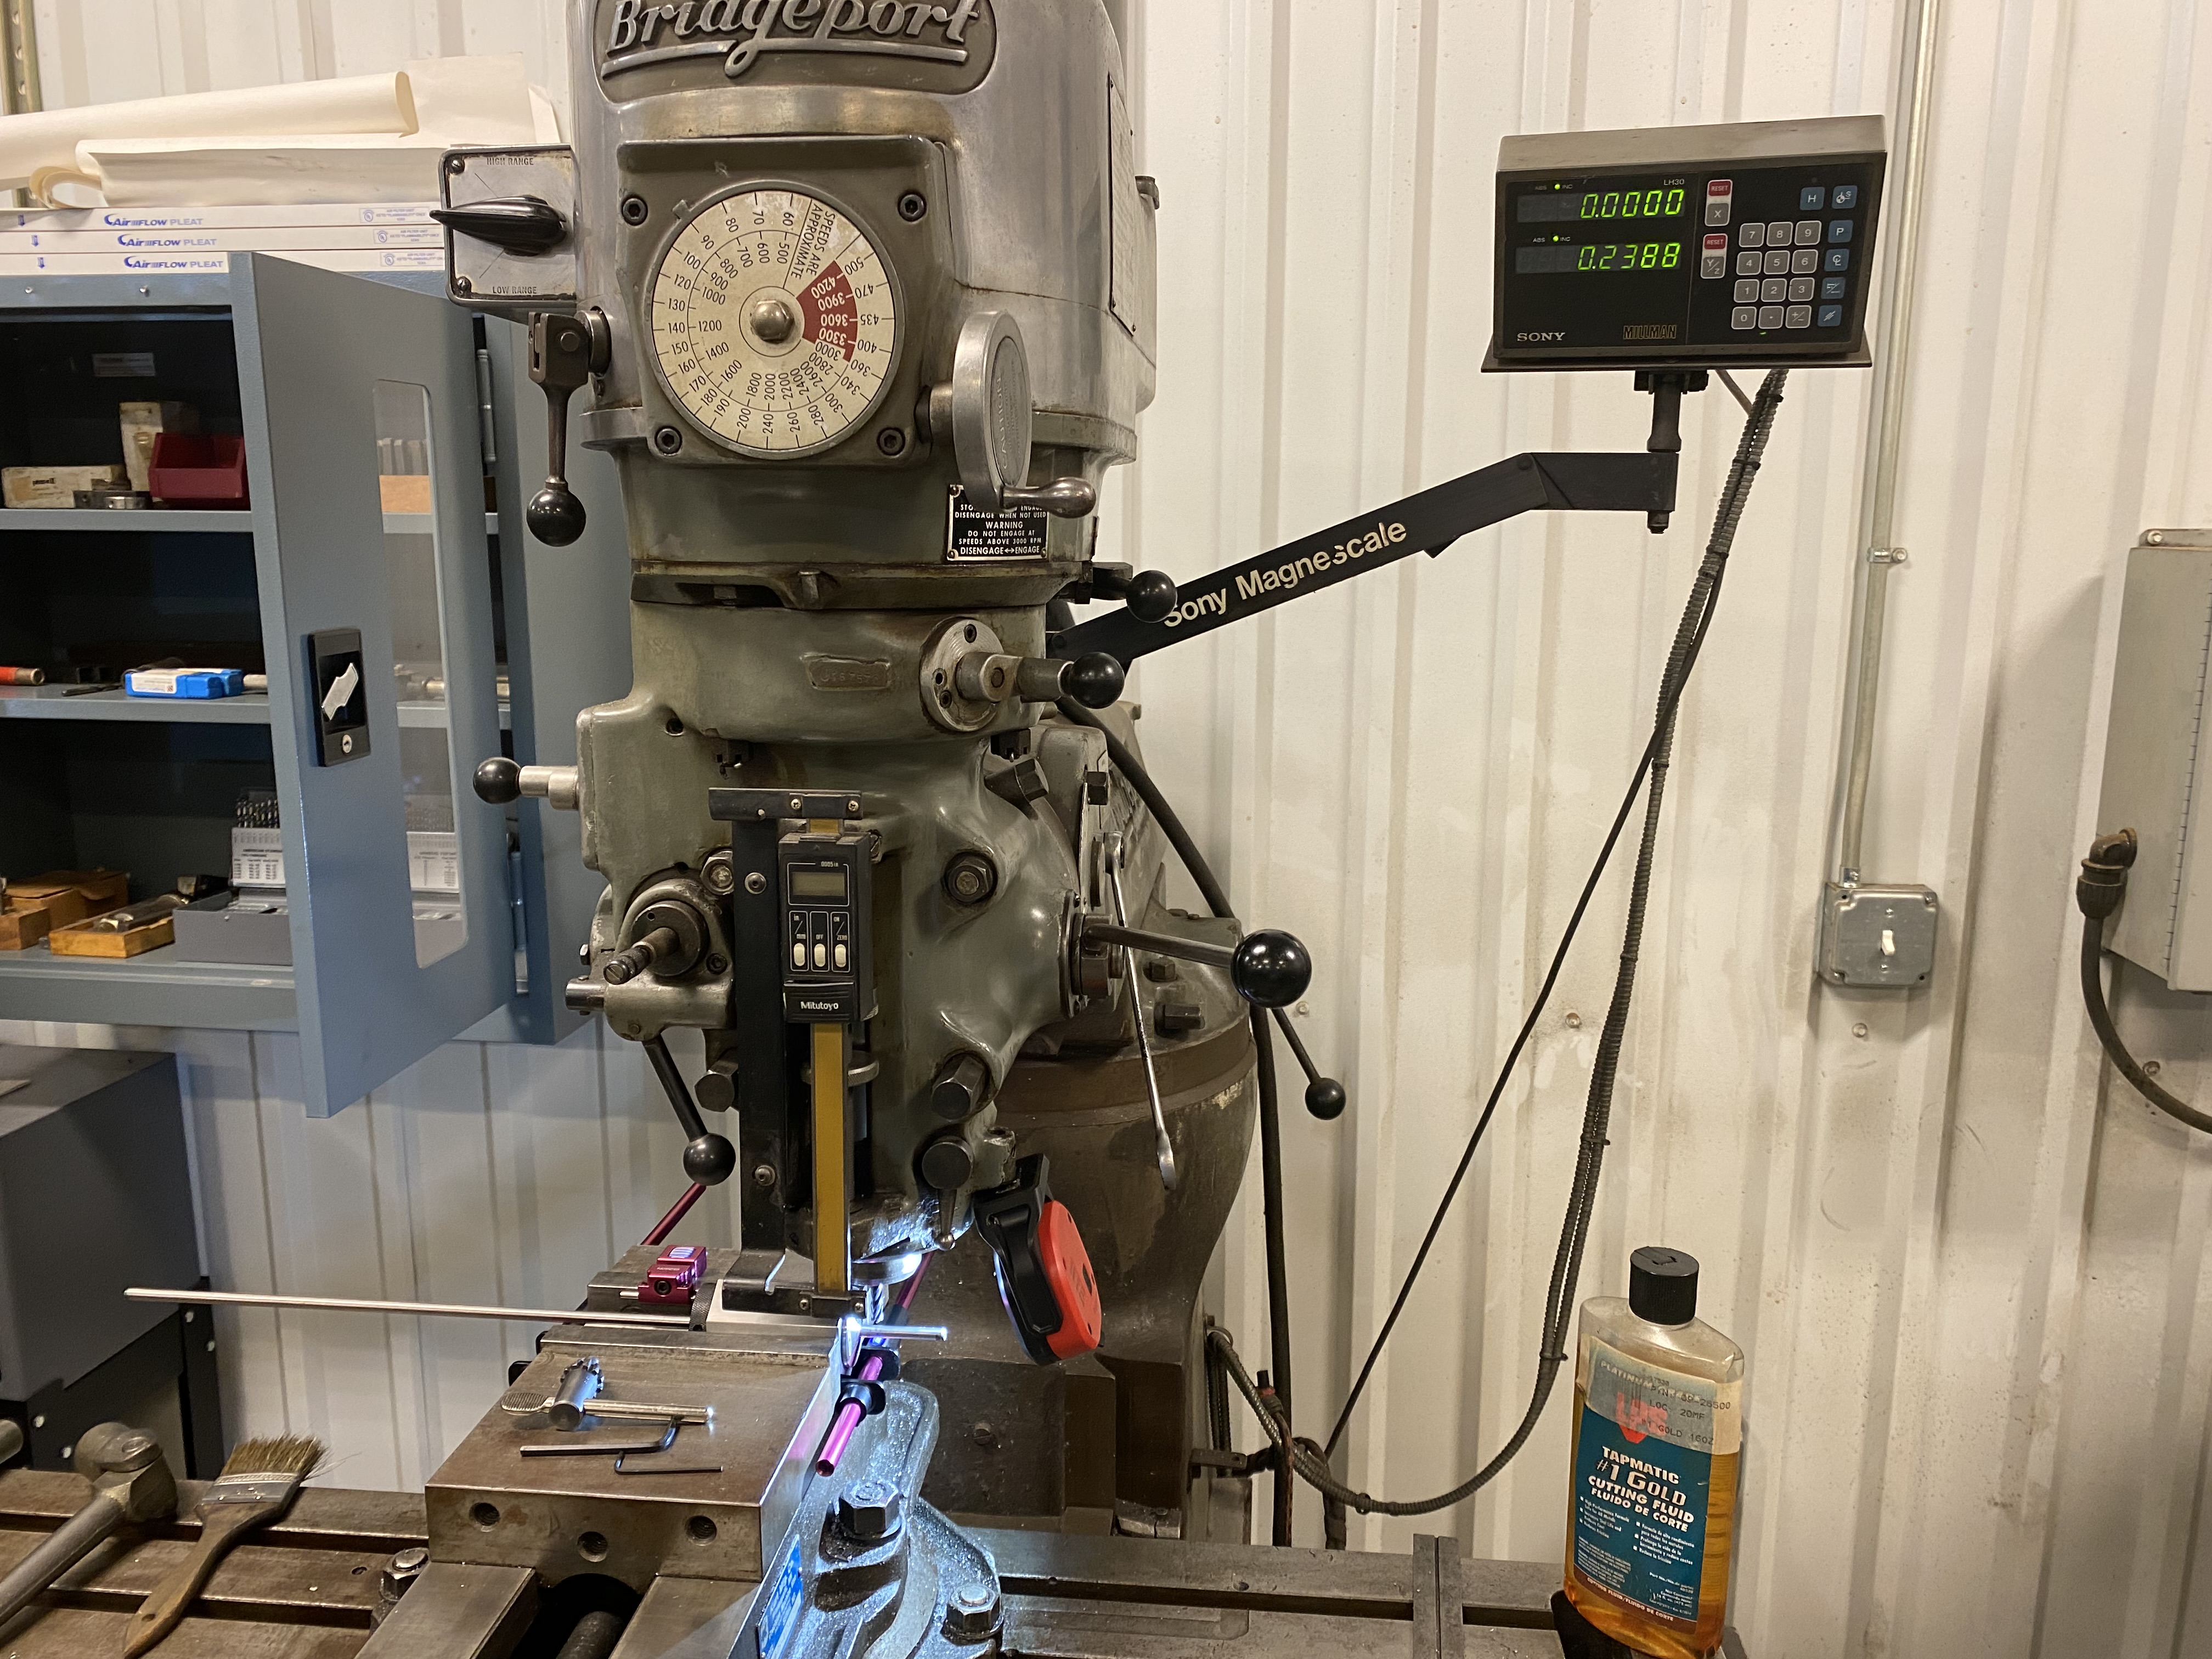
Finally got around to installing a Wilton 500S 5" vise and installed smooth jaws, it weighs 98 lbs, got it earlier this year. The only one Wilton makes still made in USA. I wanted the 6" but it weighed 150 lbs! The small roll pin holders are made on the lathe which is handy to create short pin depths and small diameters which are easier to control in the hand. I made this 5/32" last week.


-
1
-
-
.............................


-
2
-
2
-
-
On 9/23/2022 at 2:59 PM, StrangerDanger said:
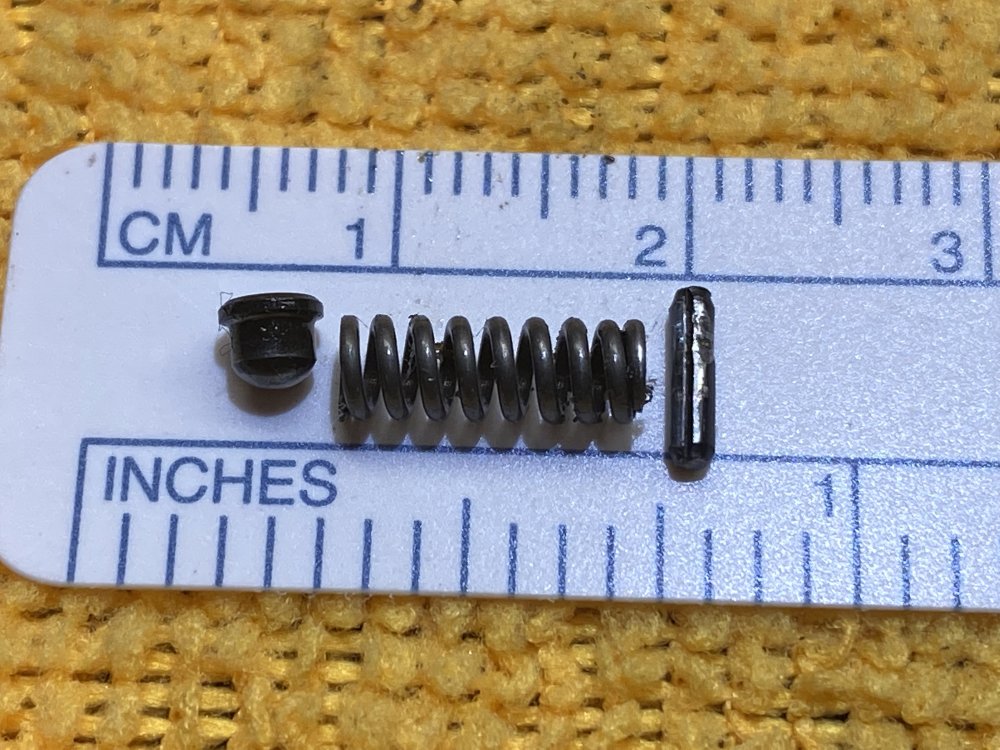
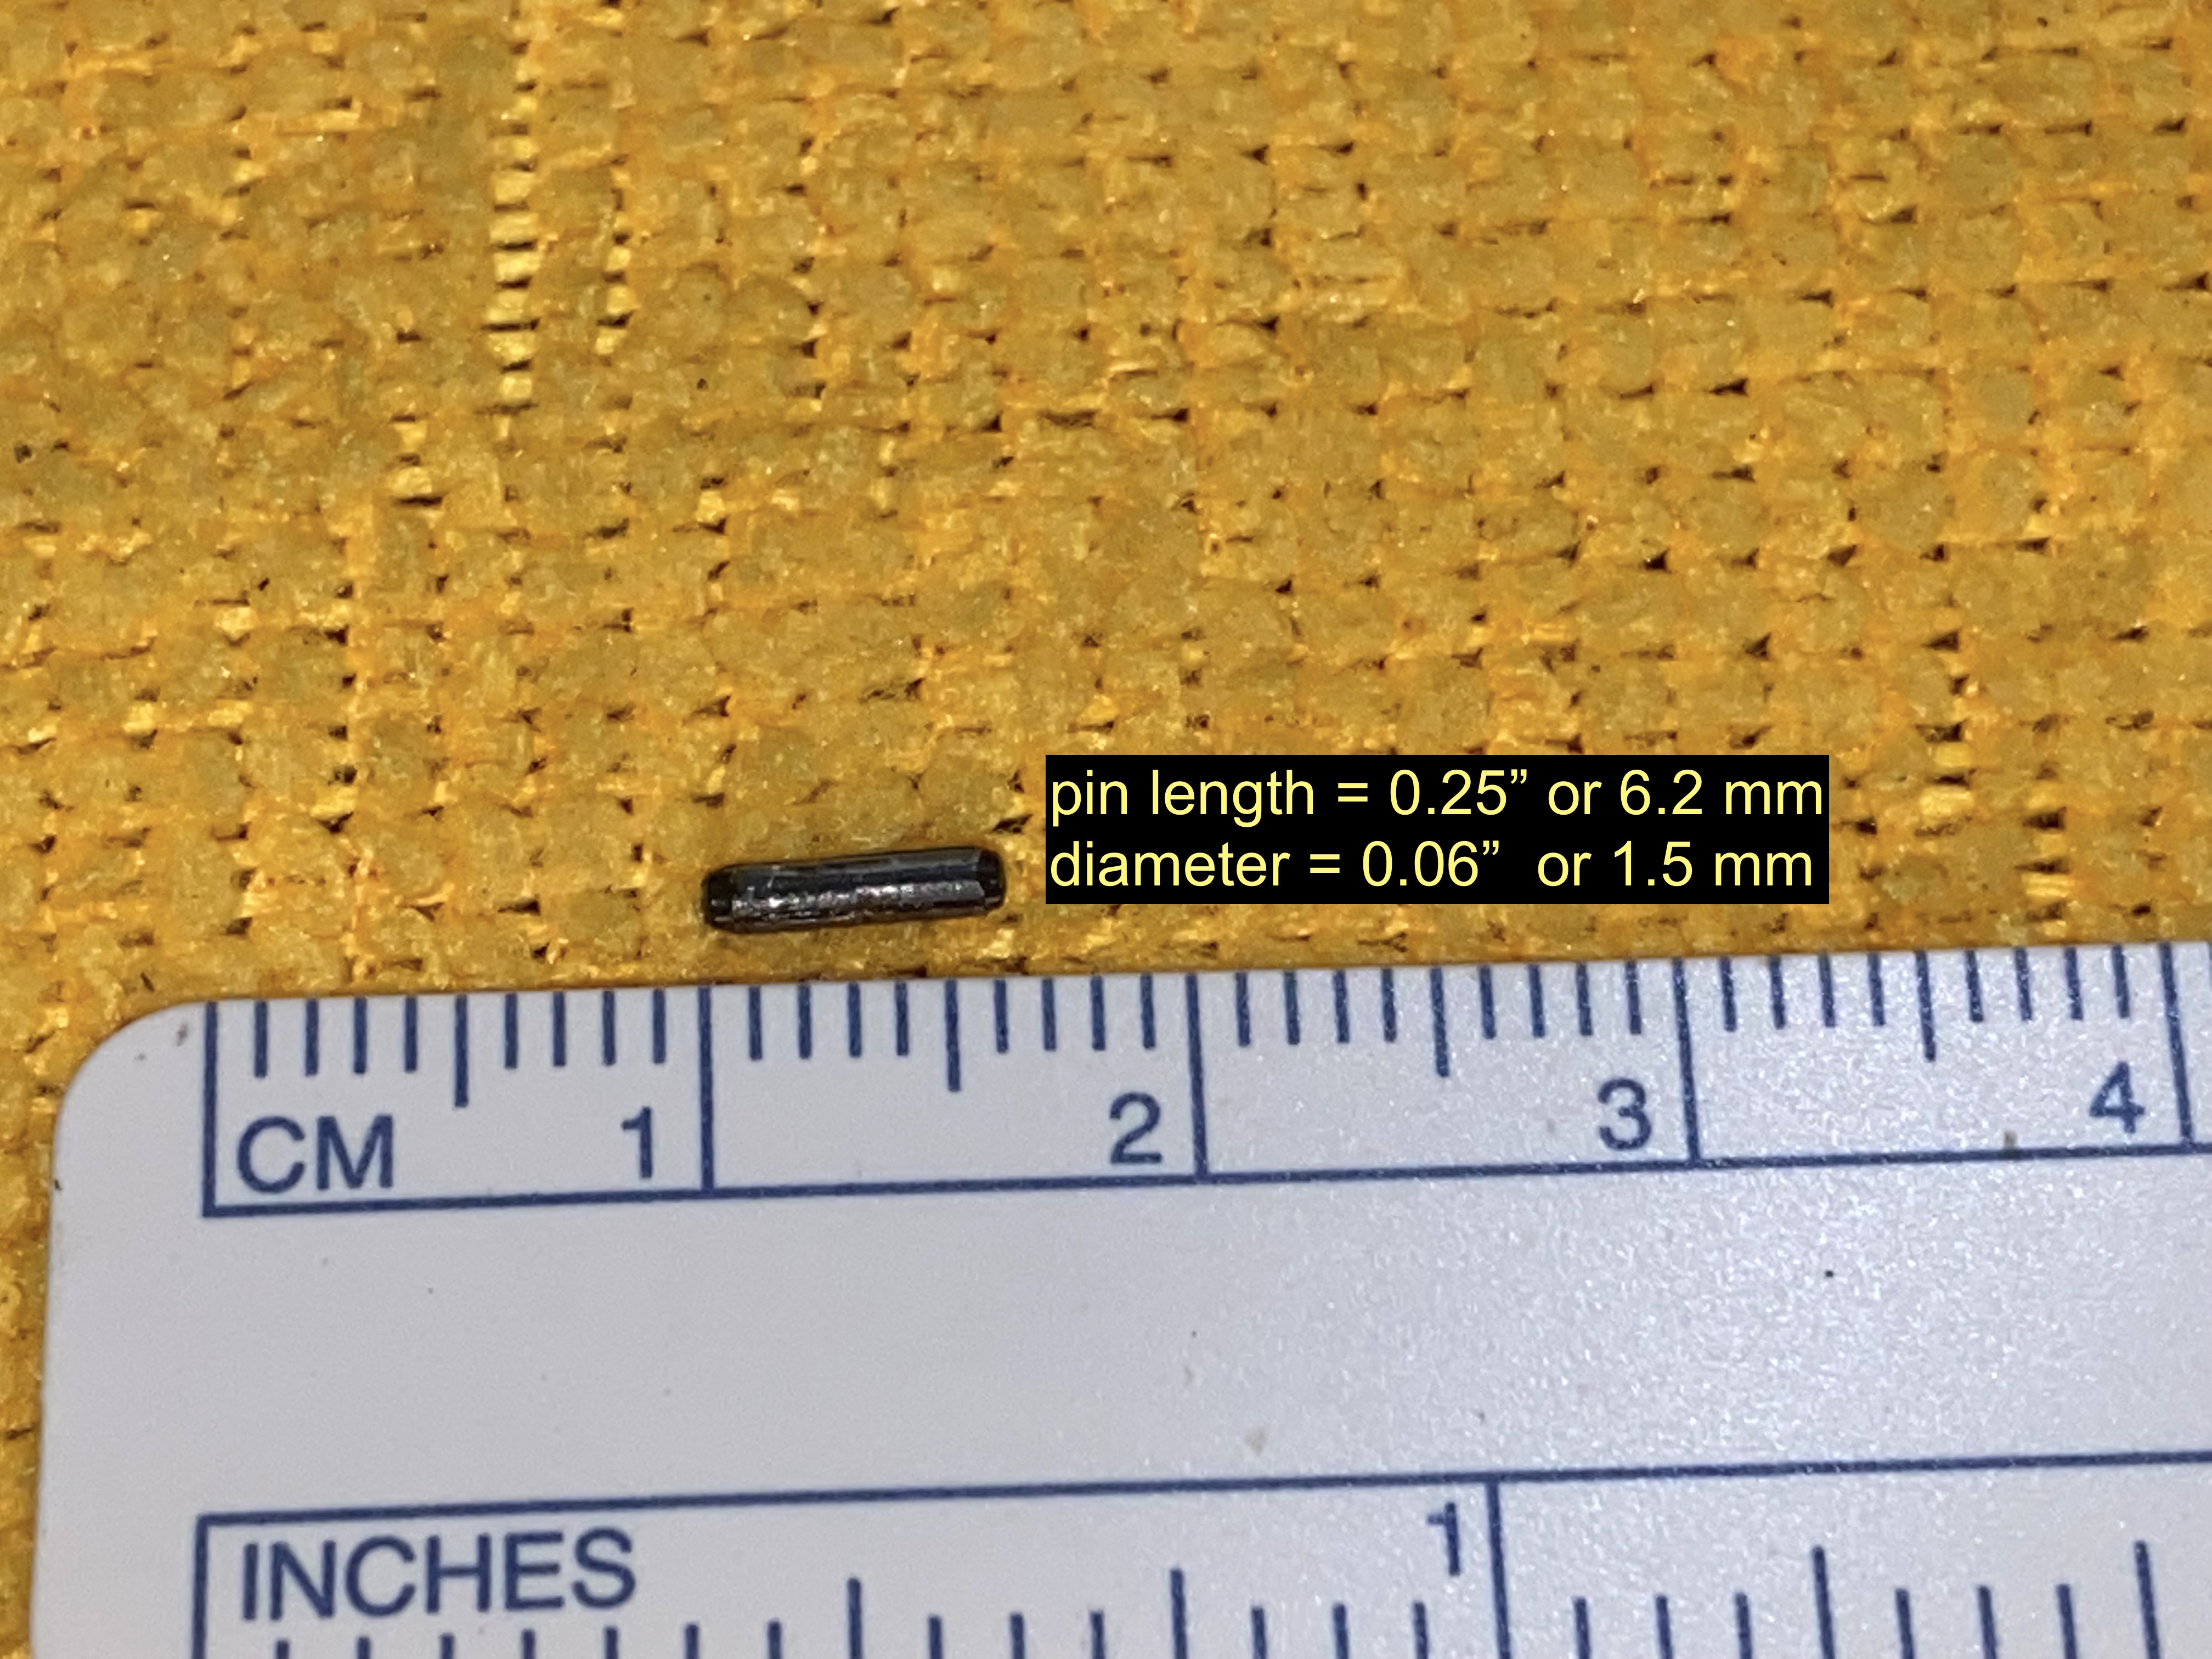
Getting the detent out of the bolt carrier is not an easy task. It takes specialized punches and finger dexterity that approaches the insane. Even roll pin holders are of no use since the pin is so short. The punch is so small that they’re easy to break. Getting that tiny pin out without damaging anything is one of my least favorite Benelli M4 jobs. Getting it back in without damaging the spring it retains is even worse.
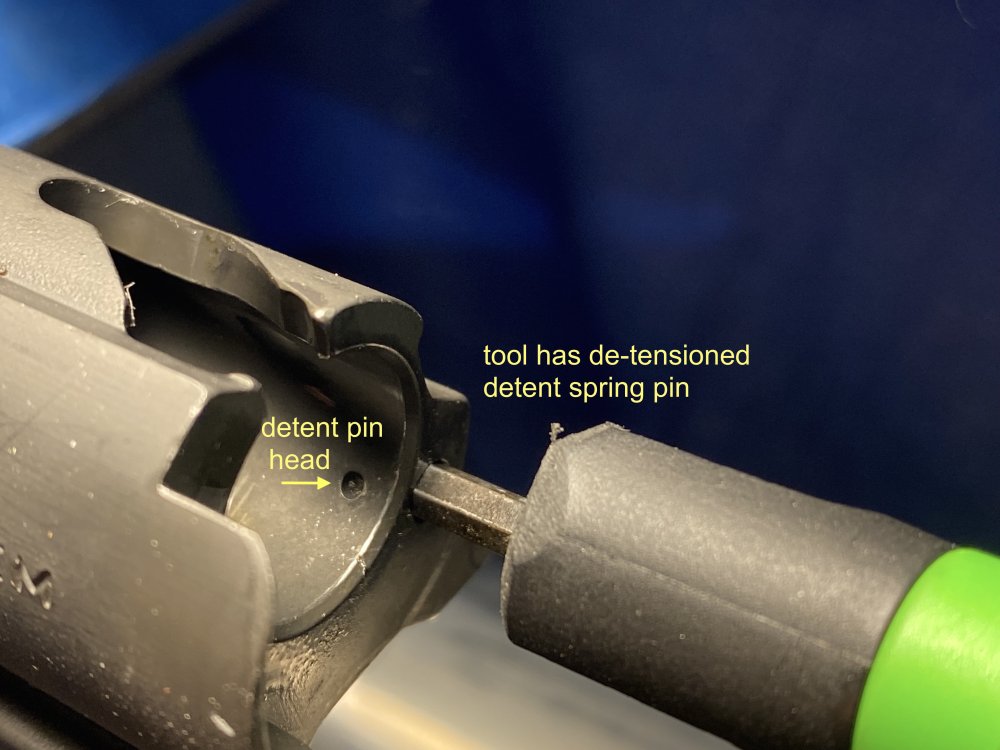
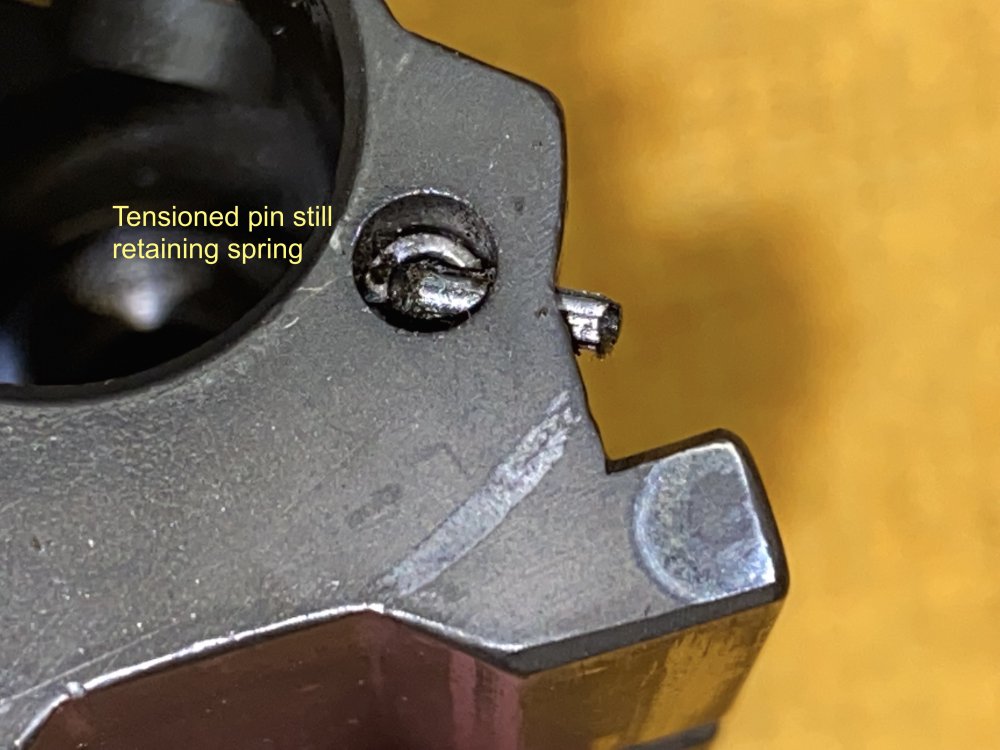
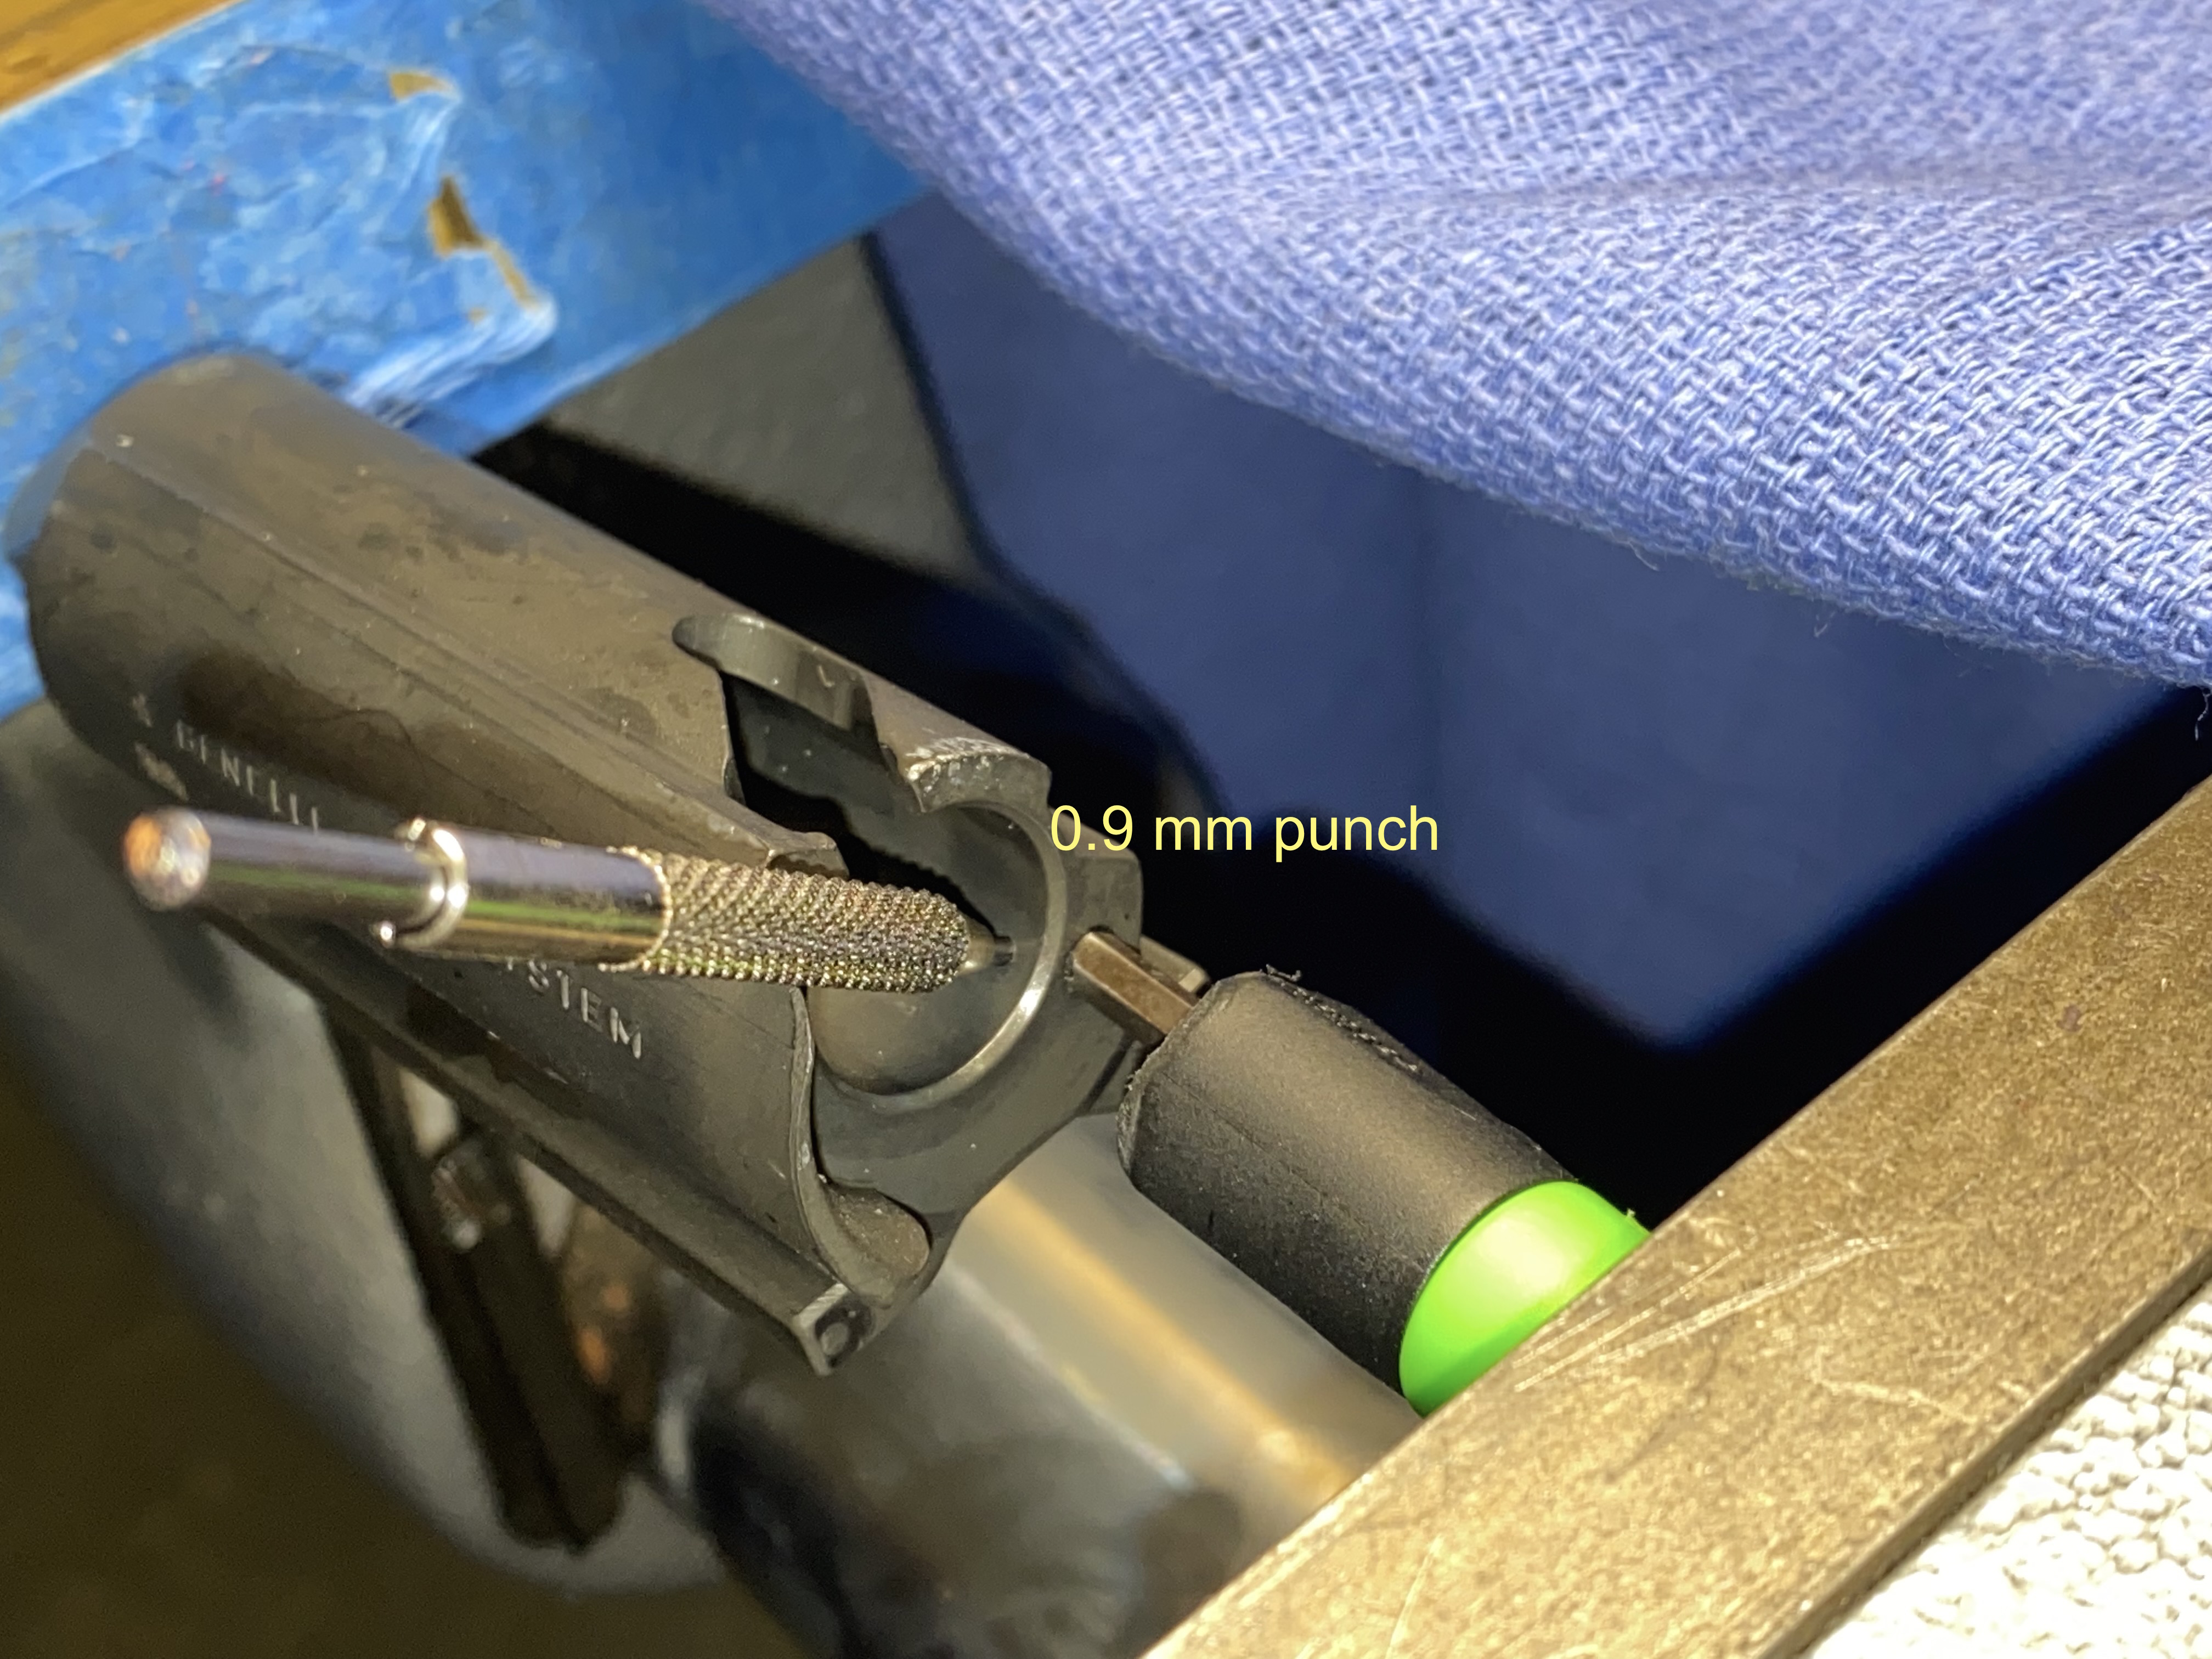
Removing the M4 Bolt Handle Detent Spring Retaining Pin.
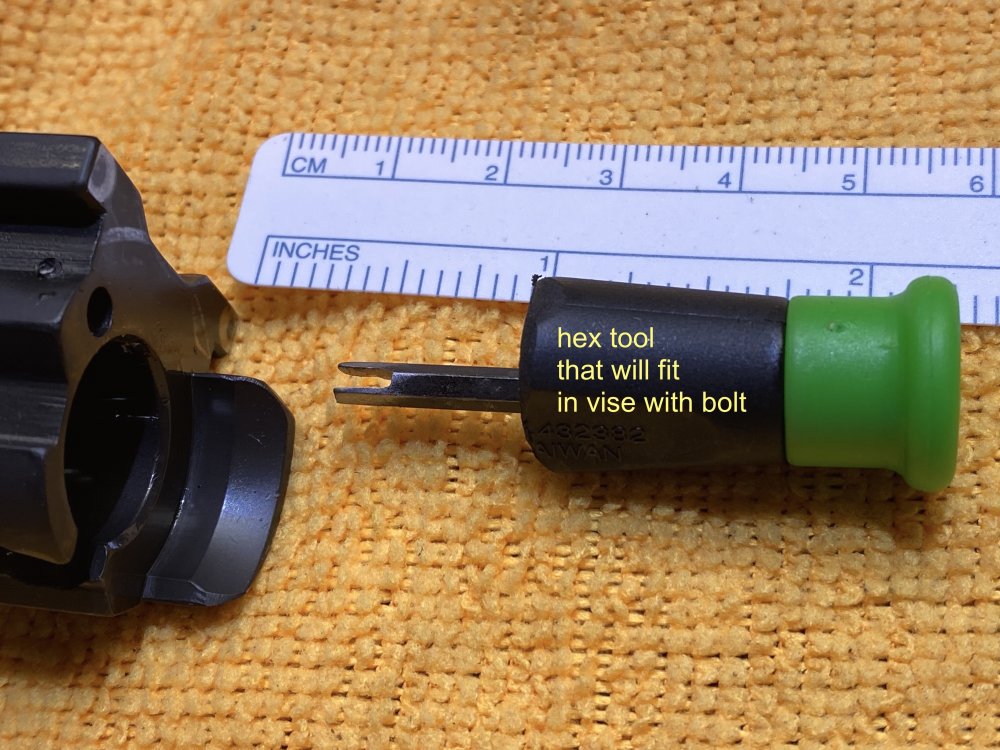
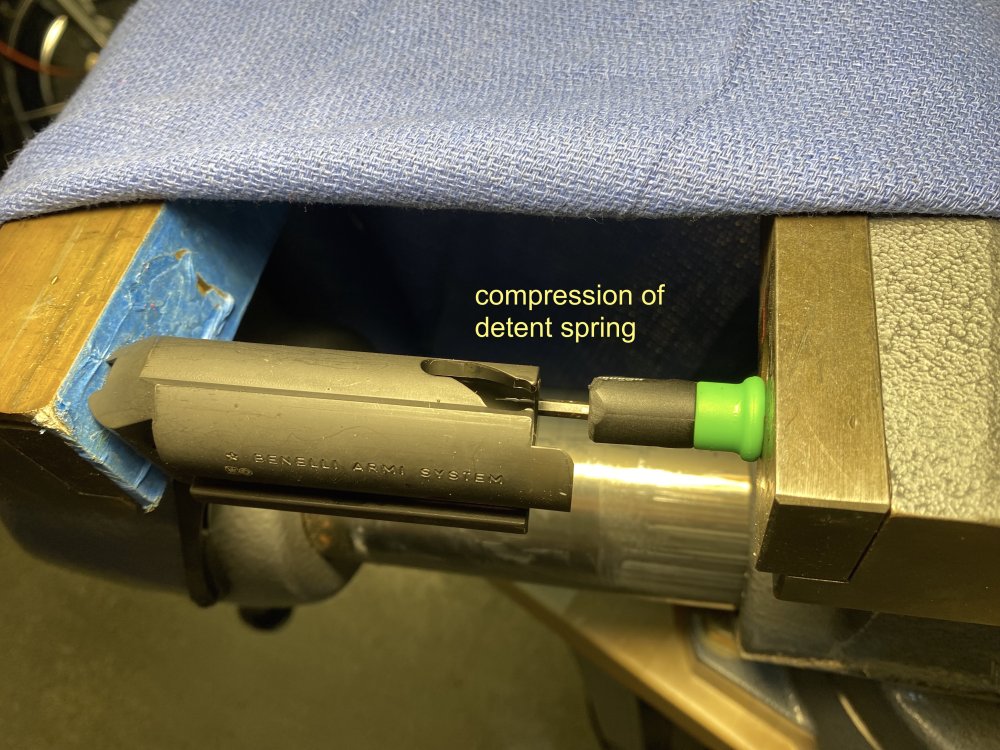
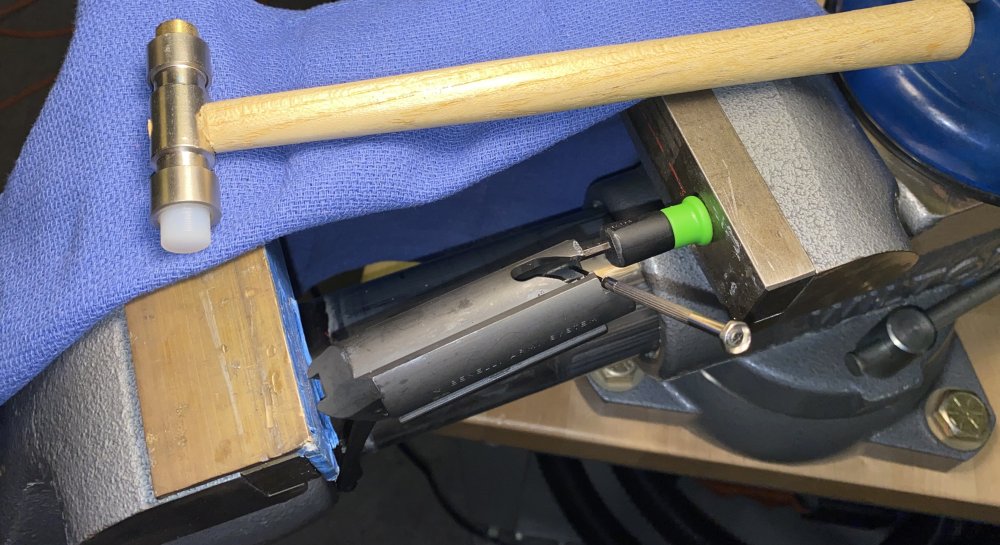
The key to making the task simple is to de-tension the spring from acting on the pin, very much like for the bolt extractor roll pin removal. The second item is to have a tool to compress the spring away from the pin.
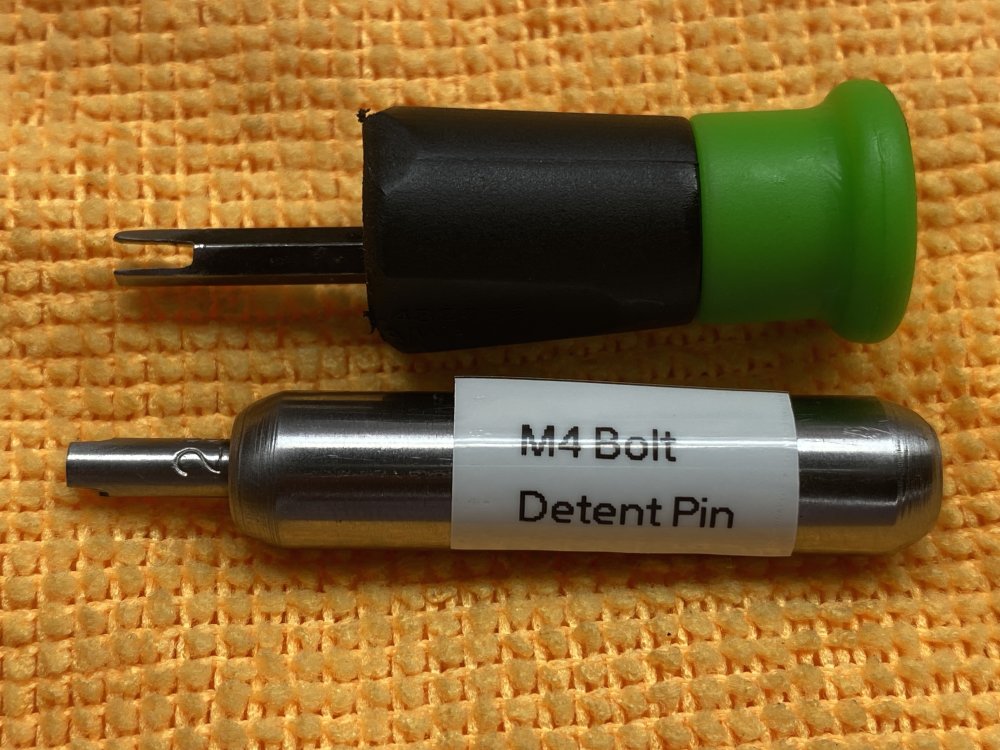
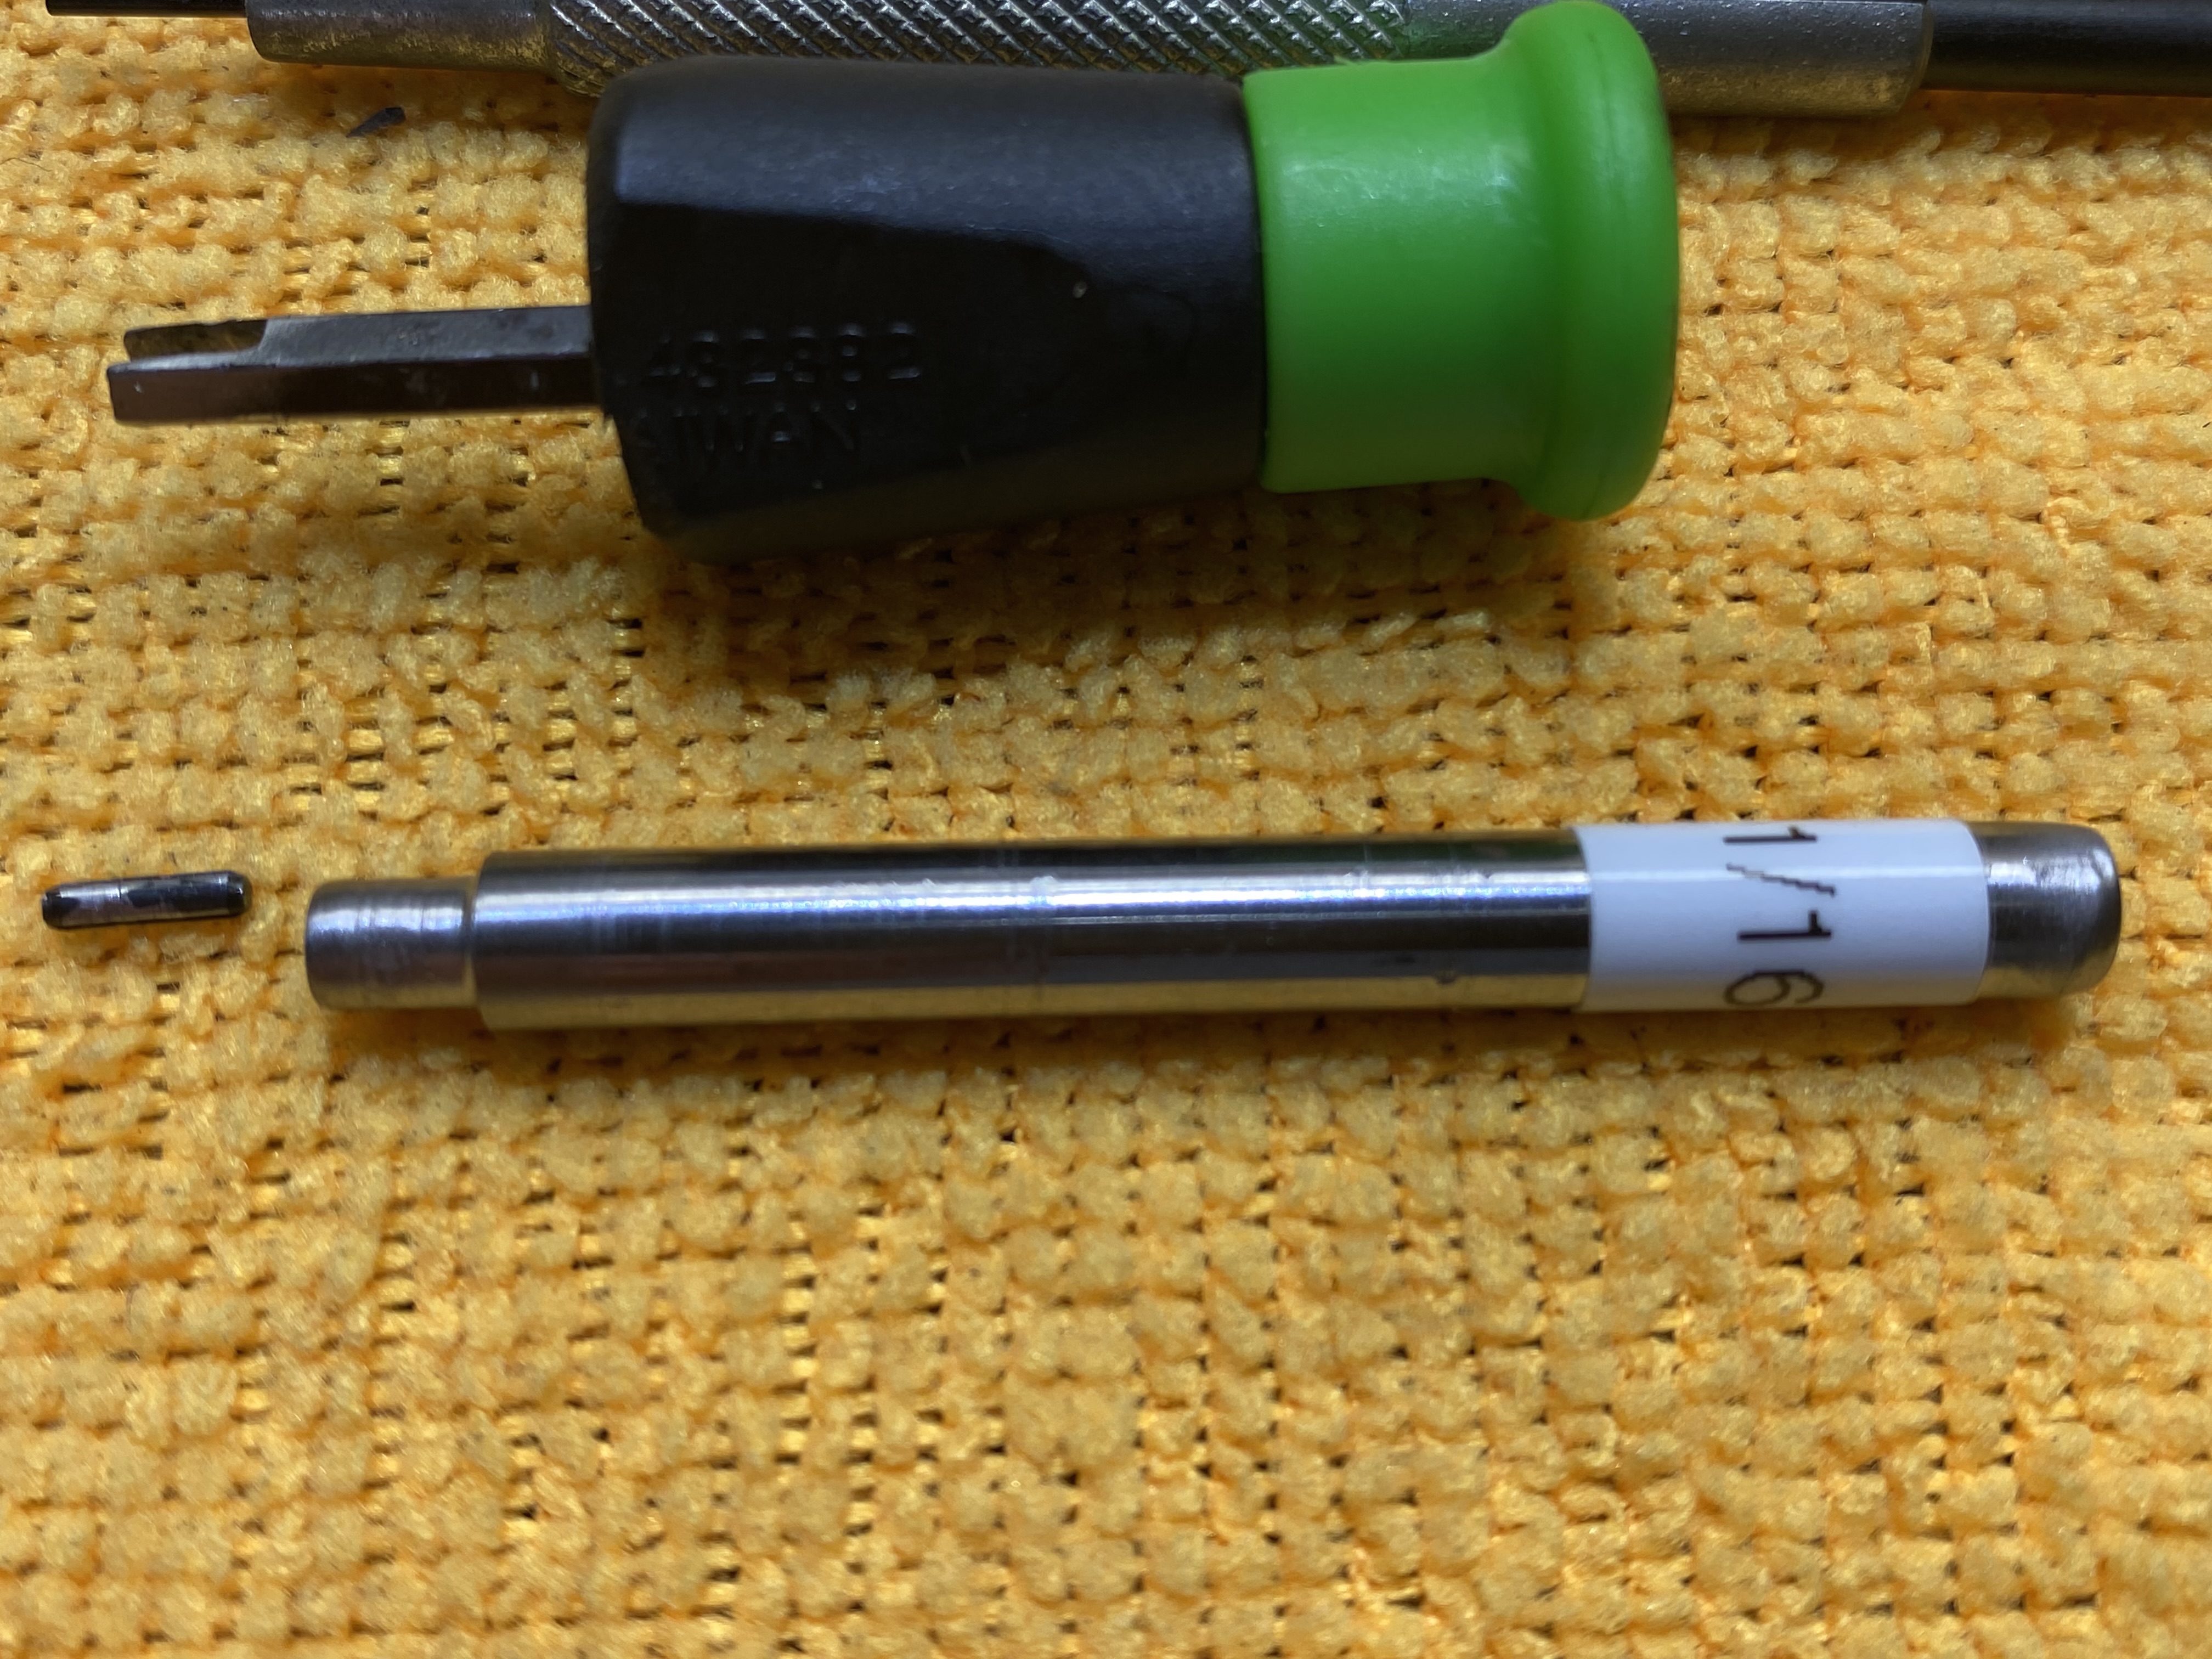
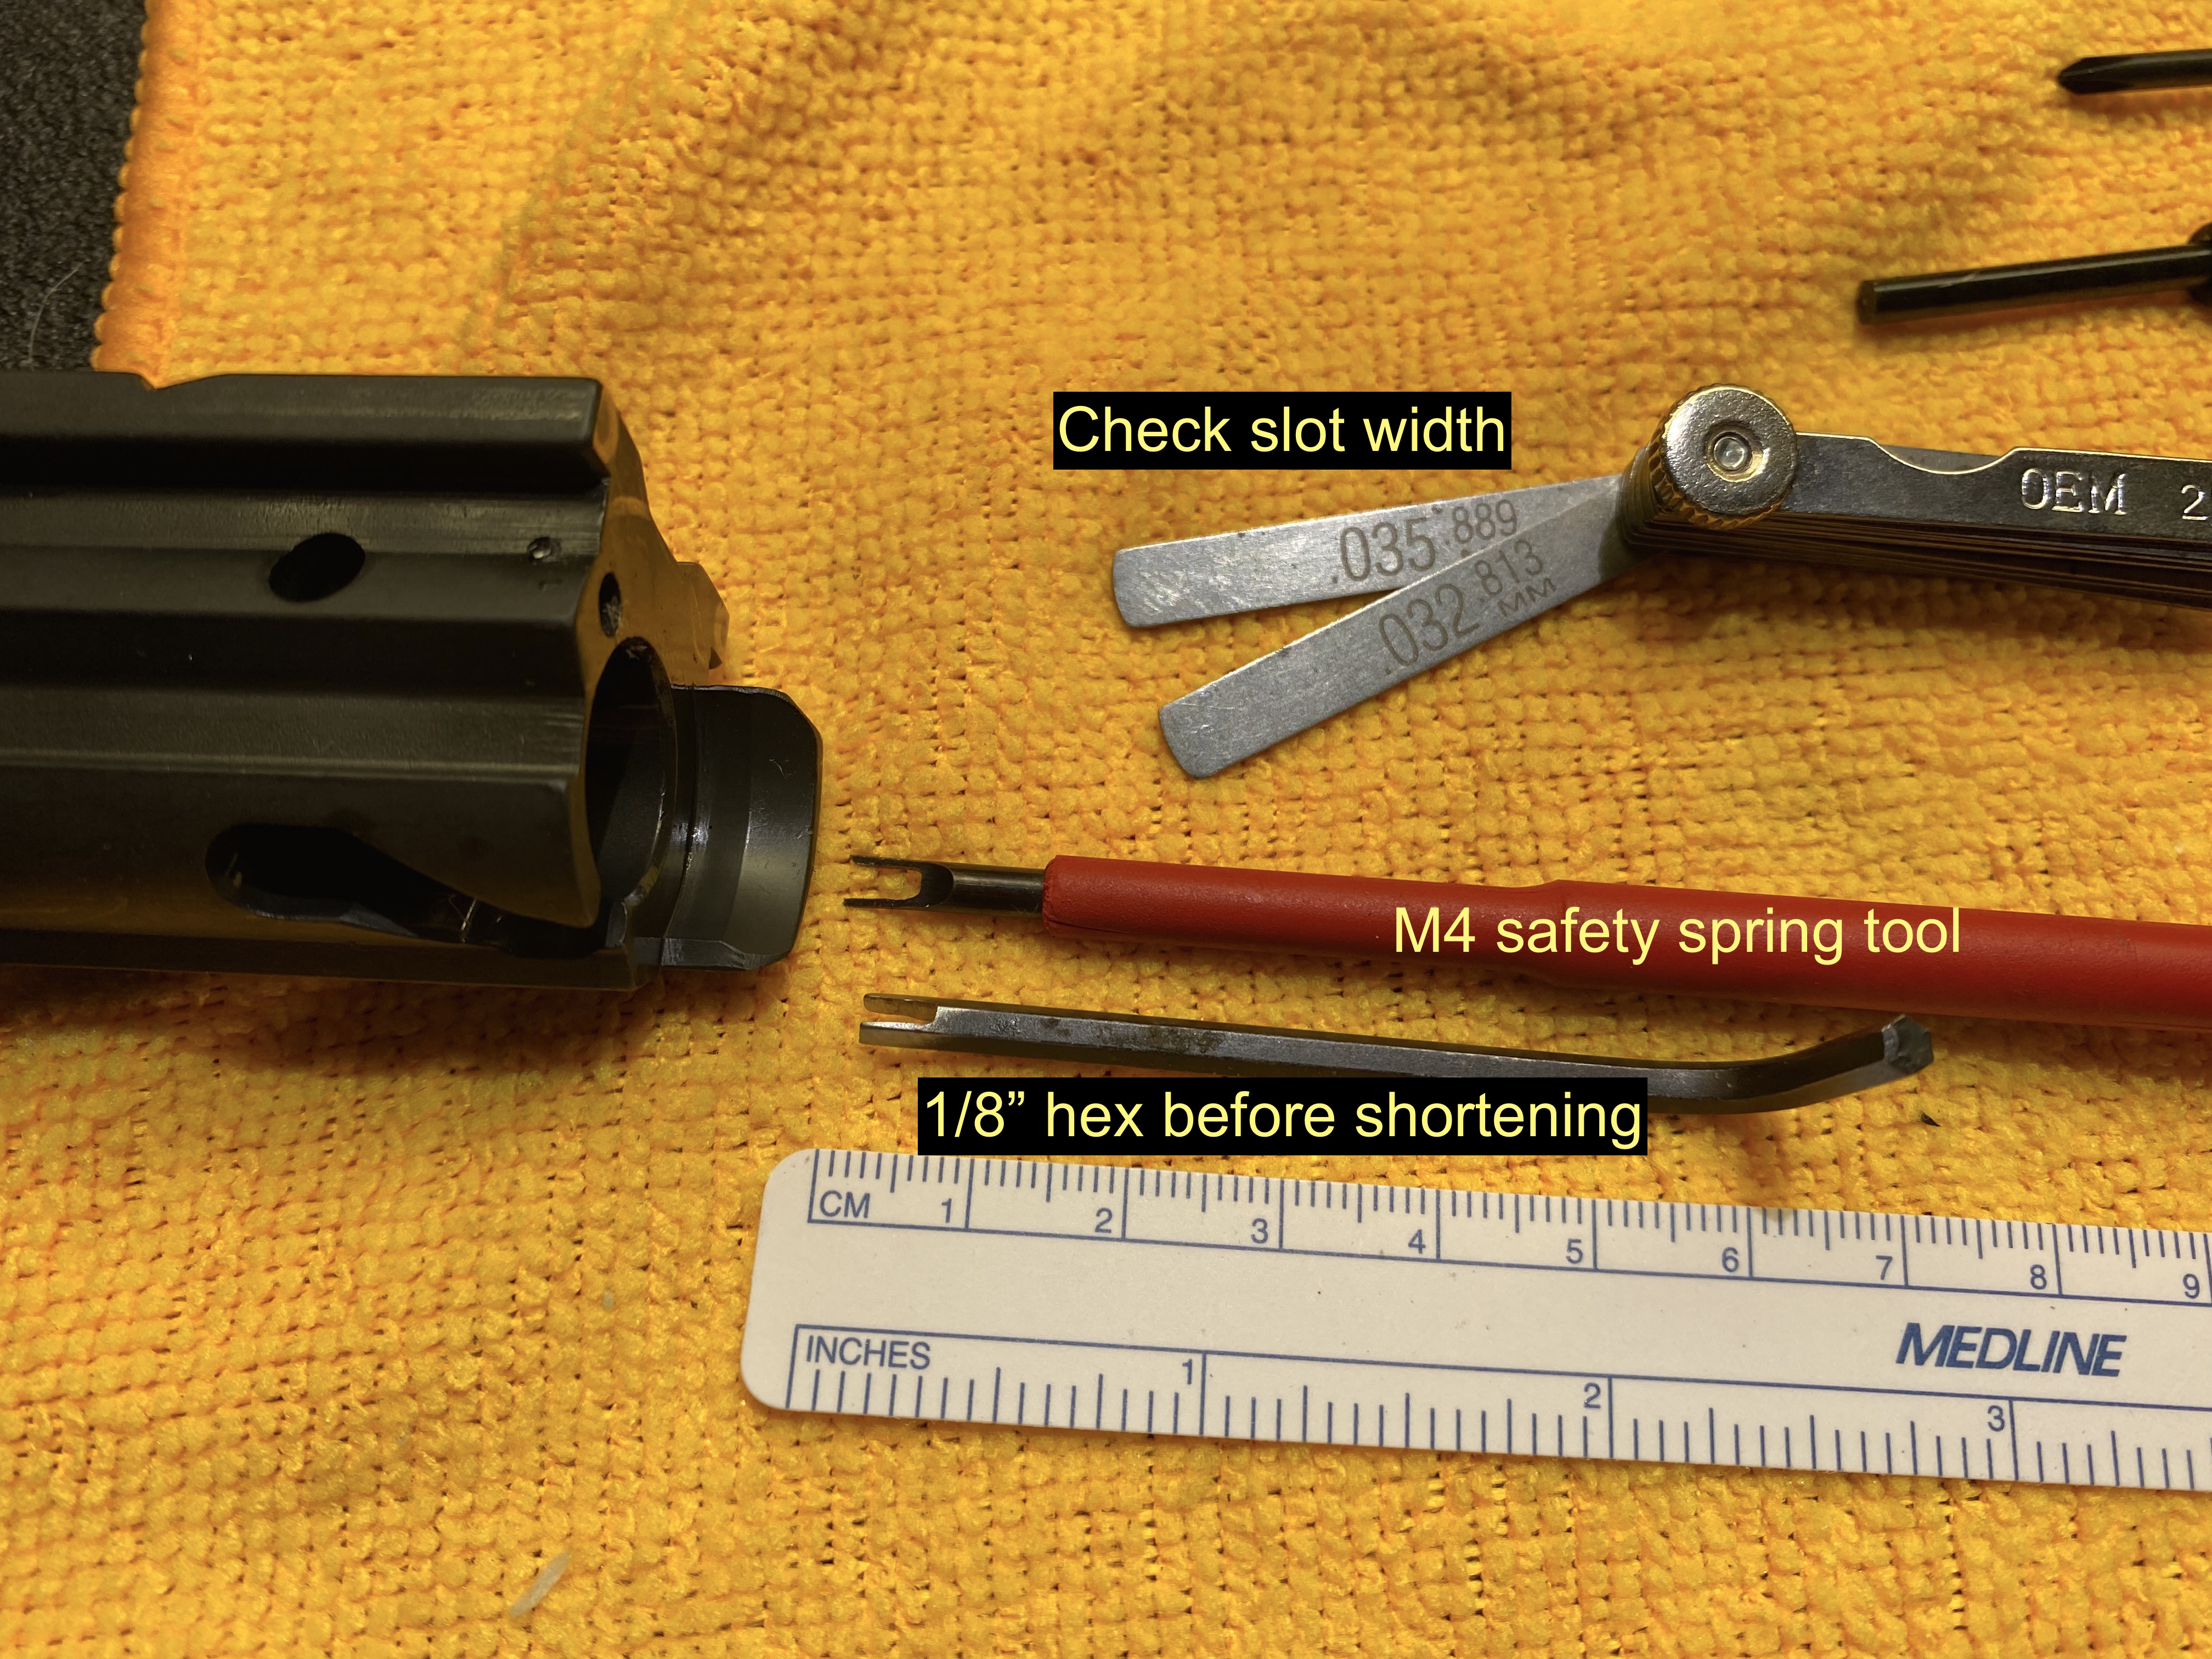
I fabricated a fork tool from 1/8” hex wrench, after observing my M4 trigger safety spring tool would fit in the hole and compress the detent spring; the problem was that tool was too long to fit in vise for compression of the spring. The hex wrench was slotted with a Dremel to 0.067”, shortened to fit a polymer tool handle. The tool can then be fitted in the vise to compress the spring freeing up your hands to remove the pin.
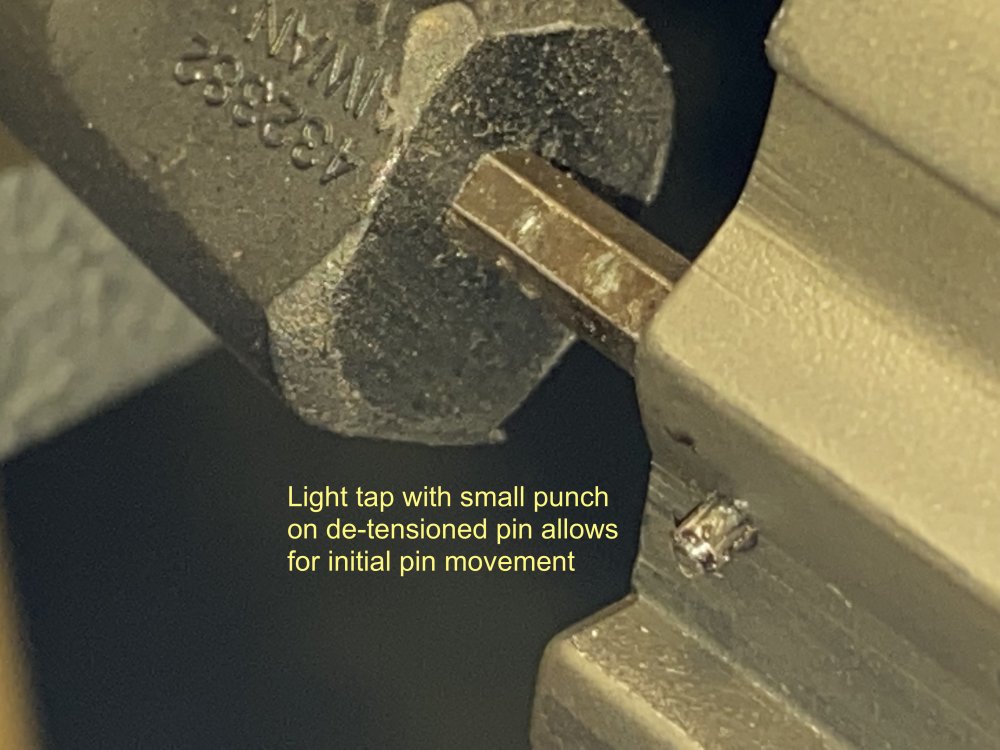
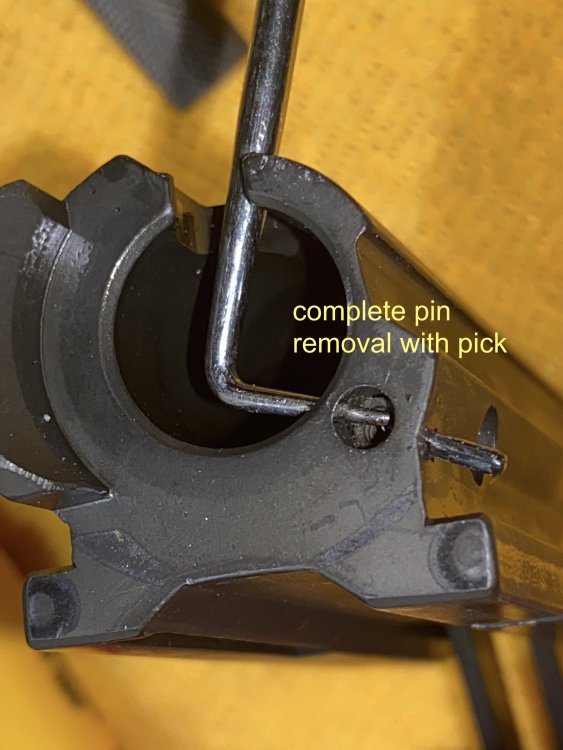
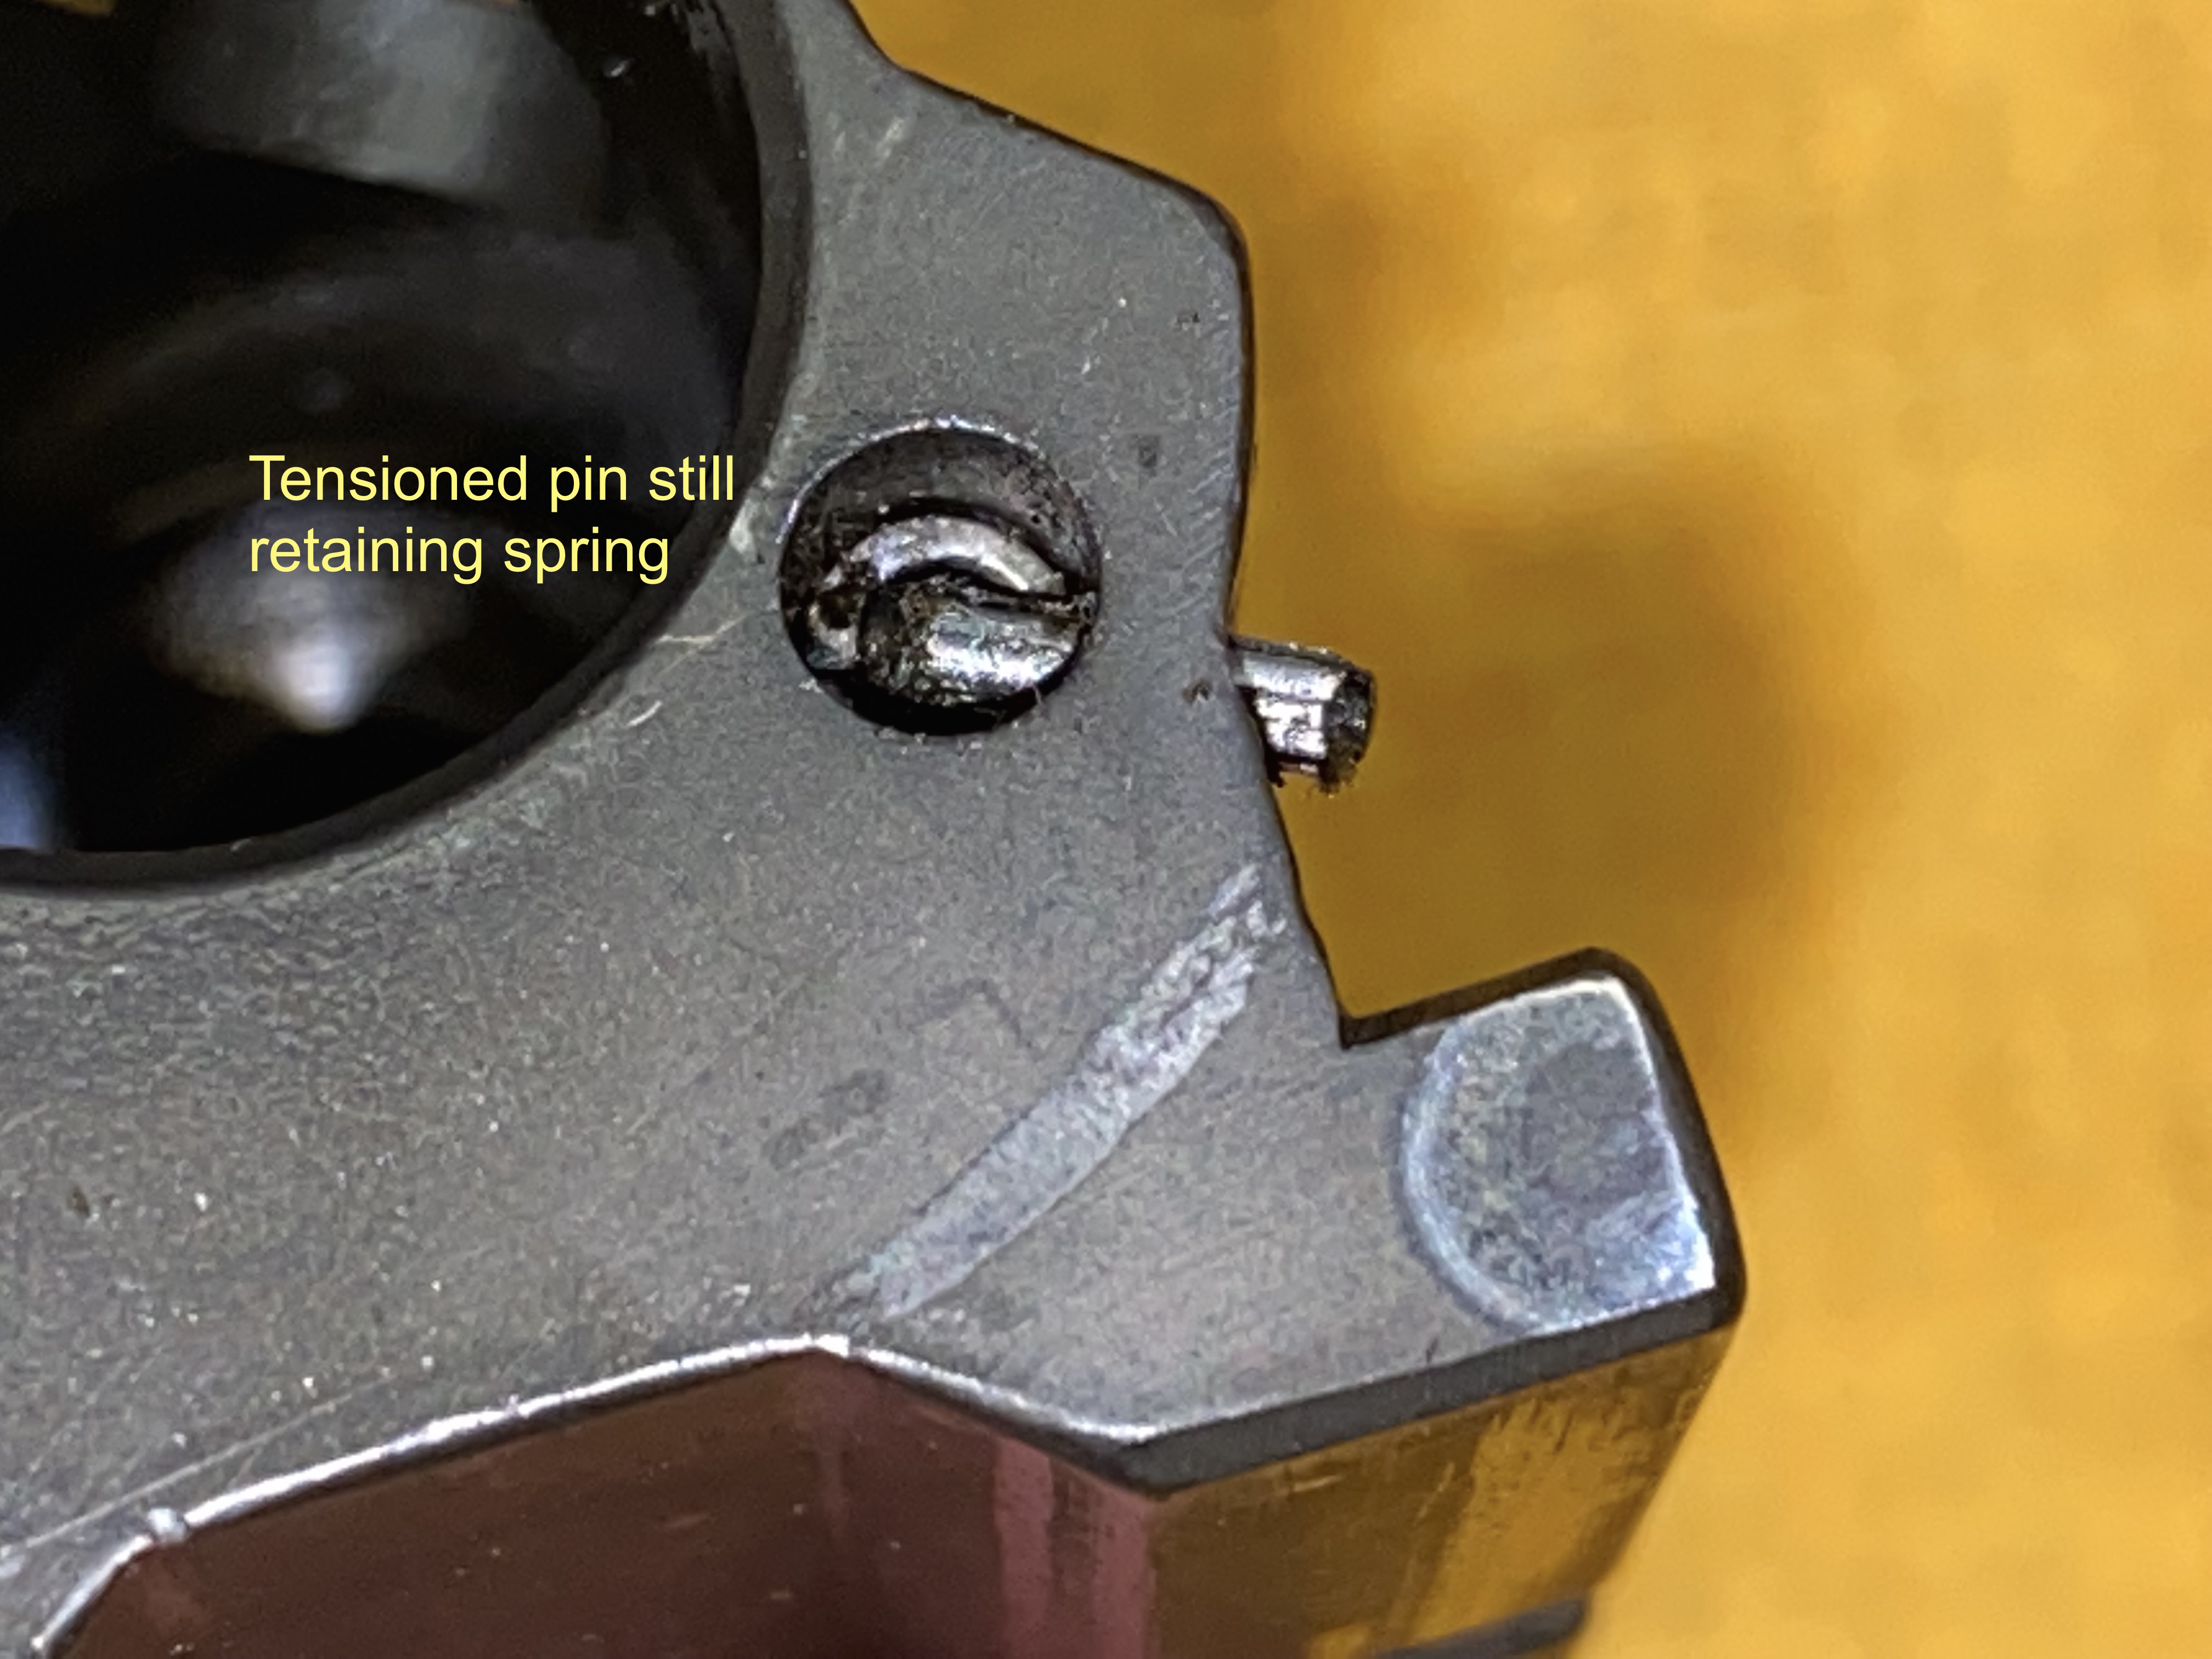
The pin is removed inside-outward, once de-tensioned a simple small tool such as jewels screwdriver or 1/16” hex wrench can be lightly tapped with a light hammer to begin moving the pin which doesn’t take much force. A right angle pick with slight pressure will complete the pin removal and the pick captures the spring so it doesn’t fly about. Cover the spring hole, remove the pick and extract the detent and its spring.
Installation is the reverse. Compress the spring, insert right angle pick, use small pin holding punch to tap the pin in, displacing the pick. Make sure the inside of the pin does not impinge on bolt raceway.
Generally, no need for breaking punches or flying springs.

-
1
-
1
-
-
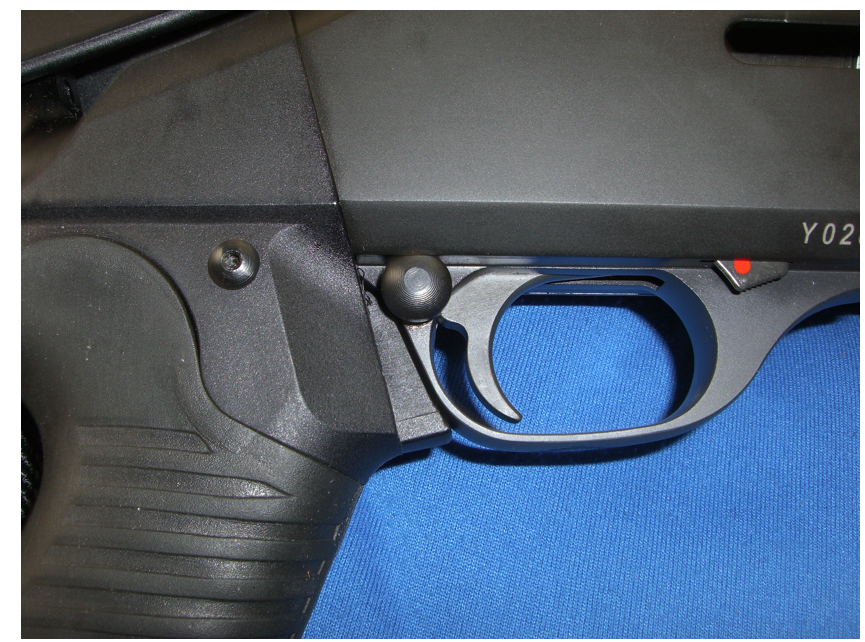
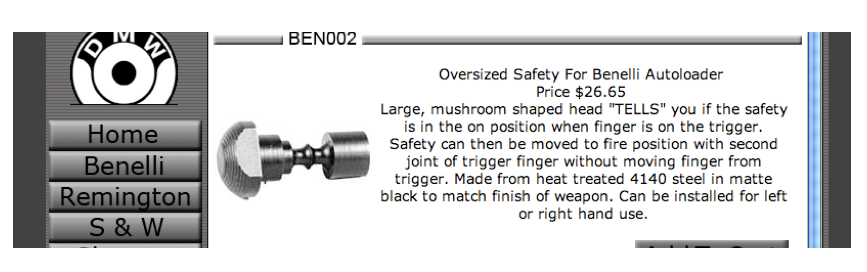
I have enjoyed Dave's Metal Works mushroom safety.
-
3
-
-
^^Aha. Got it.
-
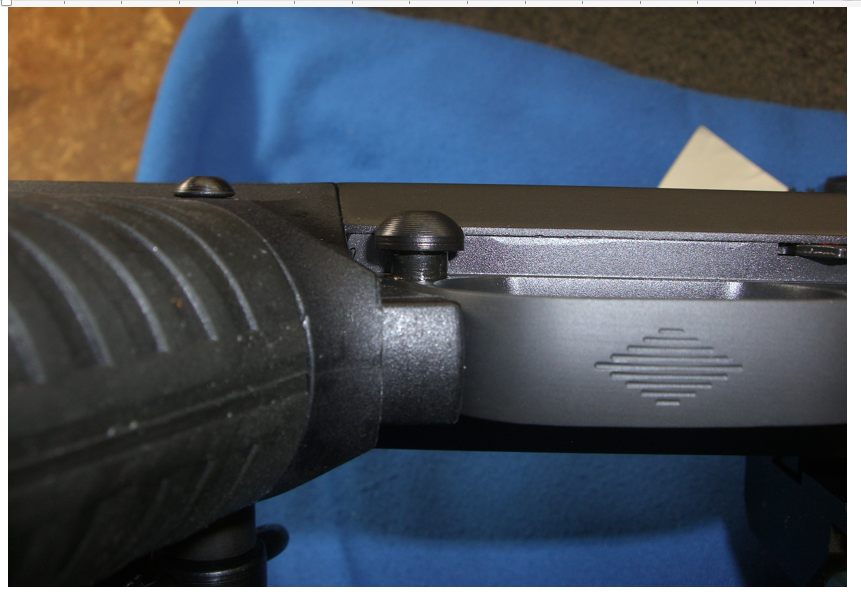
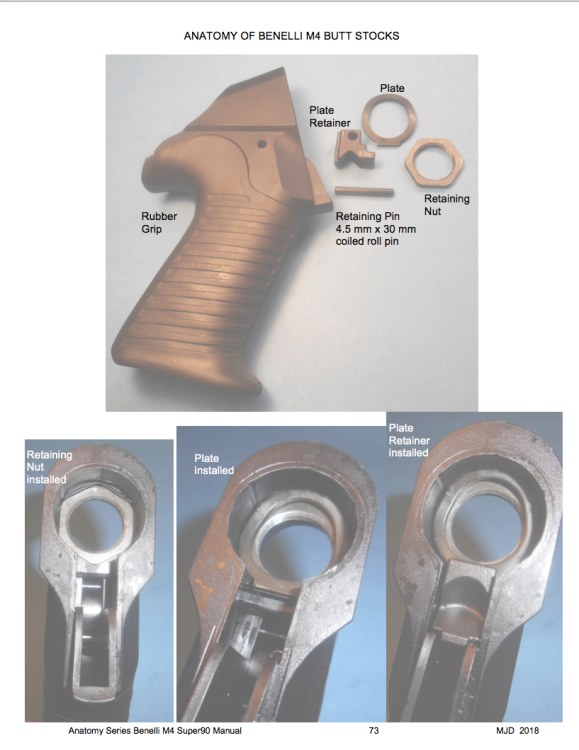
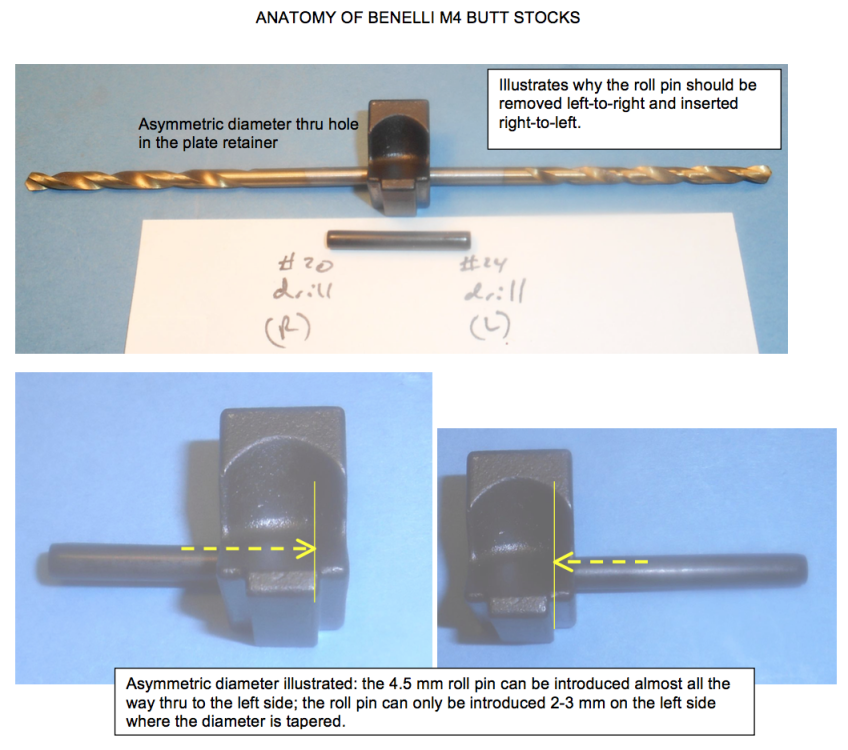
I am not sure I understand the OP question. However, the grip retaining pin is secured by asymmetric apertures on either end of the pin. It can only be removed one way! which is left to right. These might help.

-
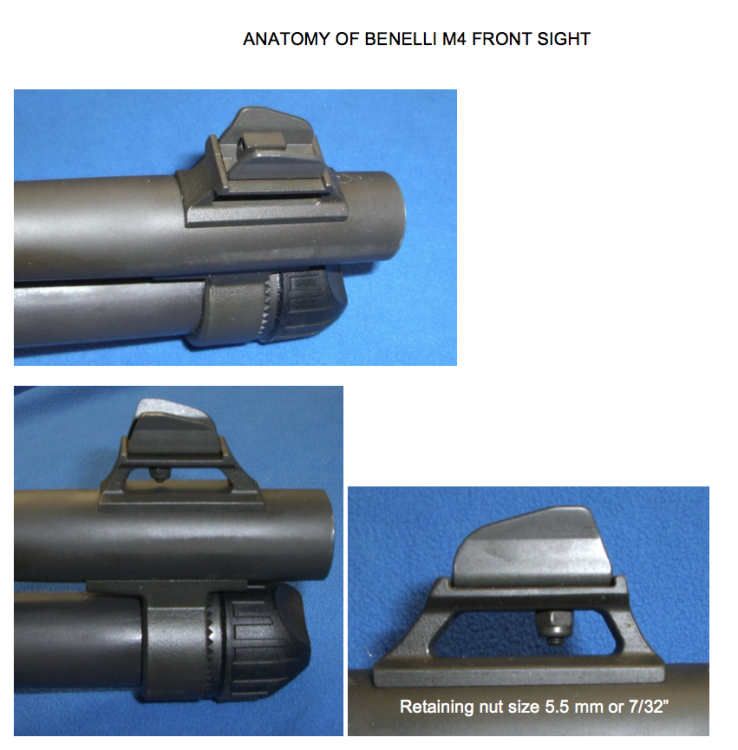
It has always been a 5.5 mm nut on the front sight. Has something changed ? Thanks.
-
1
-
-
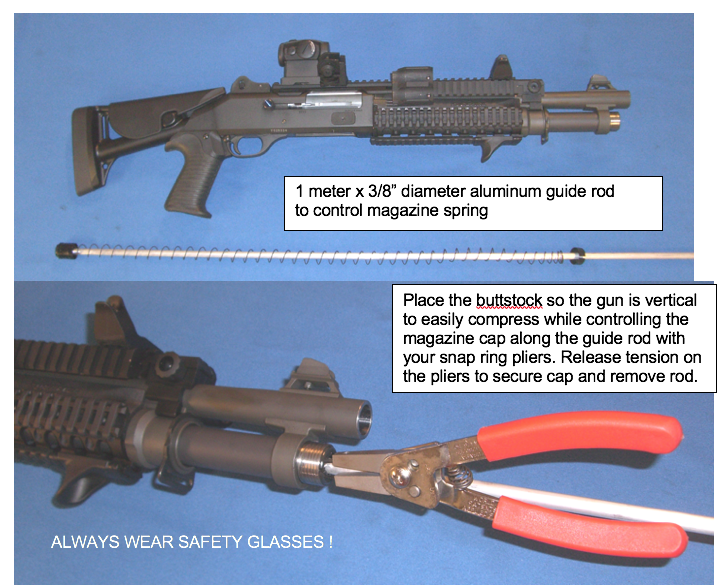
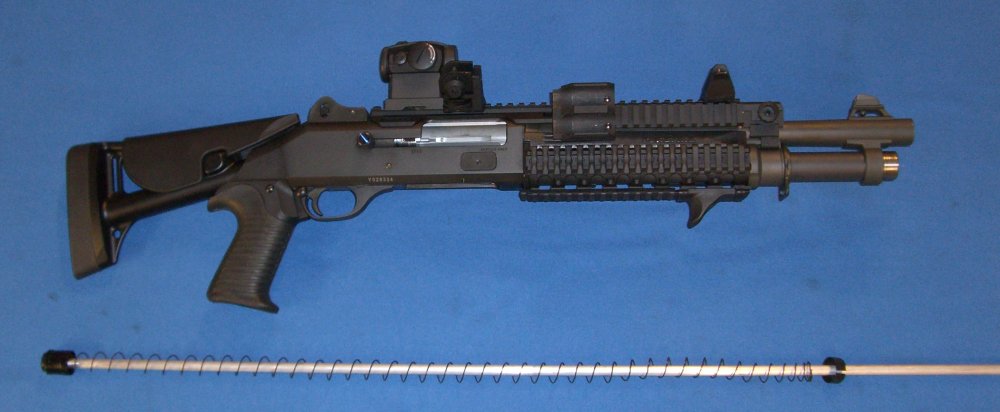
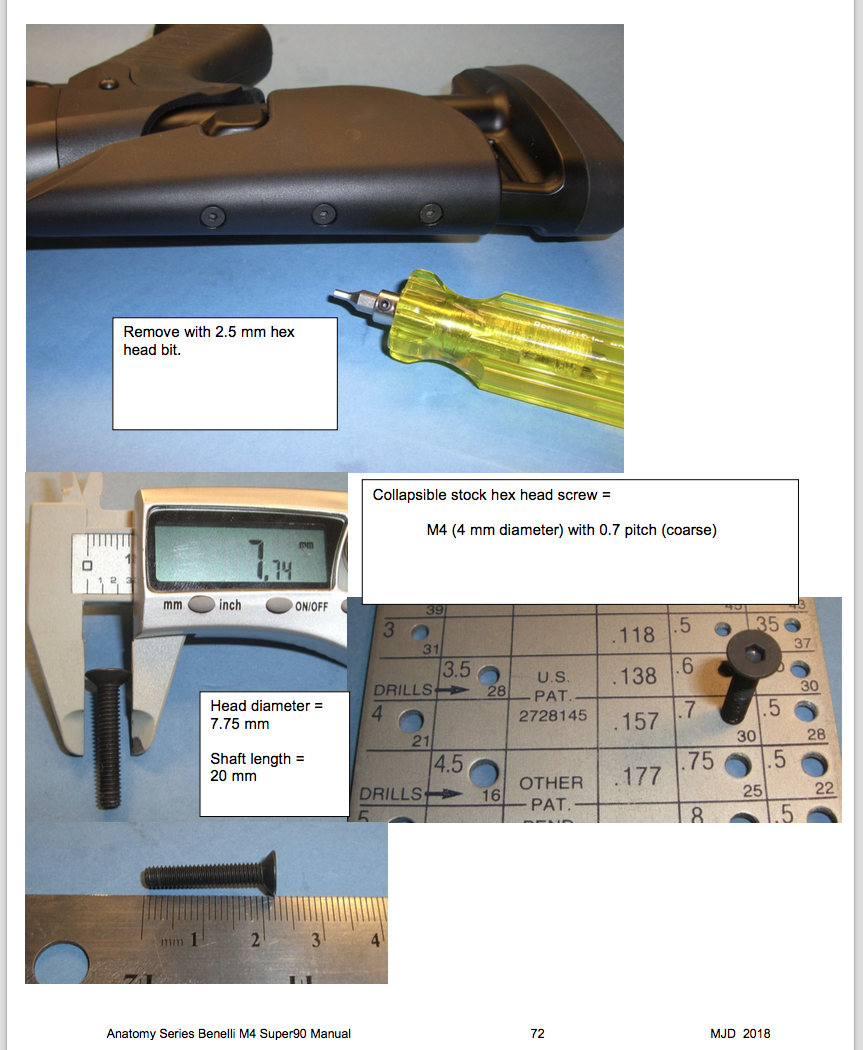
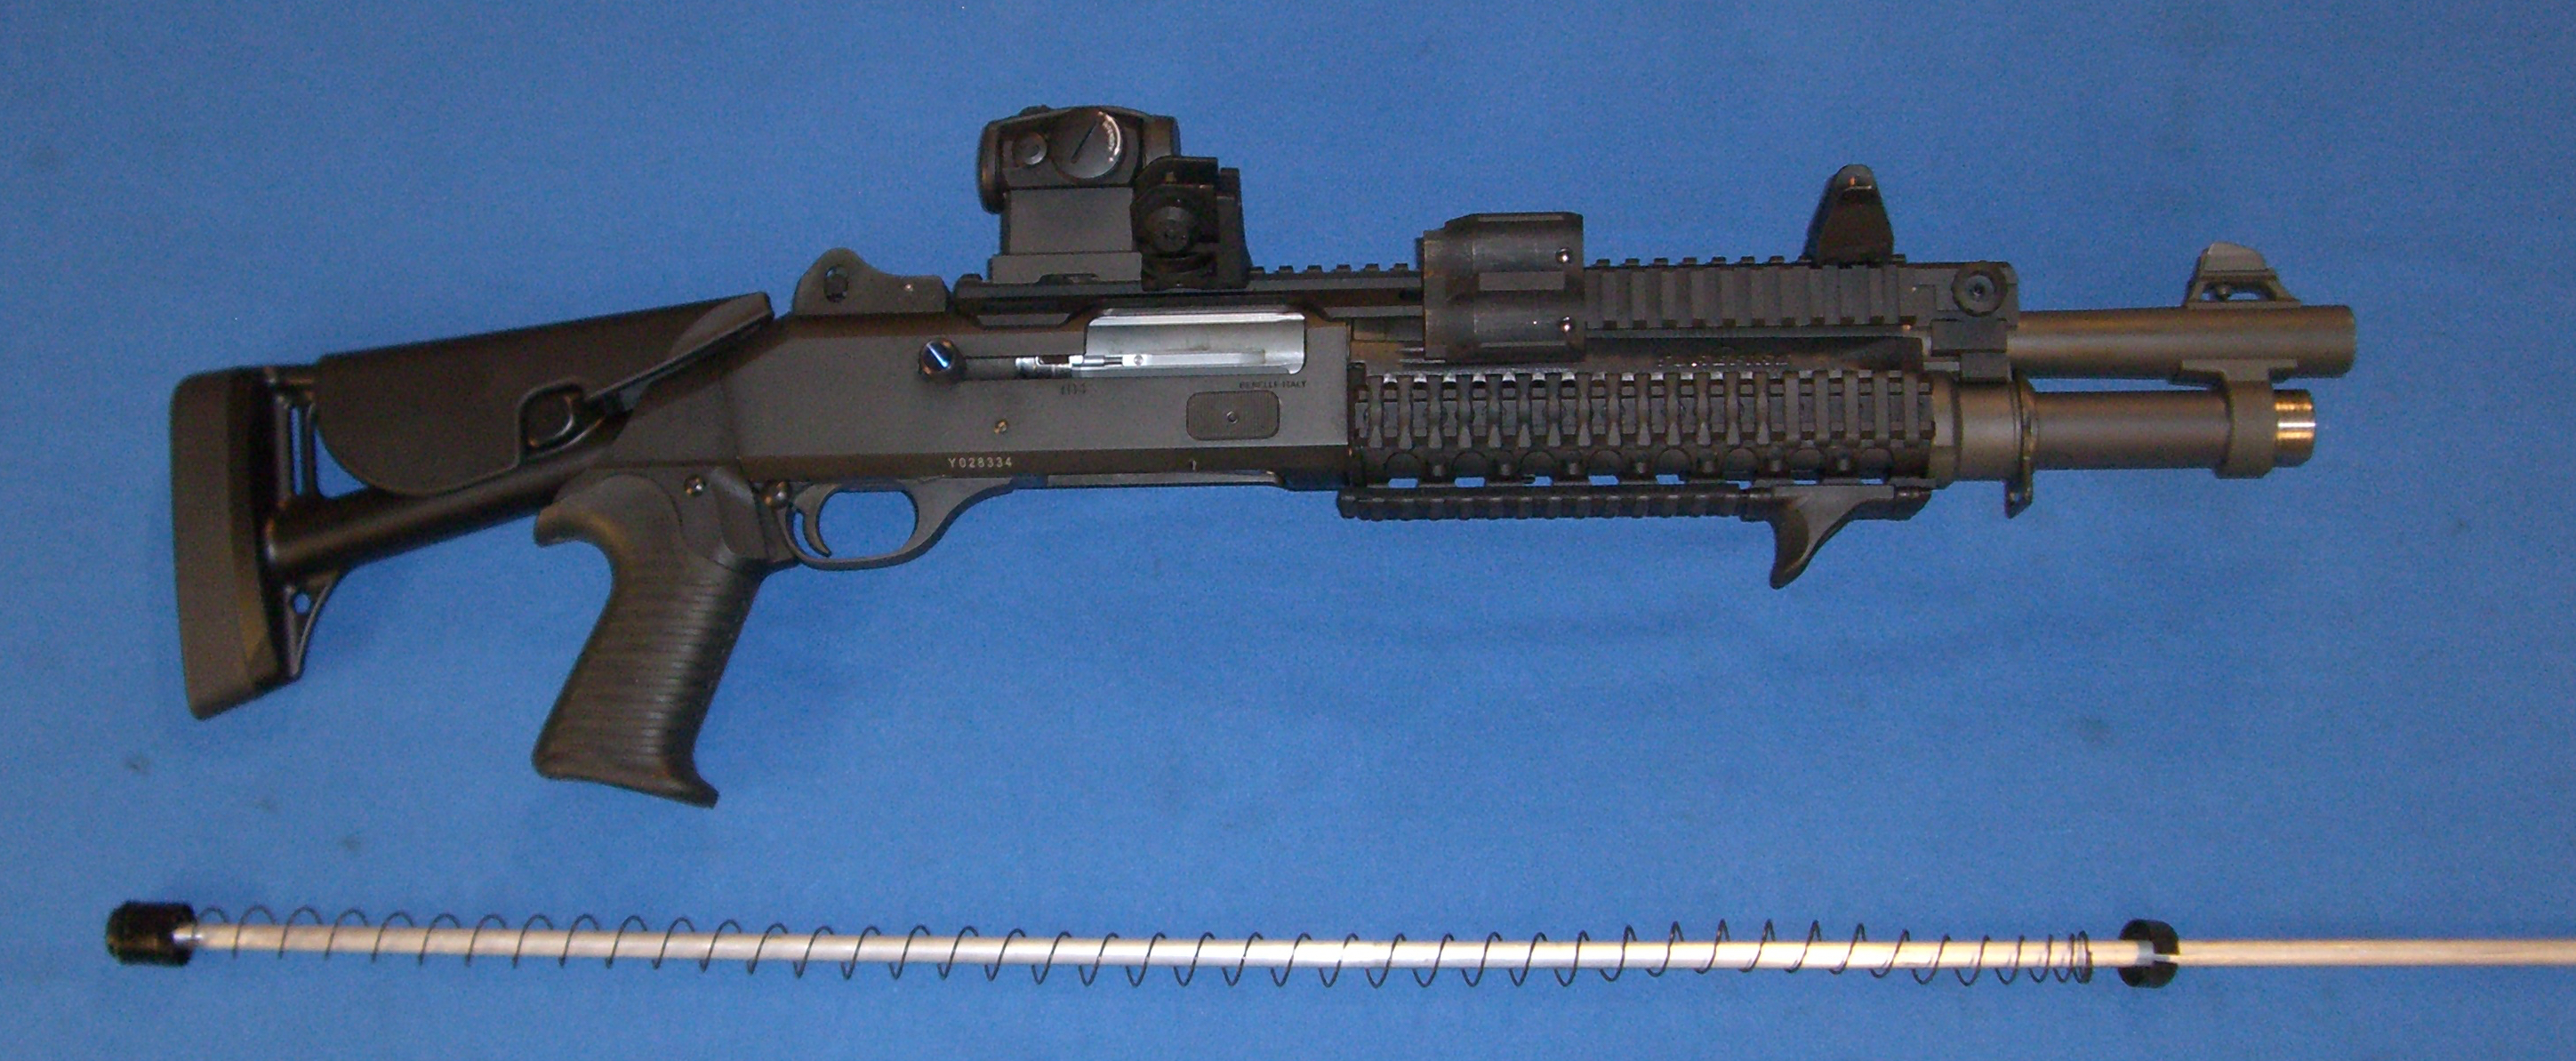
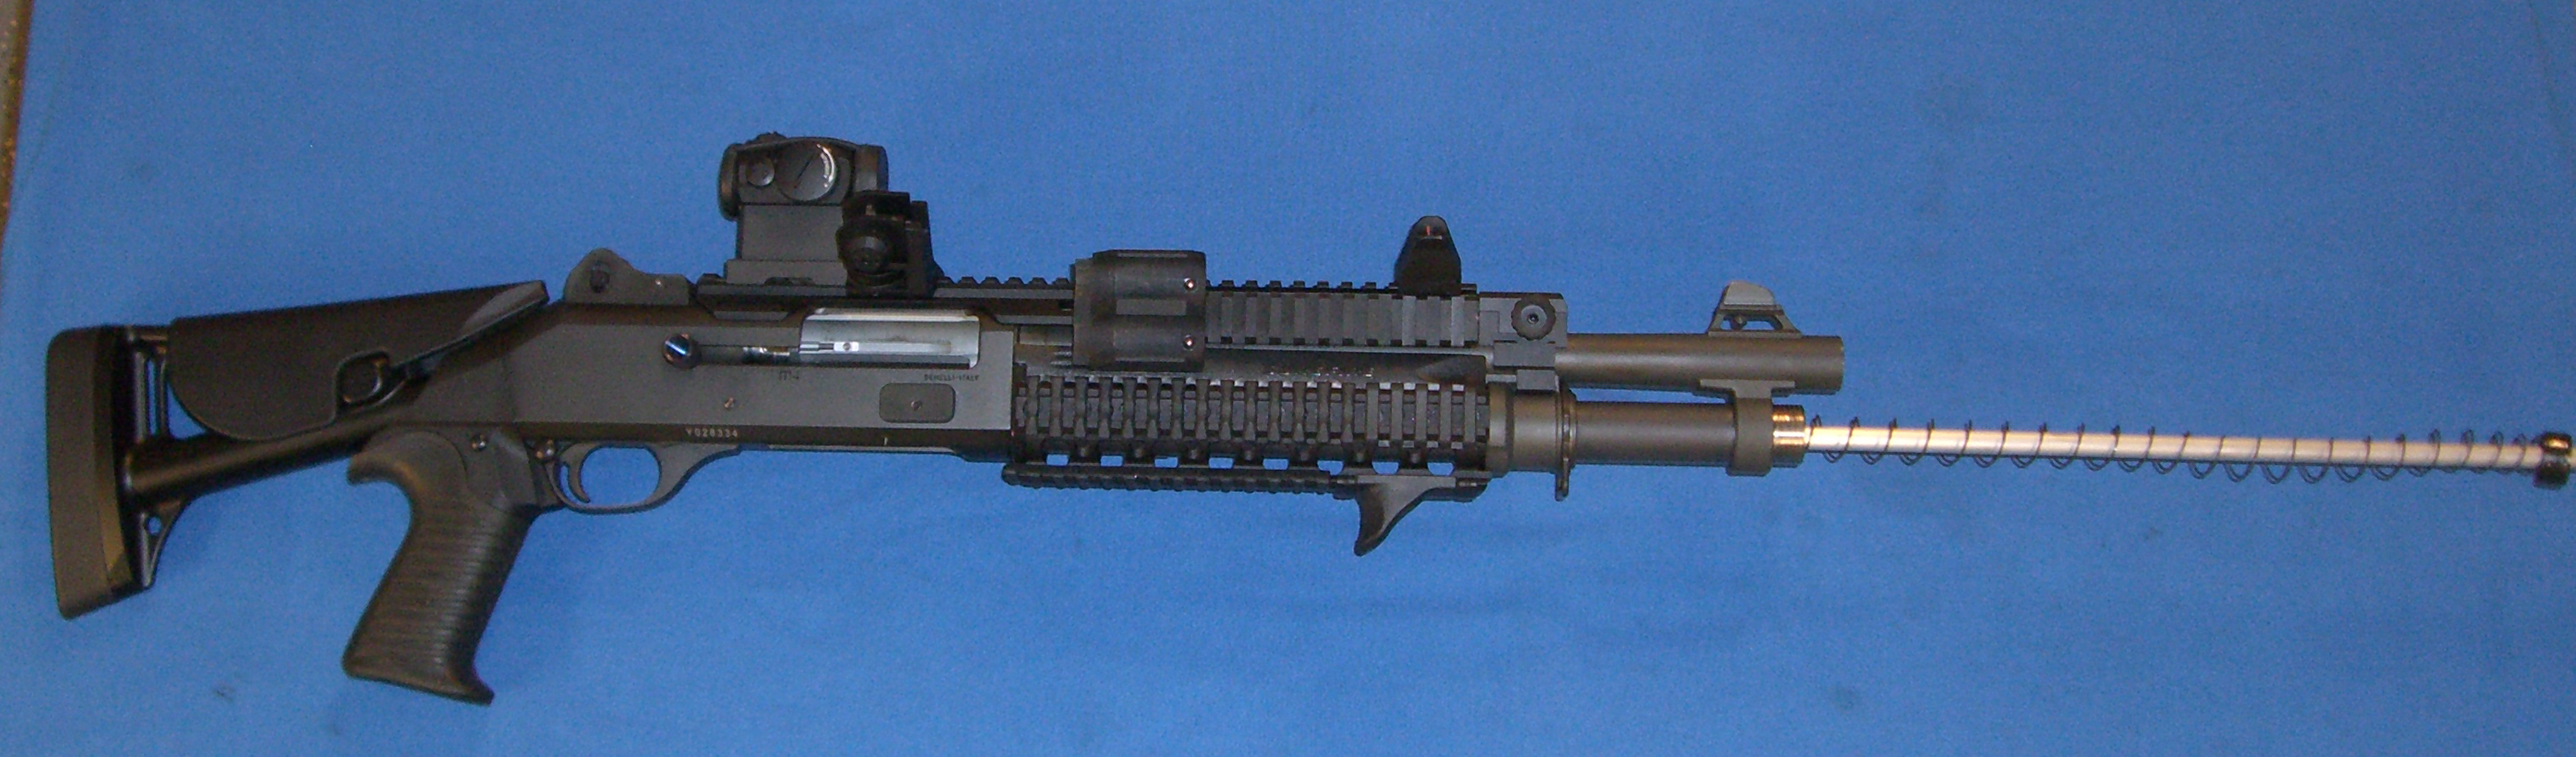
Not just for the M4, but almost all shotgun magazine spring removal / installations that have an aperture in the magazine retaining cap, I employ an aluminum thru- rod with chamfered edges that engage the follower, spring and magazine retaining cap which controls the spring in a predictable linear manner if it gets away from you.


-
3
-
-
Not very many reports of a repetitive specific part failure on this forum. Never heard of a "parts kit" for the M4.....maybe there is one.
-
IF you are hunting them at night, like many do, wear your college alumni sweat shirt.
-
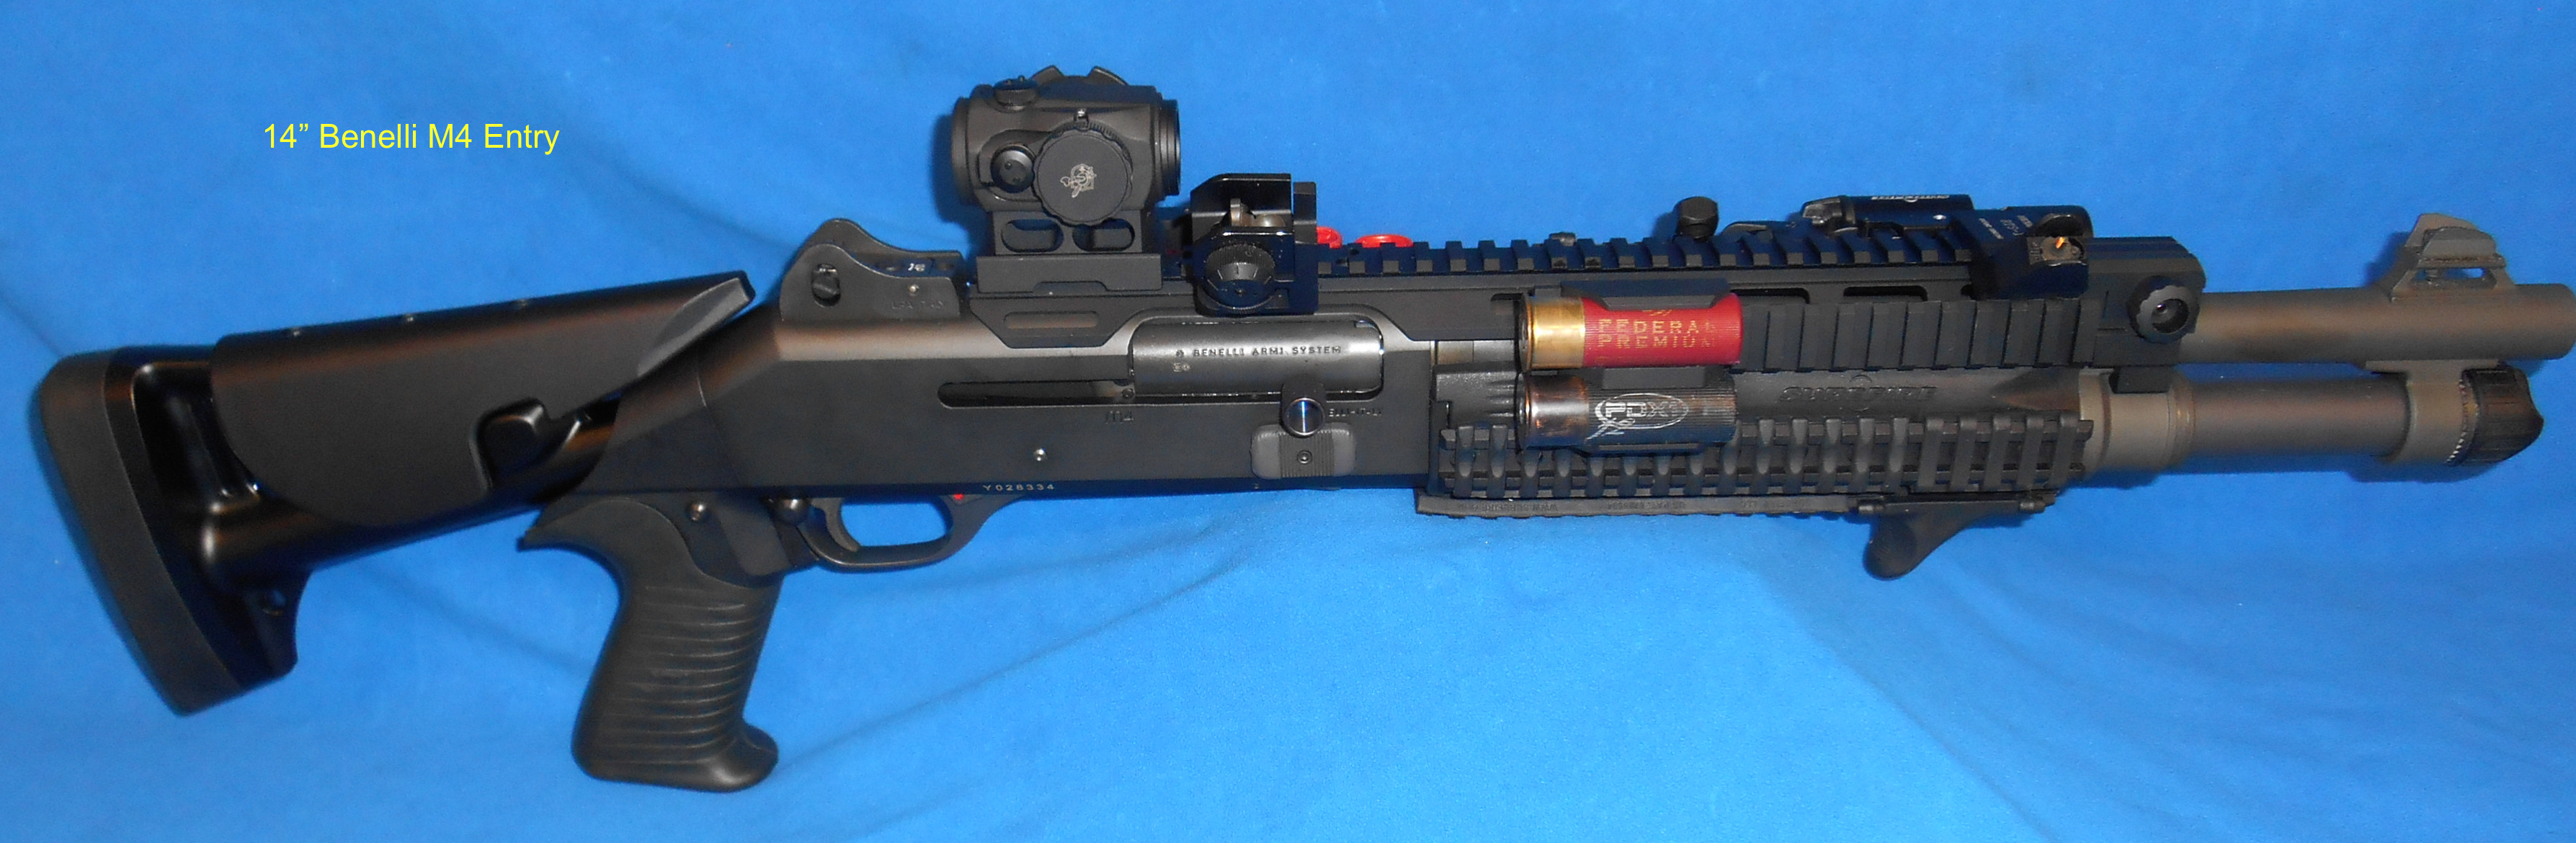
The Advantage is 4". Most often, 4" longer is better, not so in this case.

-
1
-
-
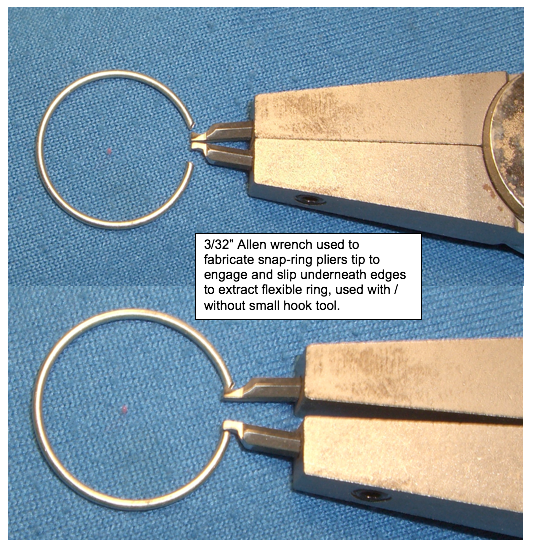
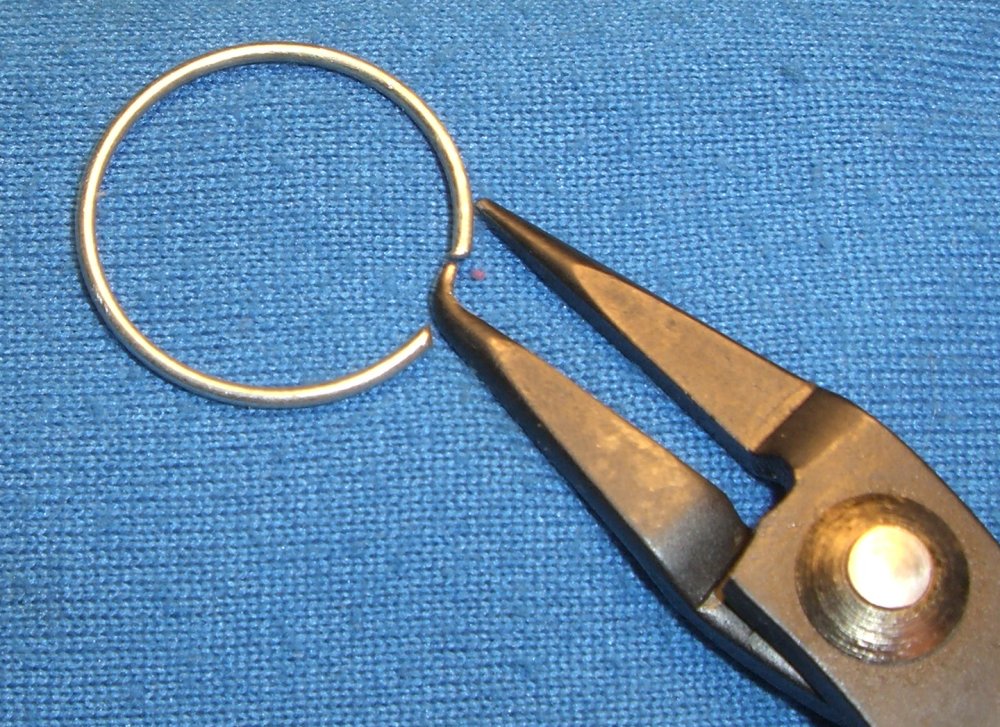
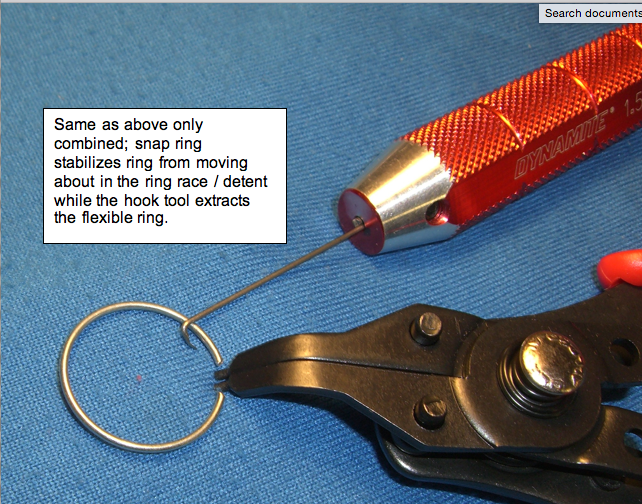
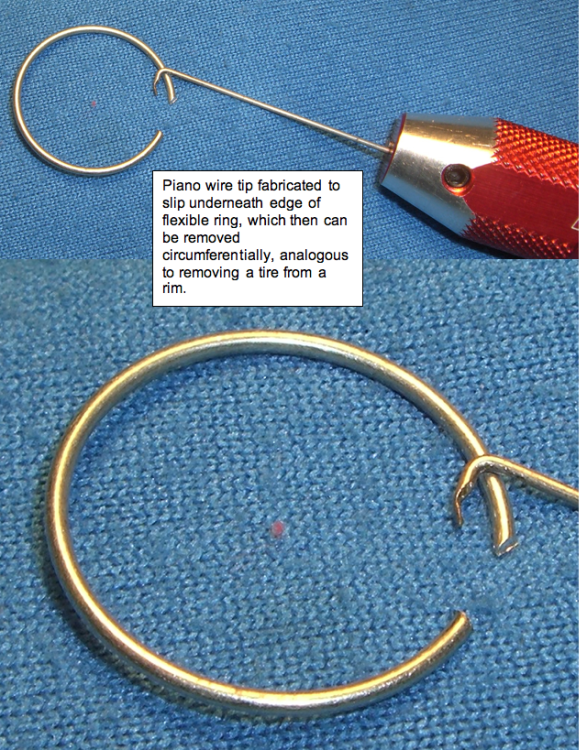
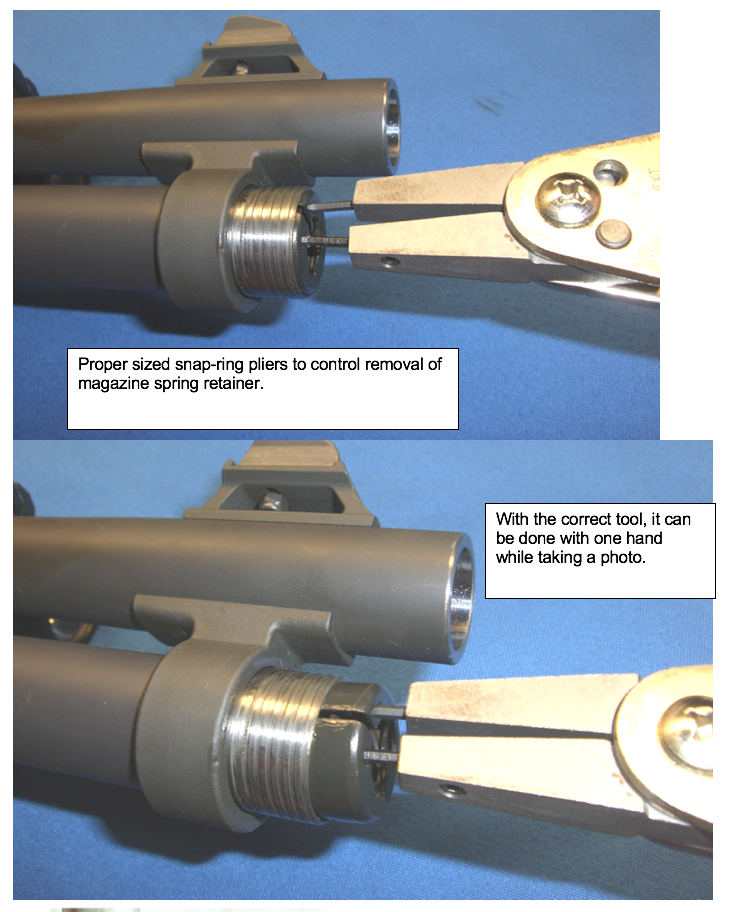
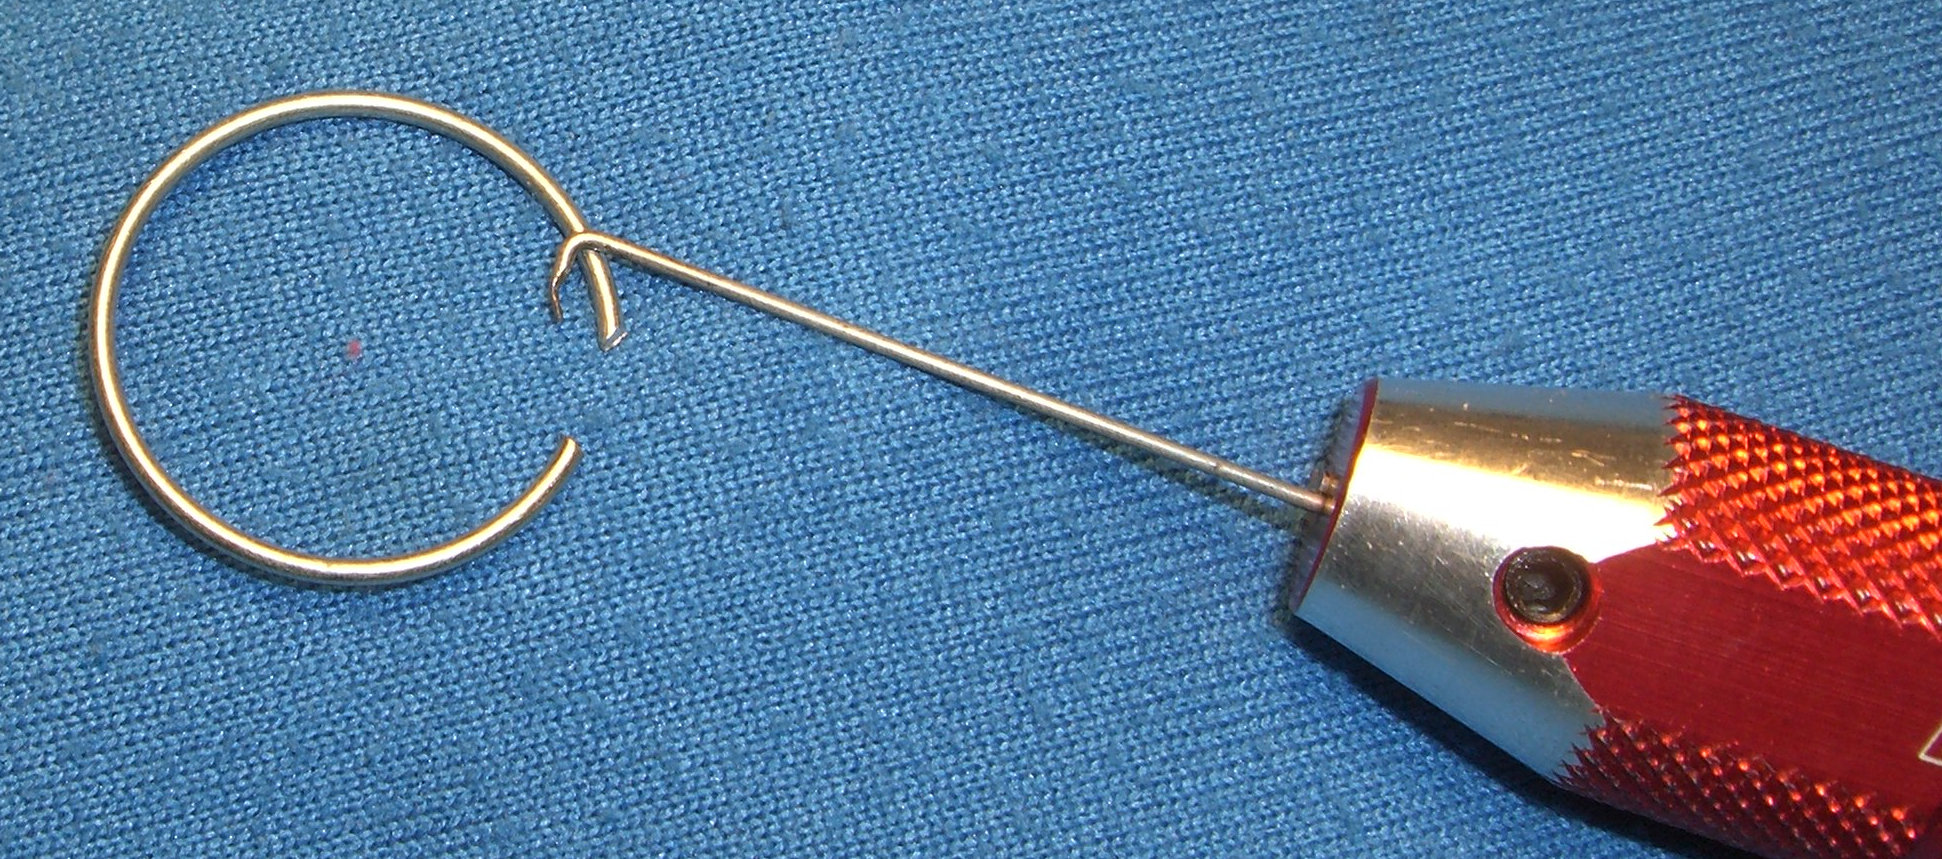
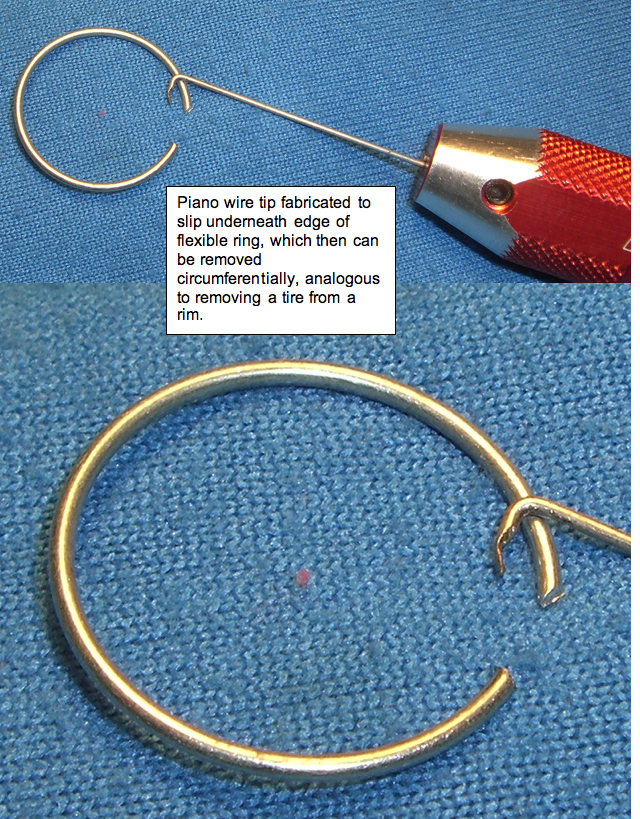
This is a mini-me version of the Benelli M4 "flexible ring" that retains the receiver end of the action spring. Benelli fabrications have a number of examples of simple open "C-clip" styled rings to retain parts; the magazine cap retaining external spring is such an example.
Almost a decade ago (2013), SD and I offered a number of alternative solutions to remove / install said C-clip; not easy.
For the flexible ring removal some alternatives are a fine tipped hook tool to slip under the ring and lift it out, in combination with external snap ring pliers, fine split ring pliers or some other fabrication.
Just tinker with a small tool under the clip and get-it-done. Report back.

-
Ask your attorney IF it's a real concern.
-
On 8/2/2022 at 8:14 PM, MarioB said:
I won't name names, but there are licensed Benelli dealers on YouTube instructing that it's done the way I did it. Not that that makes my case, but I feel justified in pursuing the matter further.
Prior to my posting many years ago describing the fastener system for the Benelli M4 fixed stock, and its disassembly / assembly I never saw any YouTube on the topic....share the Link(s) for Benelli Dealers or it didn't happen.


M4 Pic rail always loosening
in Benelli
Posted
Rocksett would work fine. It's a ceramic adhesive that can withstand 2,000 deg F. of temperature which is why many mfg.'s (e.g. SureFire) of silencers and brakes recommend it to secure the devices. Heat is not how the adhesive is de-activated though; use warm water and soak the parts to release the adhesive.
The picatinny rail steel screw threads have only 4 mm of engagement with the aluminum receiver threads......David v. Goliath.
May have a hard time soaking the bulky receiver in warm water for de-installation.