

benelliwerkes
-
Posts
808 -
Joined
-
Last visited
-
Days Won
24
Posts posted by benelliwerkes
-
-
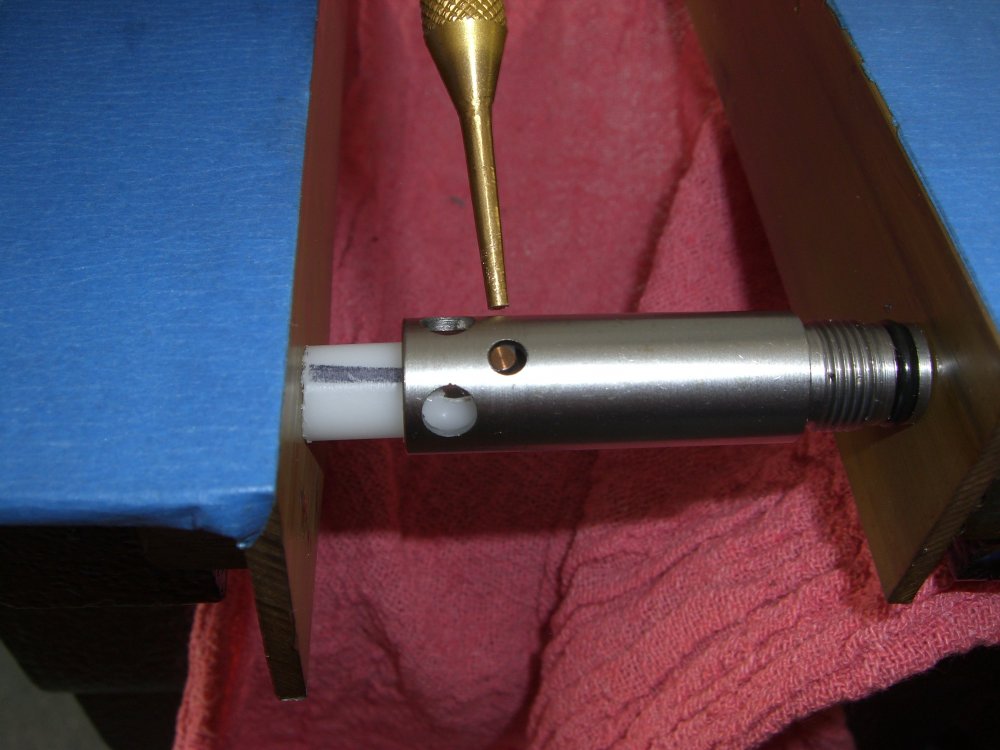
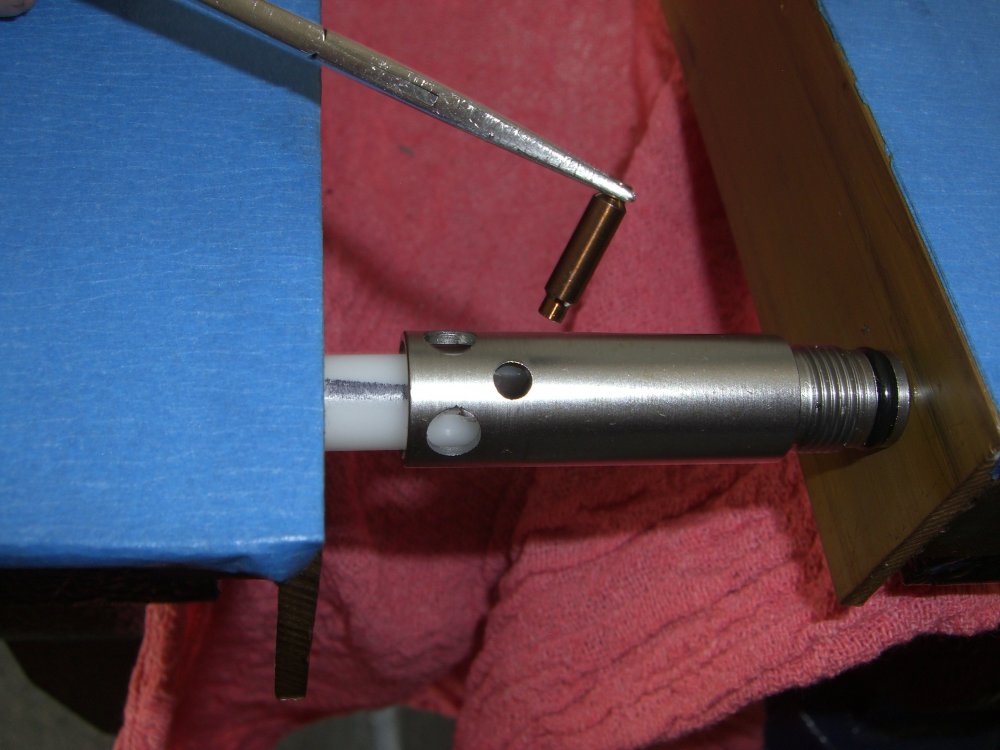
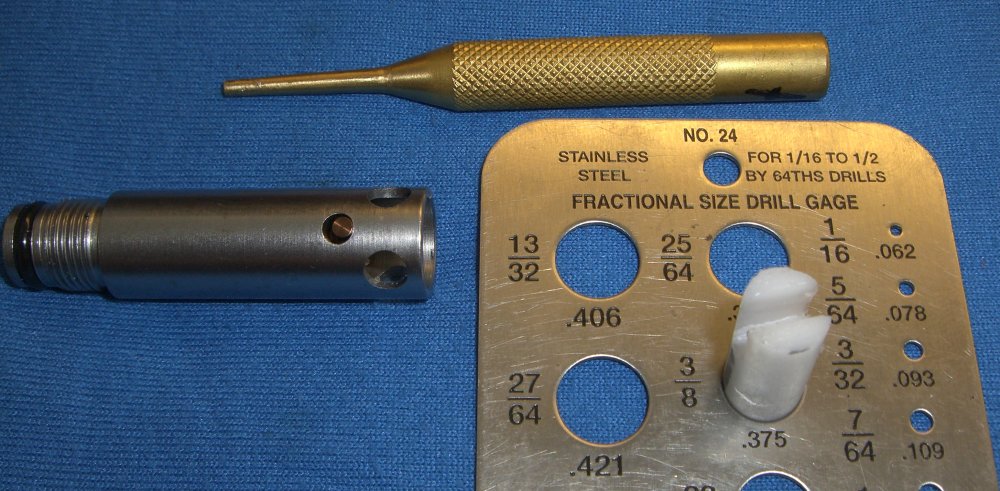
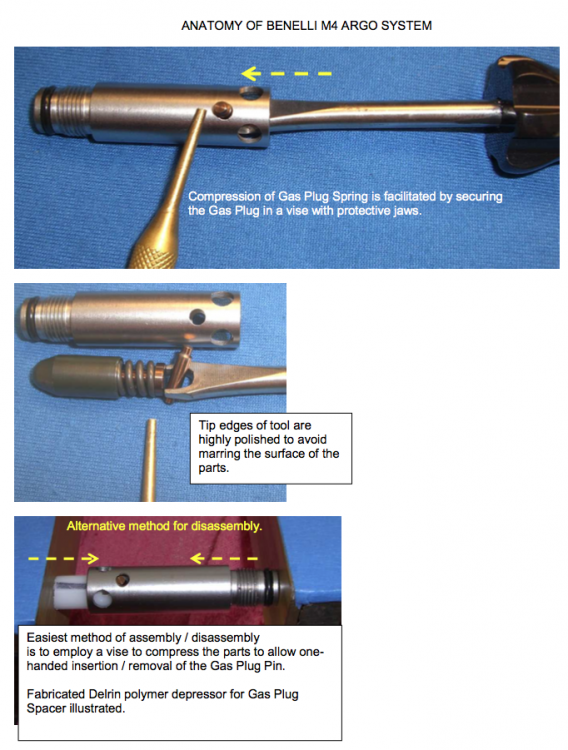
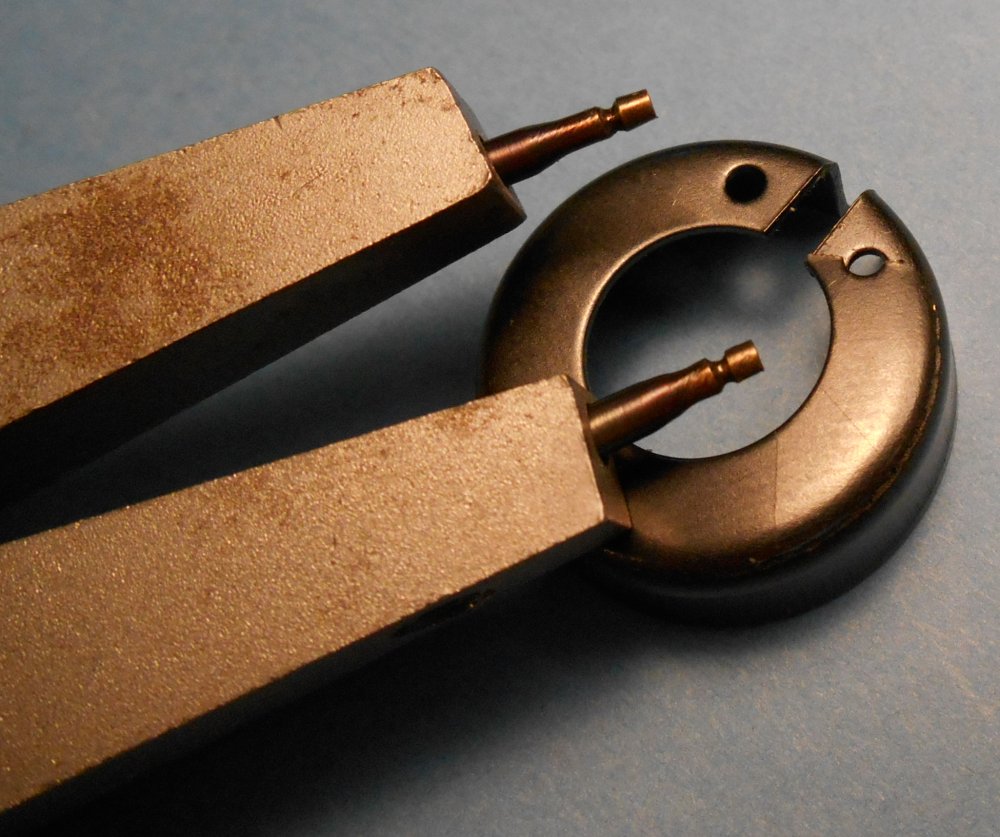
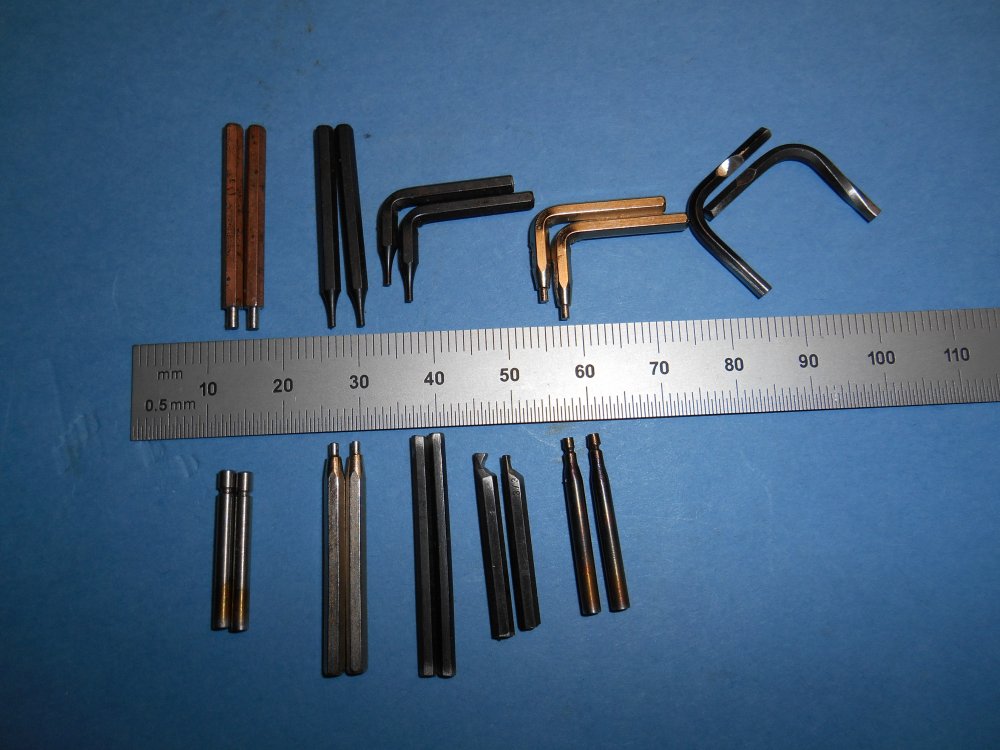
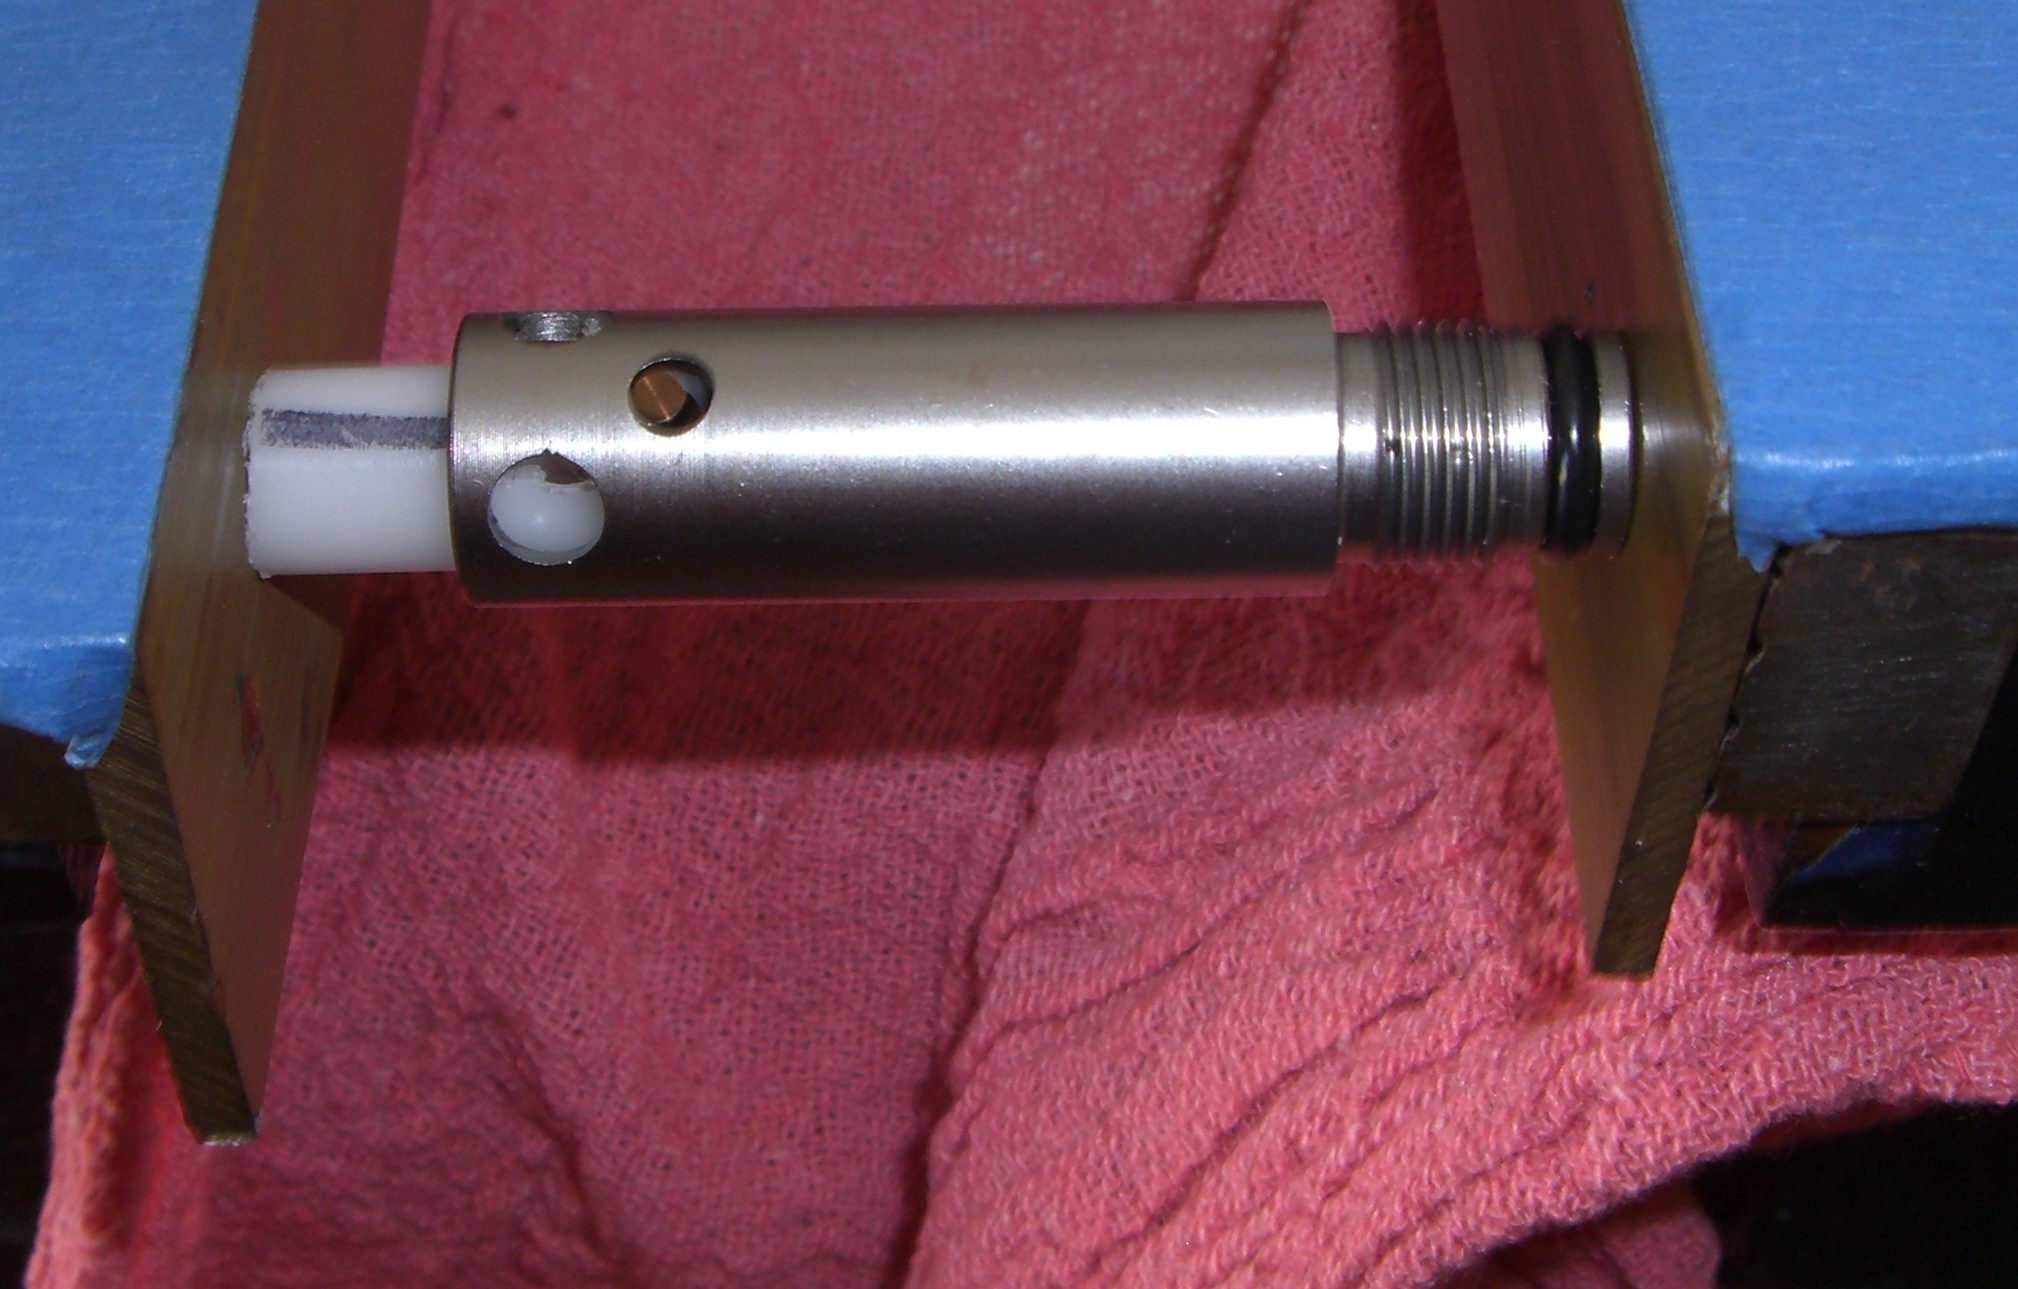
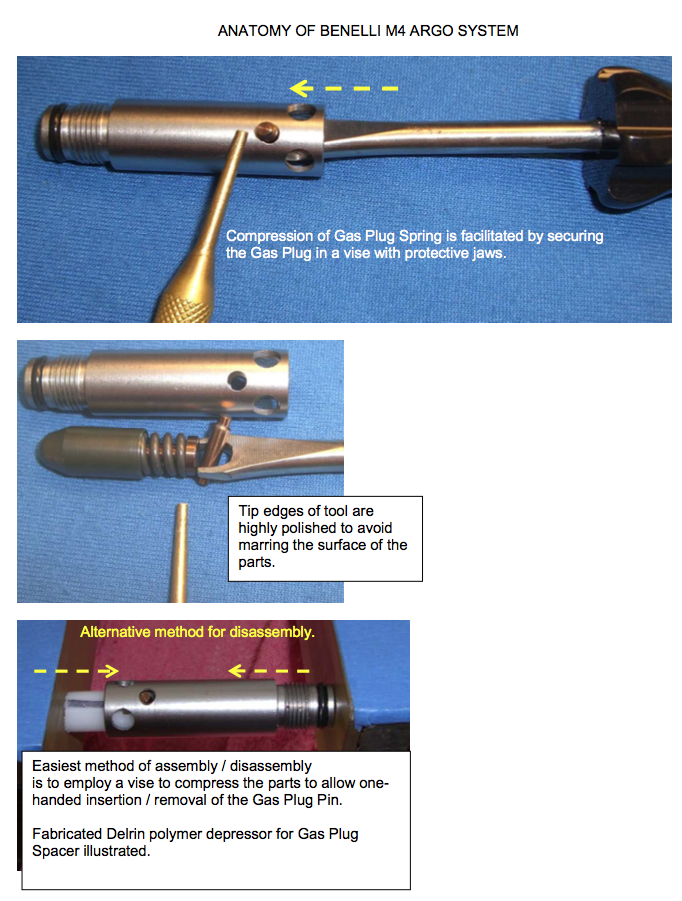
I agree with SD; years ago I fabricated a hand tool that would compress the spring while securing the piston with protecting vise jaw inserts. A simple 3/8" diameter Delrin rod relieved to fit about the retaining pin compressed in a vise allows the retaining pin to be simply removed with a punch tool as all the spring tension has been withdrawn from the pin.

-
 1
1
-
-
Do you have photos of the uncontrolled explosion results ?
-
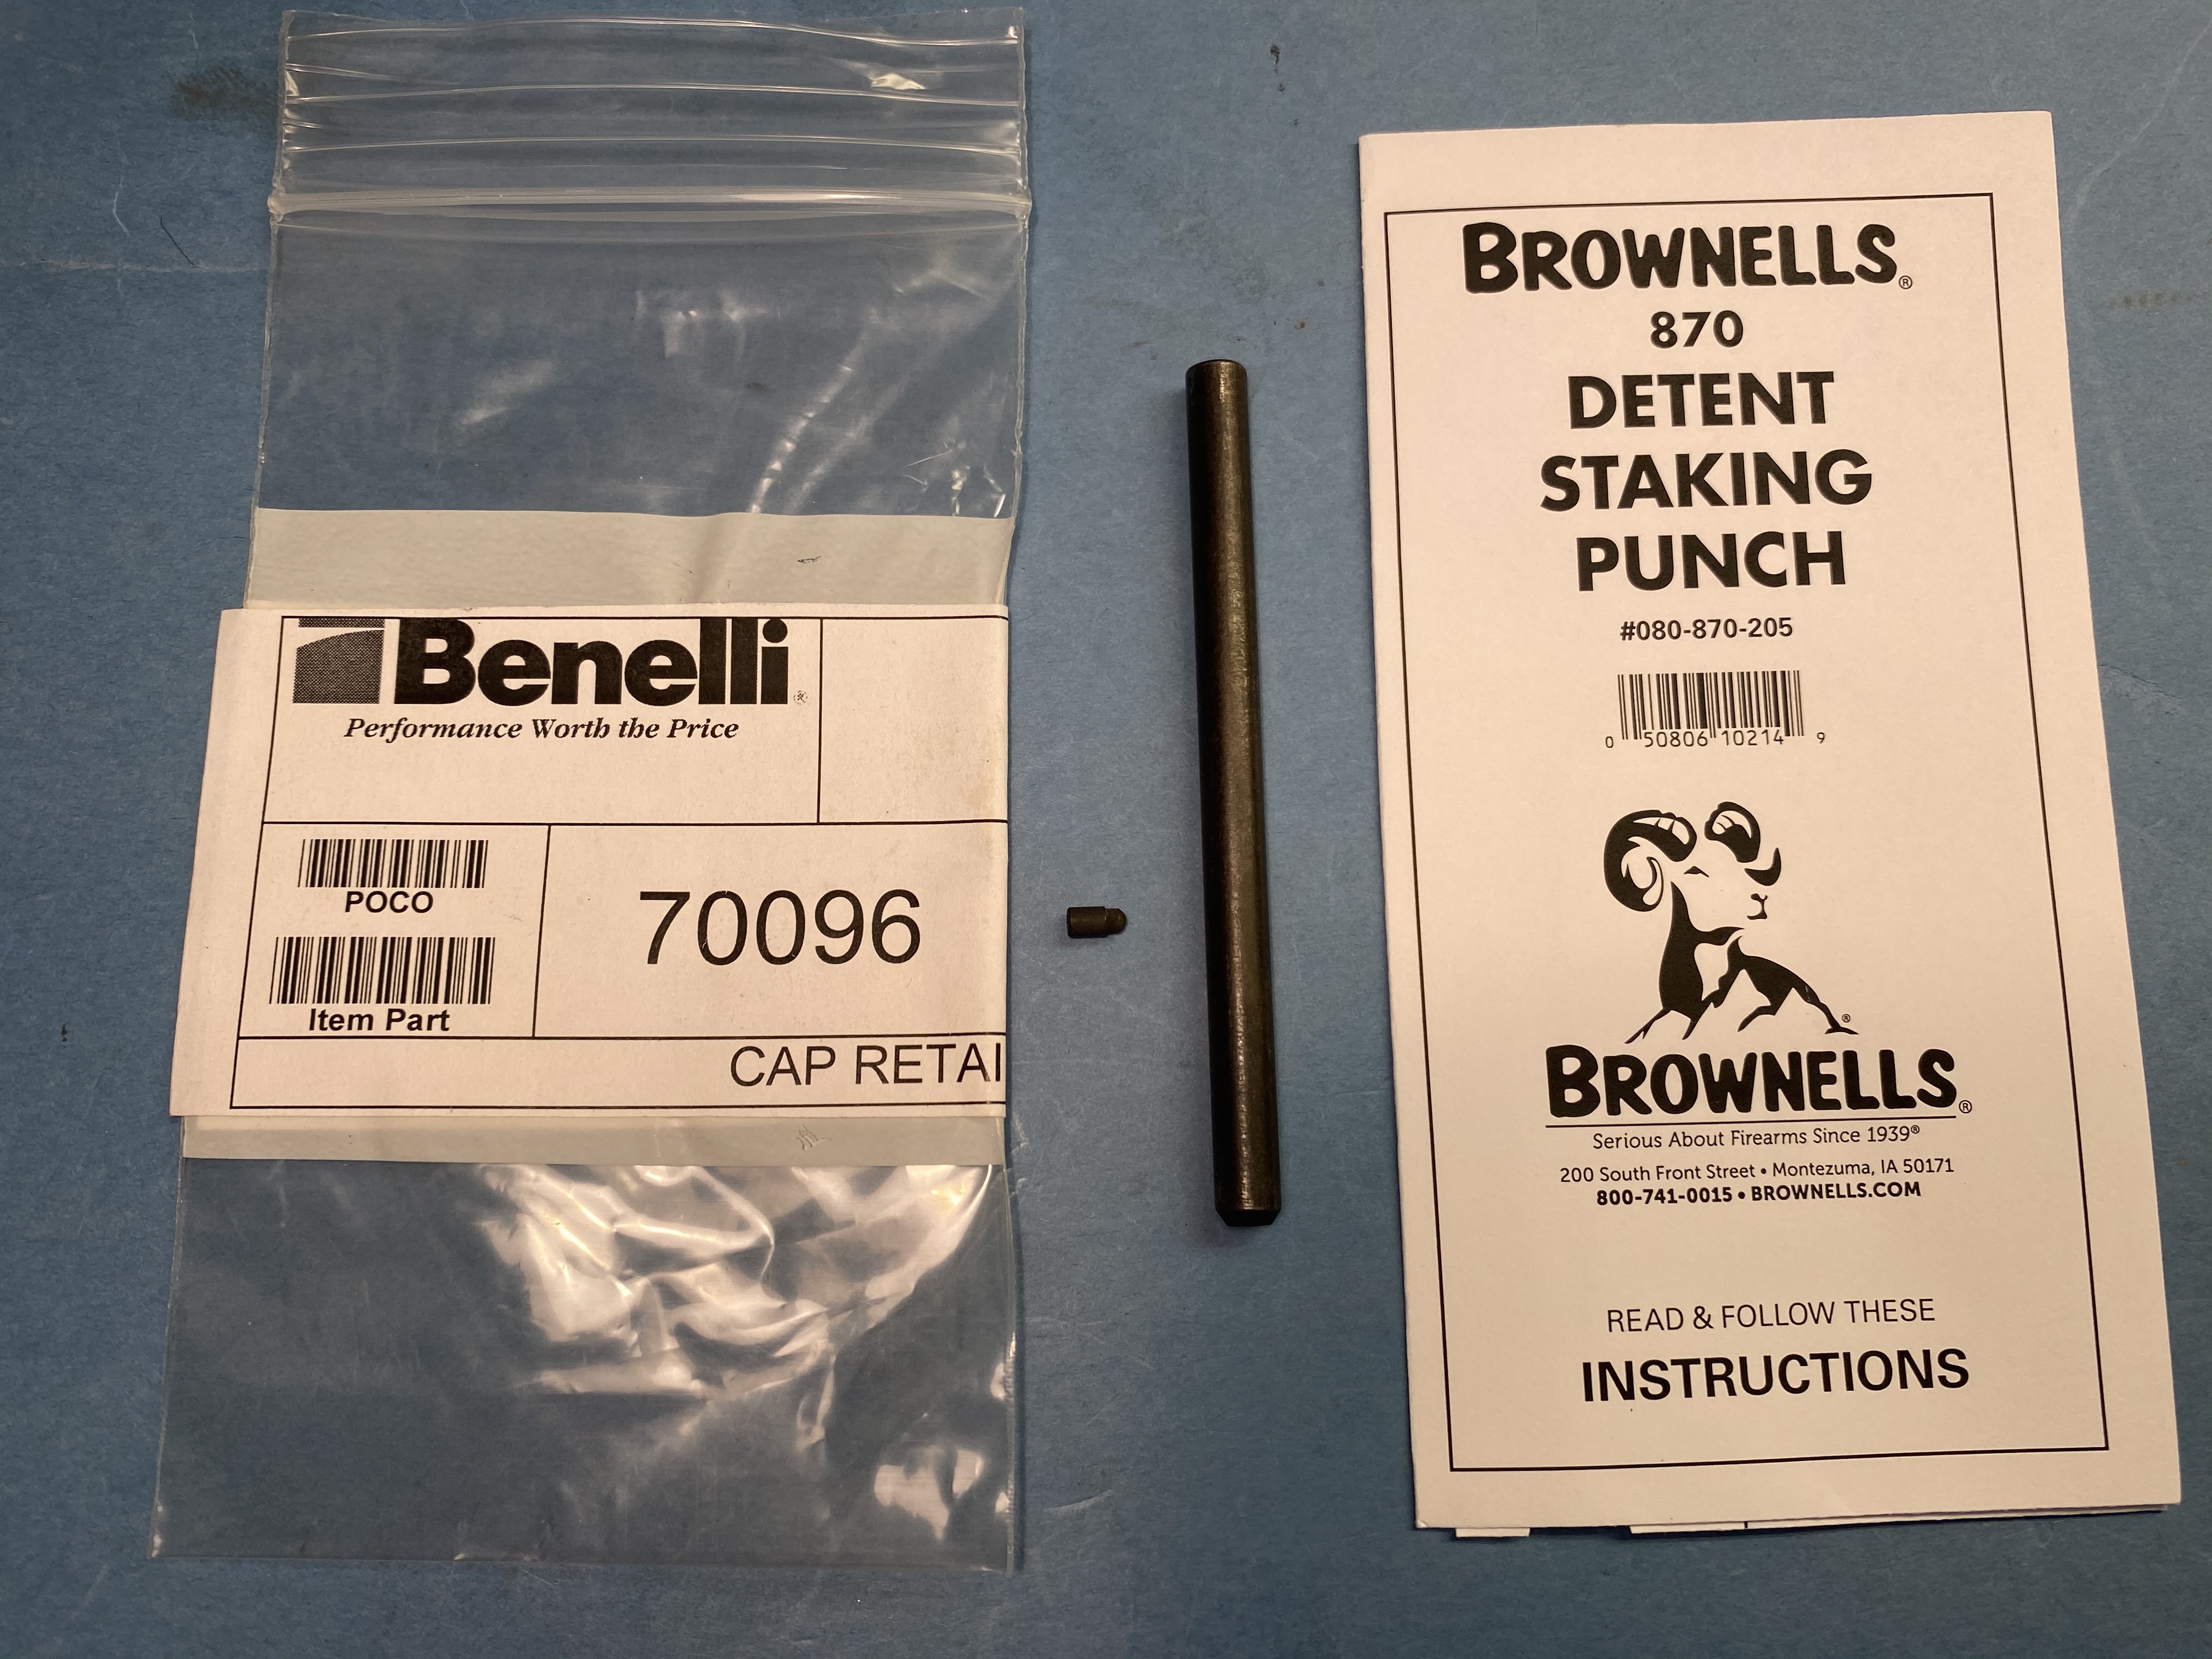
The Remington 870 staking punch should work just fine.


-
2
-
-
^^Got it. Thanks.
-
SD - What tool do you speak of ?
-
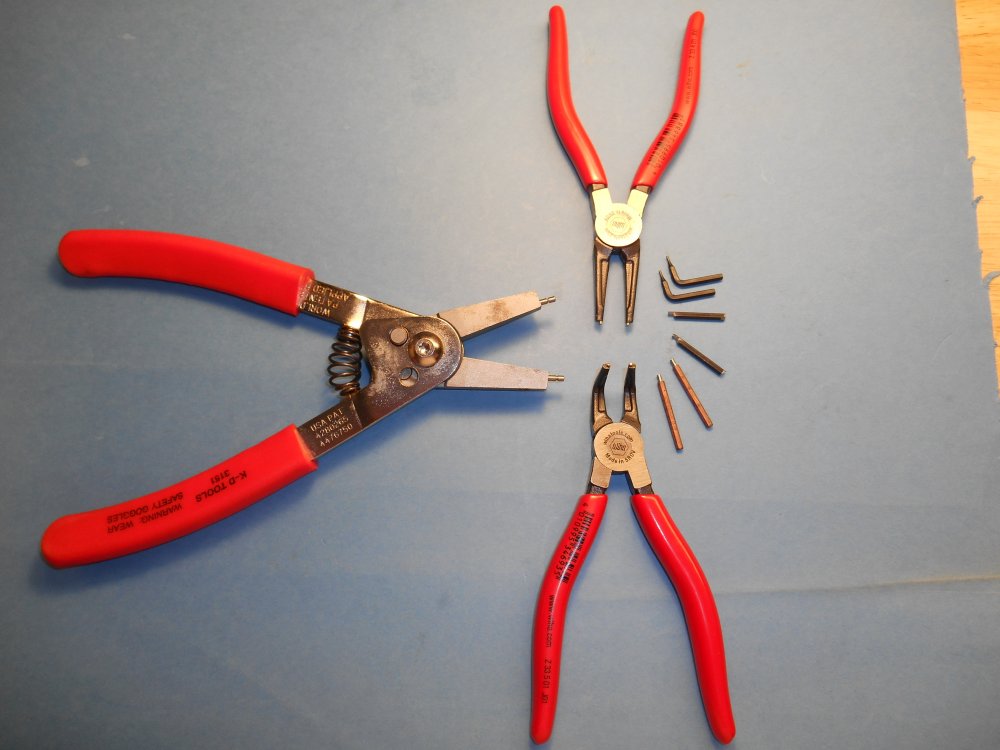
I'm late to the party on this thread but I like to use Wiha German brand small snap ring pliers, external / internal variants. I have also fashioned a variety of
tips to fit in the snap ring pliers that have a set screw to change the tips; the more you tinker with firearms the more often the occasion to have just the right pair of tips to make the expletives trend to zero; that's a happy space. Buy USA whenever possible but not always a good offering available.

-
1
-
-
^^I have never asked the factory parts guys if there is a part # to purchase.
-
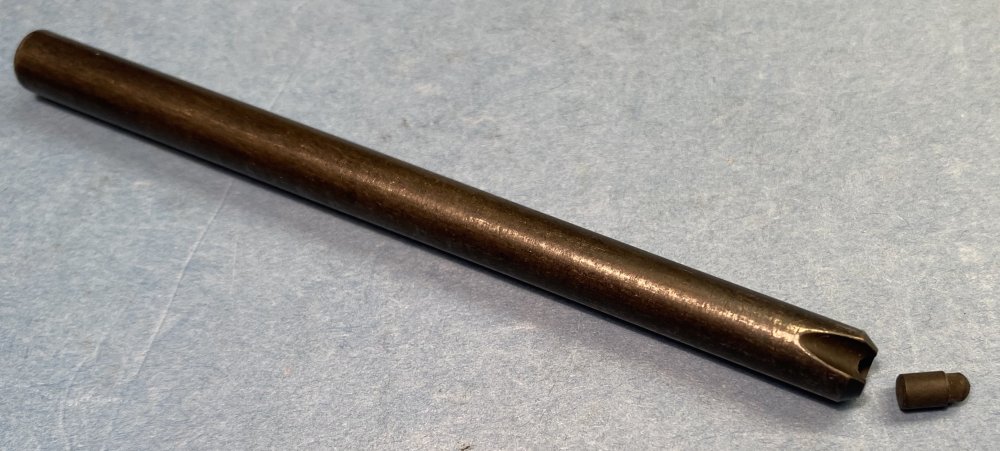
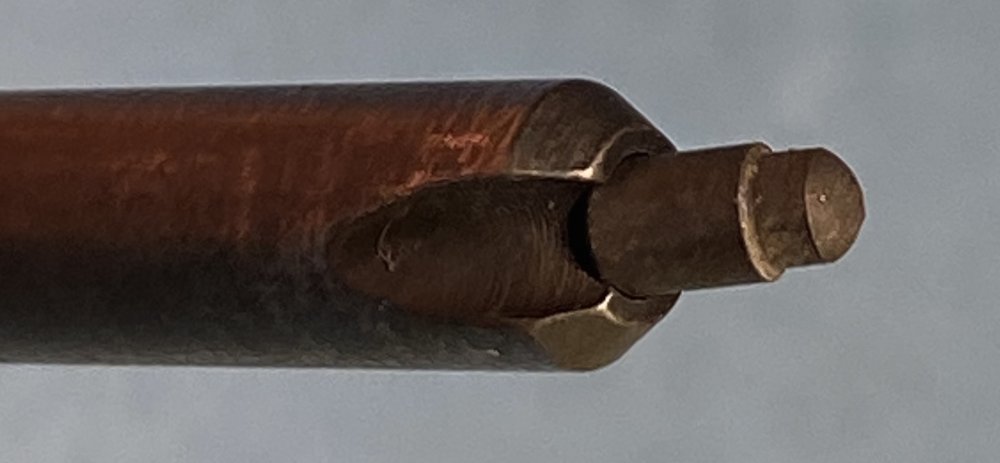
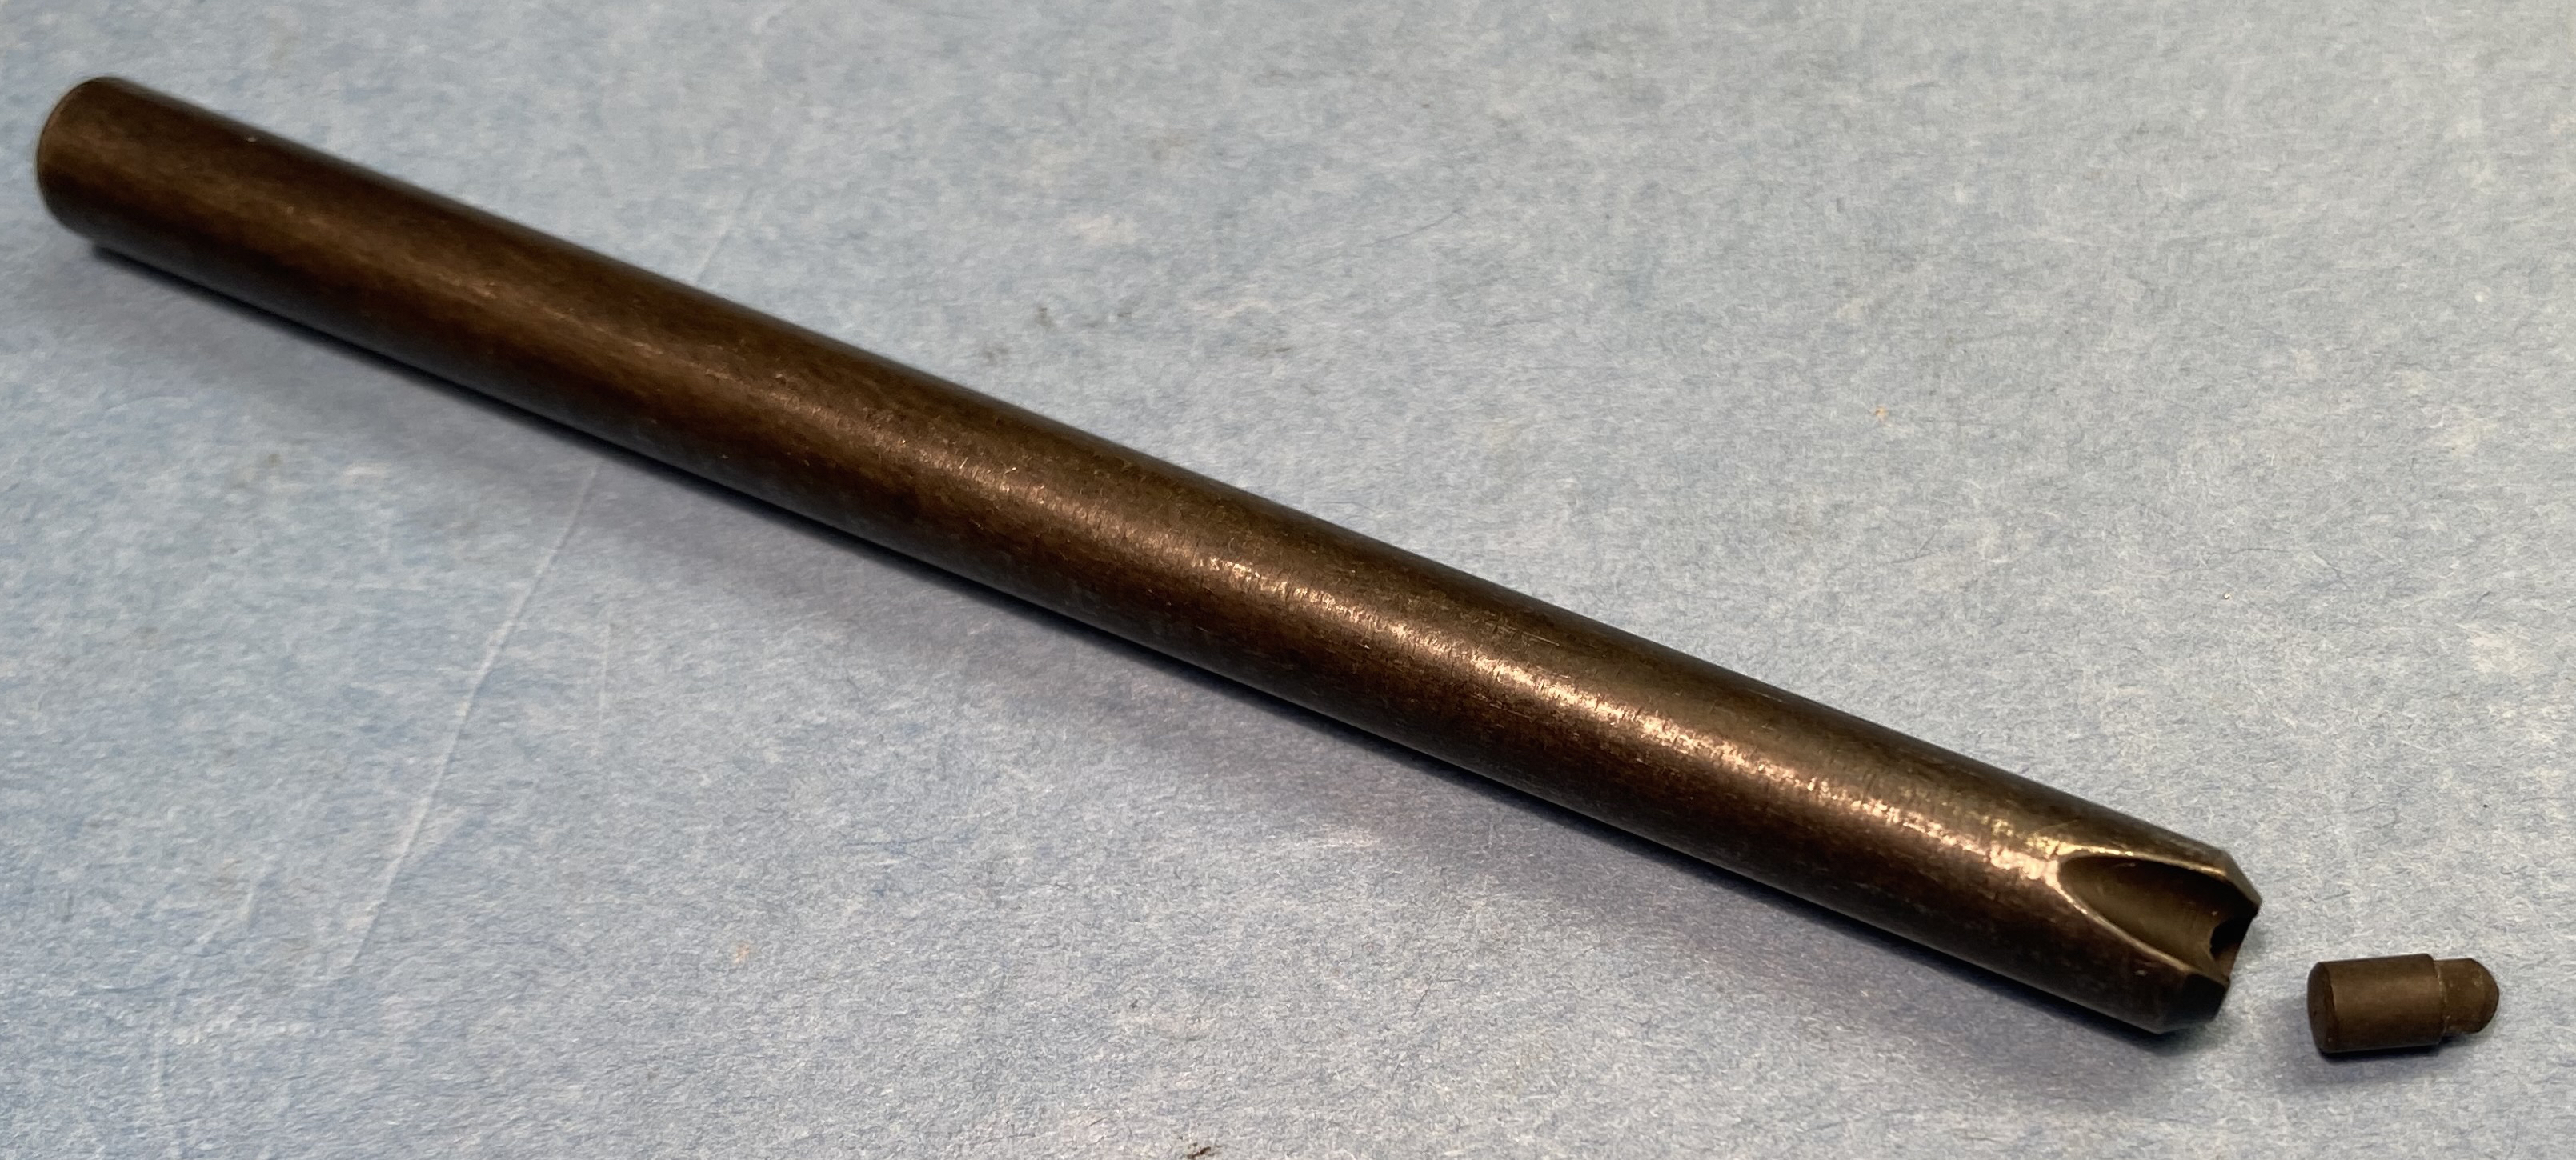
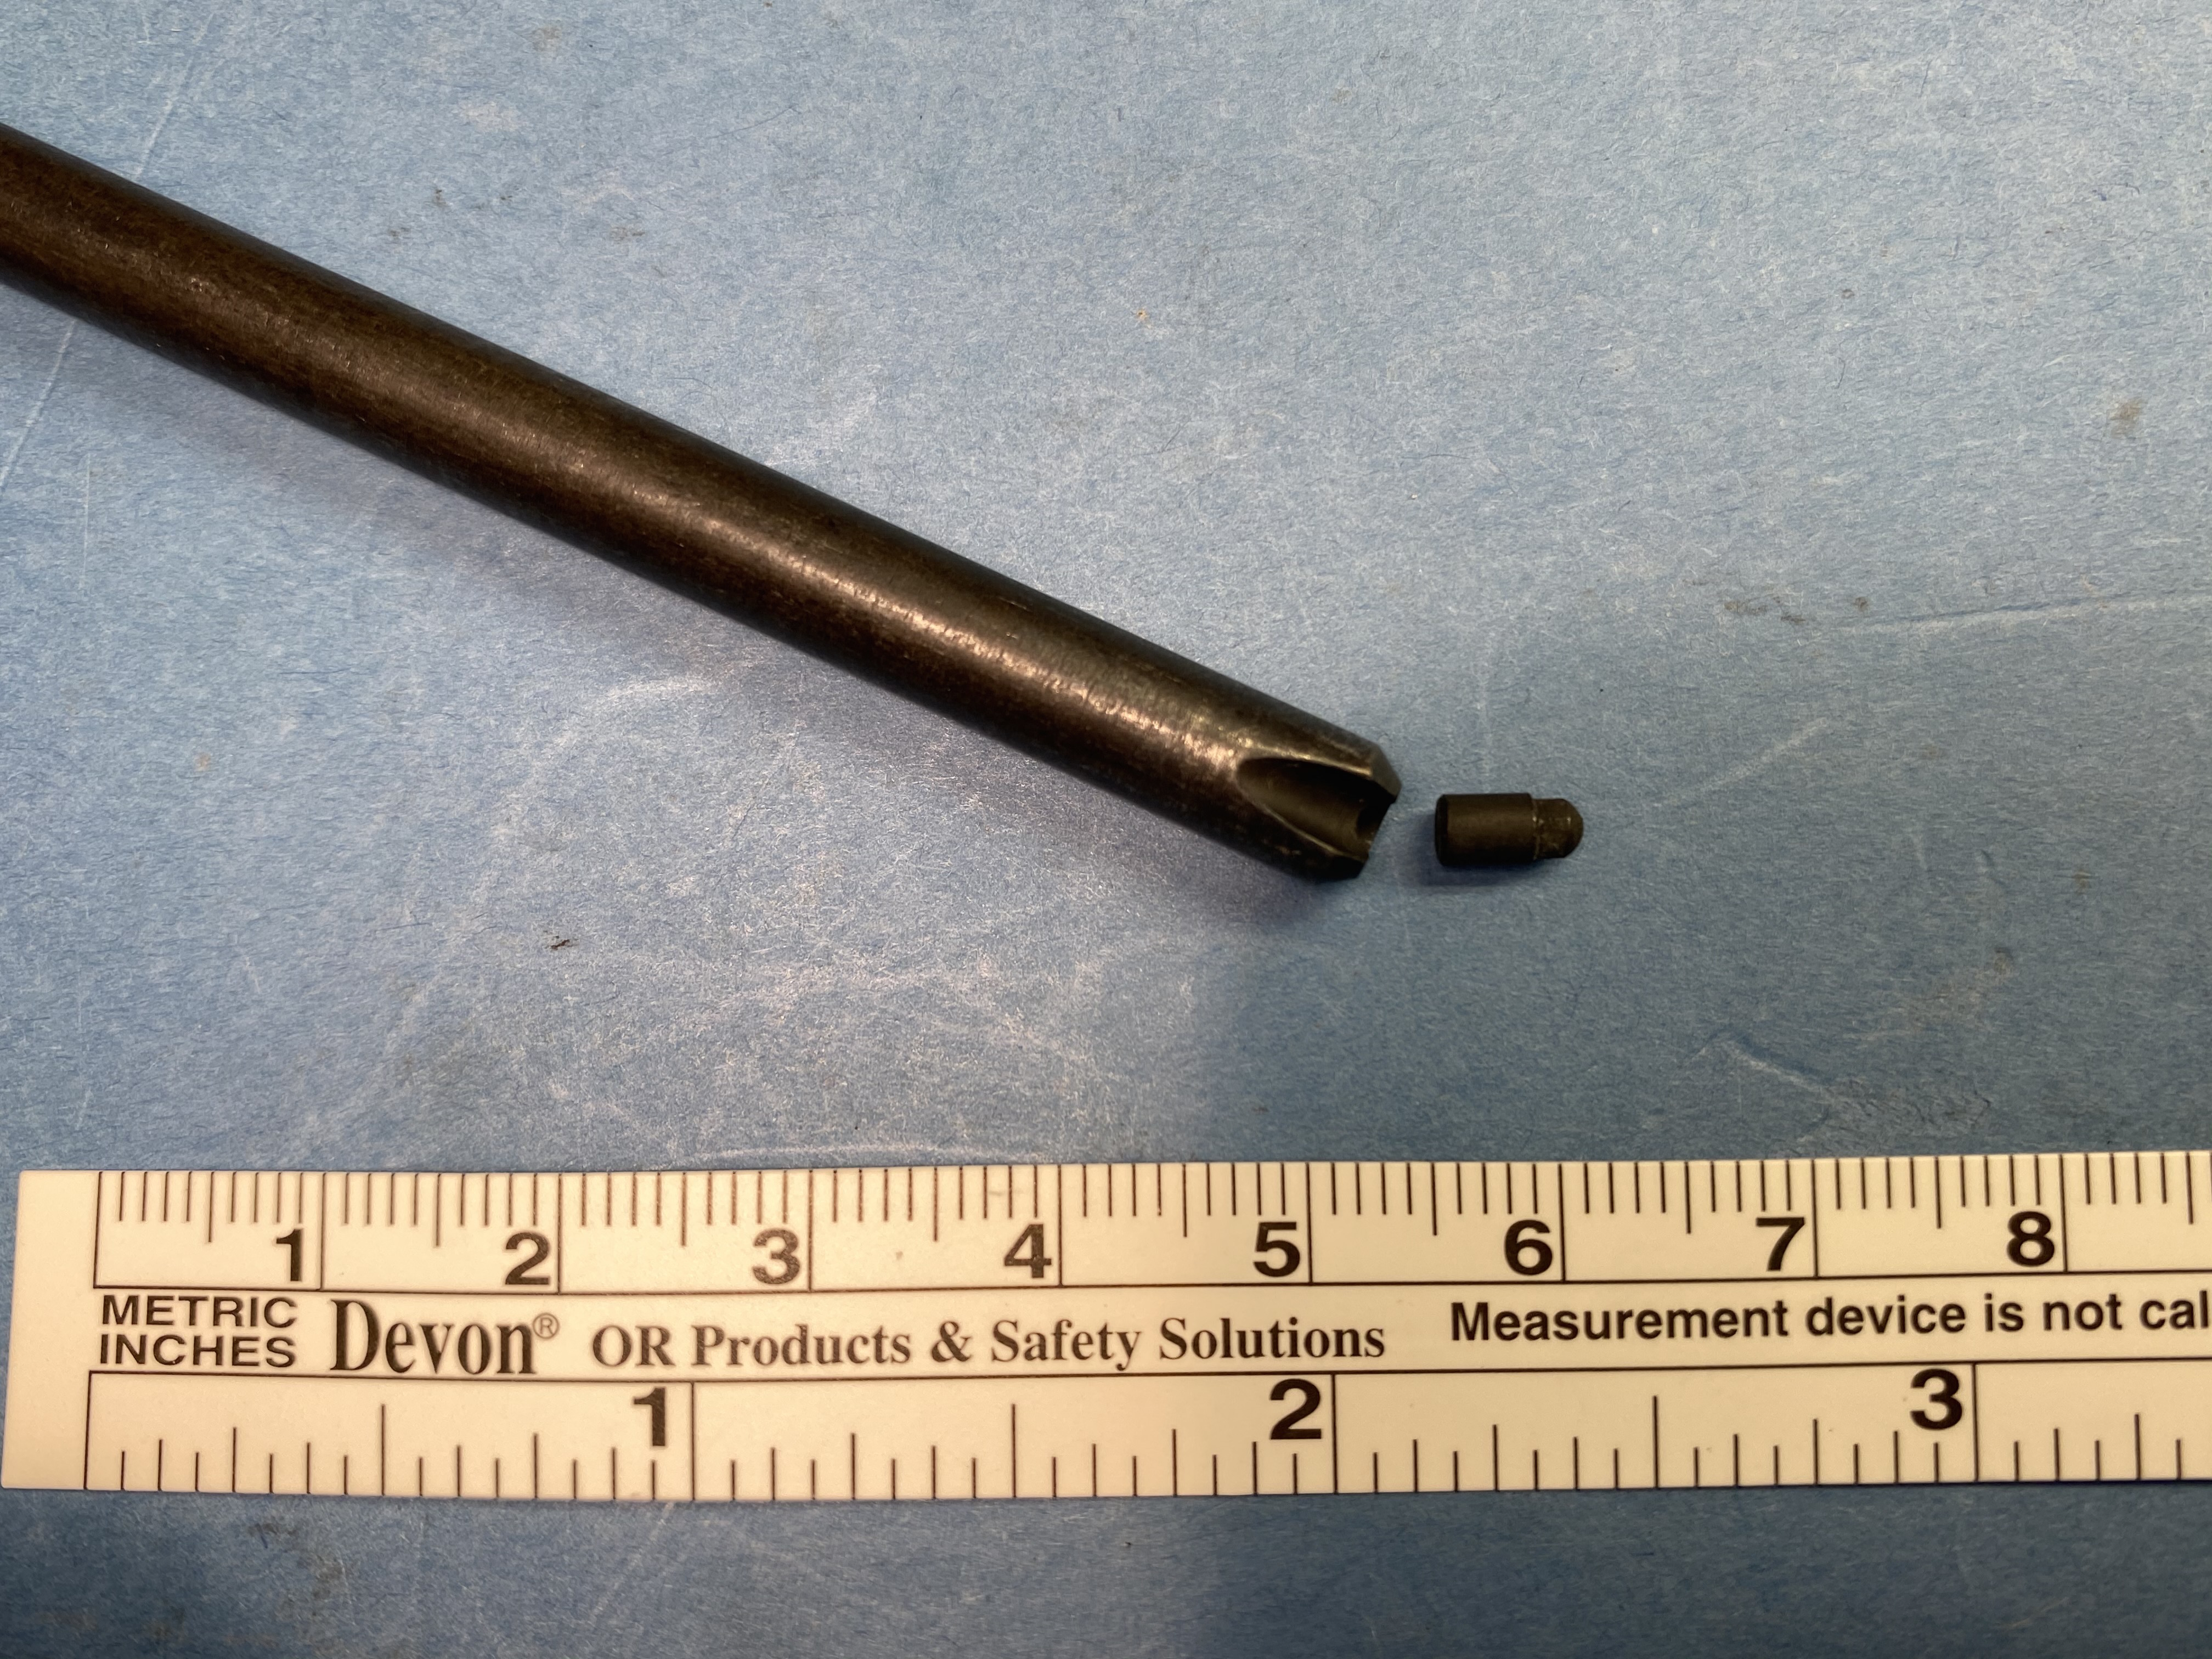
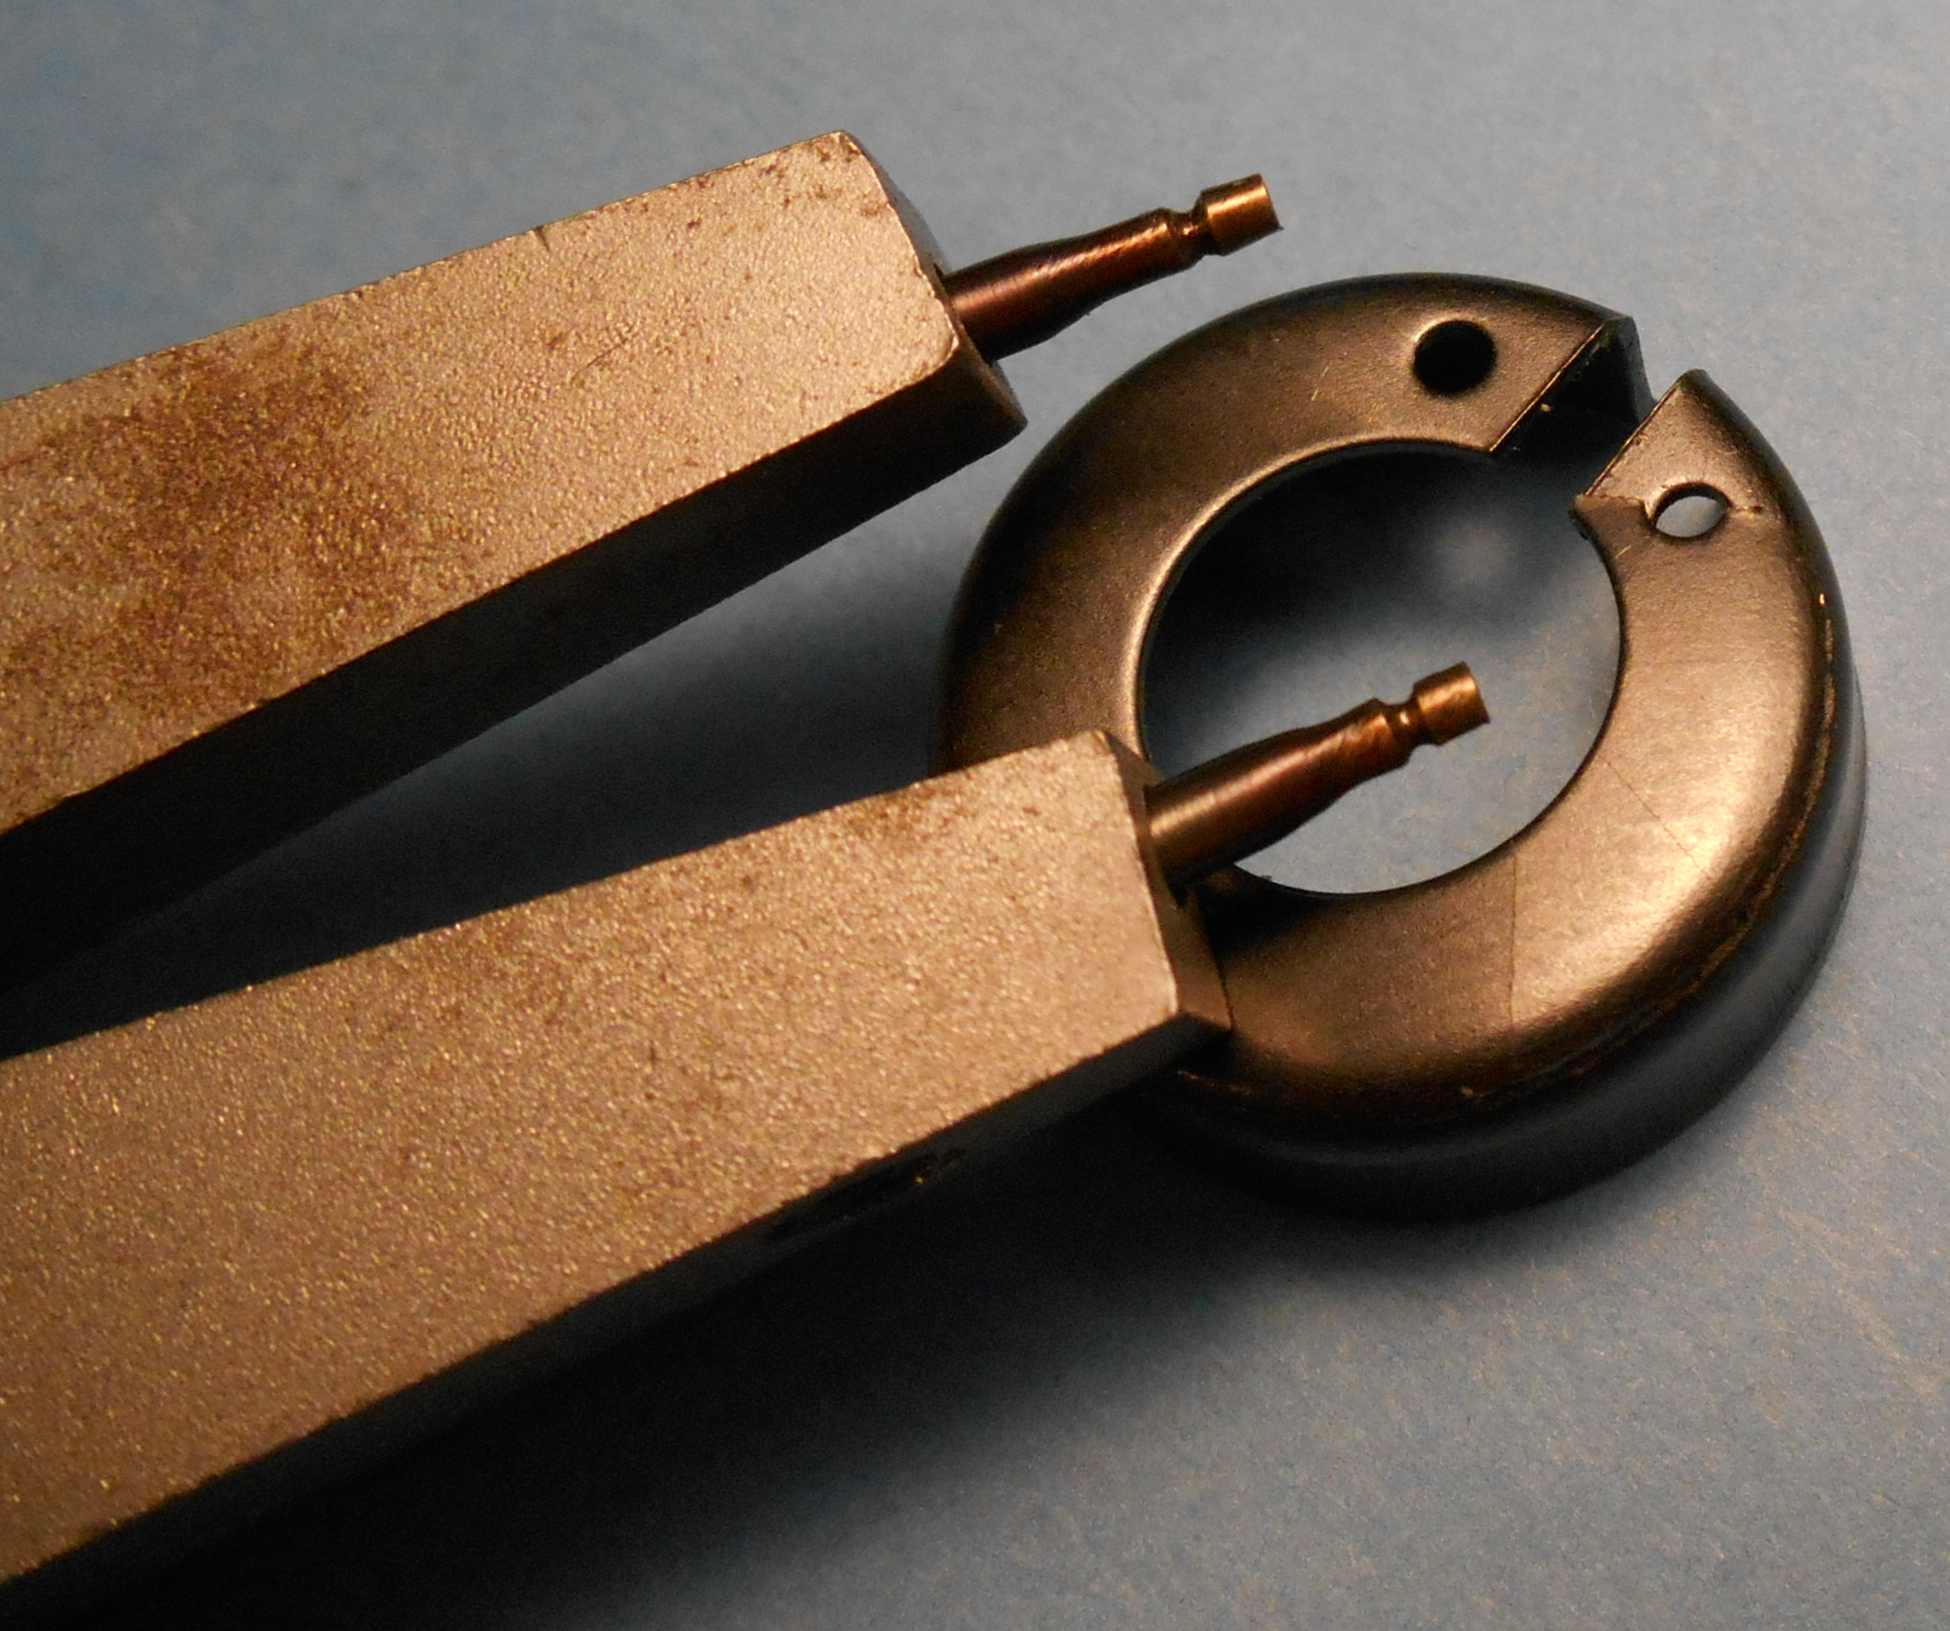
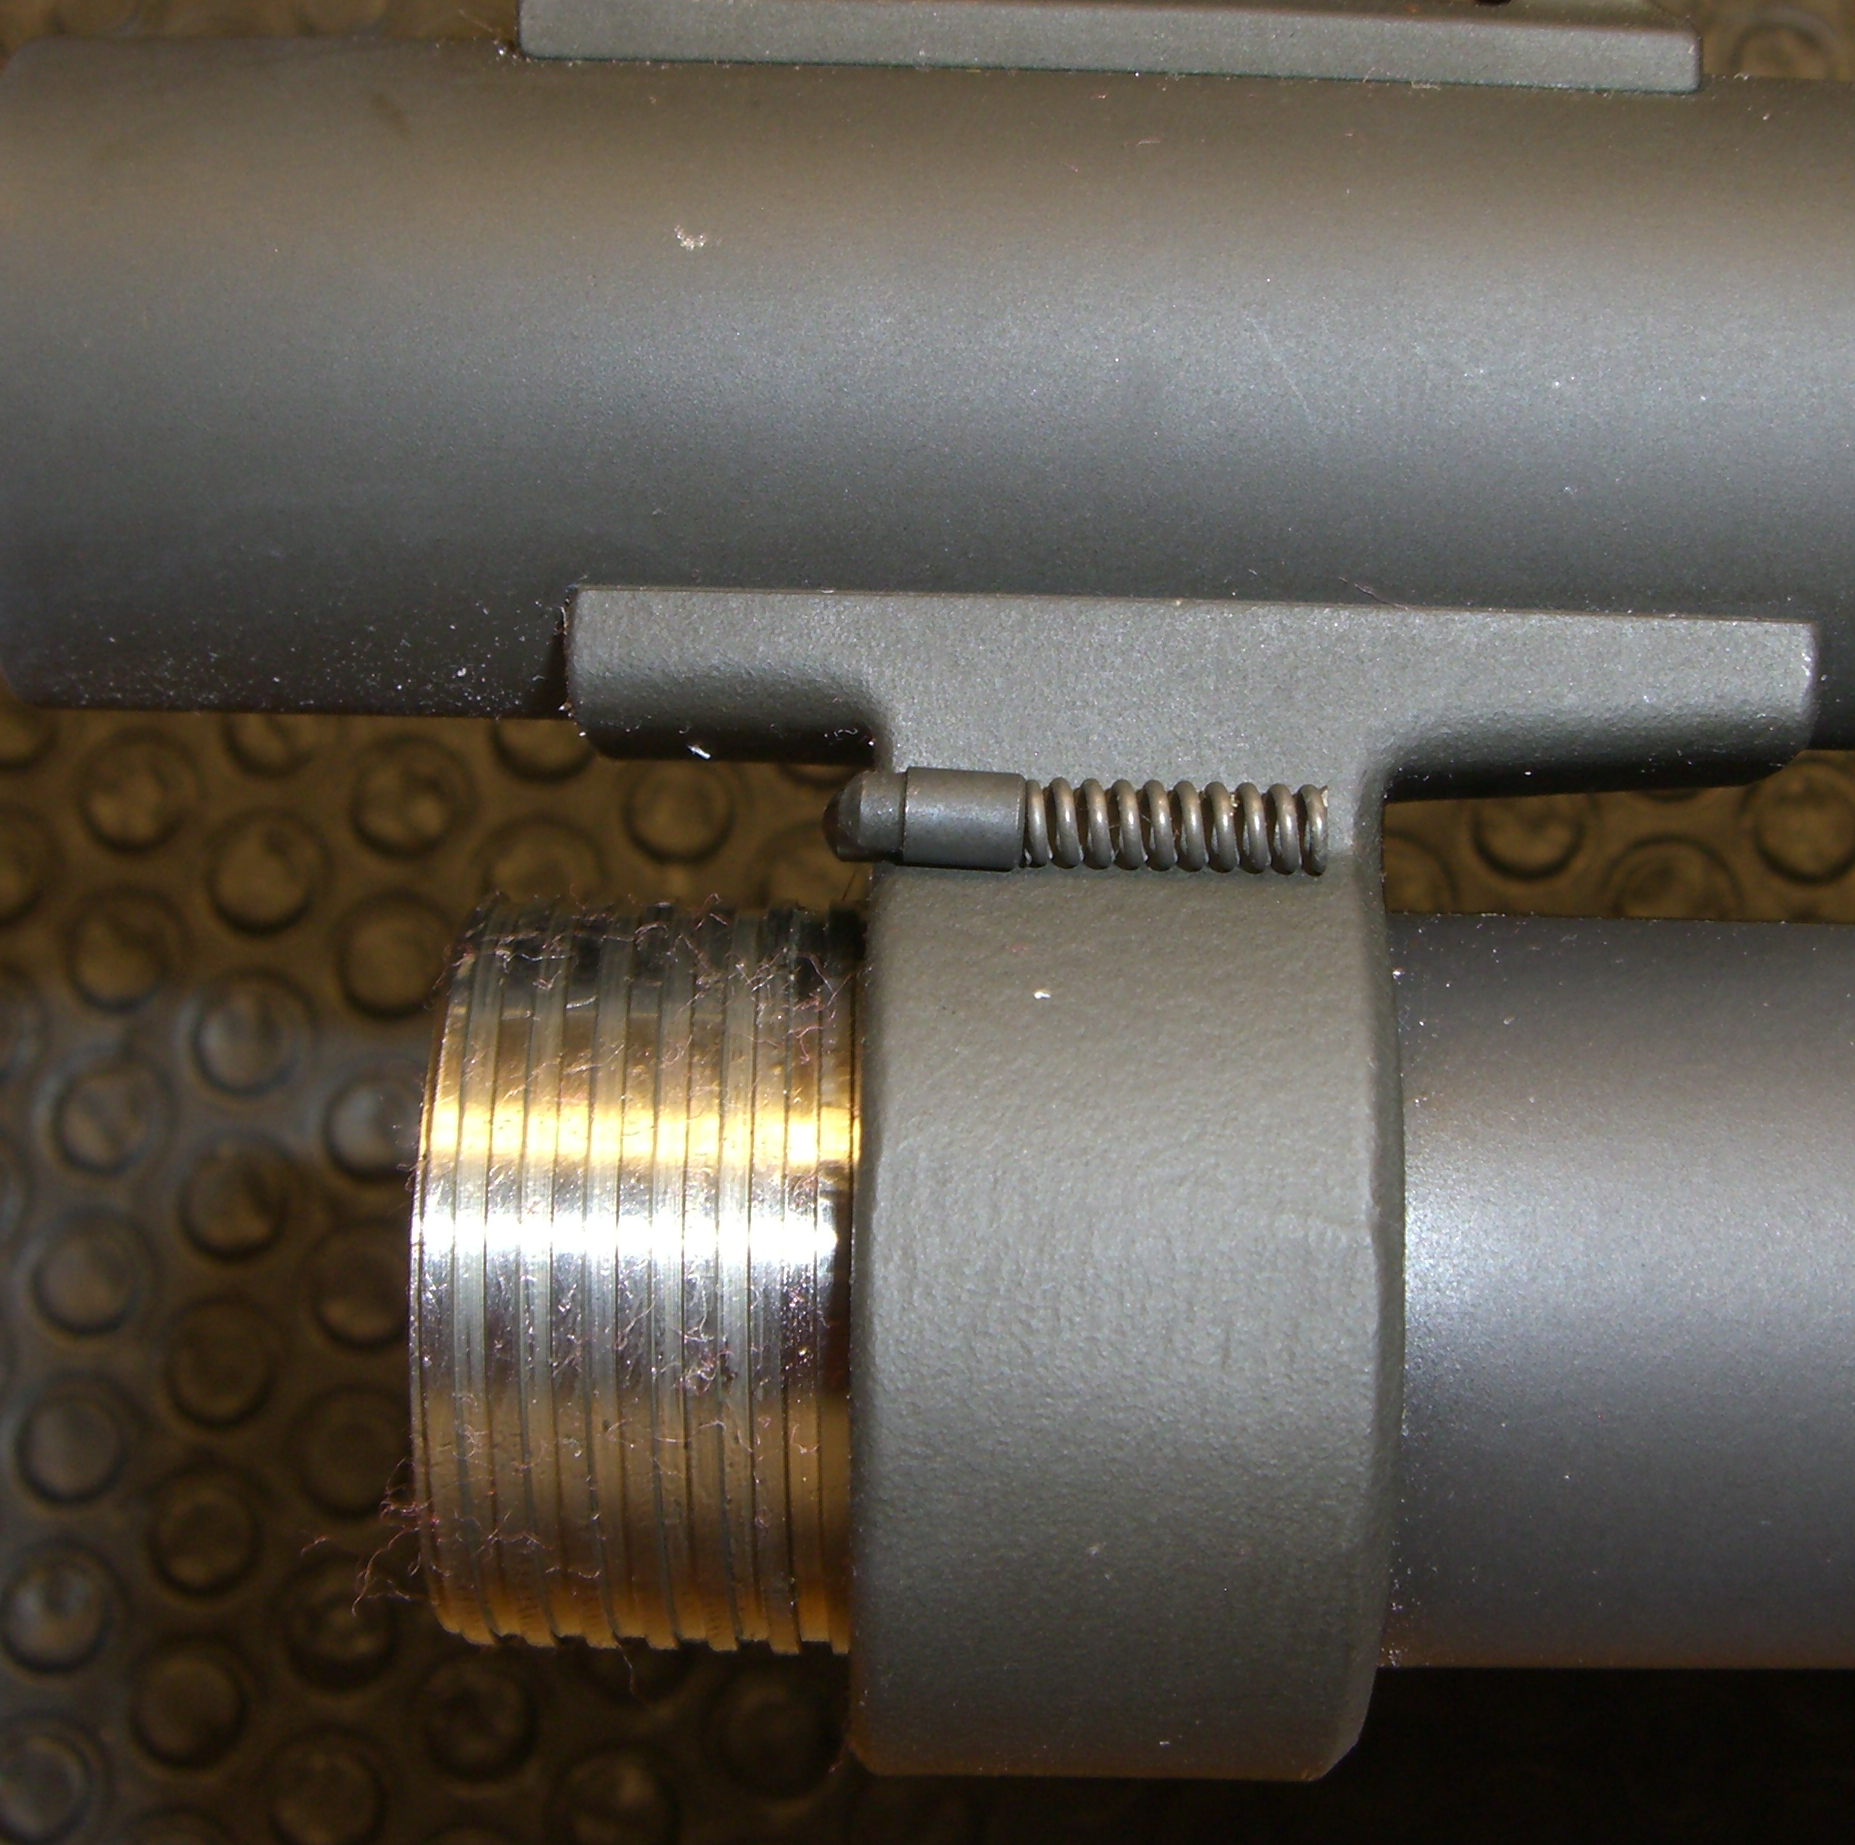
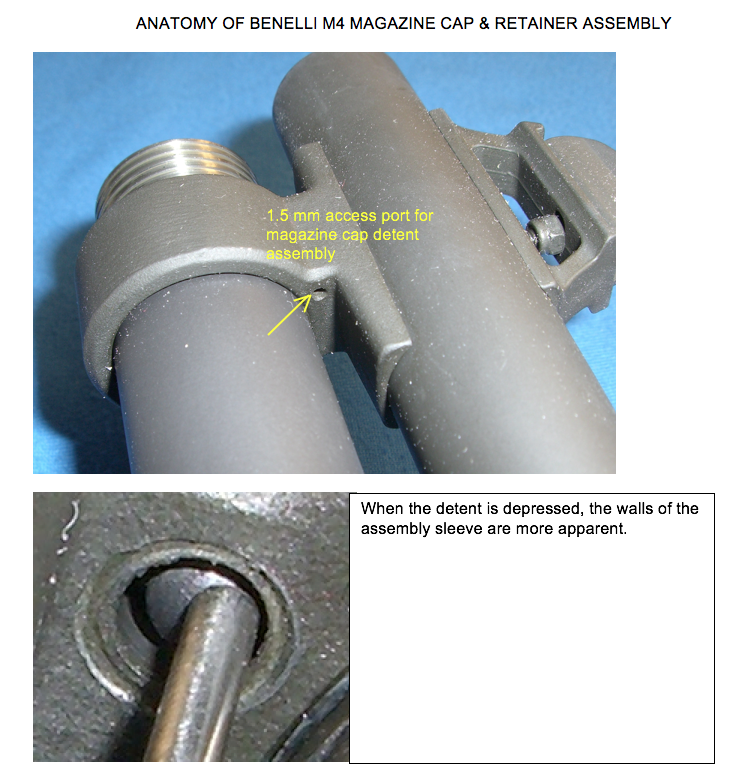
I haven't installed one nor had sufficient intellectual curiosity just to knock it out for the heck of it BUT if I did this would be my plan. Call factory for replacement support collar; then whack away.
But I believe you would have to have the proper support collar for the plunger which I envision as a small externally splined cylinder that allows the spring powered plunger head to traverse thru it.
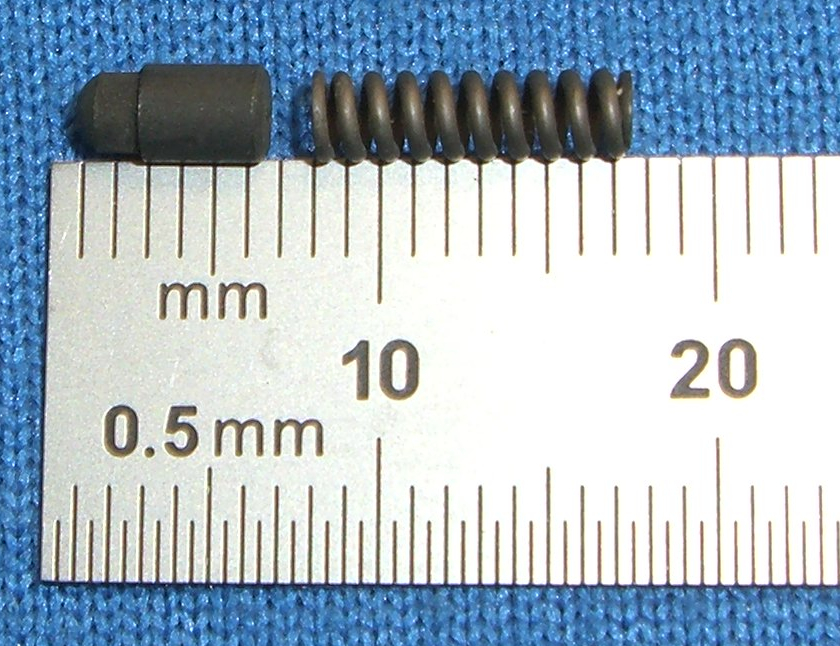
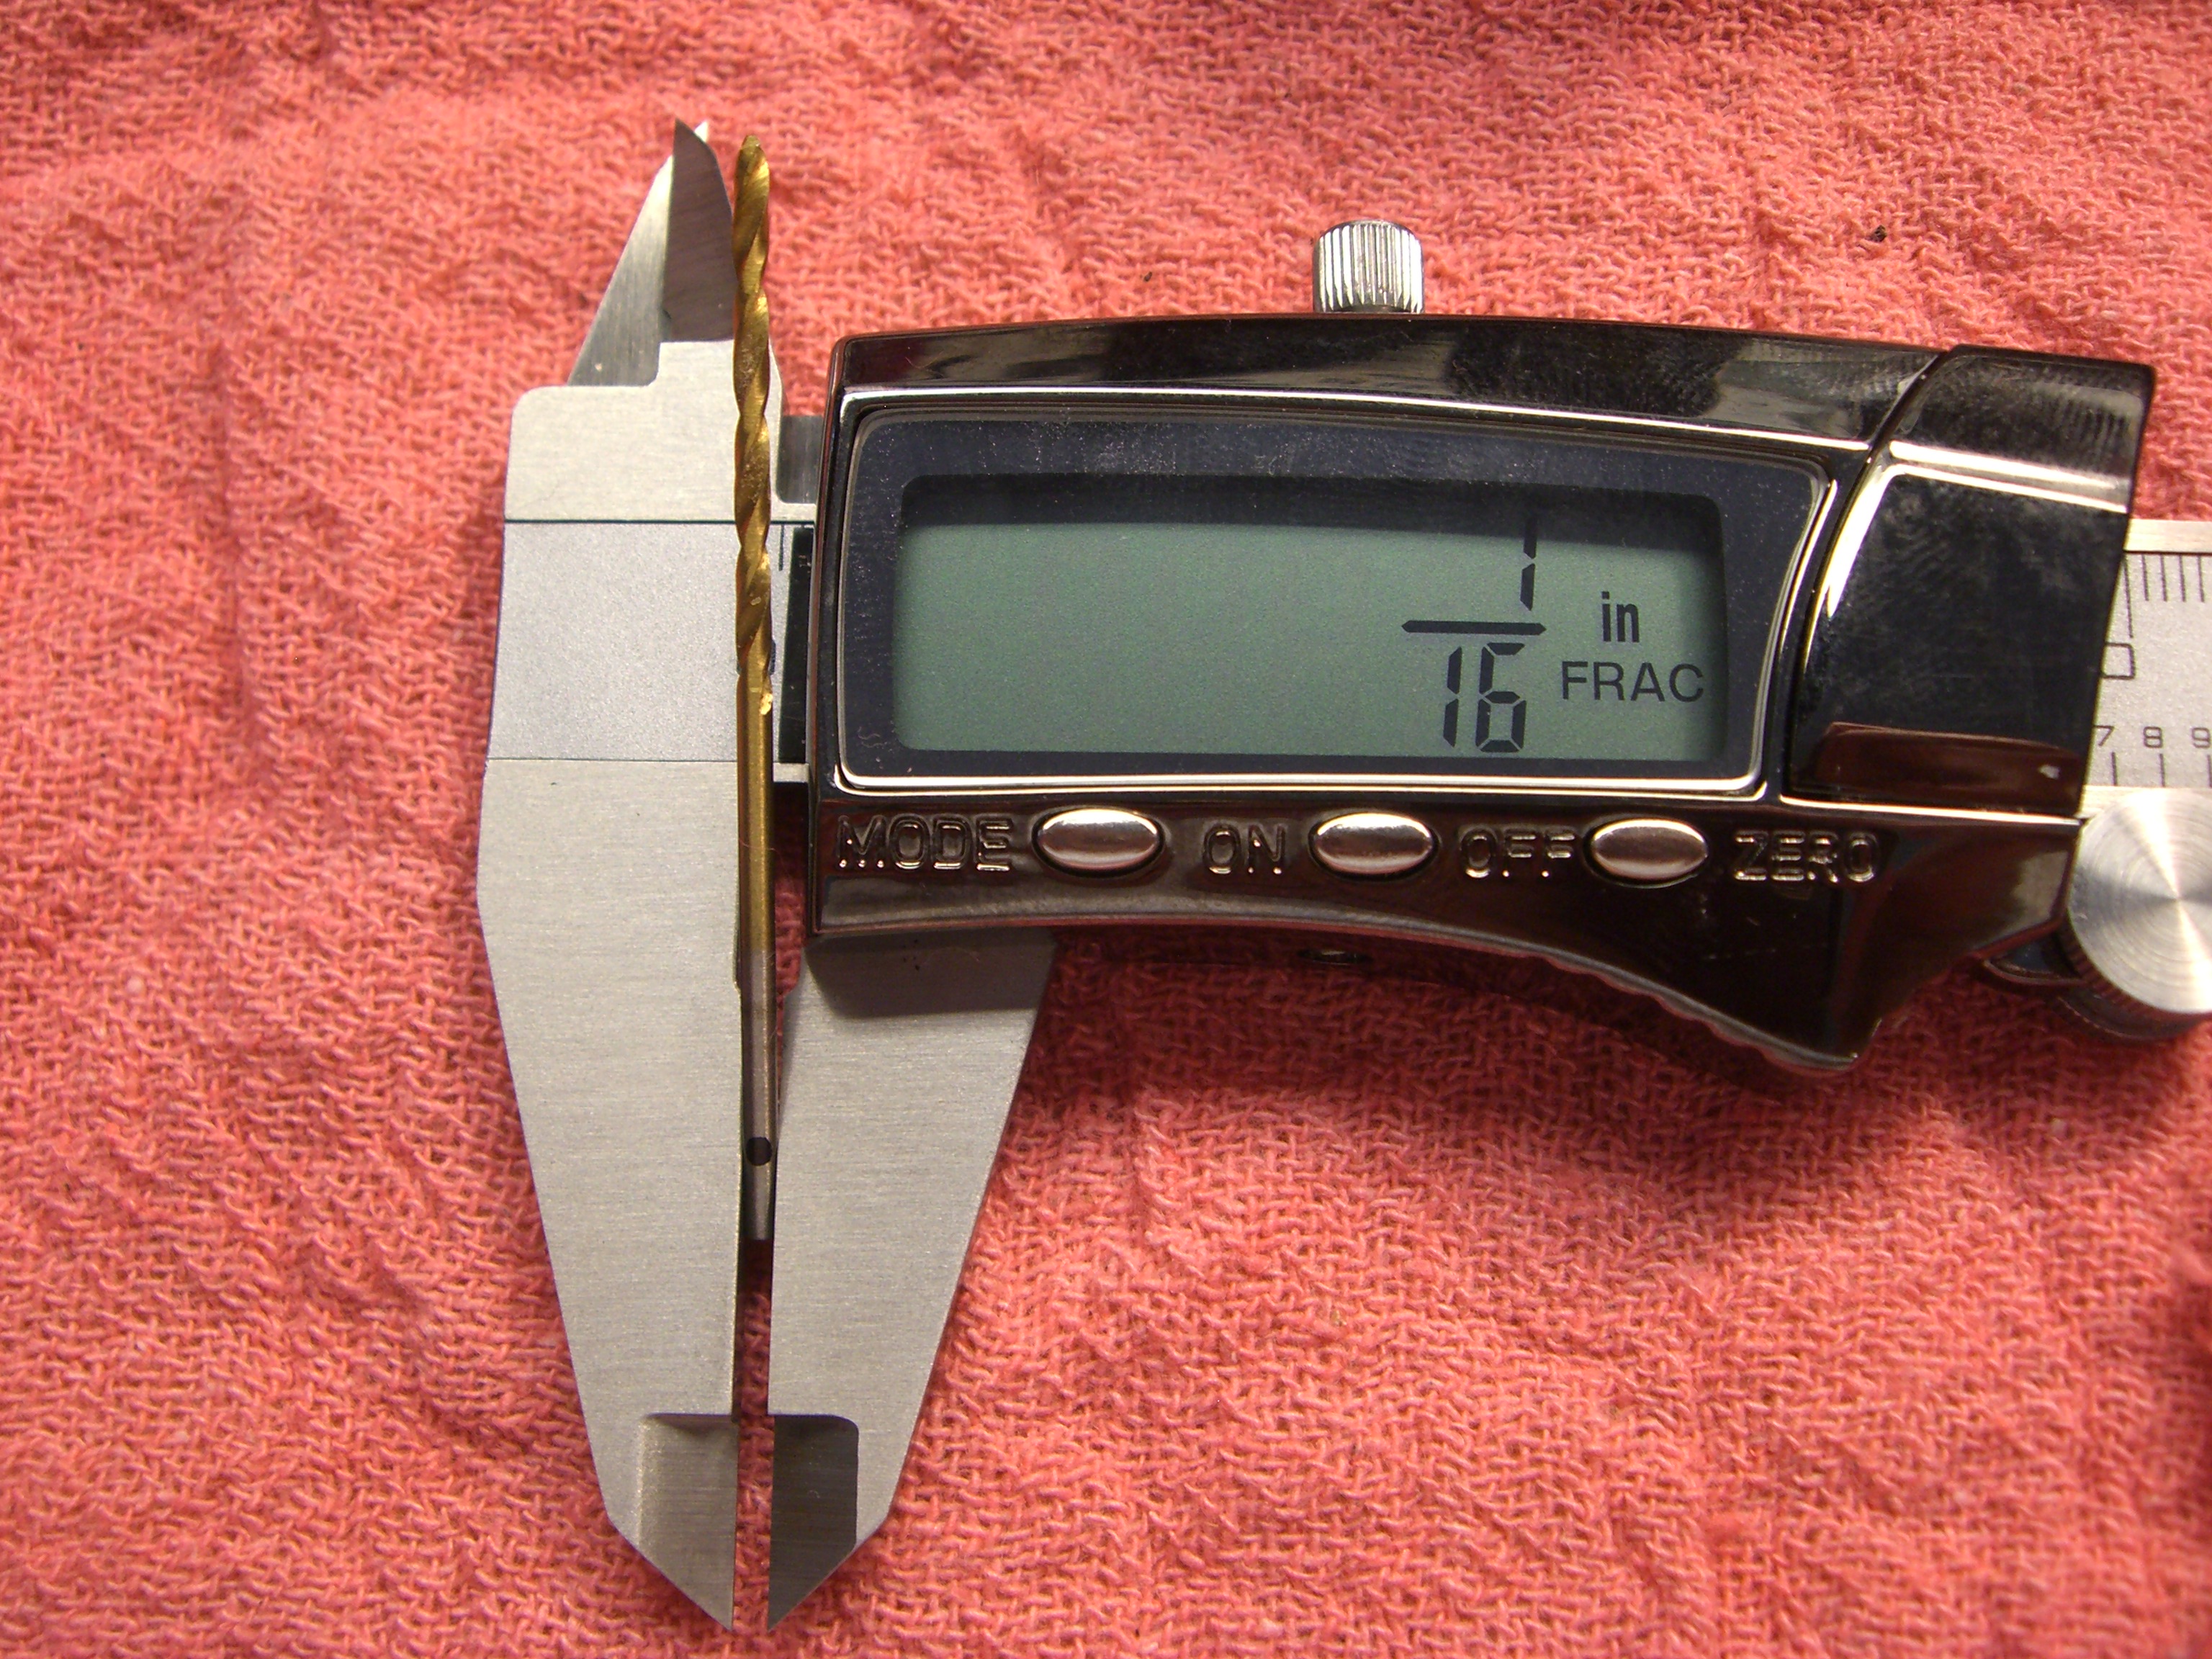
I believe the plunger spring assembly is removed by inserting a 1.5 mm punch thru the access port on the back side of the assembly which would fit thru the spring to greet the back side of the plunger. Installation would be the reverse, probably use a roll pin starter punch ? or a proper sized pin punch to compress the head of the plunger while tapping in what appears to be a support collar that is press fit into the cylindrical recess.


-
 2
2
-
3
-
-
...................
-
-
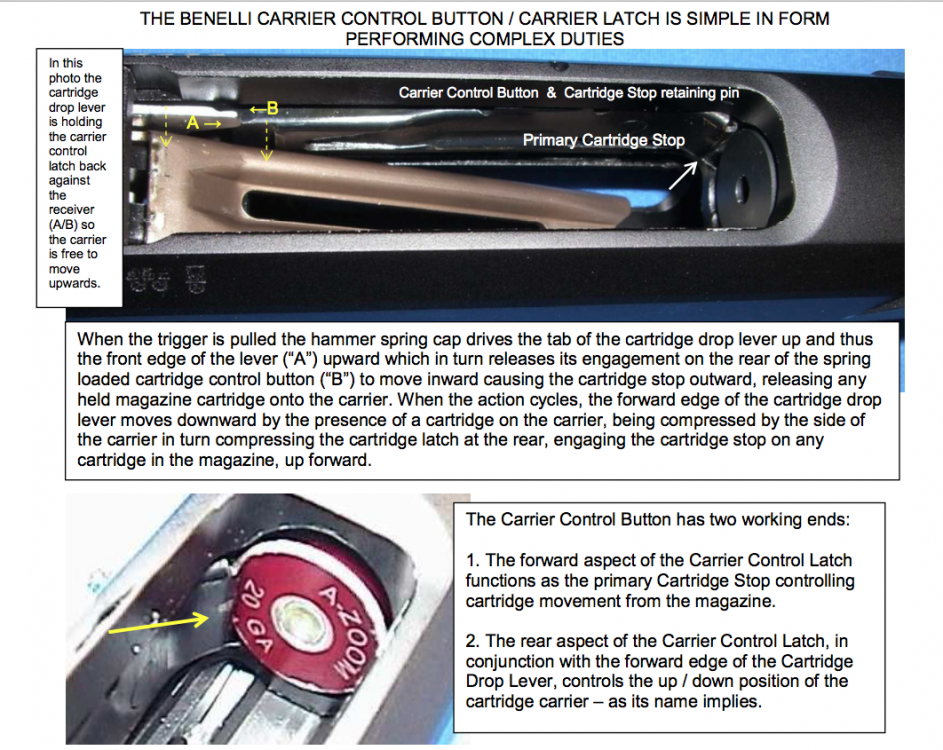
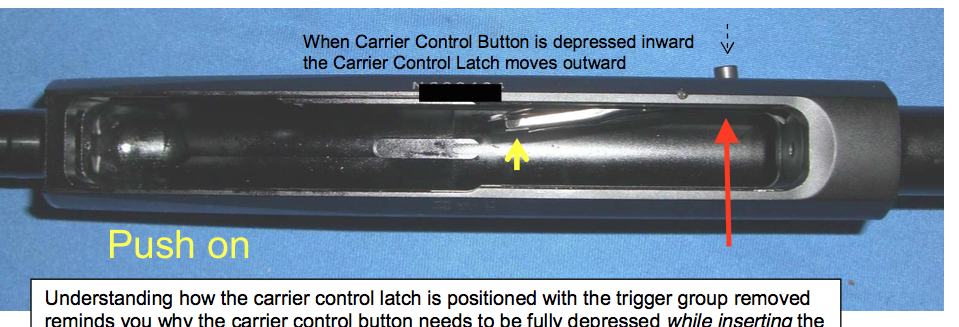
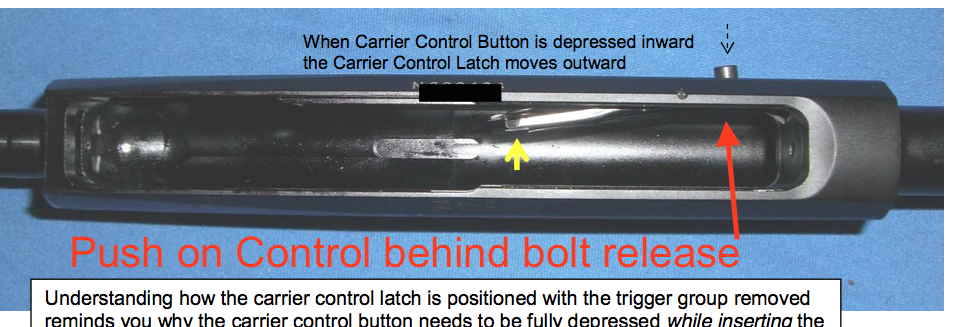
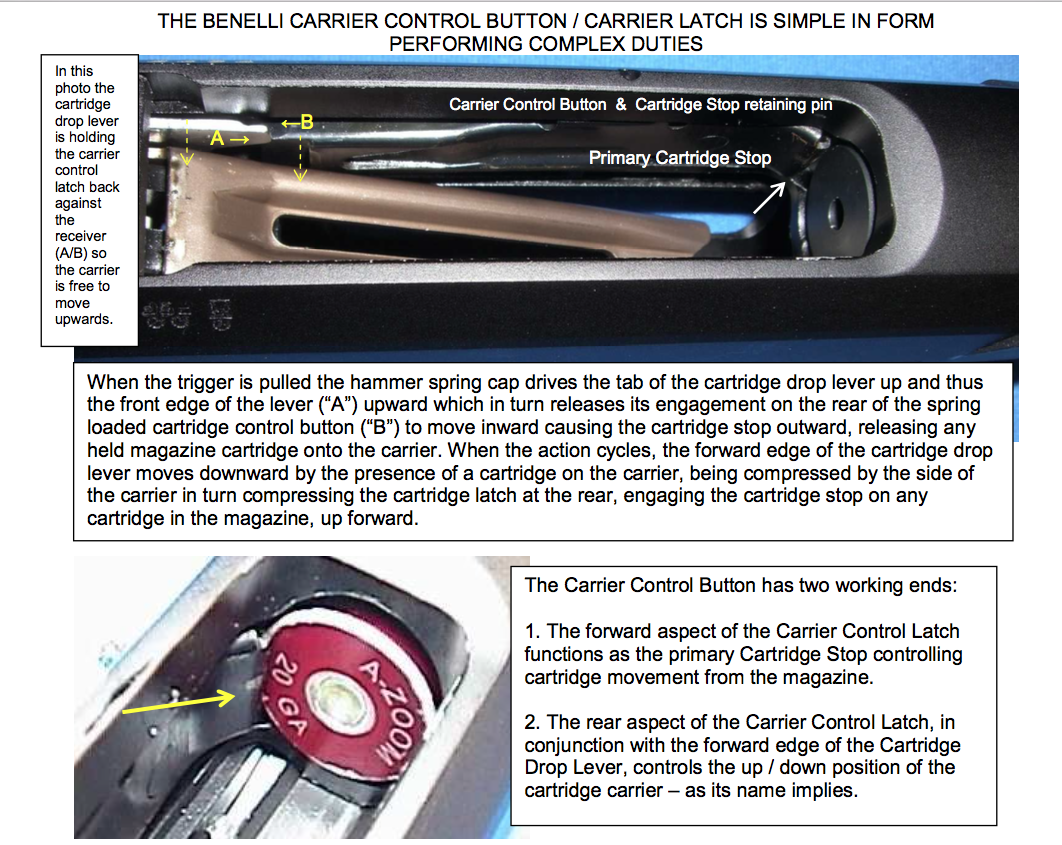
To unload directly from the magazine usually my experience is that it is easiest with a two finger technique.
First the carrier has to be free to move.....that happens when the Red dot on the cartridge stop is visible.
Then because of the force of the magazine spring driving the cartridge into the cartridge stop, you need to push the cartridge in the magazine back into the magazine ~ 1/8" while simultaneously depressing the the cartridge stop area immediately behind the bolt release, this moves the stop laterally out of the path of the cartridge rim; finally release the cartridge from the magazine while still holding simple outward pressure on the cartridge stop section. It's too hard to try and move the cartridge stop out of the way, up next to the retained cartridge. So, I find it easiest to perform the task with the receiver upside down so the cartridges are released directly on to the carrier in a controlled fashion one at at time and not allowed to fall to the ground.
-
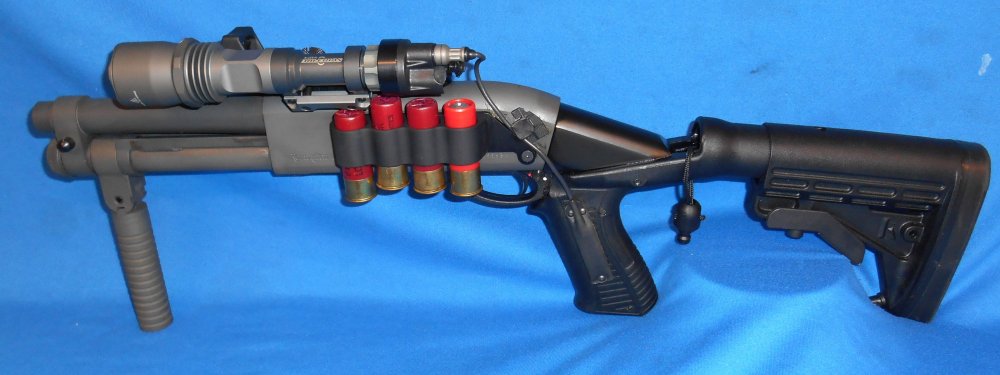
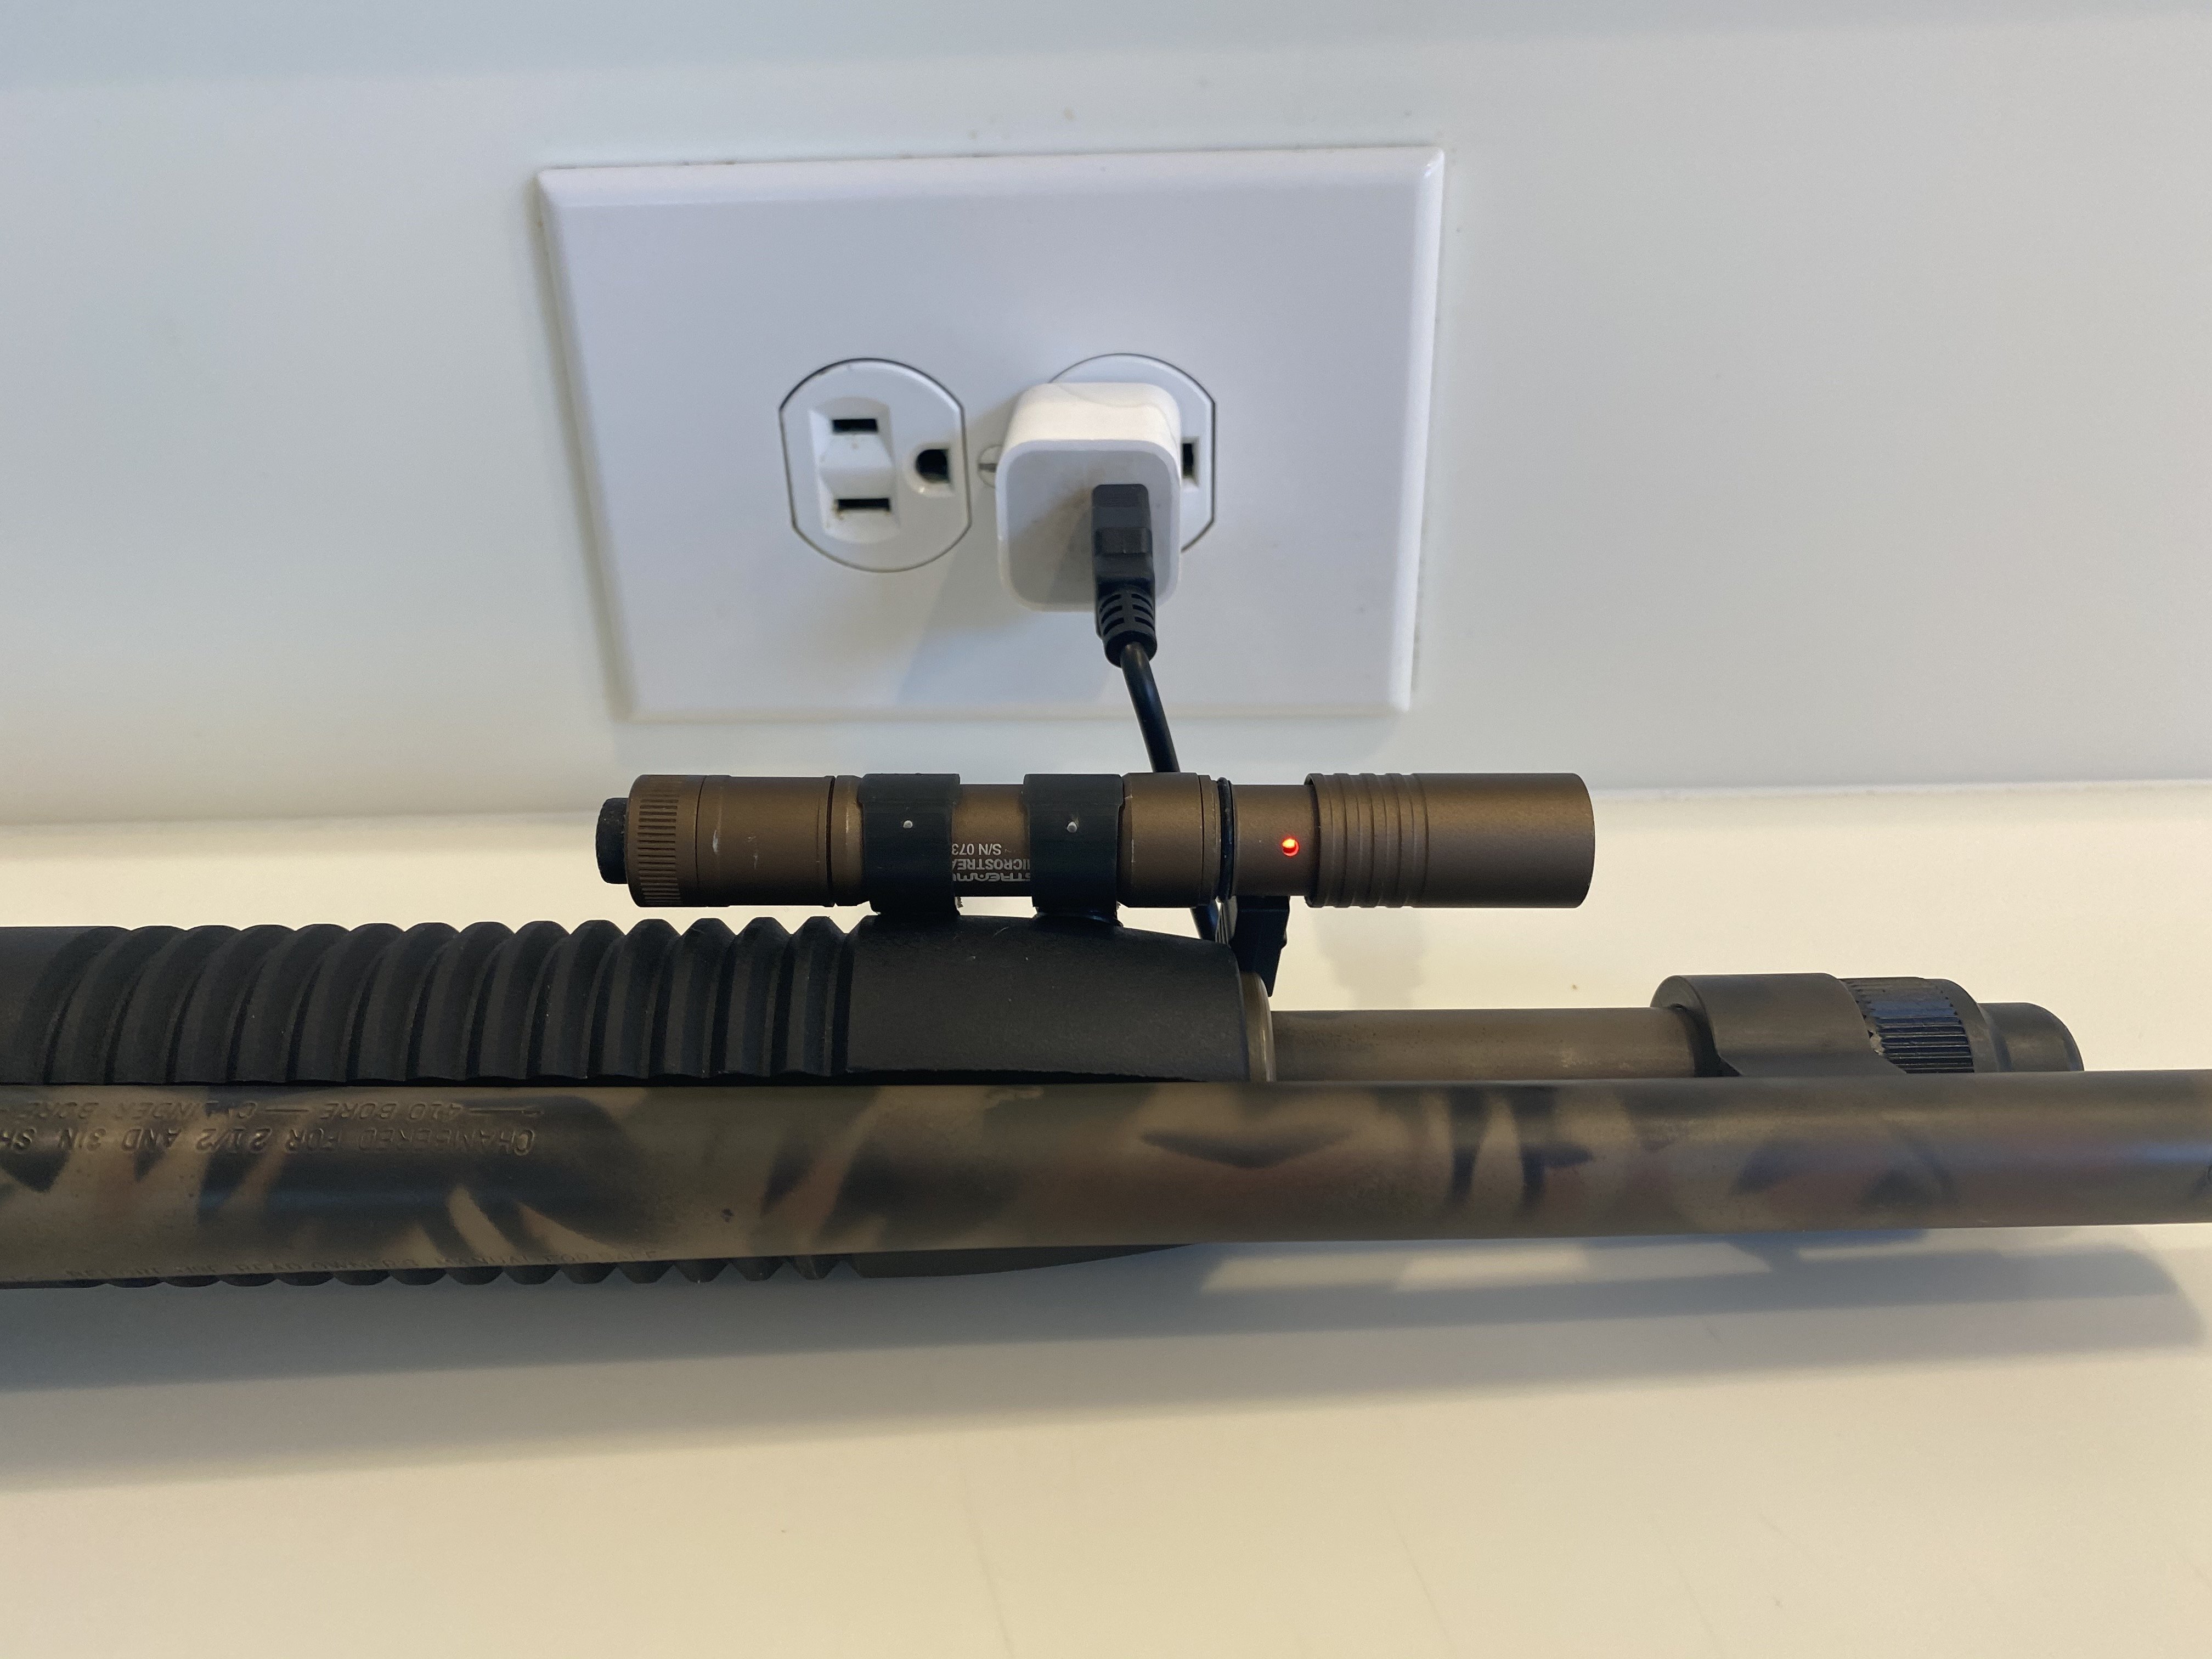
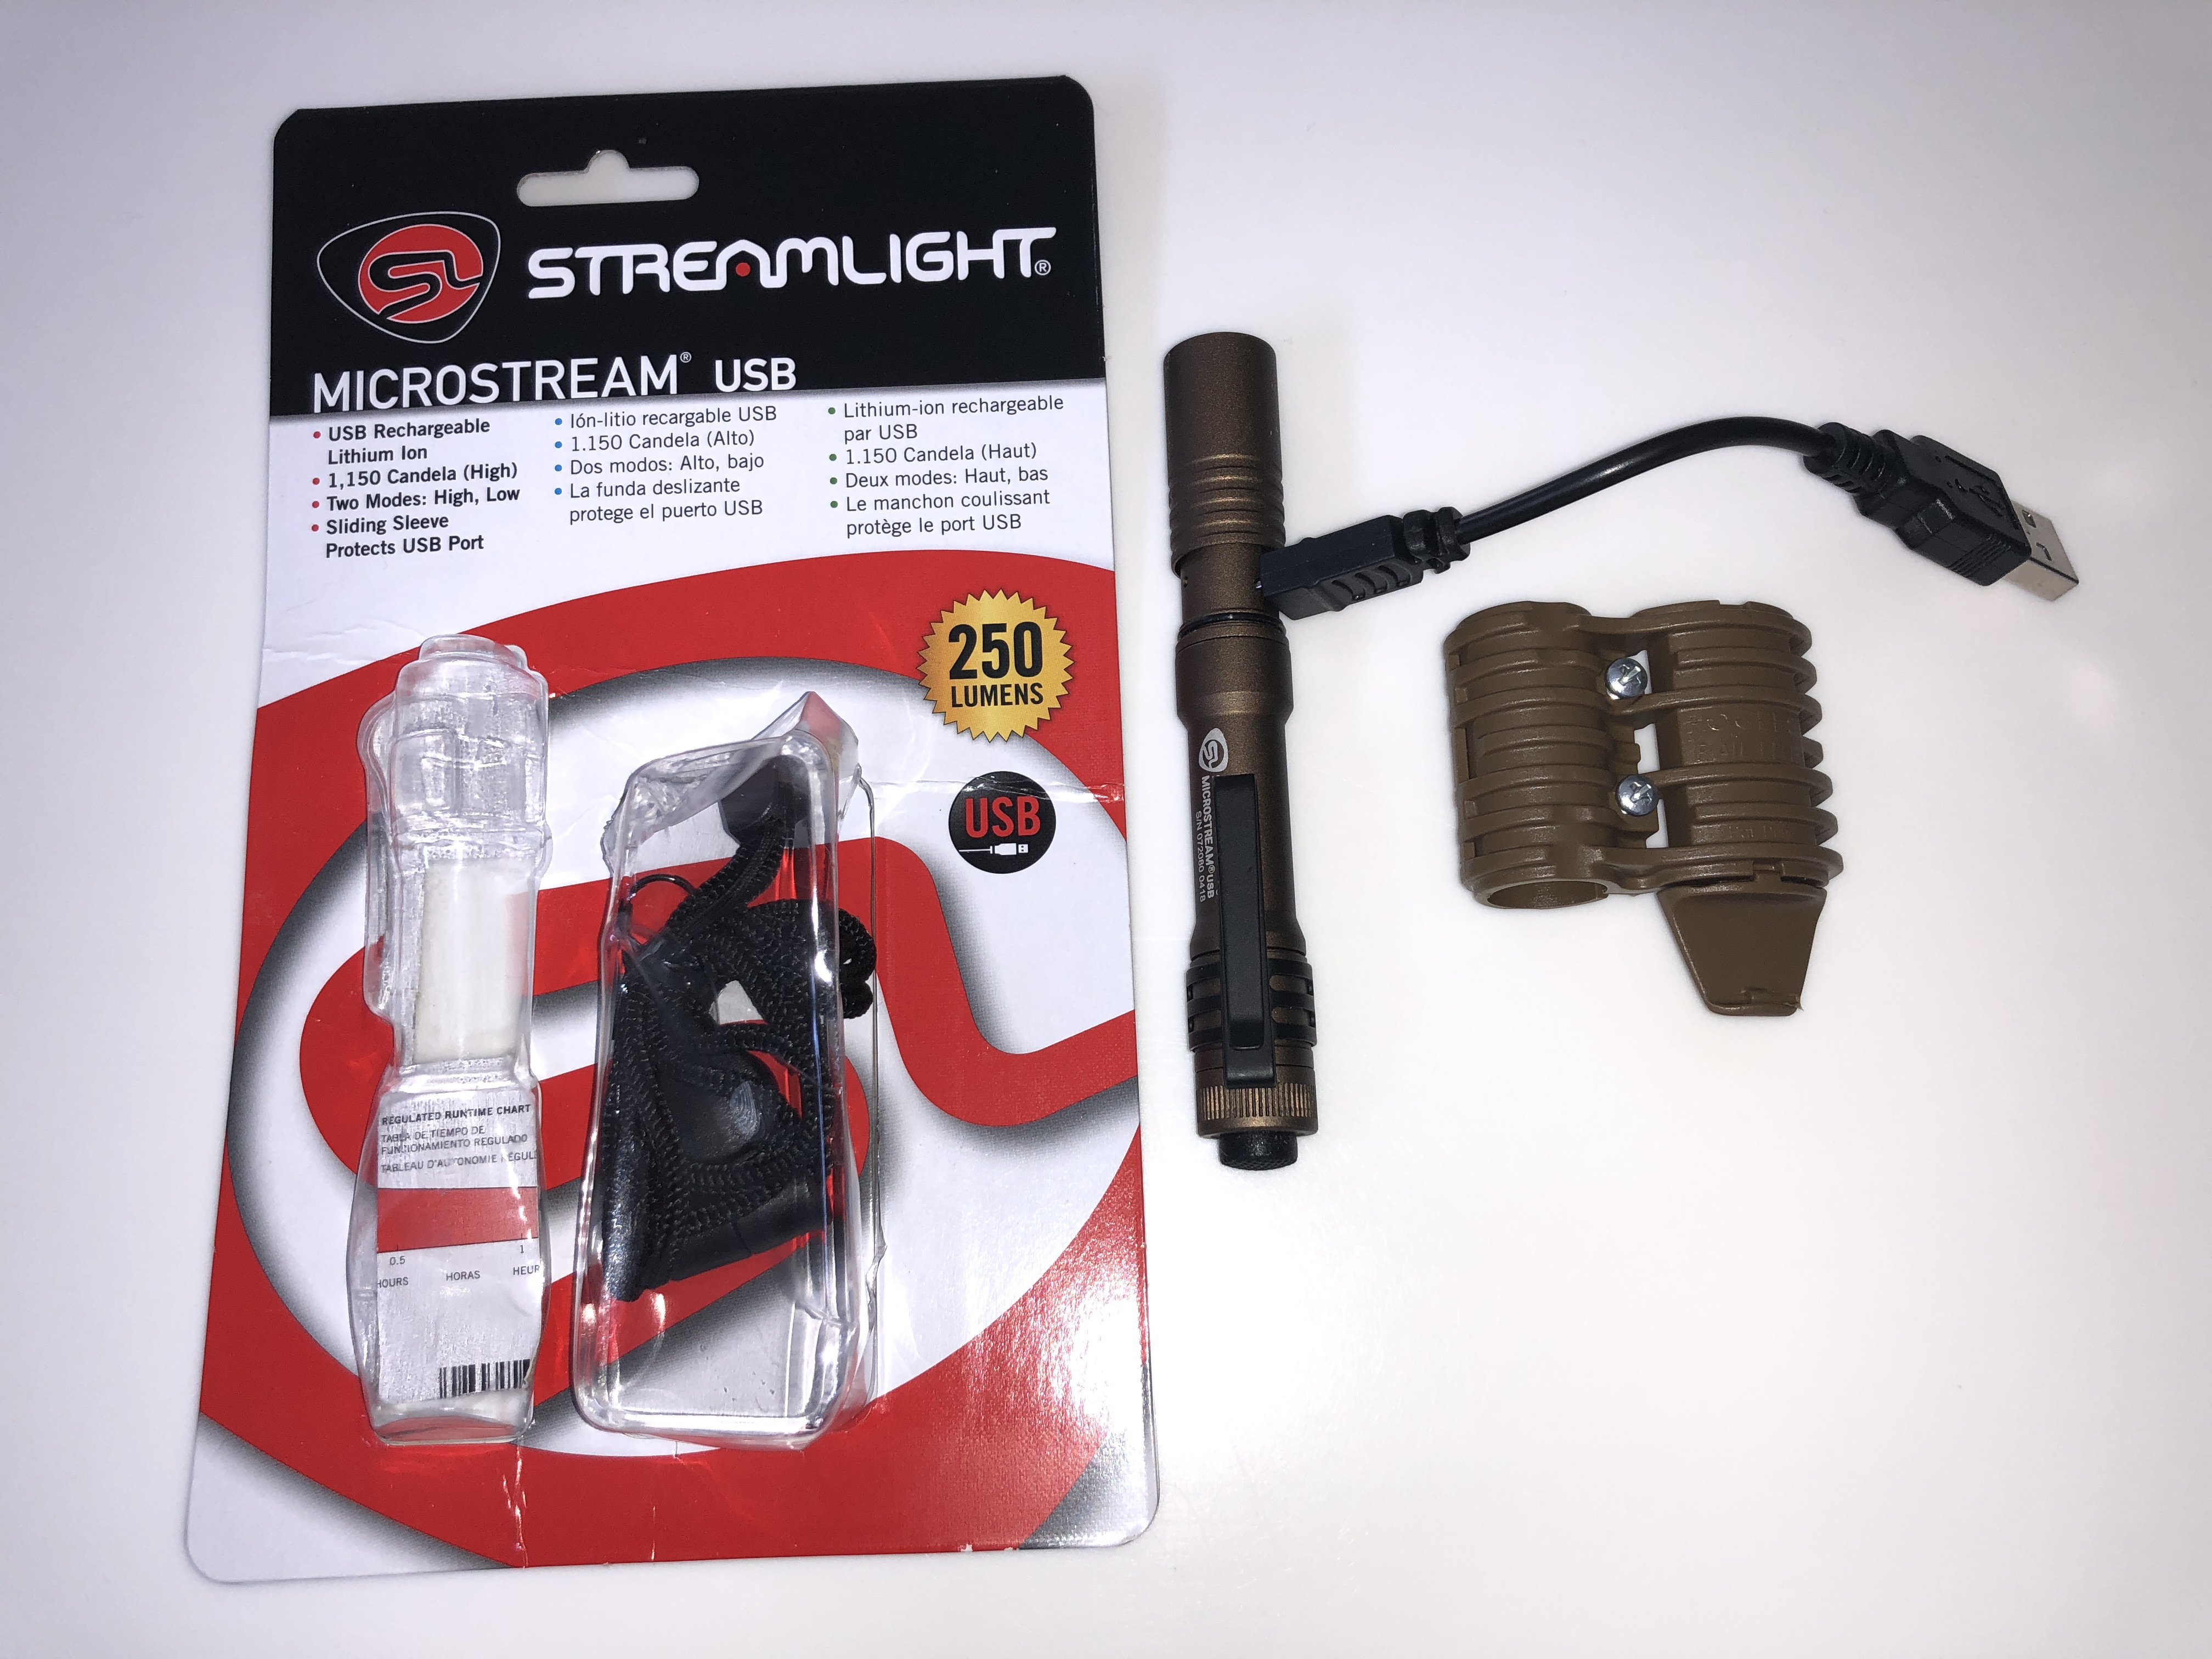
Years ago I mounted that same SureFire model on a 7" Remington 870.....too much bulk for the lumens.
Switched over to a lighter more powerful Scout model.
-
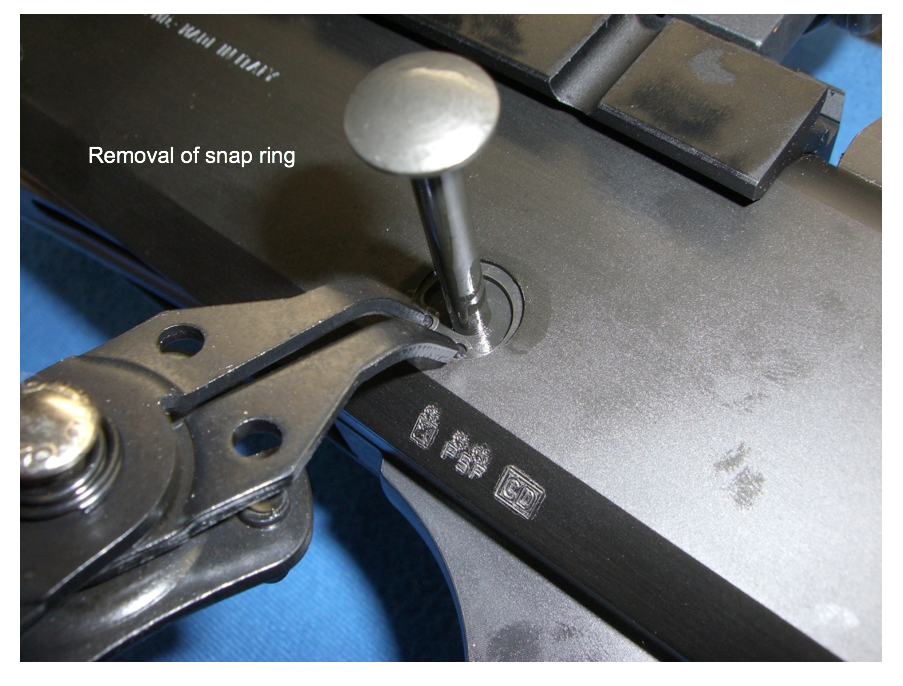
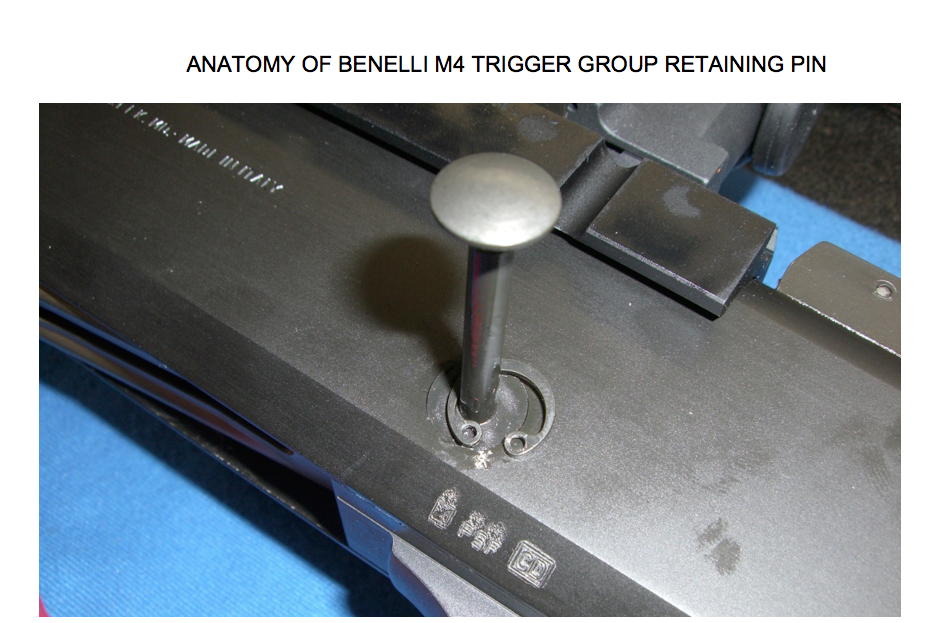
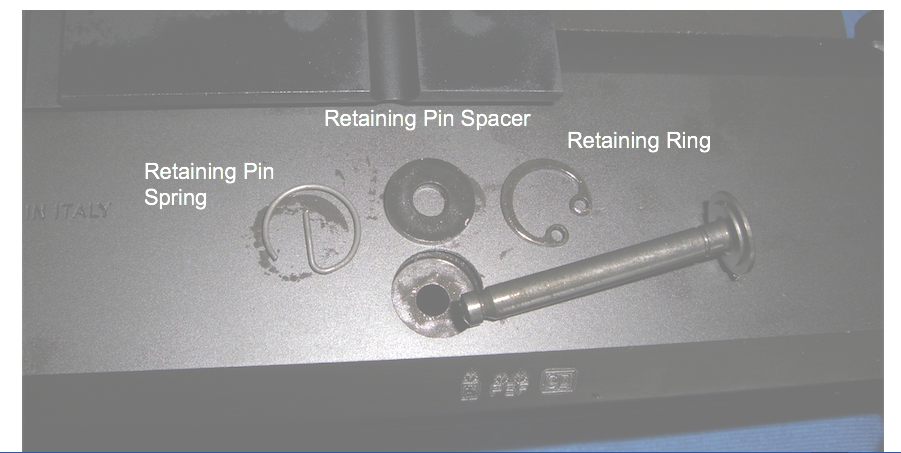
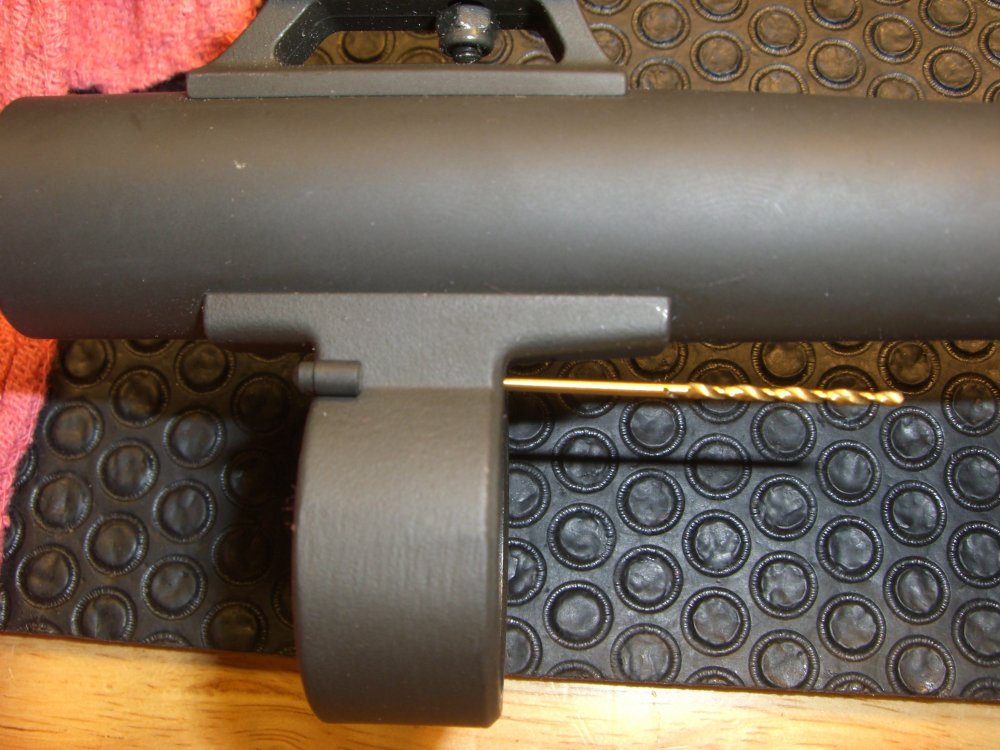
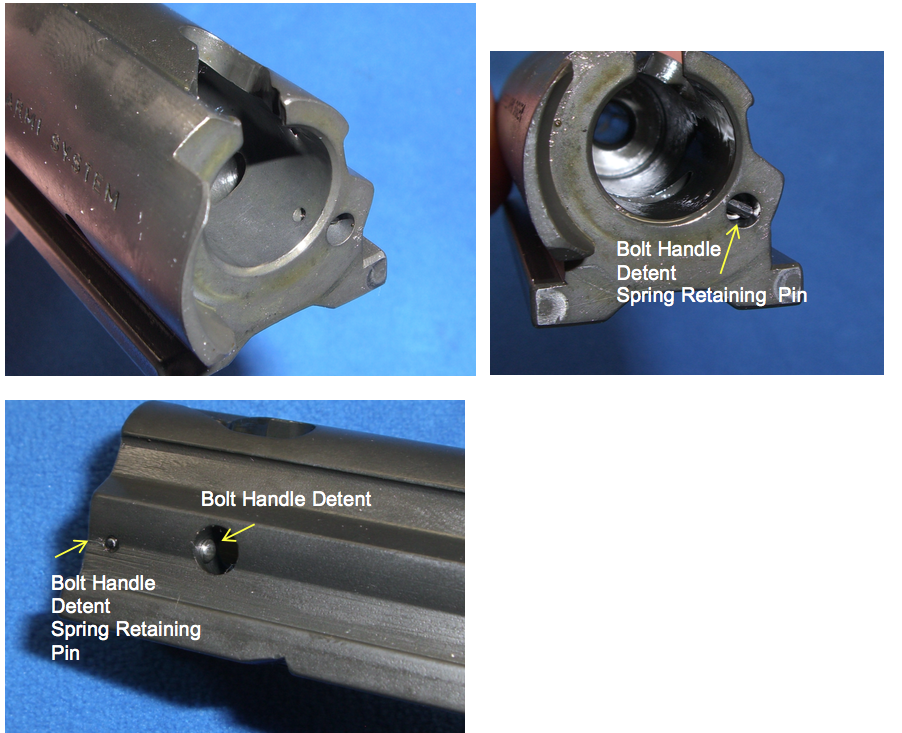
The bolt handle has a simple recess that is captured by a spring-loaded ball detent integral to the bolt. Lateral pull will be sufficient to liberated the bolt handle from the bolt.
The bolt handle can then be utilized to displace the receiver trigger group retaining pin for field disassembly.
-
1
-
2
-
-
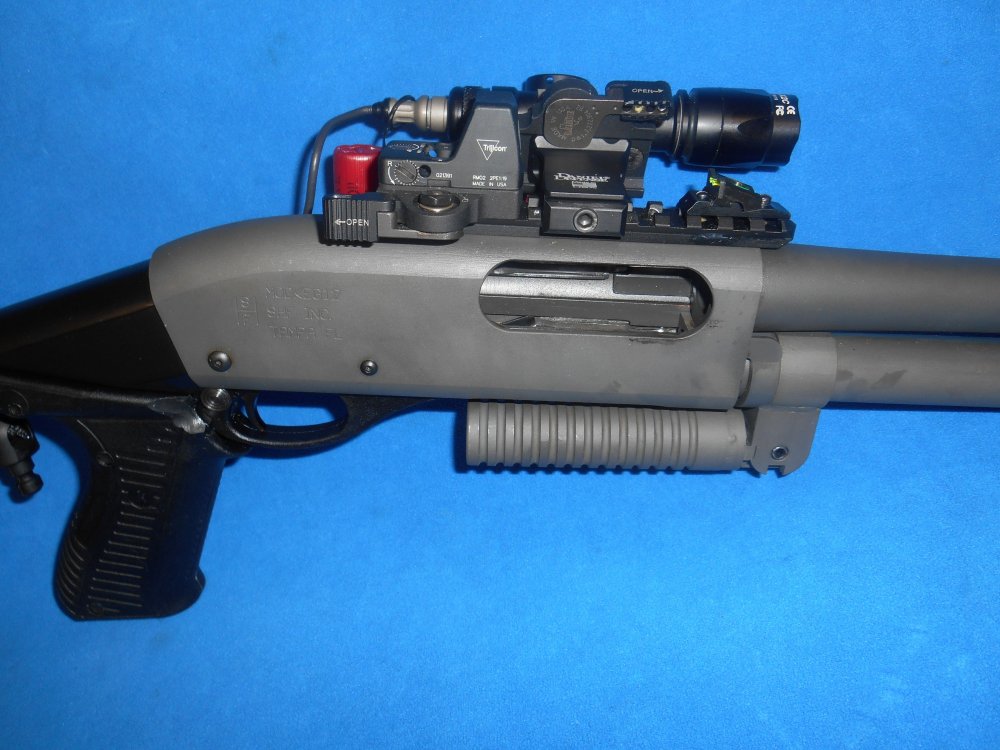
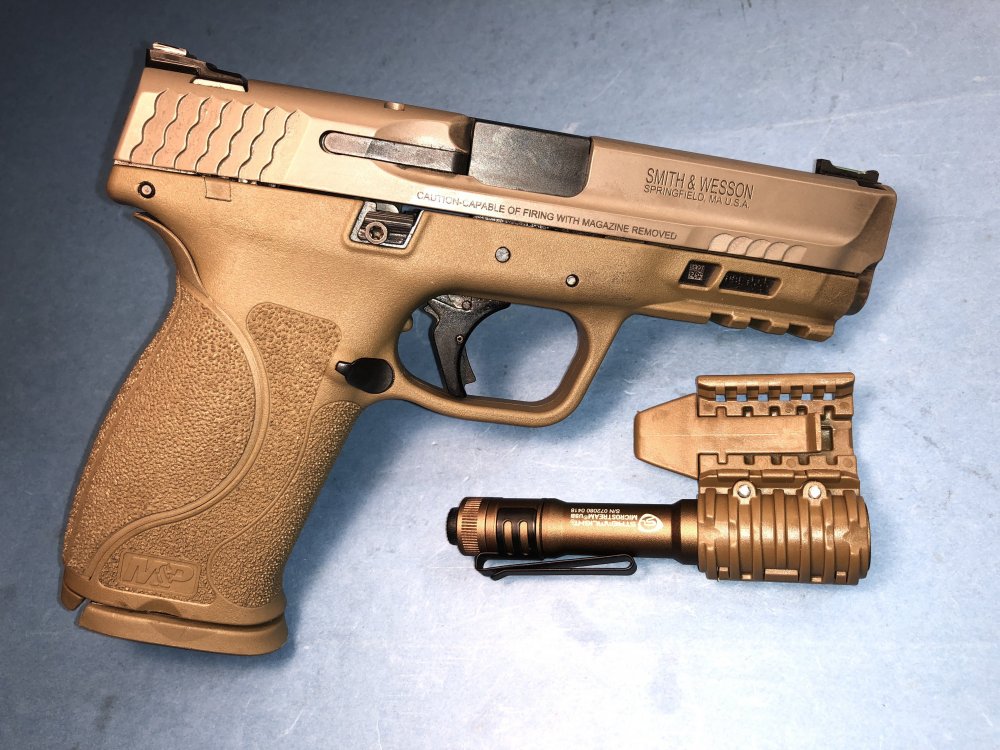
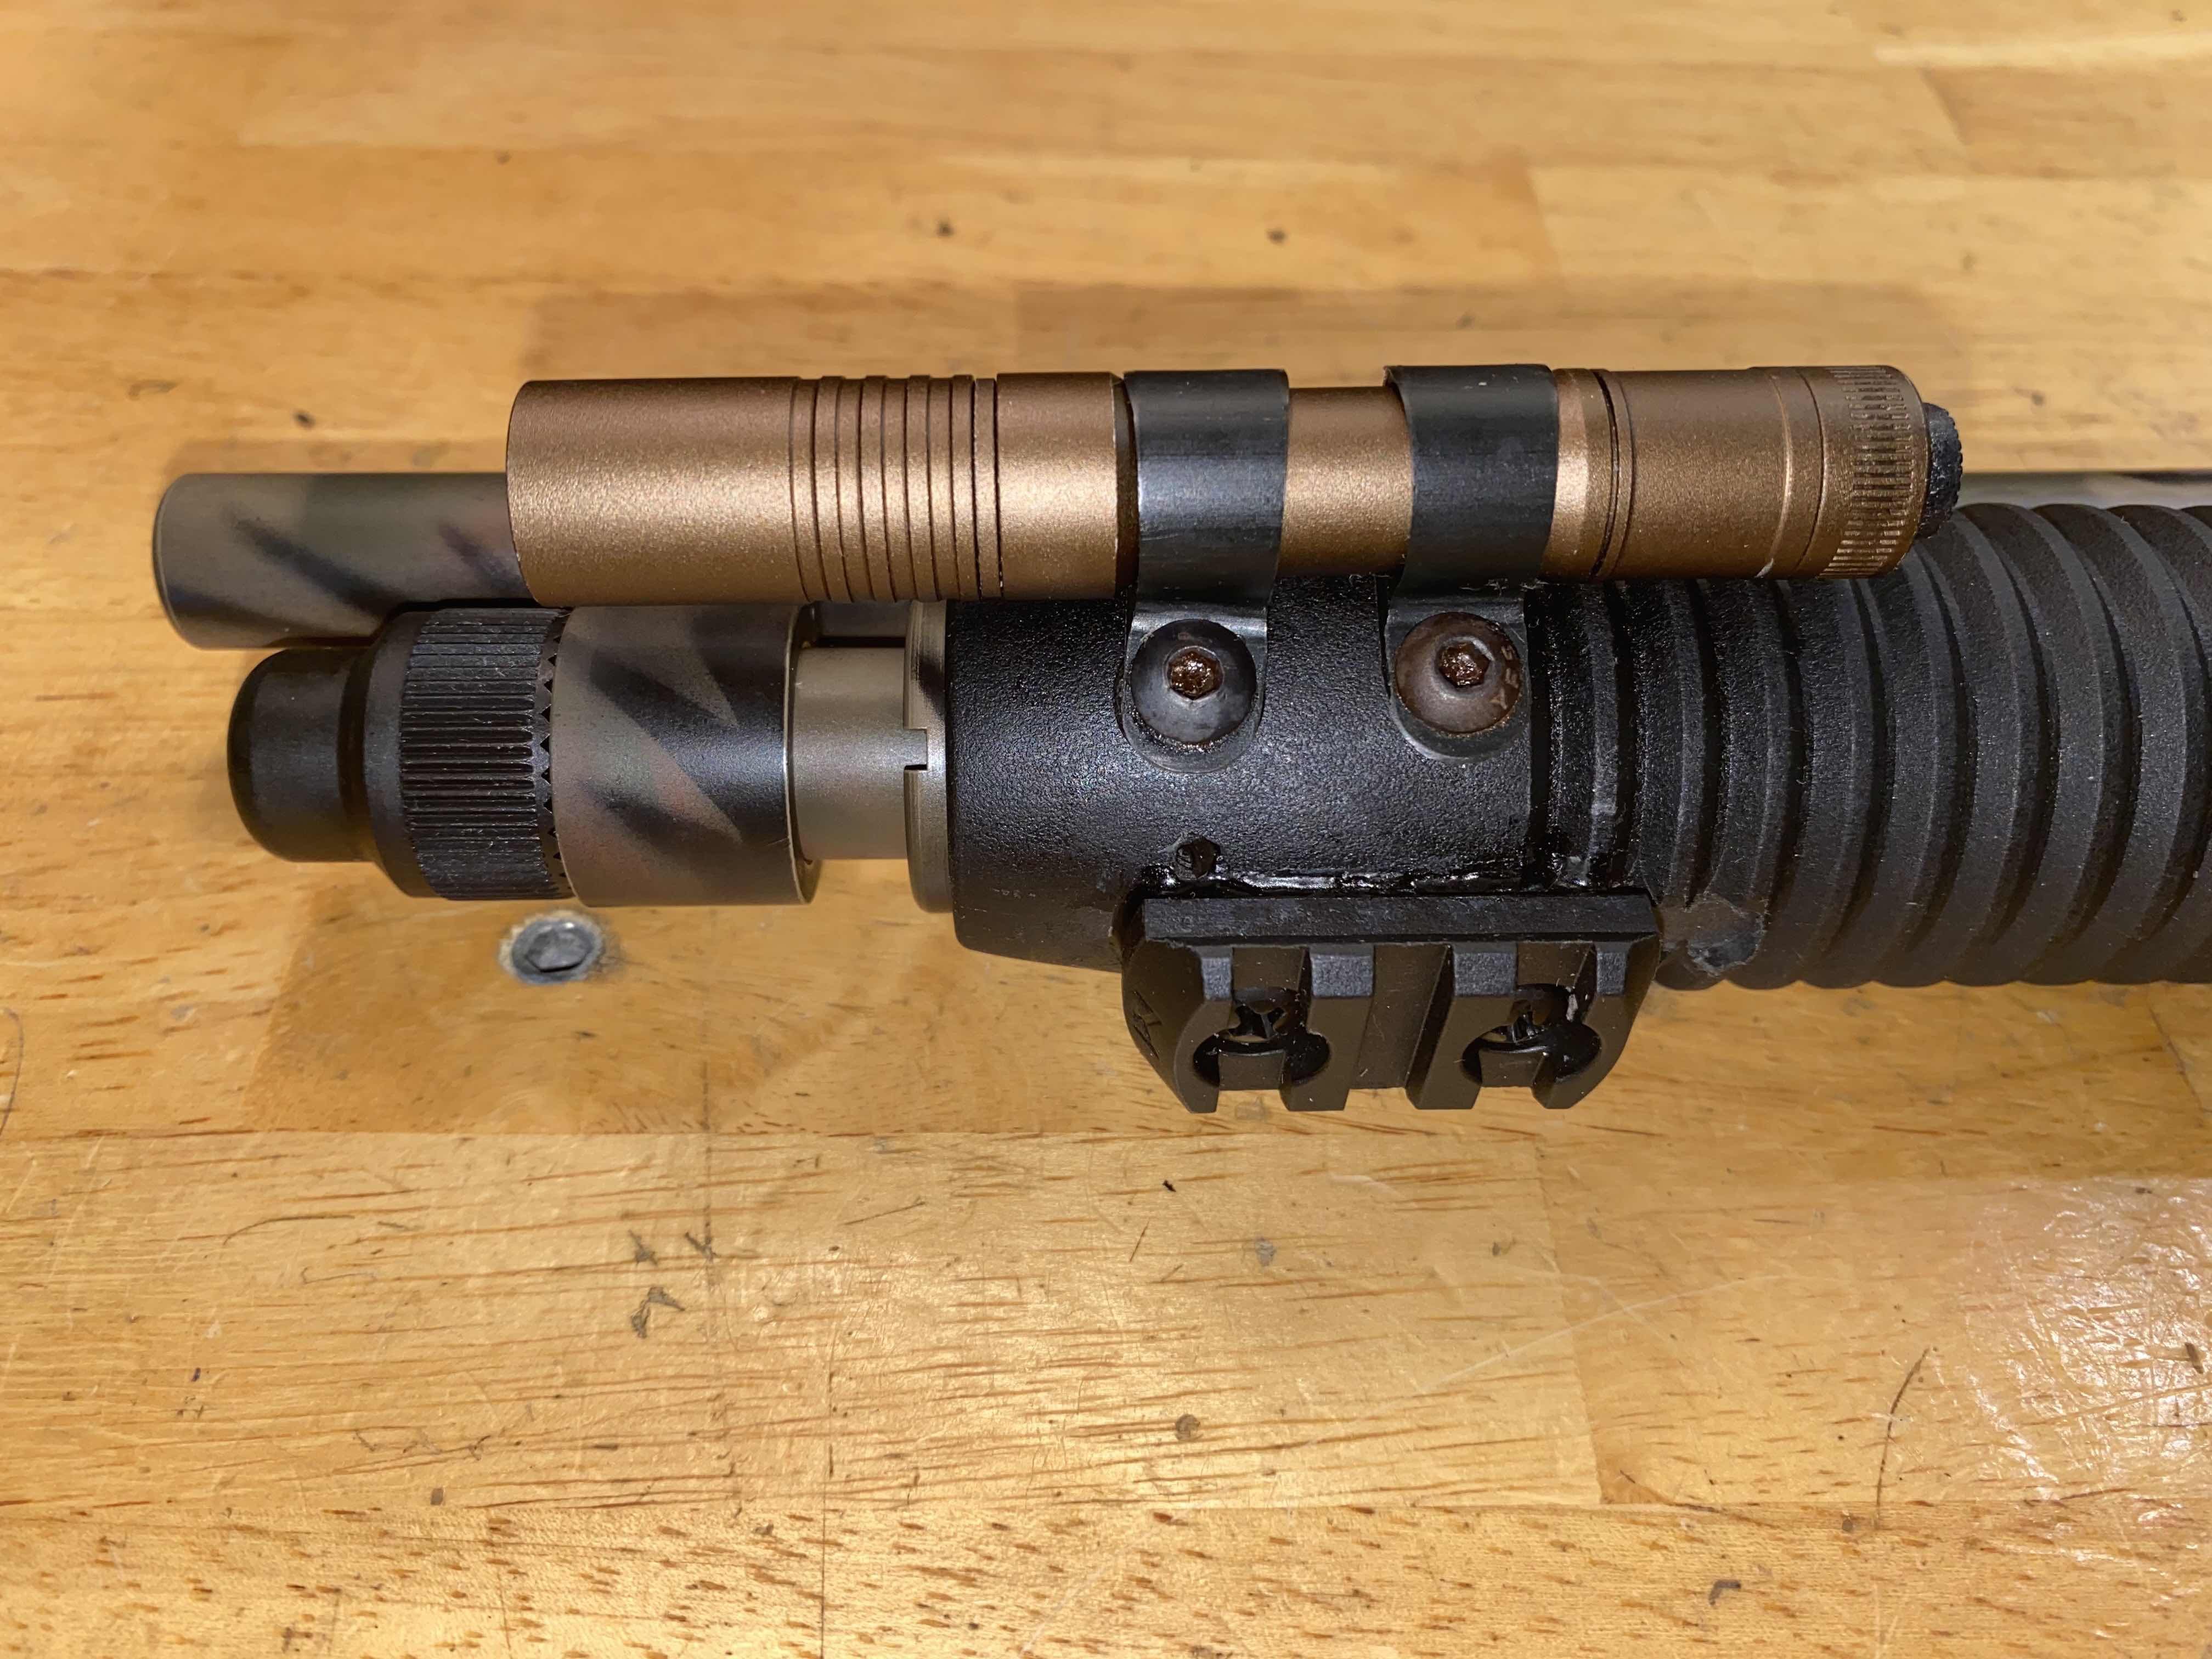
The offset light mount attached to the picatinny rail was not as ergonomically clever as I hoped, so a simple application of electric cable wraps being employed for installation worked great for this particular light. This should be considered for the OP's project for it's simplicity. I used a simple backing plate tapped and threaded for desired fastener or again use T-nut, for the mount. The Streamlight is $40! and can be cross decked to pistols etc.


-
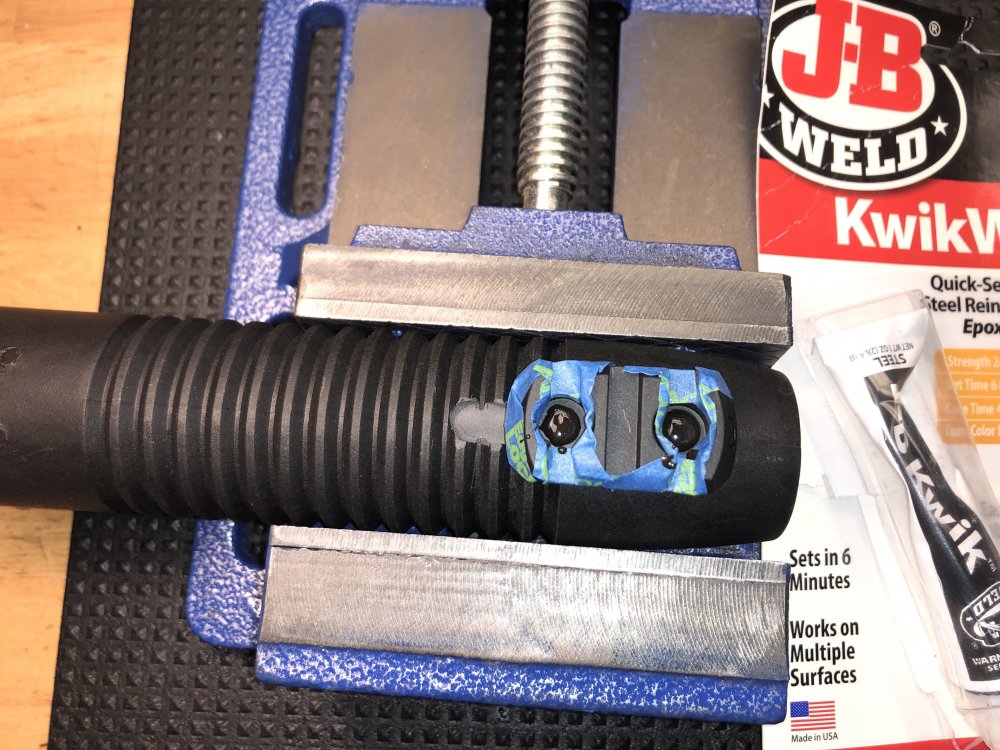
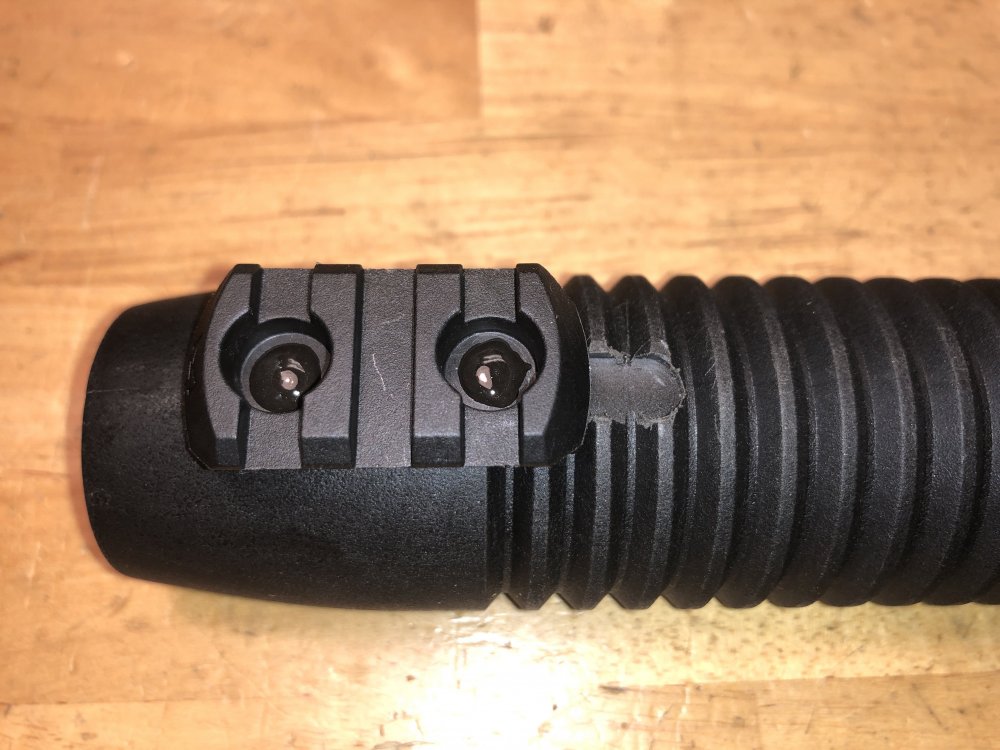
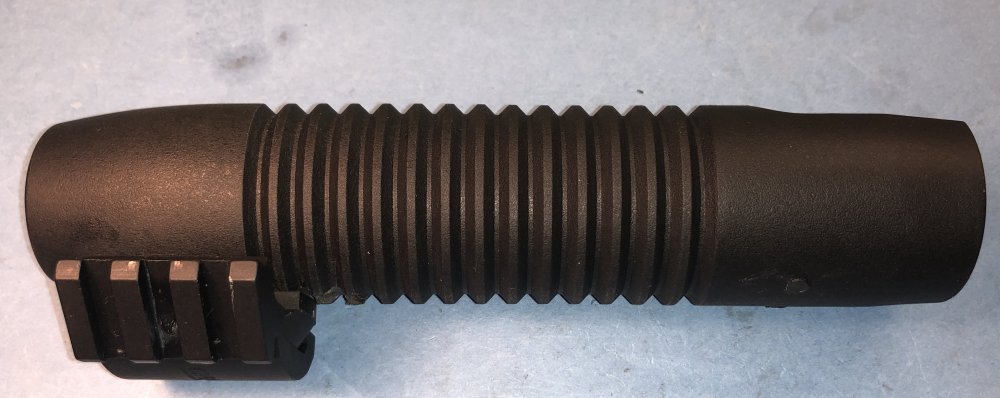
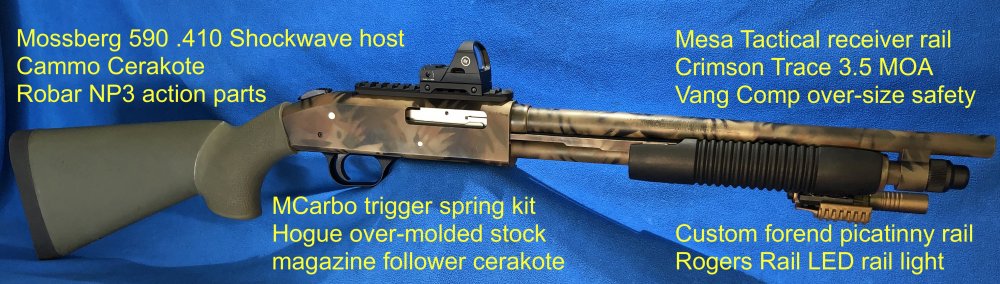
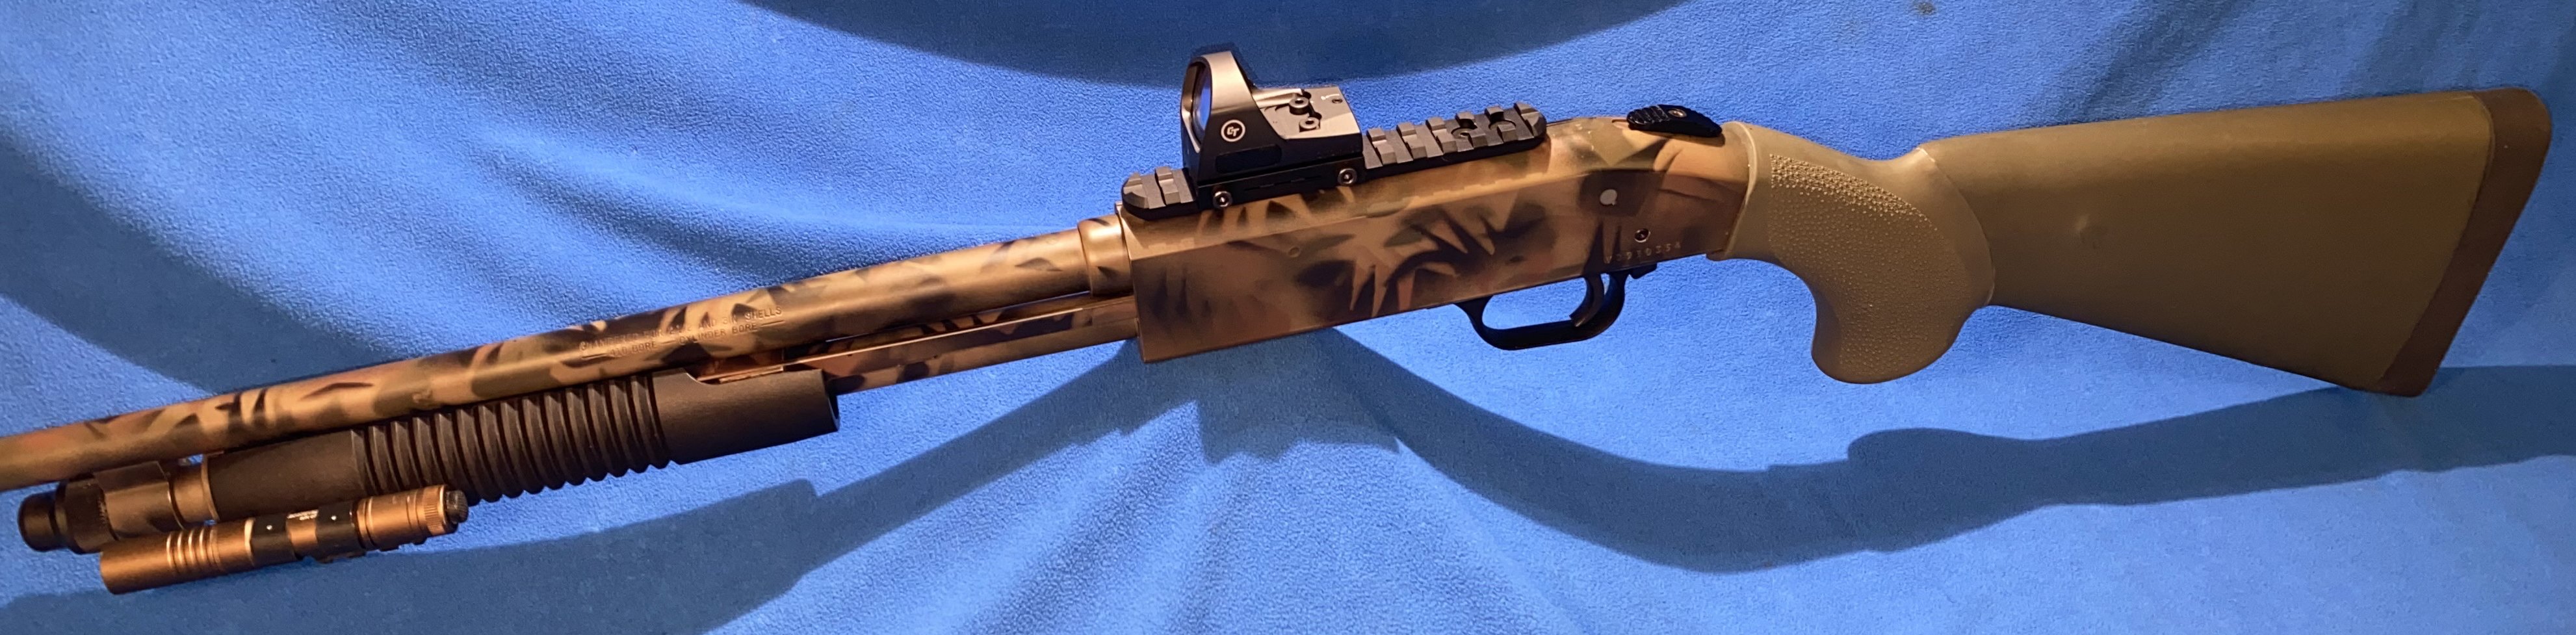
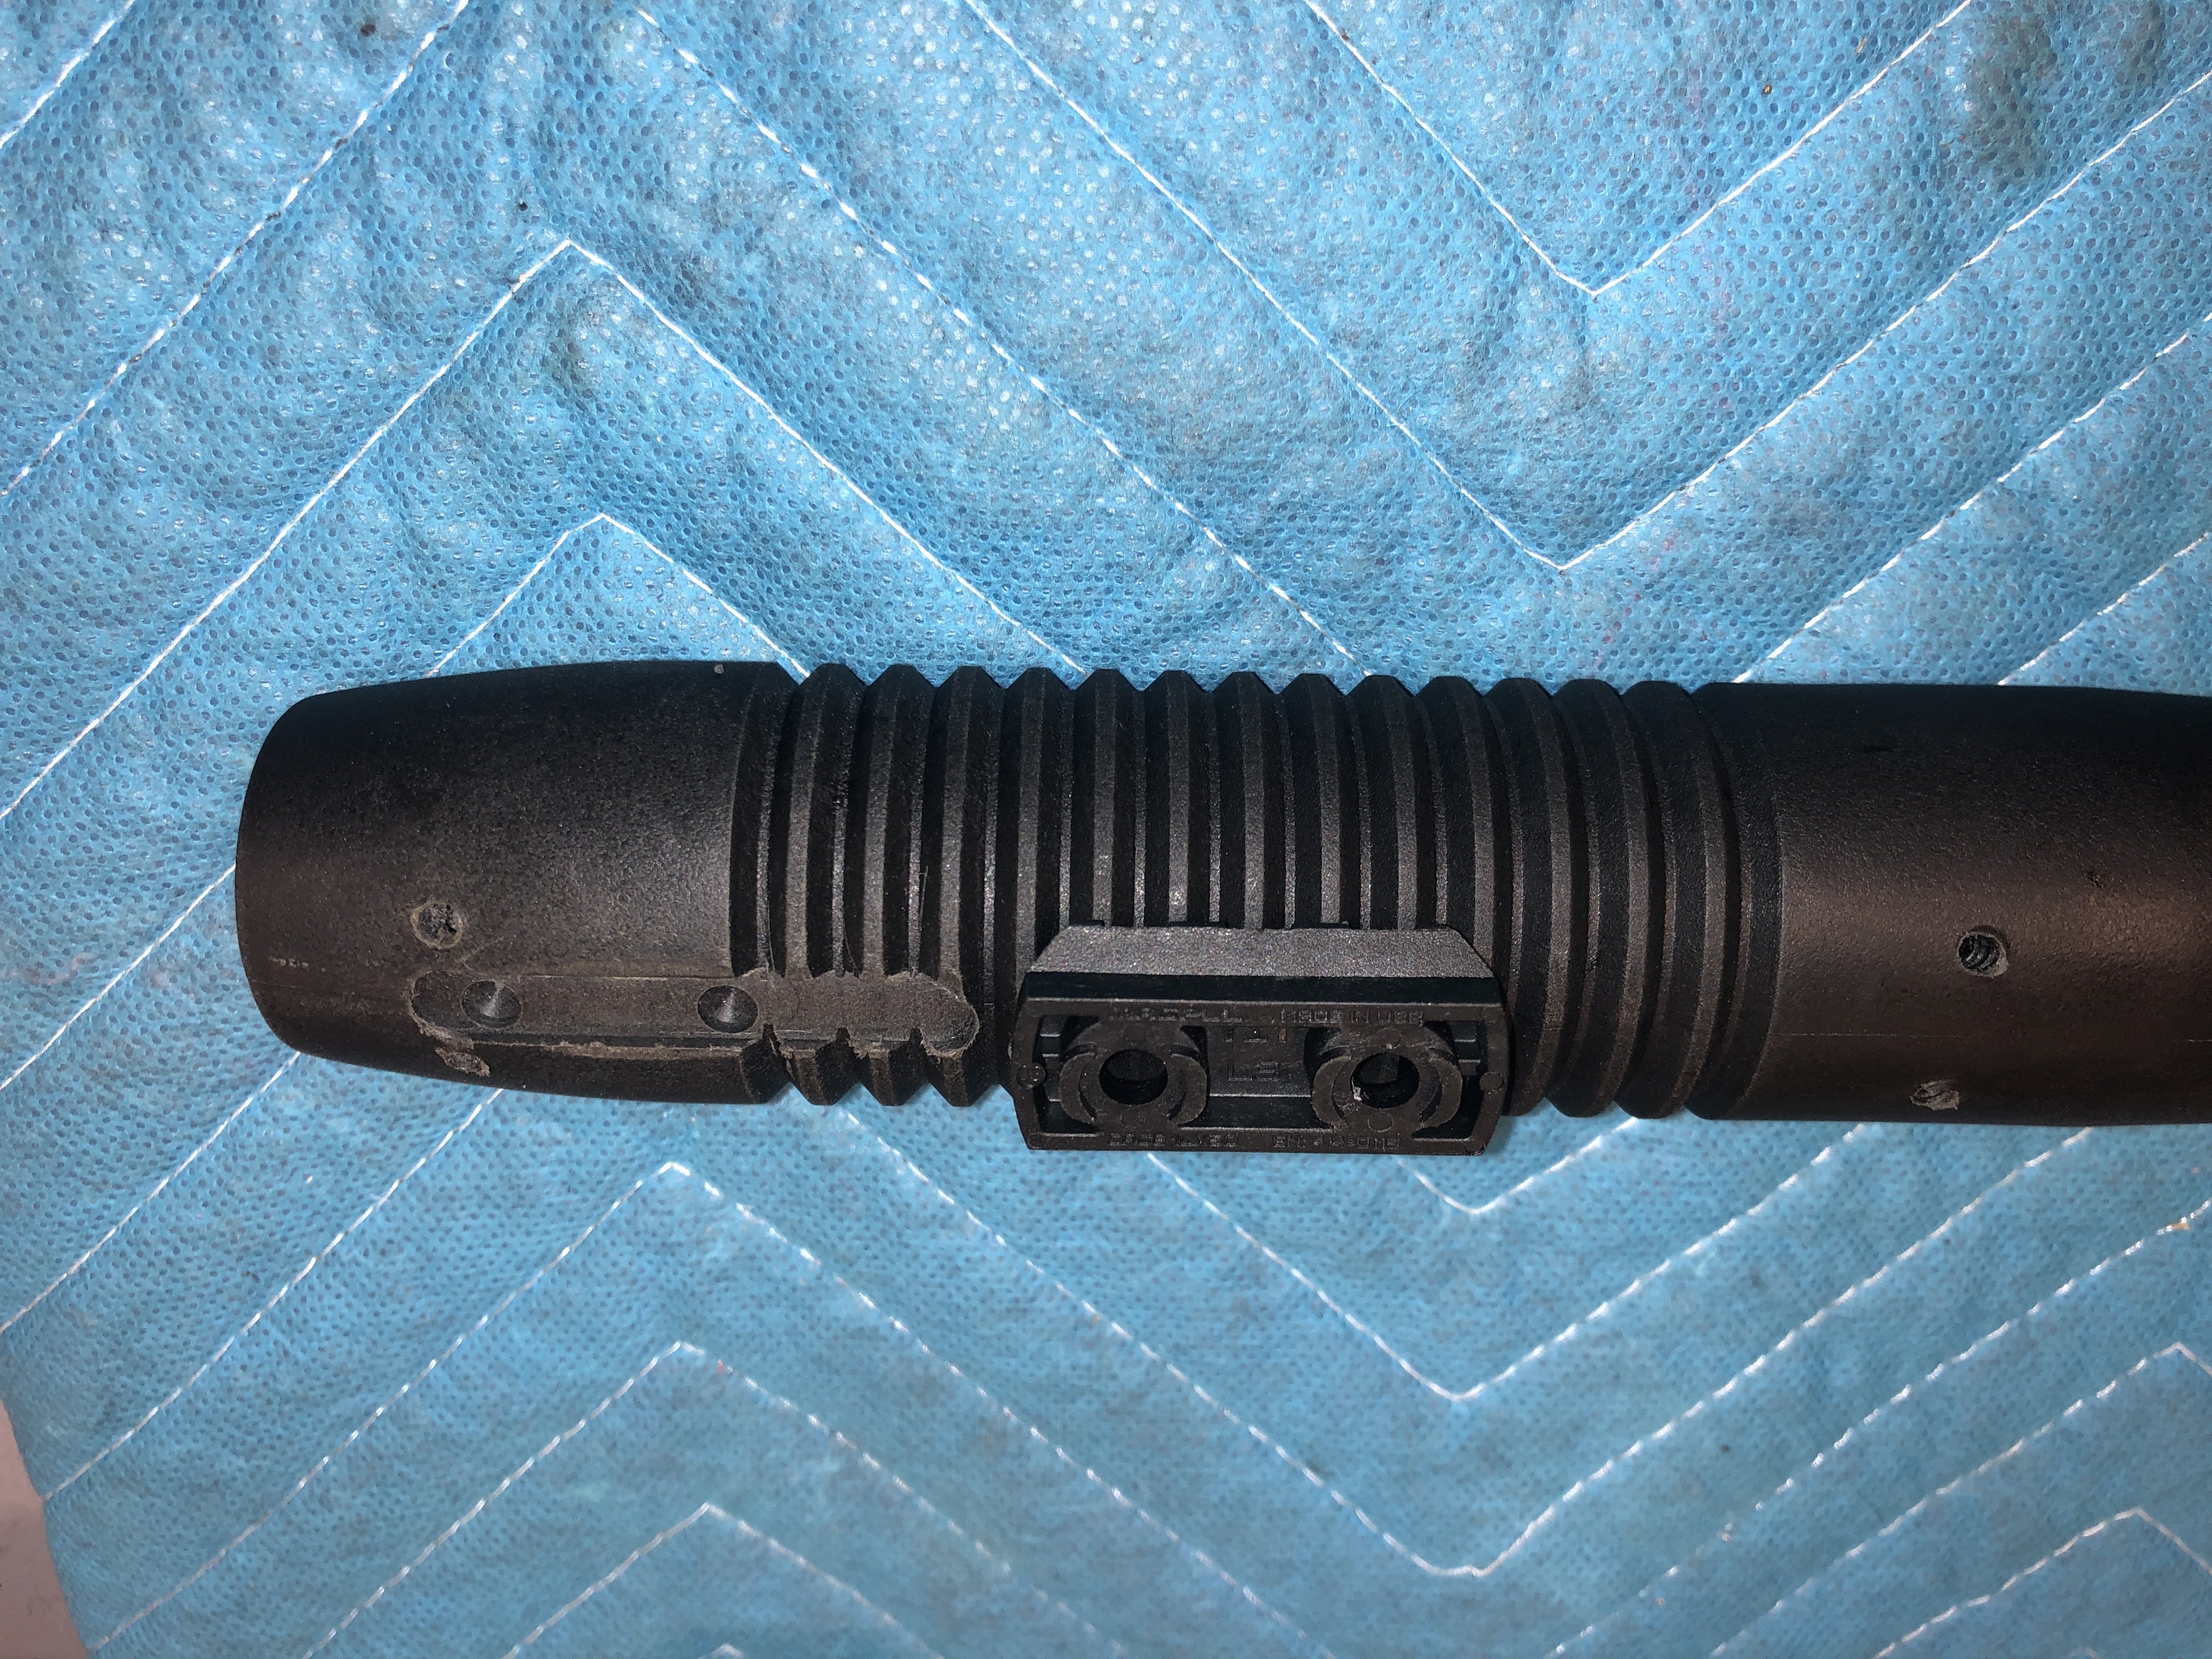
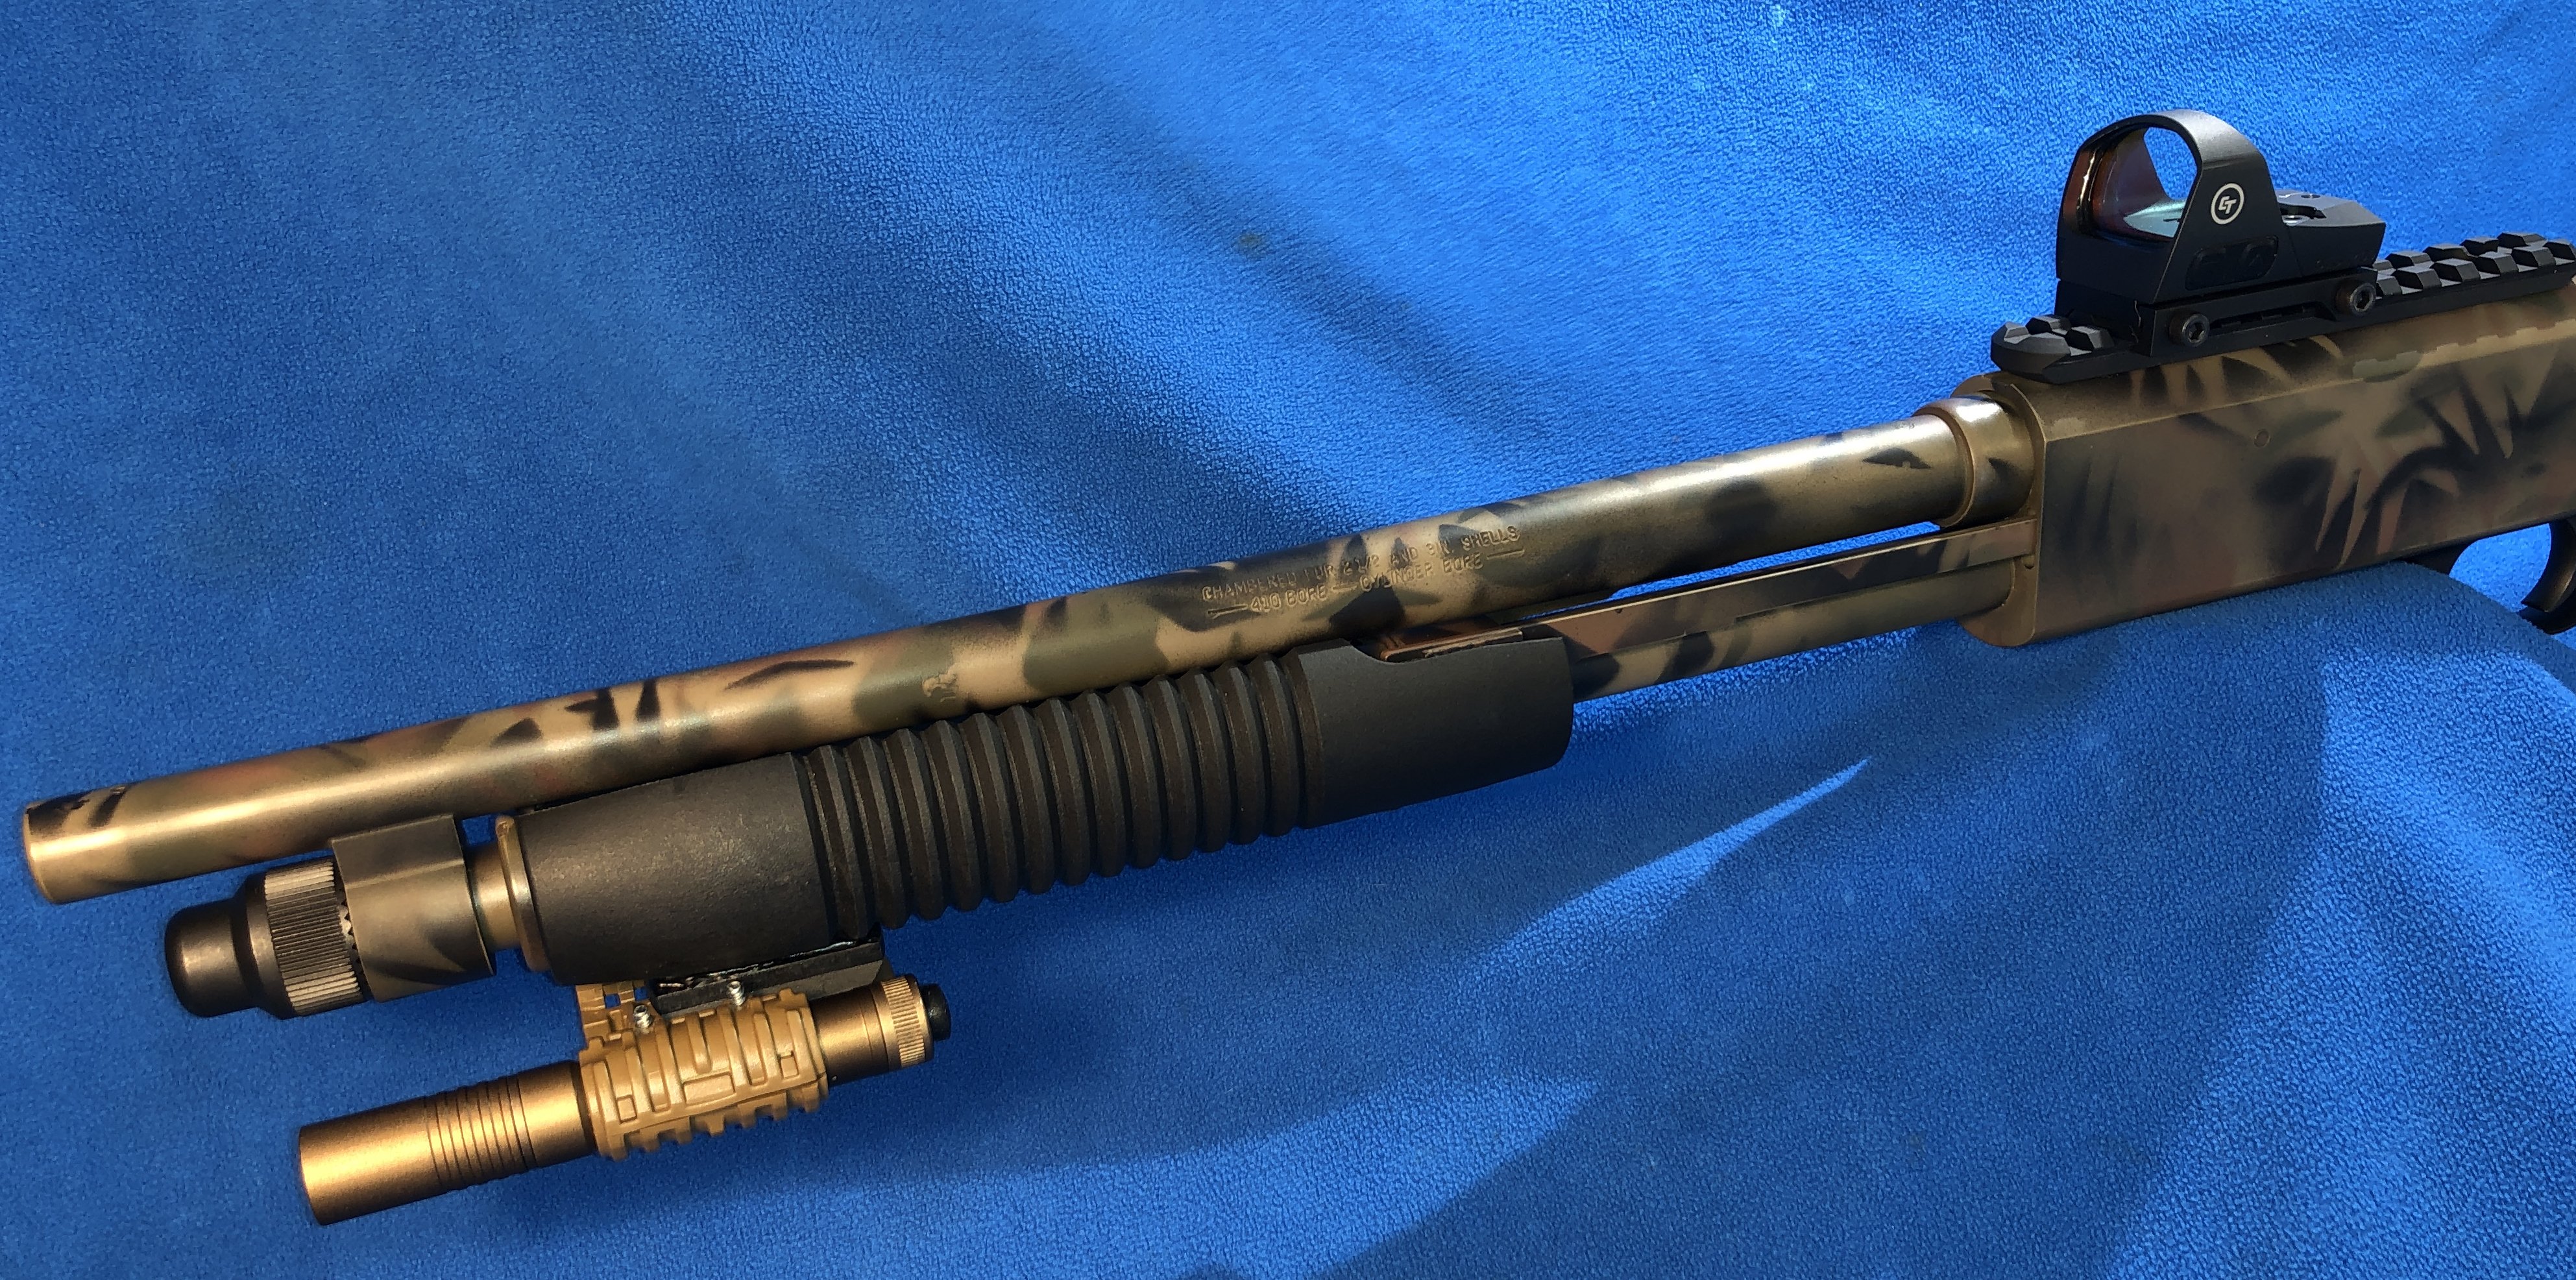
I recently converted a 14" Mossberg Shockwave to a BATFE registered AOW (any other weapon) with a lot of modifications to have a little varmint gun. There was no mounting options available for the OEM forearm with a curved surface to install a light, so I milled a flat and used 2 part epoxy & screws to mount a picatinny rail at 6 o'clock position. The four holes seen were mounting points for the OEM "strap"; these were filled with same JB Weld black epoxy and can barely be seen in finished photos.


-
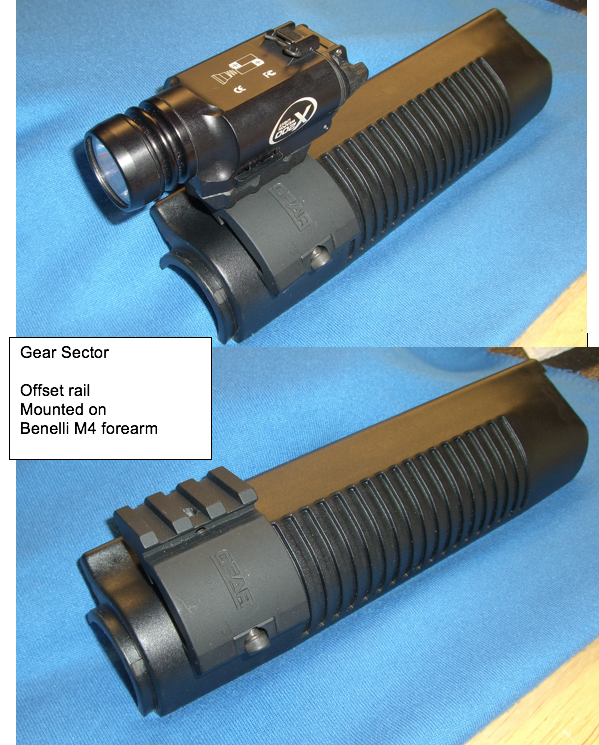
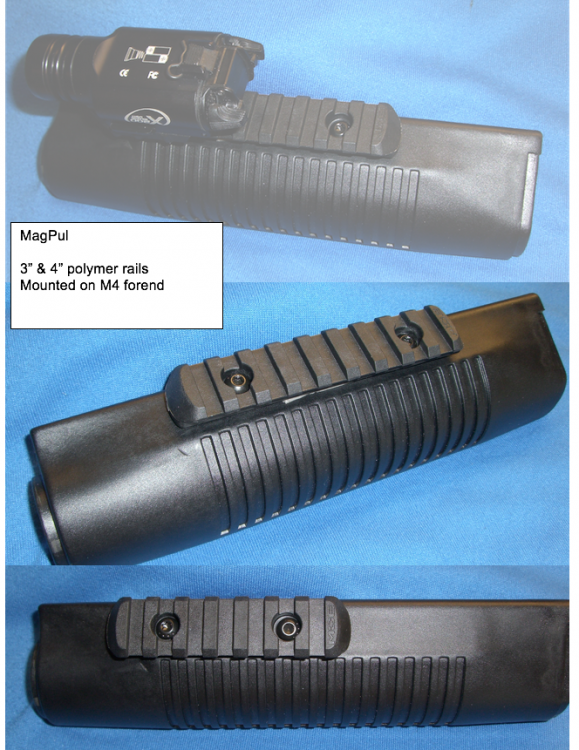
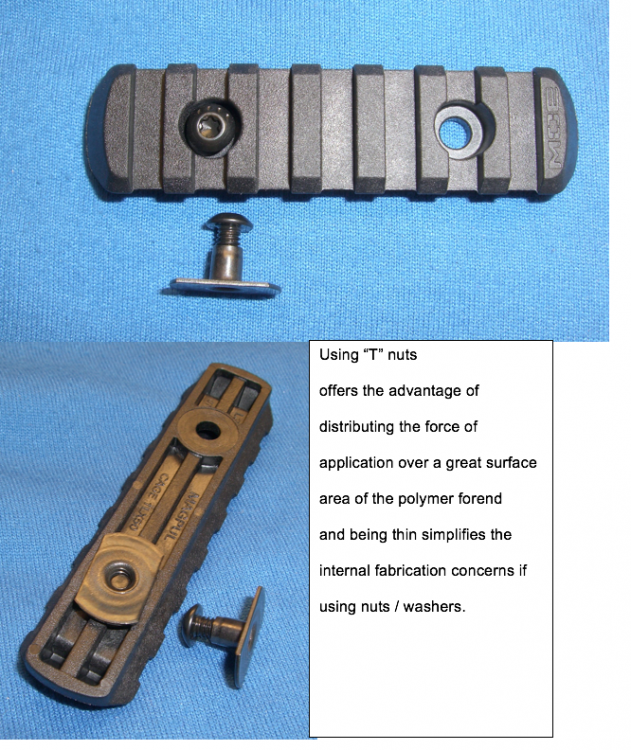
A few years ago I mounted a variety of picatinny rail mounts to the OEM two piece polymer rails. The simplest and secure manner I found was to use thru T-nuts, the hole has to be drilled precisely to fit the shaft of the T-nut to prevent any wobble, which could be corrected with 2-part epoxy if you need to. The Magpul switch mount could be installed likewise.

-
I have always like the M4 Entry. The c-stocks are nice on an SBS.
Hello, SD, it's been awhile !

-
1
-
-
Carry on. Just experimenting with photo uploads on the new site format.....much improved.

-
It is quite simple. IF you are purchasing the firearm from a reputable FFL in the locale of your domicile AND you personally don't have any legal liabilities from owning such firearm, no problem. IF you source the firearm from a non-FFL then you are responsible for knowing all applicable the Federal BATFE laws as well as the State / Local ordinances that apply to firearm sales, the most restrictive of the collective laws controlling its ownership legality in your locale. All the laws are now readily available for review at the click of a mouse.
-
Hammer cocked and locked on insertion of the trigger group?
-
Maybe the detent / spring are just full of crud and they and the channel that retain them may just need a good cleaning to allow the detent to have free full travel to engage the handle.
Collectively, all the parts involved are a few bucks total. IF one desires a different handle, buy the parts and swap them out and see what happens. Carry on.
-
My Plan A would be to gently open up / deepen the handle component and see if it helps. One can remove the bolt and insert the handle and observe exactly what the situation is.
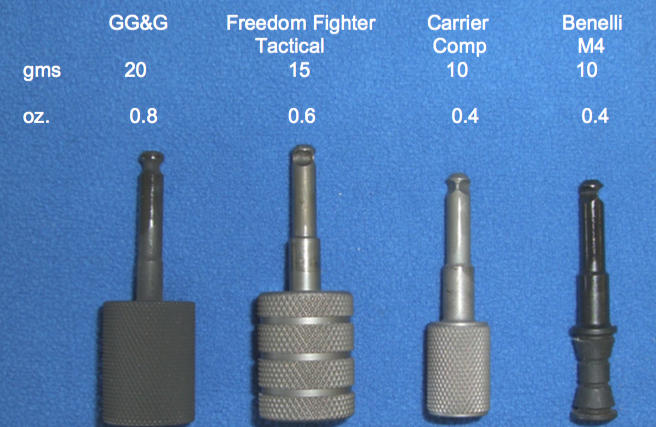
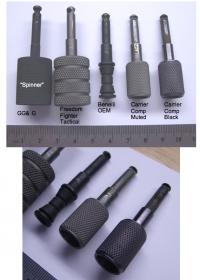
In my view the detent-handle engagement of the axle component of the handle is a non-load bearing surface that simply retains the pin in its lateral position thru the bolt; the actual axle of the handle bears all the load with retraction of the bolt, however its only with hand pulling rearward force, not a repetitive high speed violent impact on the axle part. So I don't think the surface hardening is particularly important at that engagement site. One only has to deepen one of the surfaces not both on the Carrier Comp; the G&G "spinner" however is a continuous circular detent. Due to part intolerances, the tip of the detent may not be engaging the handle recess correctly.
Plan B addressing your correct observation about the limiting travel of the retaining pin, would be to fill in the handle recess with some JB weld, then incrementally enlarge the engagement until it felt like a solid fit.
-
And finally, you might take a small round needle file and deepen the notch where the detent engages it.
-
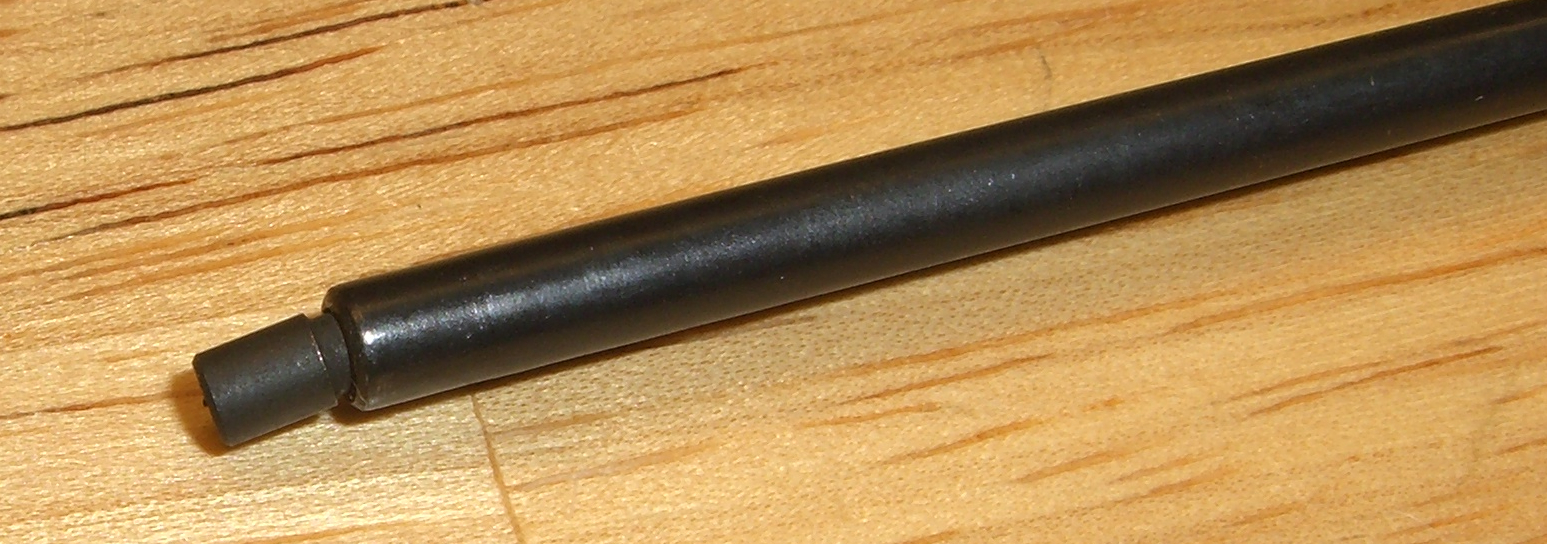
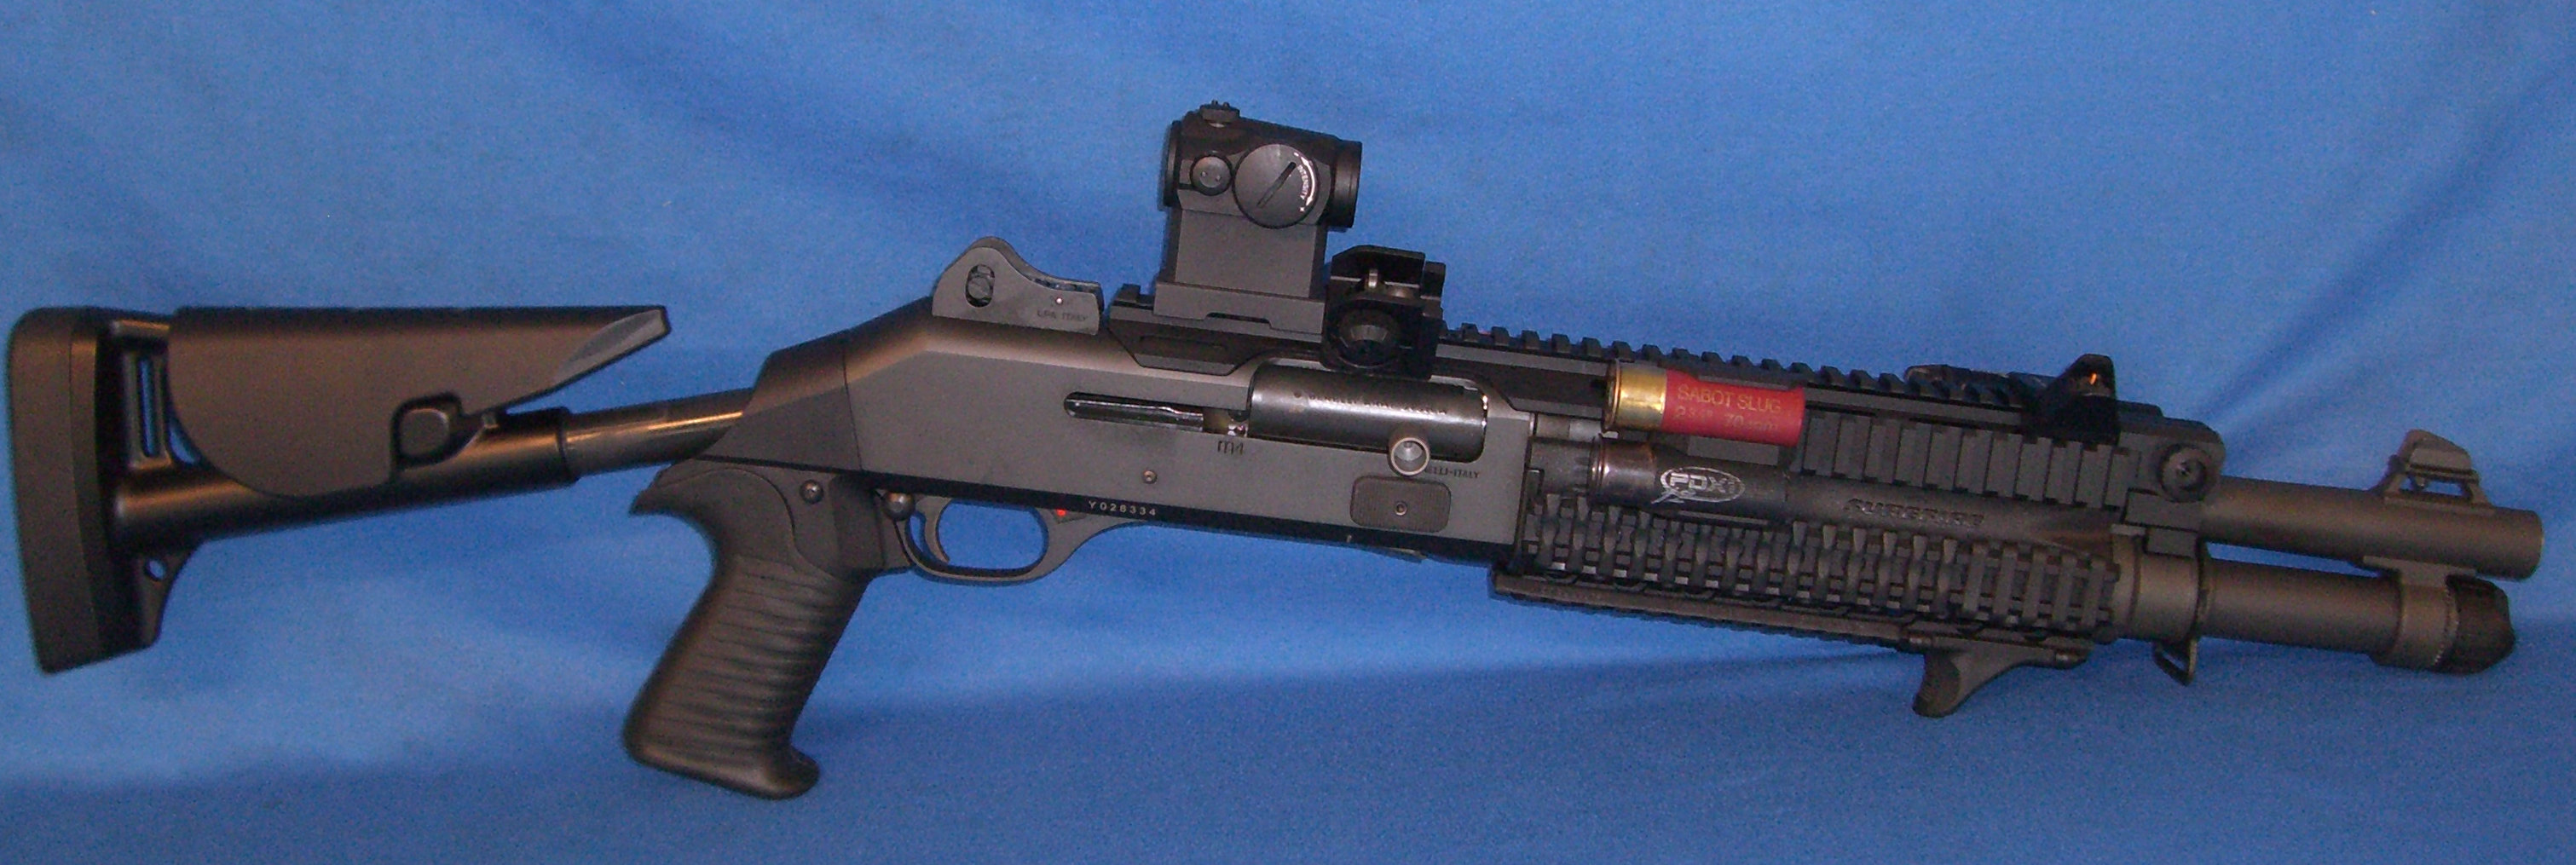
The 14" entry M4 has a smooth bore fixed Cylinder choke barrel.


Some R&D
in Benelli
Posted · Edited by benelliwerkes
Modify your firearm in good faith. Screw the fine print on 922R as I have yet to see a real incident report of a common citizen being legally cited for an infraction of said regulation.....standing by to review of any legally prosecuted instant cases. IF however you live under a rock and are found to be in possession of cocaine in weight exceeding your shot shell magazine capacity and a firearm that has had its serial number defaced with a hard piece of crack, some zealous prosecutor will use said infraction to pursue such scumbags for a 3-strikes-and-they're-out case over the top and put them away. Just sayin'.