SJPotter31
-
Posts
17 -
Joined
-
Last visited
-
Days Won
2
Everything posted by SJPotter31
-
I highly recommend Edgar Sherman Designs for slings. I also adapted the paracord method of attaching the slings to my rifles as a big weight savings over qd attachments. I do believe I saw ESD is also working on a padded sling coming soon.
-
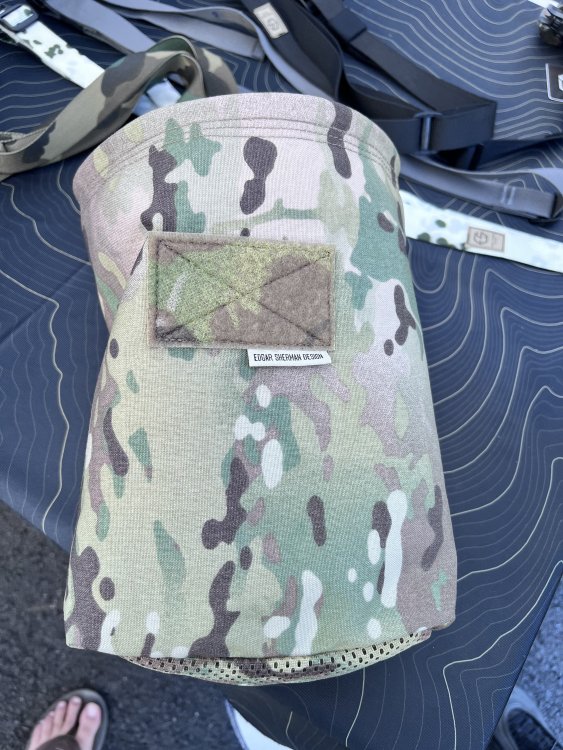
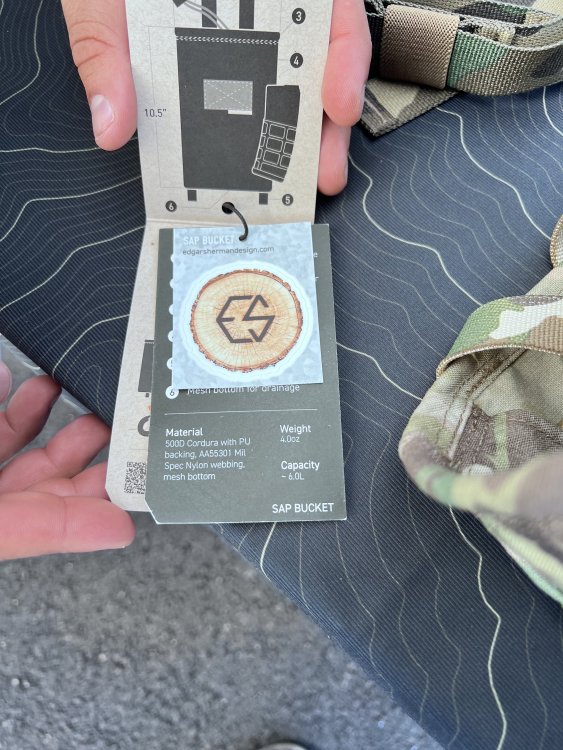
I was just visiting The Edgar Sherman Design booth at Sig Sauer Experience Center on Friday. They had some real nice slings. I’ve been using the VTAC padded sling because I found the BFG Vickers to be too short. I decided to give ESD a try and ordered the black multicam sling. Looking for ward to it. oh and btw.. they are coming out with their own dump pouch. I was told it would be available in about a month. They are calling it The Sap Bucket, in honor of New Hampshire maple syrup.
-
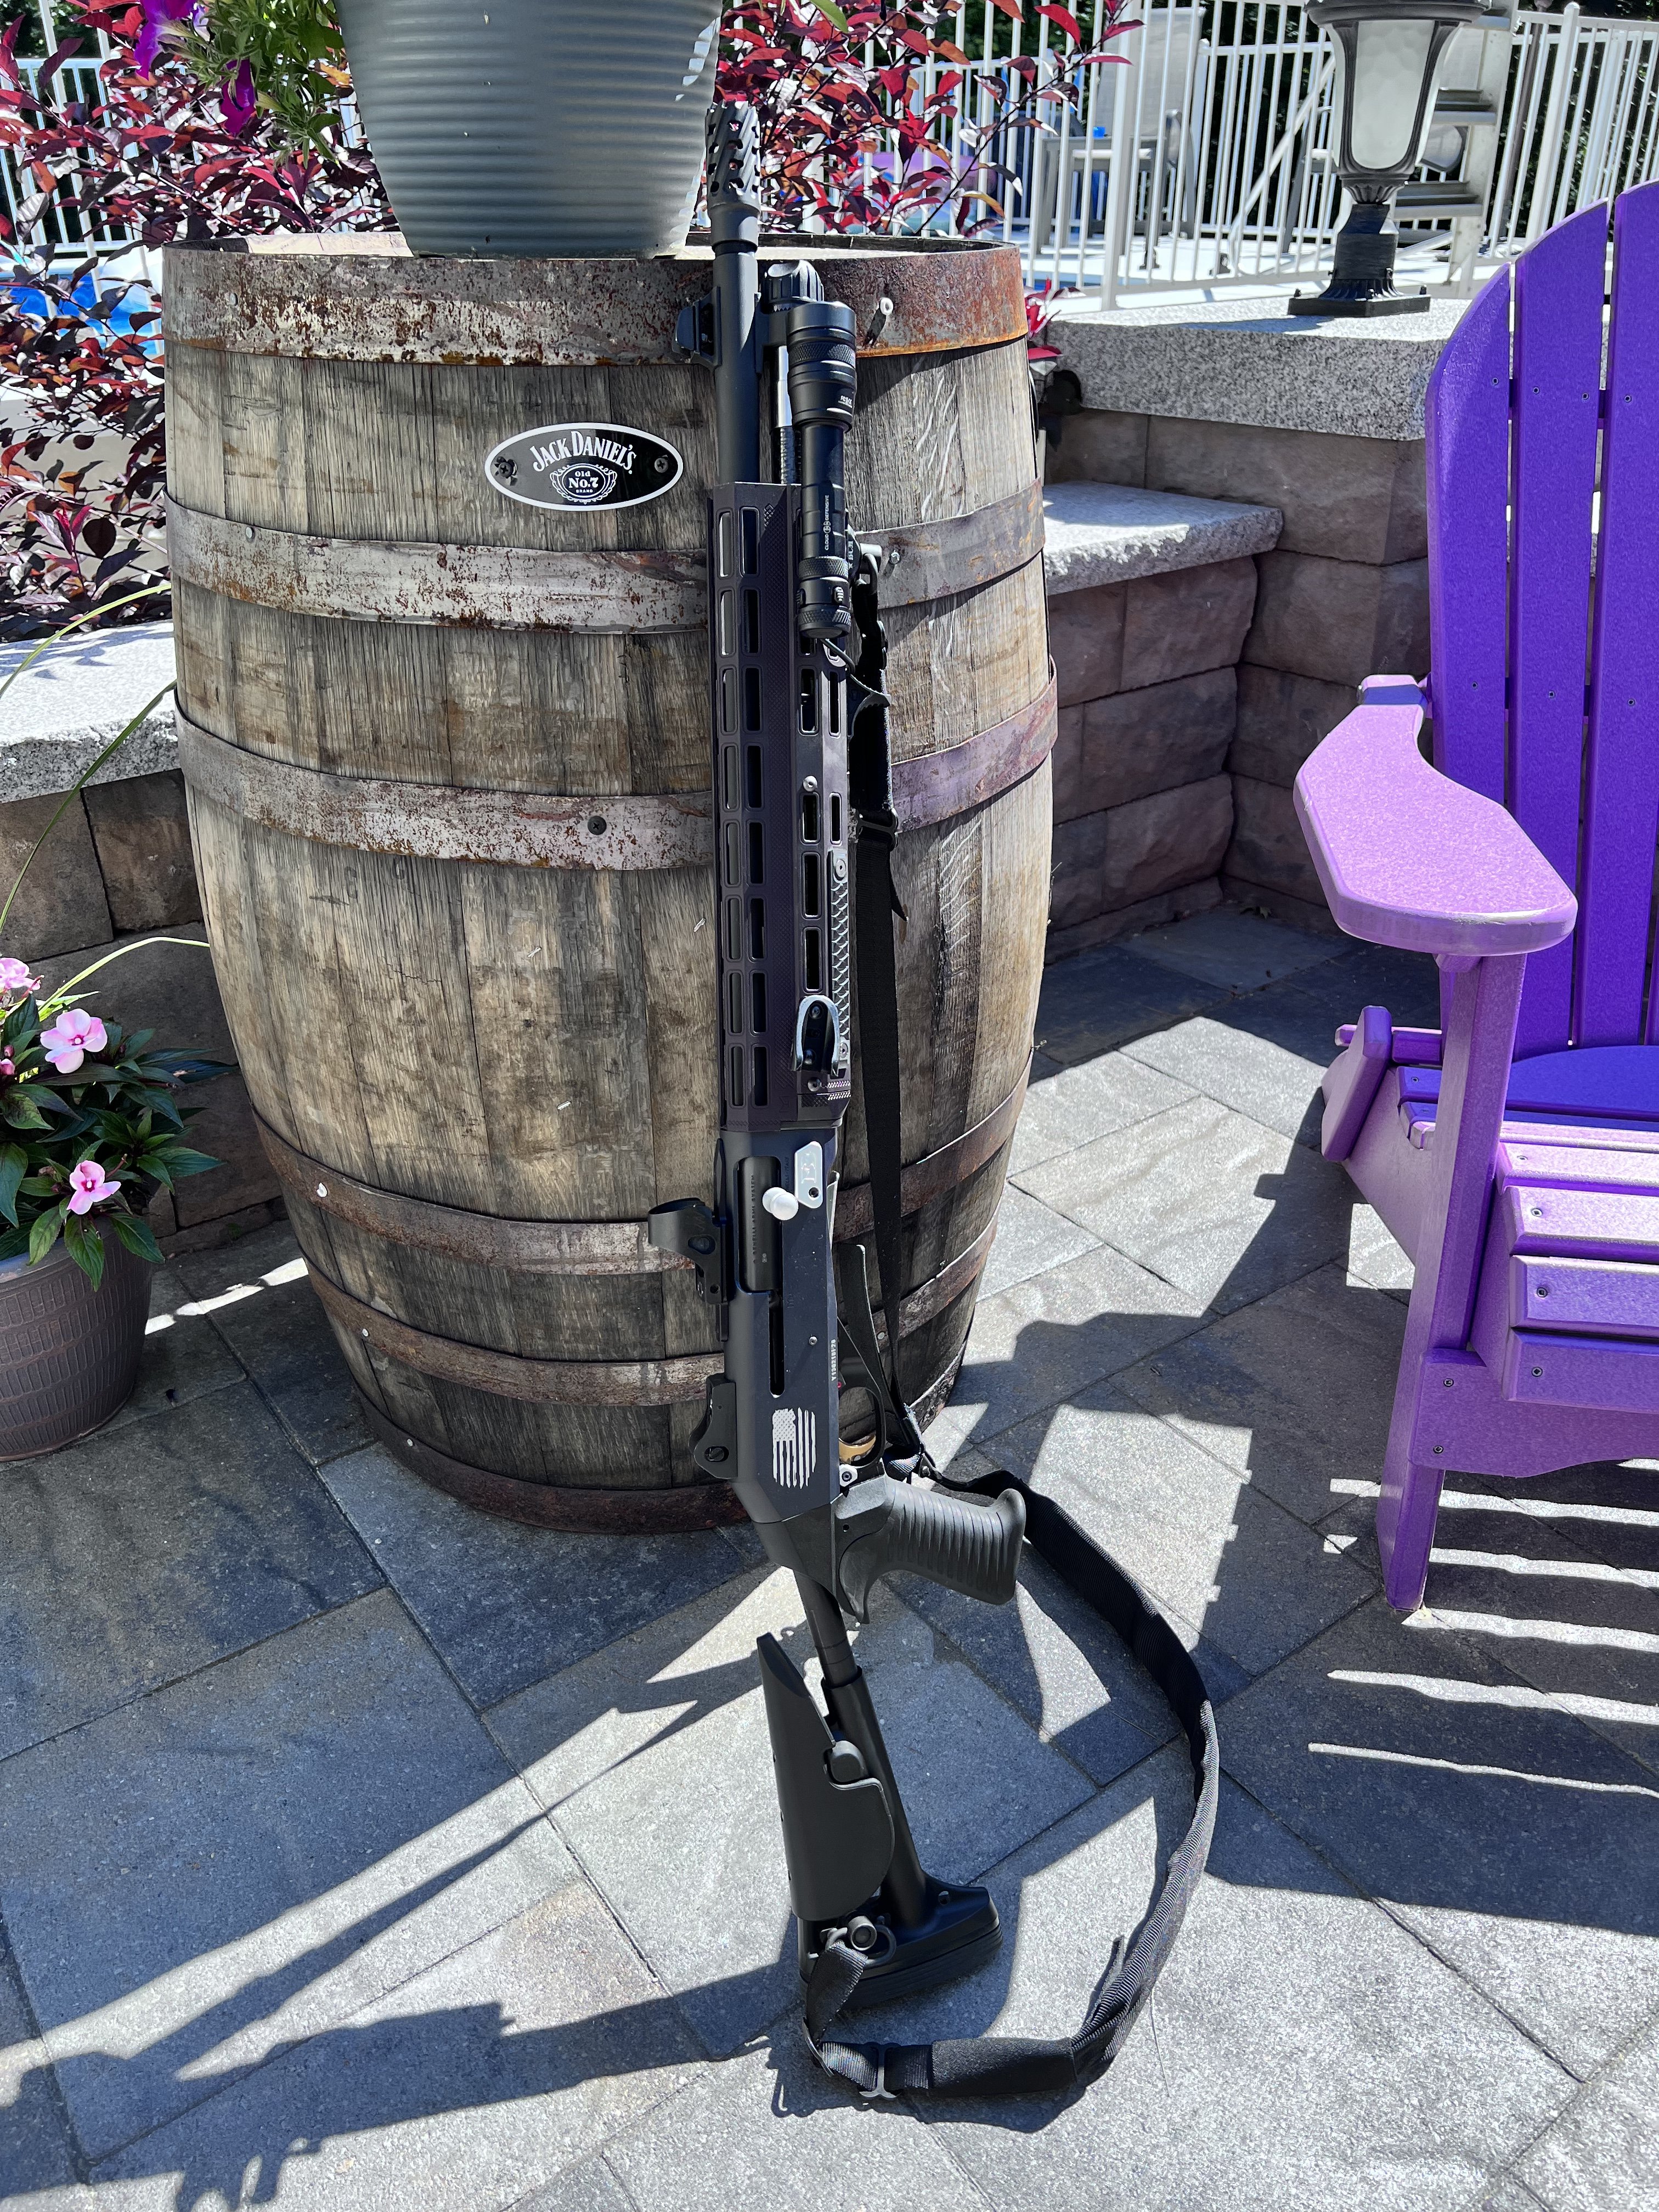
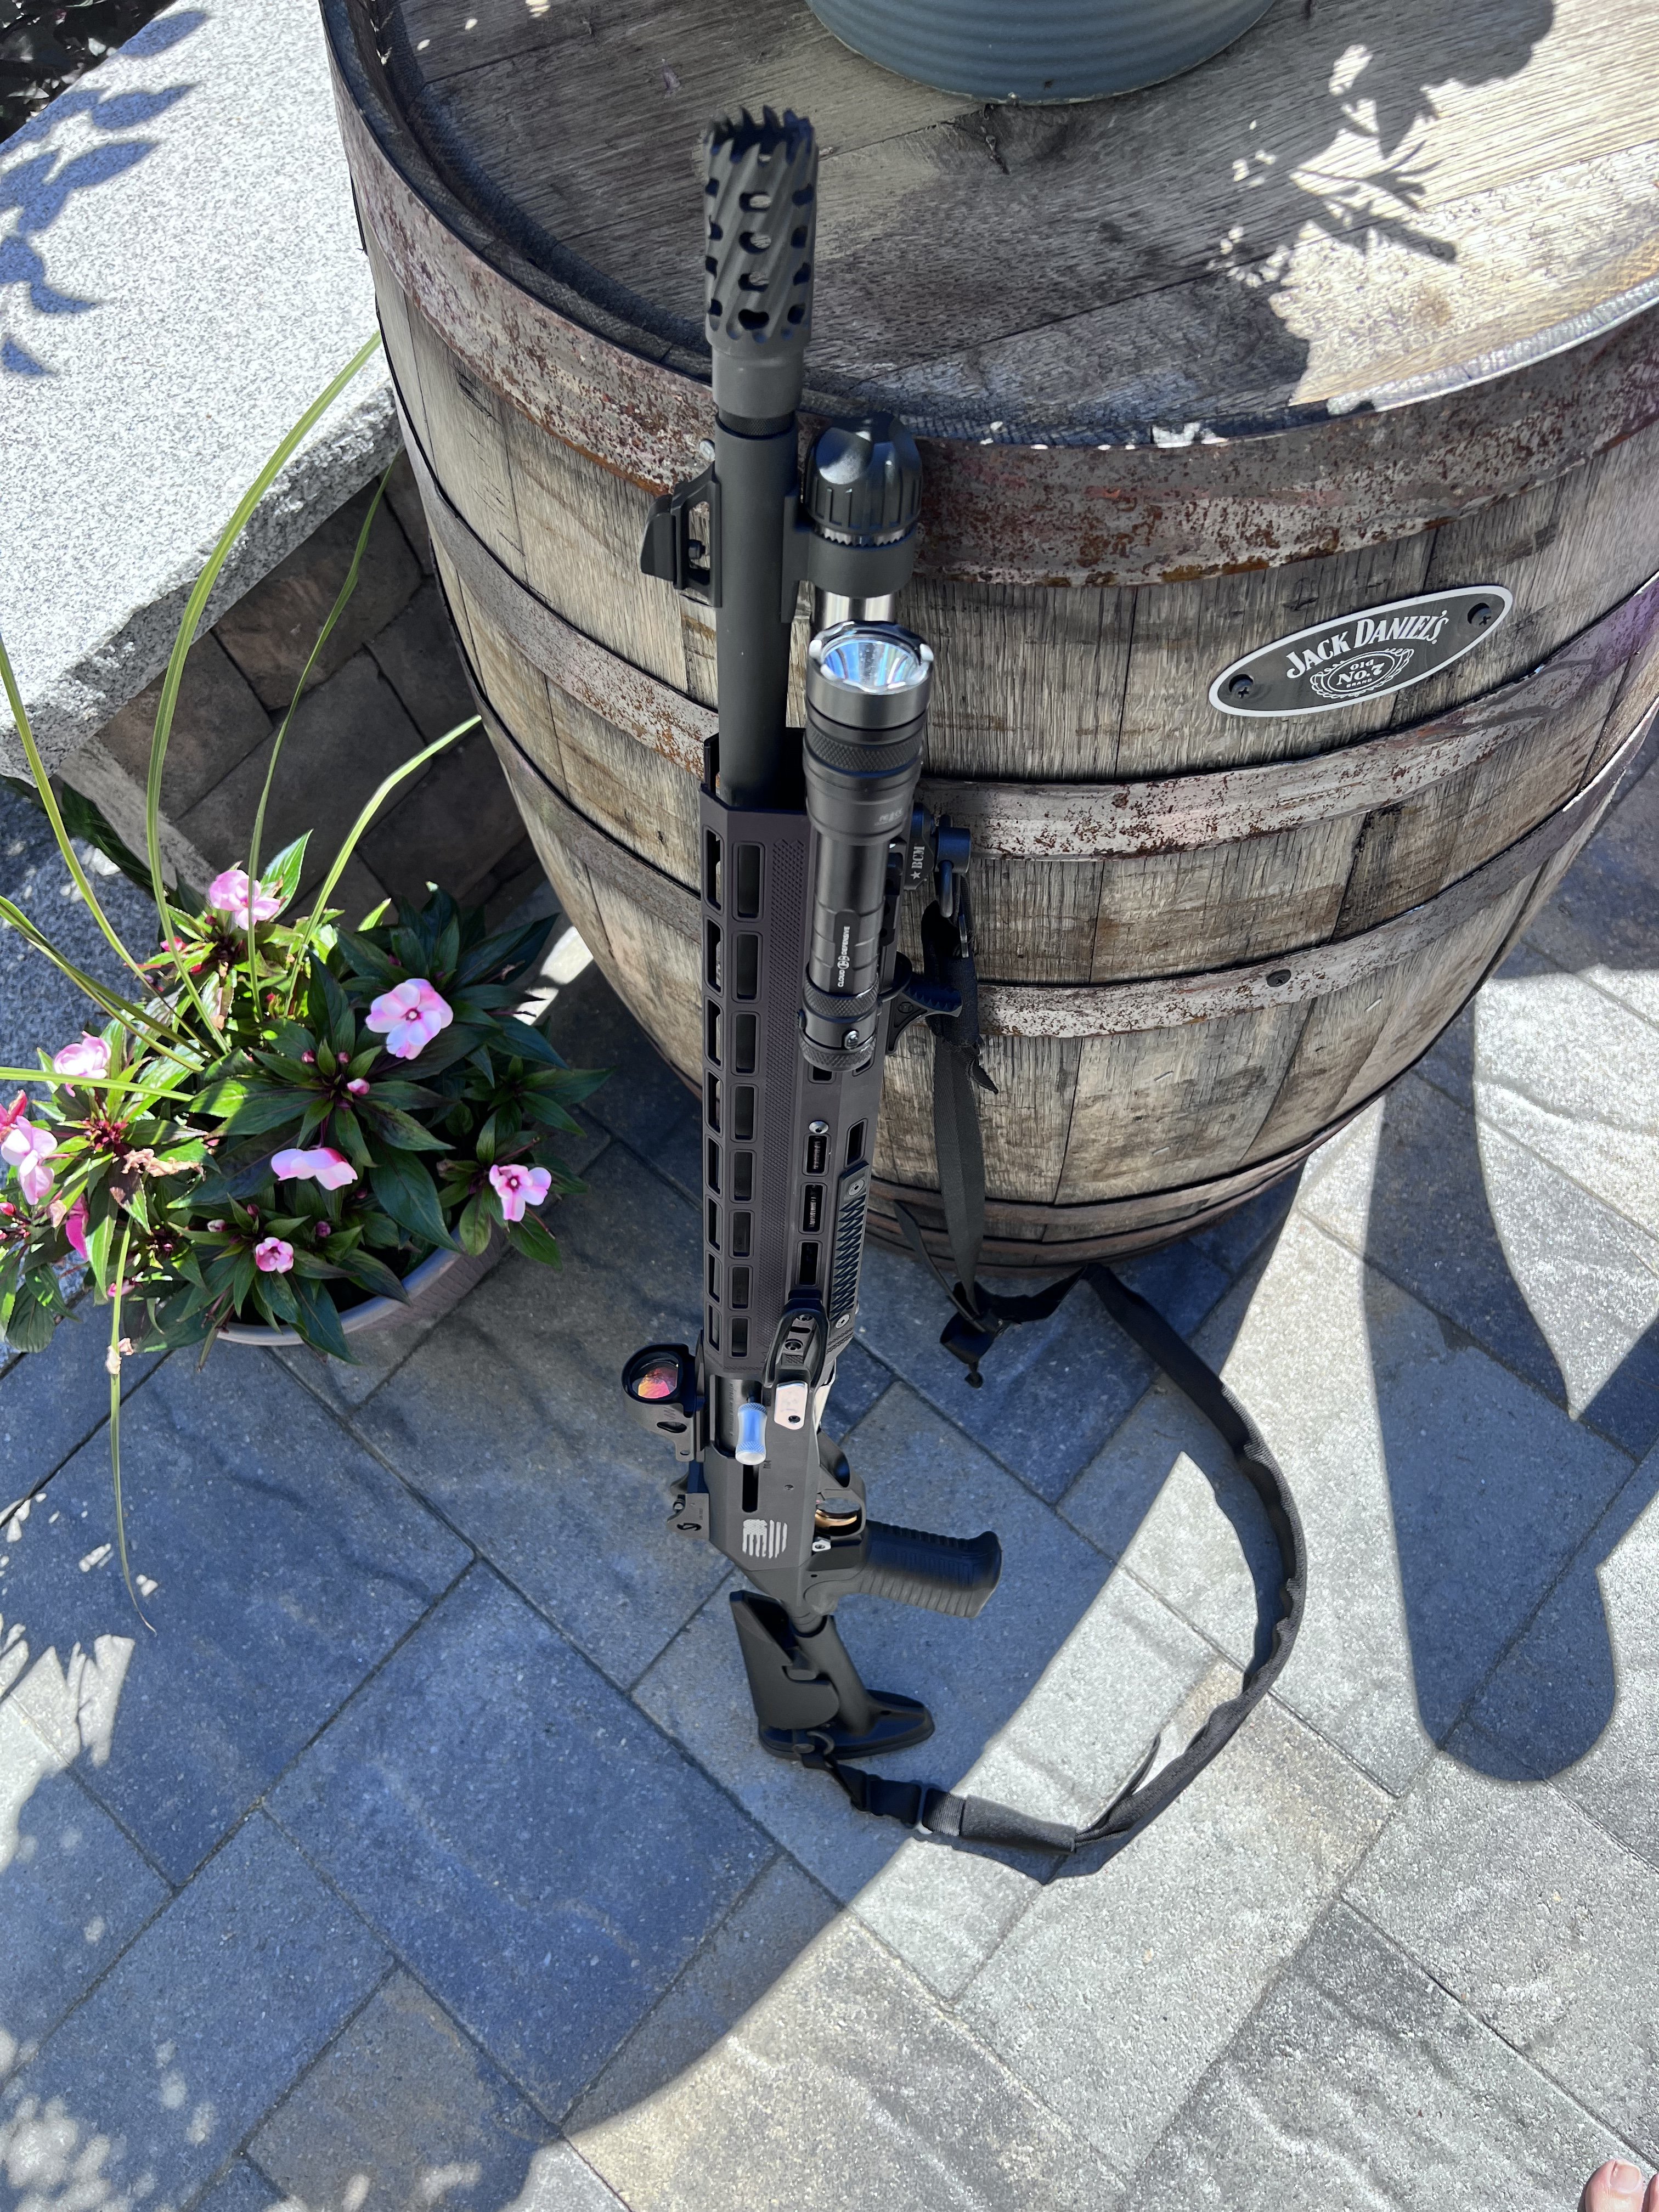
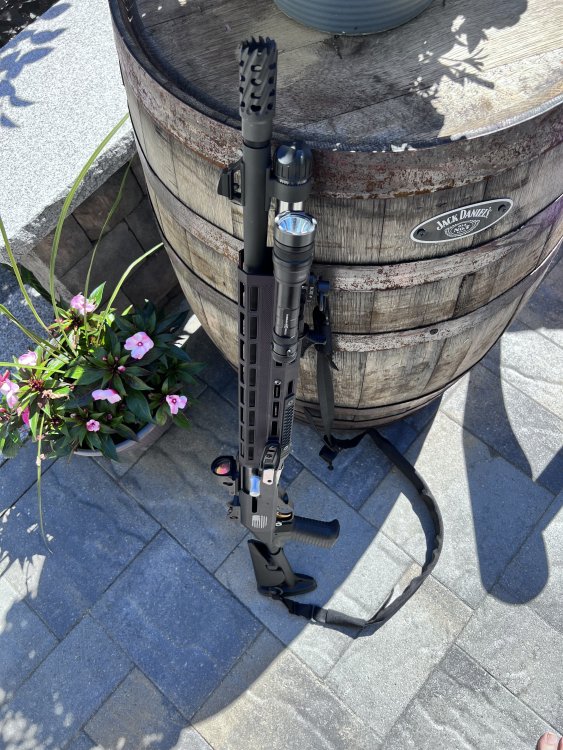
I replaced the breacher choke with a flush modified choke. I think I’ll probably get a flush IC choke to see how that patterns as well. That dropped about 3 inches off the barrel. When I get back from the trip I’m on I’ll dig into removing the irons. The trijicon SRO worked really well for me during the classes at Sig last week. I didn’t look at the irons once, so I don’t think I’ll miss them.
-
Man, not only did I admit I don’t have the gunsmithing abilities I’d like, now you’re calling me out on my woodshop abilities!! I didn’t make it..I bought that too!! ? it’s a pretty nice Adirondack chair. I live in NH so it’s made of PVC which holds up to the winters and summers really well. Some day I have aspirations of being a decent gunsmith and craftsman. But that day isn’t today. Maybe tomorrow!!
-
I want the Benelli Ghostbusters variant she's firing!
-
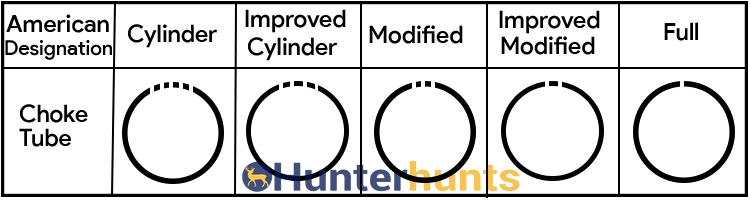
This chart should tell you which size chokes you have. Count the notches on the choke rim.
- 1 reply
-
- 2
-

-
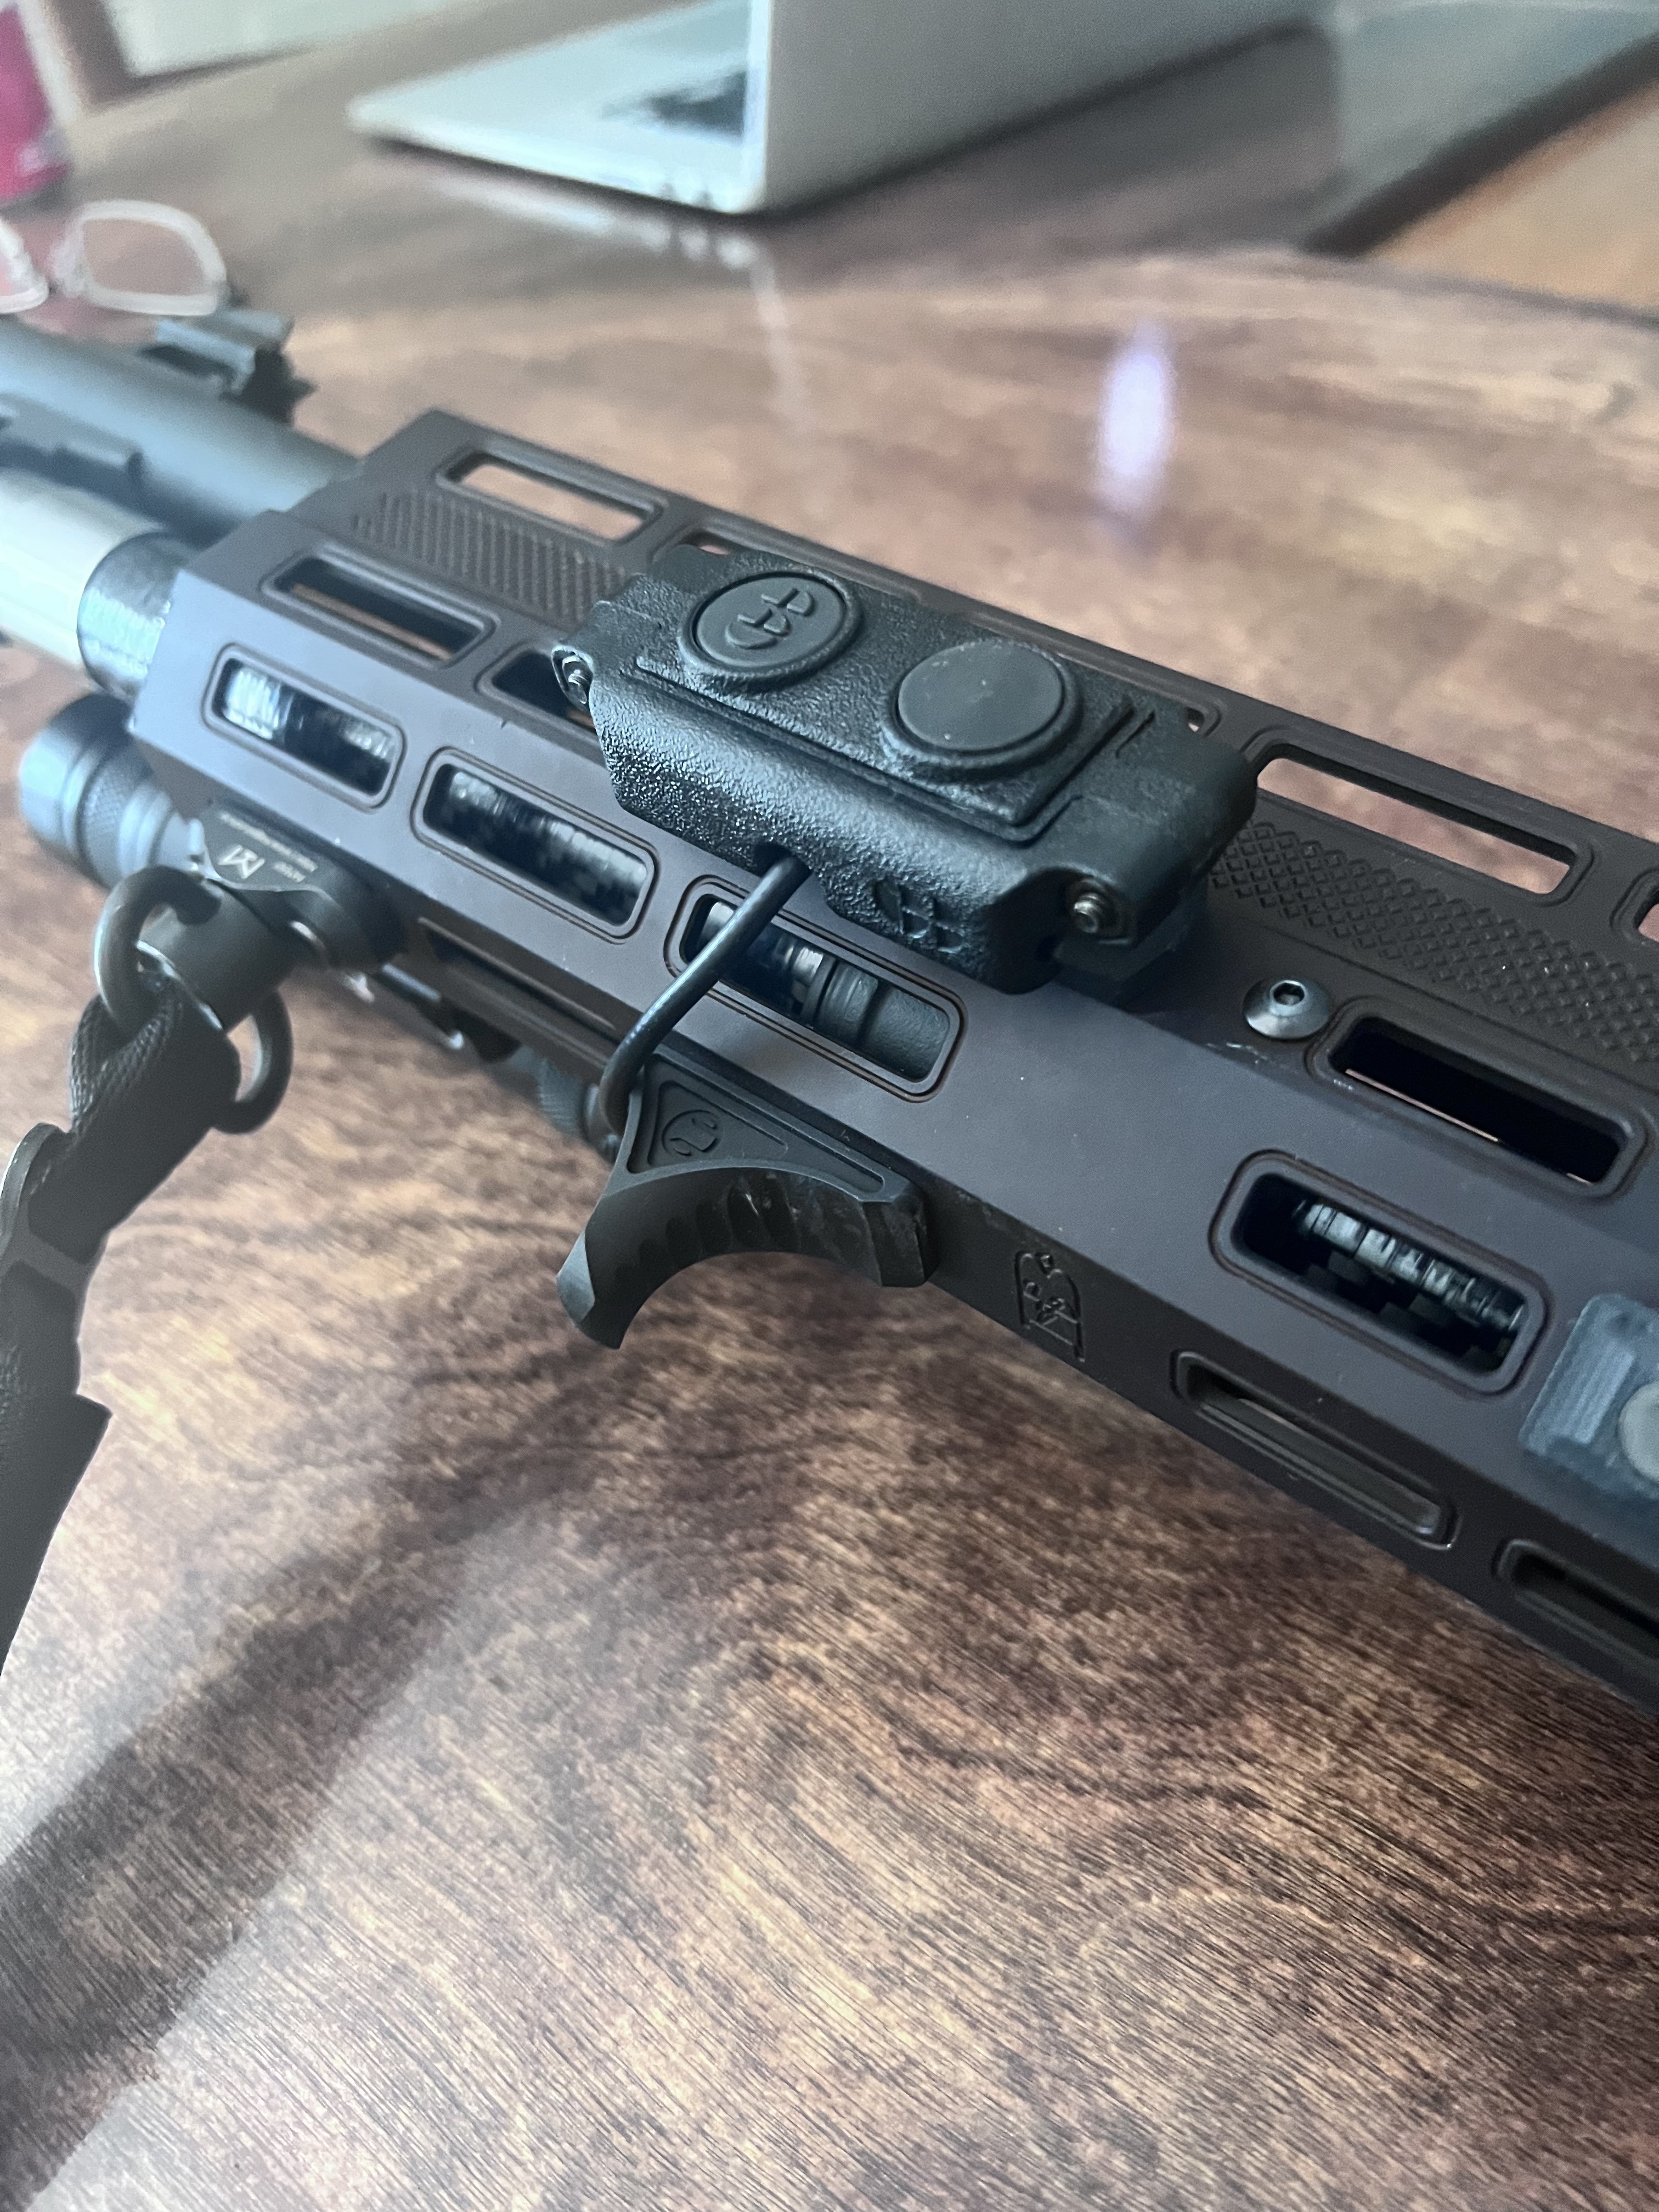
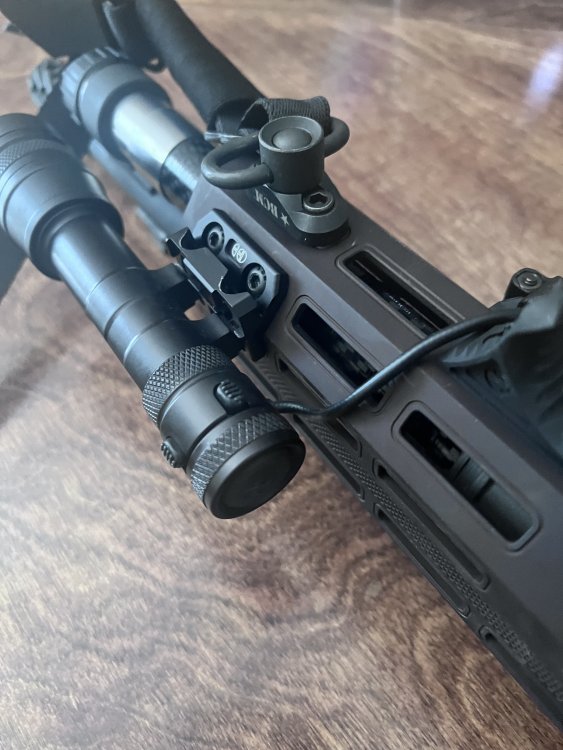
Thanks for the tips! I will ditch the extended choke for a flush choke. I think I can remove the rear iron but the front iron looks like it might be welded to the barrel. The rear sight looks like it’s the heaviest one anyways. My concern about losing the irons though is the red dot getting washed out with the light on. Who knows, maybe under the stress of the situation, I wouldn’t have the presence of mind to revert to the irons anyways. I’ll give a try! The pressure pad for the light won’t fit through the m lock so I could thread it under the mag tube. It is hard wired from the pressure pad to the light cap. I think I would have to cut slits through the hand guard between m lock slots in order to snake the wire through. I’m not sure what that would do to the structural integrity of the hand guard.

-
It wasn't an OEM part. I had seen an instagram post from Briley announcing a "coming soon" 6 position buffer tube. So when I sent in my M4, I had requested the 6 position tube be added to the order. I think that is why it took so long to get it back. When I had called to check on the status, they told me that the tube had not gone into retail production yet, so I assume it's Briley's in house tube, but they were going to get one for me. The invoice shows they charged me $249.95 for the tube and no charge for the gunsmithing labor to install it due to the wait time. I've seen the posts from RXarms and his tube sounds awesome with a great price, especially with the position markings, which mine does not have. However, I feel I got a decent deal due to not having to pay the labor to install the buffer tube. I like the 6 positions mainly because it lets me dial in the length a little better to make the perfect cheek weld for the optic.
-
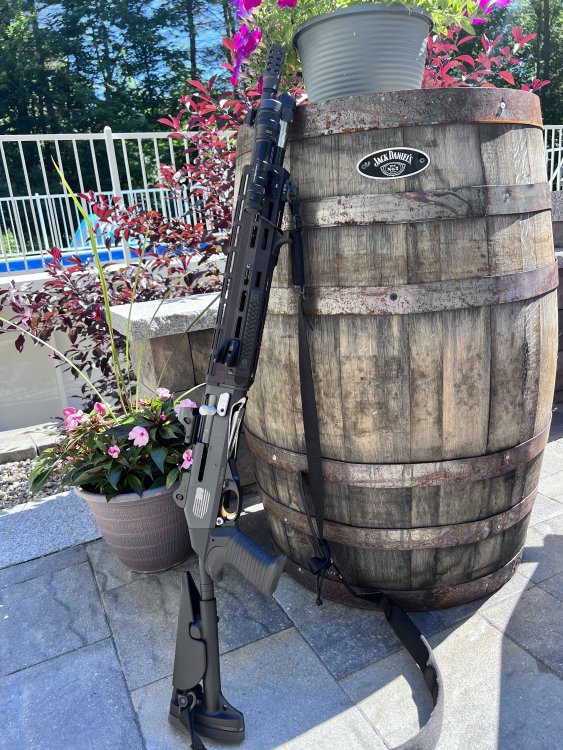
Hi guys. It’s been awhile since I’ve posted but I’ve been reading frequently about all the improvements you all have been making to your M4s. I was able to do a couple small things like the TTI extended carrier and tried out various bolt handles. You guys are a gigantic wealth of information! Thank you! I don’t yet quite have the gunsmithing confidence to make sure that my M4 is built correctly, so I sent it off to Briley to get a bunch of work done. They did the elite package for me as well as the 6 position buffer tube. It took close to 3 months as they explained the buffer tube wasn’t commercially available yet but they were going to get it for me. Needless to say, my credit card has vastly outpaced my skill level. Last time I saw my credit card it was heading westbound over the horizon. If anyone sees it, use your Benelli and put it out of its misery. Now, I’m hoping to up my game with defensive shotgun classes at Sig Sauer Academy this week. I’ve had that on the books for quite awhile and that’s why I ended up sending it off to Briley, so I could have the mods I wanted done correctly before the classes. I thought I’d share some pictures in case anyone was interested how it turned out from Briley. I was thinking about losing the iron sights to shed some weight, not sure if it would make much difference, but one thing I noticed that makes me feel I should keep them and possibly upgrade them to tritium sights, is when I use the weapon light it washes out the red dot on the SRO. I’m thinking if I need to use it with the light on, I would have to revert to the irons. Anyone experience this issue?

-
I found a video that I thinks explains what Benelli is meaning by indirect loading. It's really a great tip and works great after practicing the thumb index. I did make the funnel in the trigger guard on my M2. It makes sliding the thumb along the CDL much easier.
-
I just had this exact problem. This forum and it's members absolutely ROCK! It seems like I can find excellent information and advice every single time I check in here. Thanks everyone!!
-
It was an impressive machine.
-
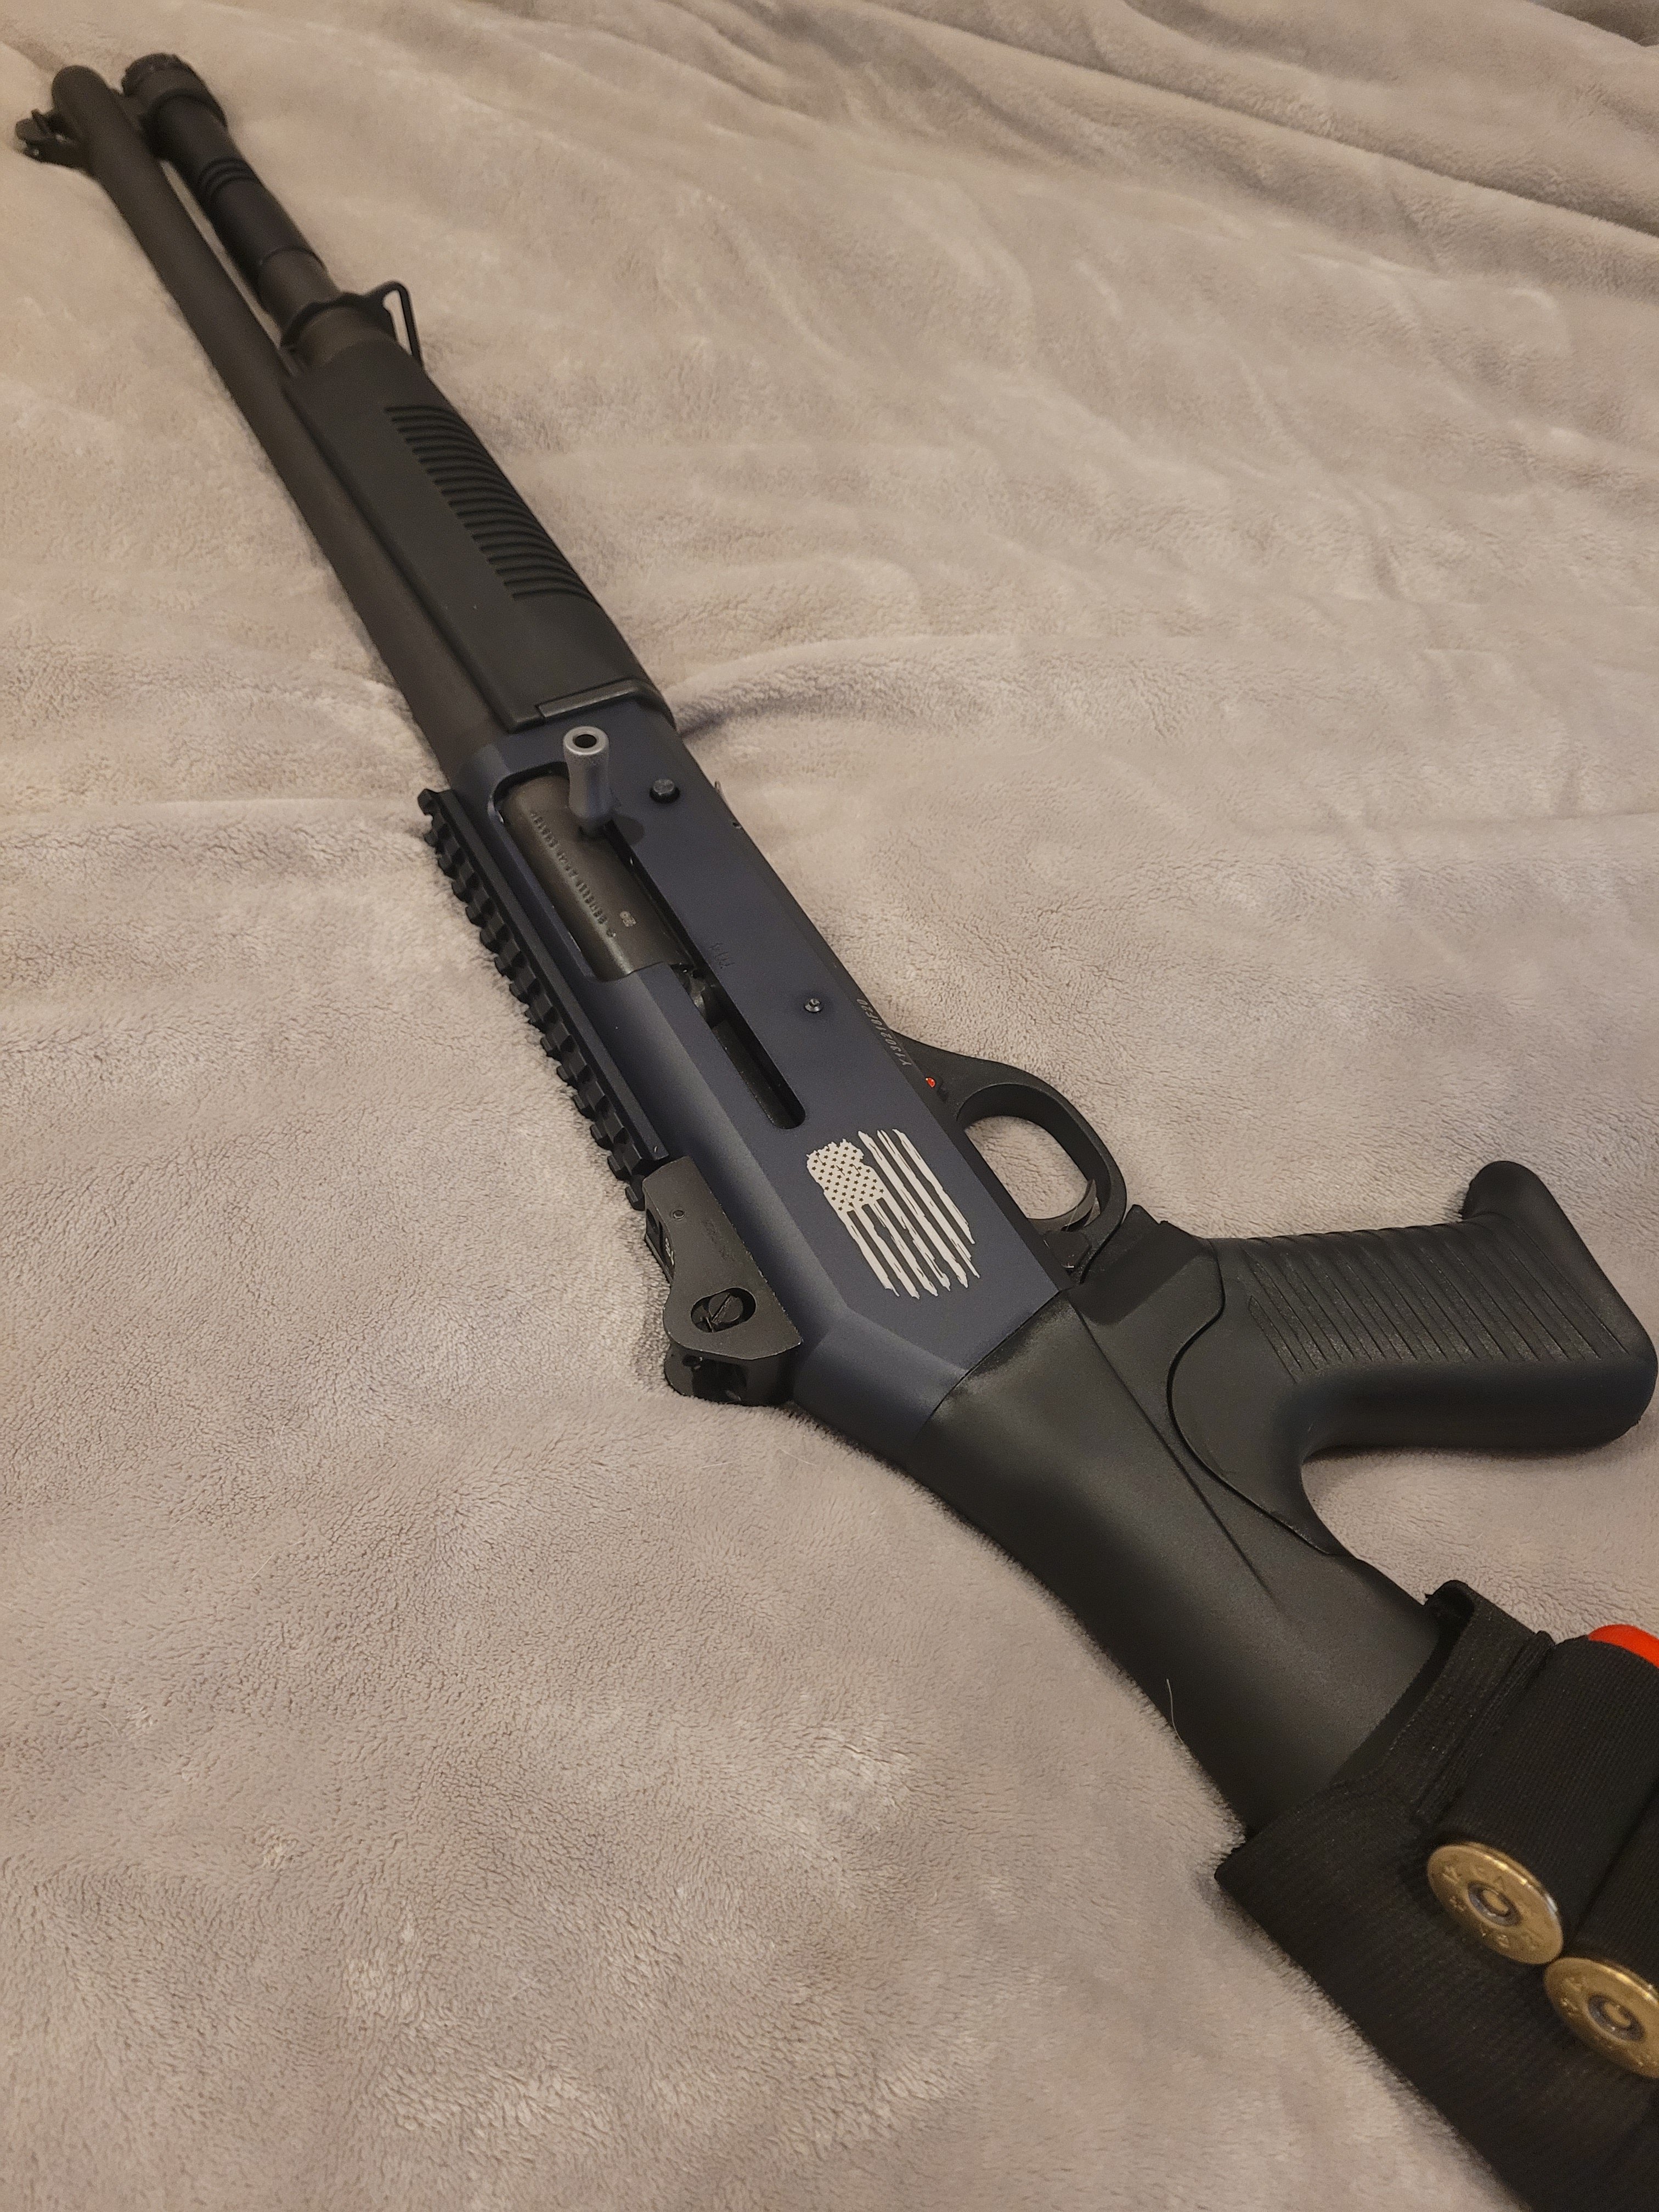
I was considering adding the NH silhouette with Live Free or Die on the other side. He recommended holding off on it and contemplating that more, as it could look too busy. He could have easily done it and charged me $150 for both, but he wanted to make sure I was confident with engraving both sides. He said he was more of a minimalist at heart, which I am now appreciating his recommendation.
-
Thanks guys! As the engraver said, "The flag is always moving forward to battle, never retreating." I got it done at 2A Engraving in Epping, NH. It was a 15 minute drive for me, so I brought the whole gun in and removed the barrel to lighten it up. I was able to watch the entire process. I wanted a "battle worn look" American flag, which he had this template on his computer. He made sure I was happy with the size and used a micrometer to measure the edges to be square. Then the laser did its work. The whole process took about 20 minutes and cost $75. I couldn't be happier with the result. The owner, Tony, is a veteran and he also works managing some manufacturing for Aero Precision at their facility in NH. He has some excellent experience and connections, especially in the AR world.
-
Hey Everyone! I decided to engrave the receiver on my M4. I found a small company in NH called 2A engraving. Great work very reasonable price. I think it came out great!

-
Also, excuse the lack of modifications at the moment... but I do have plans!
-
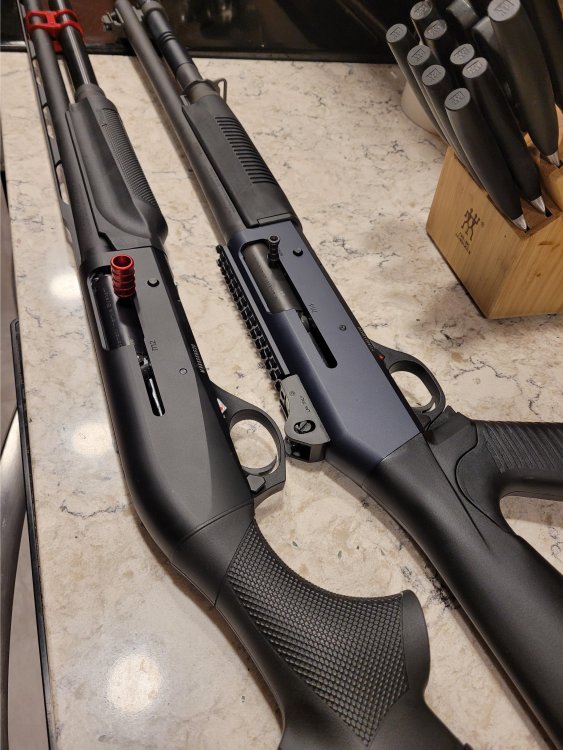
I picked up my M4 today and noticed the exact same thing while I was cleaning it. I thought maybe it was the lighting. After I saw your post, I decided to put it next to my M2 for comparison. Definitely a dark slate blue color! It is kinda cool. I wonder if ours were manufactured around the same time and thats the hue that formed in this batch of receivers?