Leaderboard


Popular Content
Showing content with the highest reputation on 10/20/21 in all areas
-
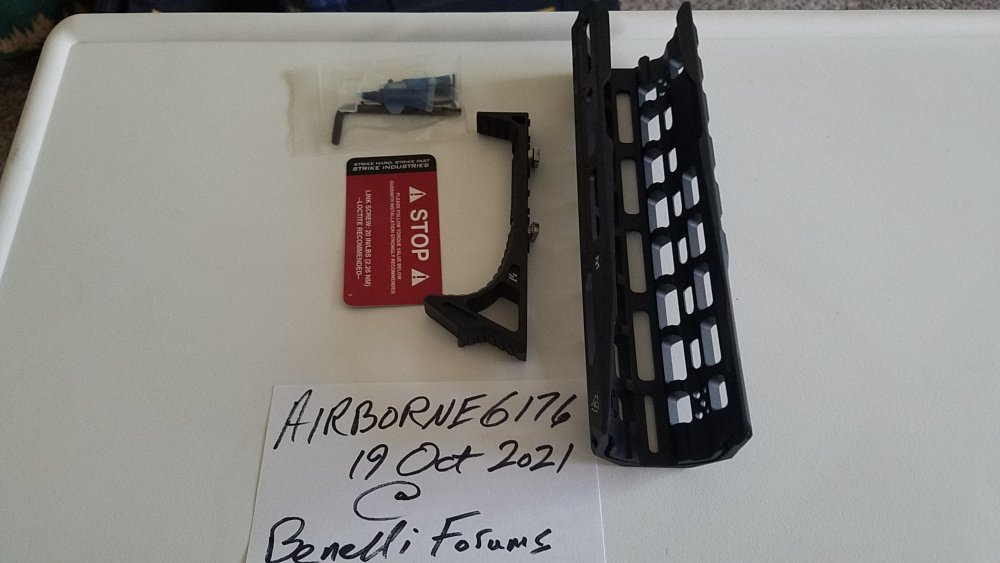
For Sale: ( 1 ) 100% authentic Strike Industries Hayl Rail MLOCK Handguard for the M4/M1014 . This all metal rail is NEW (Out of Package), includes all mounting accessories, and is unused & unmounted. It has an original item SKU # of SI-BM4-HAYL-RAIL-BK in all black. As an EXTRA BONUS, I'm also including ( 1 ) Strike Industries Link Curved Foregrip for the Hayl Rail or any MLOCK slot on any shotgun or rifle. This all metal foregrip is also NEW (Out of Package), includes all mounting accessories, and is also unused & unmounted. It has an original item SKU # of SI-LINK-CFG-BK in all black. Please see attached pictures, as well as the sights' original websites for more details: 1) https://www.strikeindustries.com/si-bm4-hayle-rail.html 2) https://www.strikeindustries.com/si-link-cfg.html My asking price for both of these hard to find authentic M4/M1014 accessories is only $125 to include shipping with tracking from here in GA to anywhere in the U.S. (no overseas). Methods of payment are PayPal (Friends & Family), U.S. Money Order, or certified bank draft/cashier's check (no trades please). Let me know if there are any questions or concerns, as I can be reached via this forum posting or by PM. Many more pictures can be made available as requested, so please let me know what I can do to assure you are confident in your purchase (index card not included). Thank you for looking, have a great week, and stay safe out there.
 2 points
 -
Finally an easier solution for adding a Limbsaver to the Benelli M4 is available. This is significantly easier and requires fewer parts in the past assemblies of the 10111 model that required the Noveske adapter plate that is no longer sold. For this assembly we'll be using the Limbsaver 10403. This model has a raised lip on the inside of the buttpad that helps center the pad on the stock. First step is to remove the collapsible stock from your shotgun. You will then need to remove the factory buttpad by using a philips screw driver and inserting it in to the two small holes on the factory buttpad. Use a little oil or spit on the driver to help push it in. Push the driver in firmly as you unscrew the fasteners. Pull the buttpad away from the stock as you unscrew it. The screws will remain captive inside of the buttpad. Not the large hole roughly in the center of the stock. This is where the receiver extension passes thru the stock and in to the buttpad when the stock is in the fully collapsed position. The next step is to fit your buttpad to the stock. I had to purchase screws from the hardware store to make this buttpad work for this application. I used M4 machine screws, 0.7 thread pitch, 16mm in length. You will need two of them. The ones I bought use a 2.5mm allen head driver. Press the screws in to the Limbsaver buttpad through the two holes in the rubber. Use your driver to press since it will have to push past the rubber. They will snap in to place once seated. You'll see the threads sticking out of the bottom of the buttpad. Screw the buttpad on to the stock. Note the two holes top and bottom for accessing the screws. Now we need to make a hole in the plastic base of the buttpad for the receiver extension to pass in to. Now that you have the pad attached to the stock, you'll want to get a Sharpie marker with the cap off and drop it down the hole of the collapsible stock where the receiver extension goes. I use a silver one since it makes it easier to see the marks. I shake the stock around a little to get the marker to give me a witness mark as to where I am going to drill. Now remove the buttpad from the stock and check your witness marks. You should have something like this. You now know roughly where you need to drill your 7/8" hole. Rather than trying to bore that big of a hole in one pass, you'll have better luck starting small and moving up. I start with a 1/4" Forester bit and drill it out on a drill press. You do not want to drill all the way through the buttpad. You only want to drill through the plastic back which will open up to a void inside the buttpad. I suppose you could drill this out with a electric drill, but your quality of work is likely going to suffer. First hole is drilled. Take the pad and offer it back up to the stock. Look down the hole where the receiver extension goes down with a flash light and see how close to center your hole is to the hole you're looking down. I see that I'm a little off center to the right of the screen. No problem. Move to the next size up bit 3/8" and try to correct for the alignment. Continue through the 1/2, 5/8 and finally the 7/8 bit. Here is the end results. Clean out all the plastic debris from inside the buttpad and clean up the edges. I use a deburring tool but you don't have to get that fancy. Offer the buttpad up to the stock again and check to see if you can see the sides of the buttpad through the hole. You should be looking straight in to the hole drilled. If an edge is present, it will liely contact the receiver extension and prevent it from collapsing. You can hog out the hole slightly with no ill effects on performance. Finally offer up the stock with the buttpad screwed in place to the shotgun and see if the stock fully collapses. If it hangs up, you need to remove the offending area. If it fits, finalize the installation by applying some blue Loctite 243 to the screws then snug them up. No retard strength is needed. These threaded holes will strip easily if you muscle it. Use your fingers to hole the buttpad in alignment to the stock as you tighten it. There is a small amount of wiggle room in the pad that will allow you to even out the alignment. Make sure everything still fits after you've tightened the screws. The rubber of the Limbsaver will often times have a dried out look to it. You can rub some lubricant on the rubber with a rag and it will return it to a deep black finish. Limbsaver claims you'll see a 70% reduction in perceived recoil with these pads. That figure is a little optimistic. Realistically I'd say you'll see a 40% reduction.1 point
-
Feels good..
 1 point
 -
Another member suggested a hose clamp on the recoil tube to disable the stock. I think that's a pretty good way as it is reversible and cheapo.1 point
-
The whole thing is cast aluminum. That slot is not machined afterwards. So slight differences will happen.1 point
-
I guess there is slight variation in the stocks, mine went in perfectly as is.1 point
-
Stock forend......LOL I hate auto correct.1 point
-
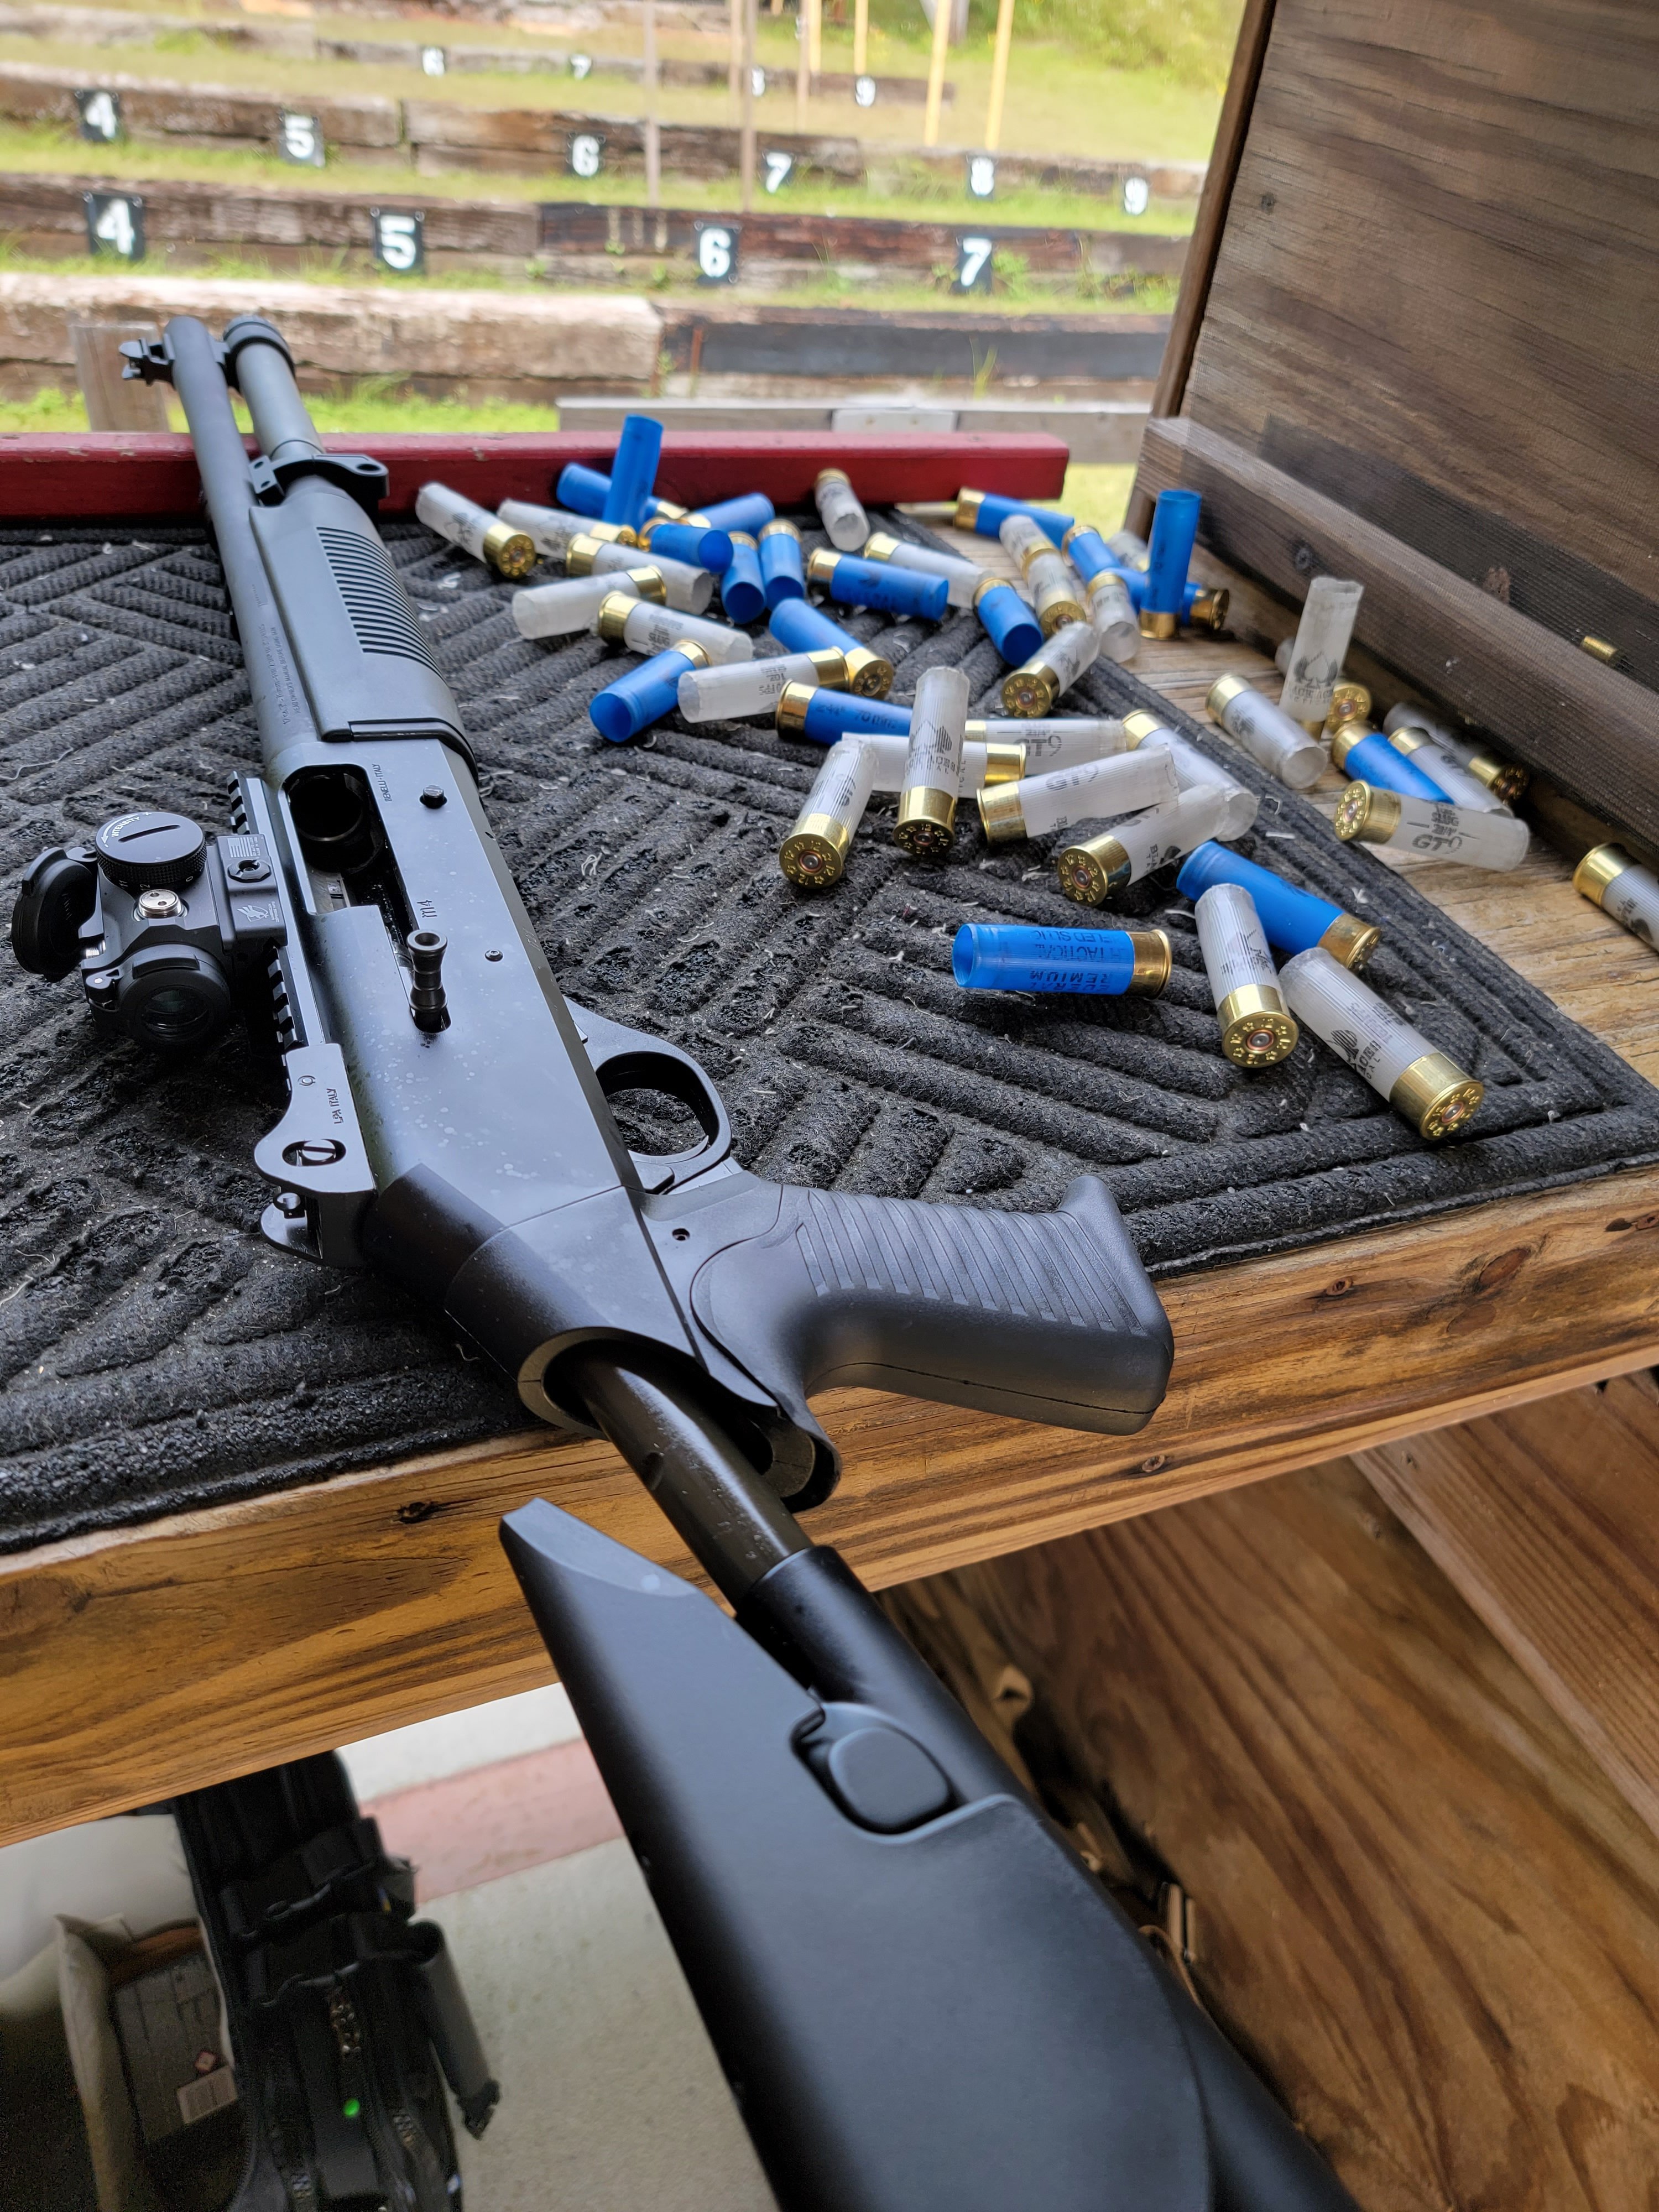
I received the pair of rails I ordered to check out. Immediately I noted that the unit is nicer to hold on to than it looks in pictures. There aren’t a bunch of jagged edges on it. It’s far better and thinner than say a Surefire M80. The factory OEM handguards weigh in at 5 ounces, where as this rail weighs in at 6.65 ounces. Not bad for being 6065 aluminum. The OEM handguards are more ergonomic than this rail, but it isn’t terrible - It’s tolerable unlike the M80. What I don’t like: The set screws are a terrible design. Whoever designed it should hang their head in shame as a designer and really be ashamed of themselves. Without using the set screws, the rail will wiggle significantly more than anyone would be comfortable with. Naturally if you use them, you no longer have a tool free disassembly. I tried to set them lightly but it didn’t seem to work for retaining the handguard. They could have solved this relatively easily by designing a replacement rear handguard retainer that held the rail in place. I did not use the front two set screws, since it is solid with just the rear set. The set screws are tiny and steel. They aren’t the nicer style that have a polymer tip to minimize marking. These kind of rails are a pain in that you end up scuffing up your barrel during installation. It doesn’t slide on easily, you have to work it back and forth to slide up over the piston assembly on the barrel. There are fitting issues if using this rail in combination with either an Ava Tactical or IWC light/sling mount. The tailcap will hit the rail and you will need to modify the rail for clearance. Or, stick strictly with a MLOK in-line Mount attached to be rail itself. I used a small cutting wheel to gain the clearance needed with an IWC light mount. I used the IWC since it offered a little more clearance and provided QD sling mounts. Had I used the Ava Tactical Mount, I’d need a MLOK QD socket since I’m mounting the light on the ejection port side of the firearm. I dont have my new Taps switch in yet to test fit it to the rail to see if it’s worth the trouble and limitations. I wish they had made some some kind of textured panels for the handguard to increase traction. I know I can use some over the Mlok points. I’ll take some pictures later.1 point


This leaderboard is set to New York/GMT-04:00