Leaderboard


Popular Content
Showing content with the highest reputation since 12/10/18 in all areas
-
14 points
-
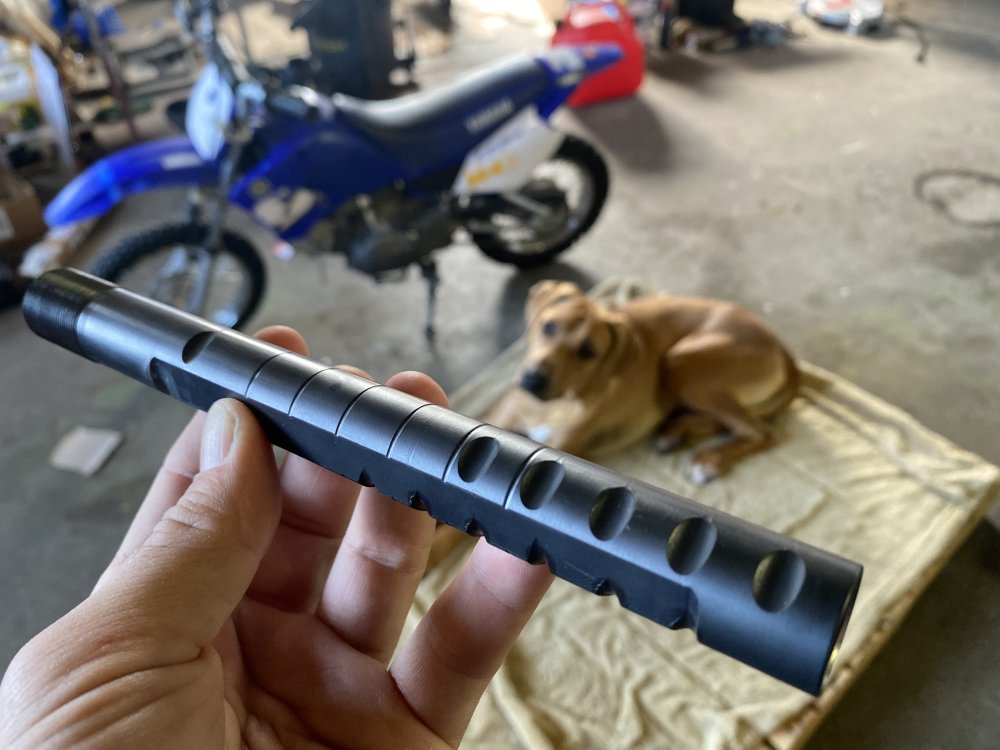
PVD aluminum titanium nitride came back, looks pretty killer… It is the only finish that exists out there that checks off all my high quality control boxes; primarily retaining the heat treat on the notches, extremely high corrosion protection, no tolerance interference, high wear resistance. Shout-out to the guy that put me on this path further back in the thread here. I have been told by the finisher that salt corrosion is essentially non existent with this finish… but no formal military testing has been done since it is used primarily for hard use tooling. experienced some minor delays at the machine shop, but this week is full production. Coming soon… (sample pic below that I abused a bit to test the finish… and my canine Apollo)
 12 points
 -
This is more a documentary of my personal evolution. I am not an instructor, "expert", or Holiday Inn frequenter, and would be happy to hear how I can improve. That said, a big reason for my fumble on the live drill is I loaded the shot card mixed, when I typically leave it all slug. It tripped me up. Normally, its all buck in the gun, and all slug for select slug on the card.12 points
-
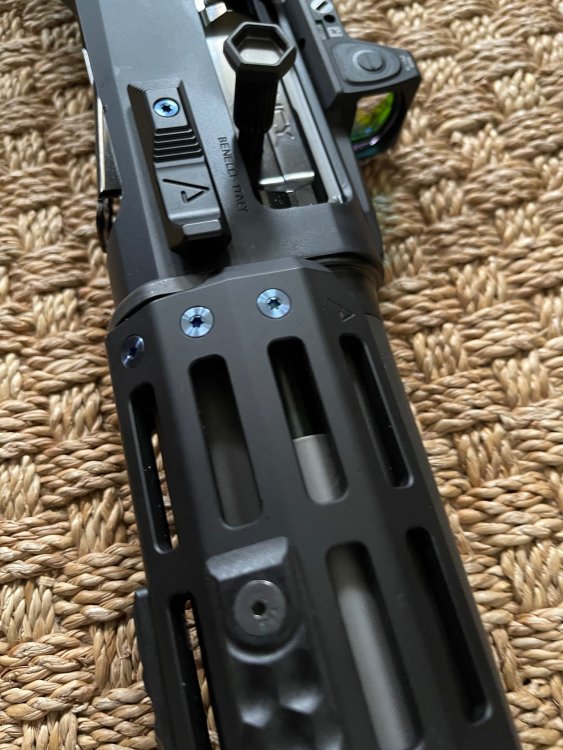
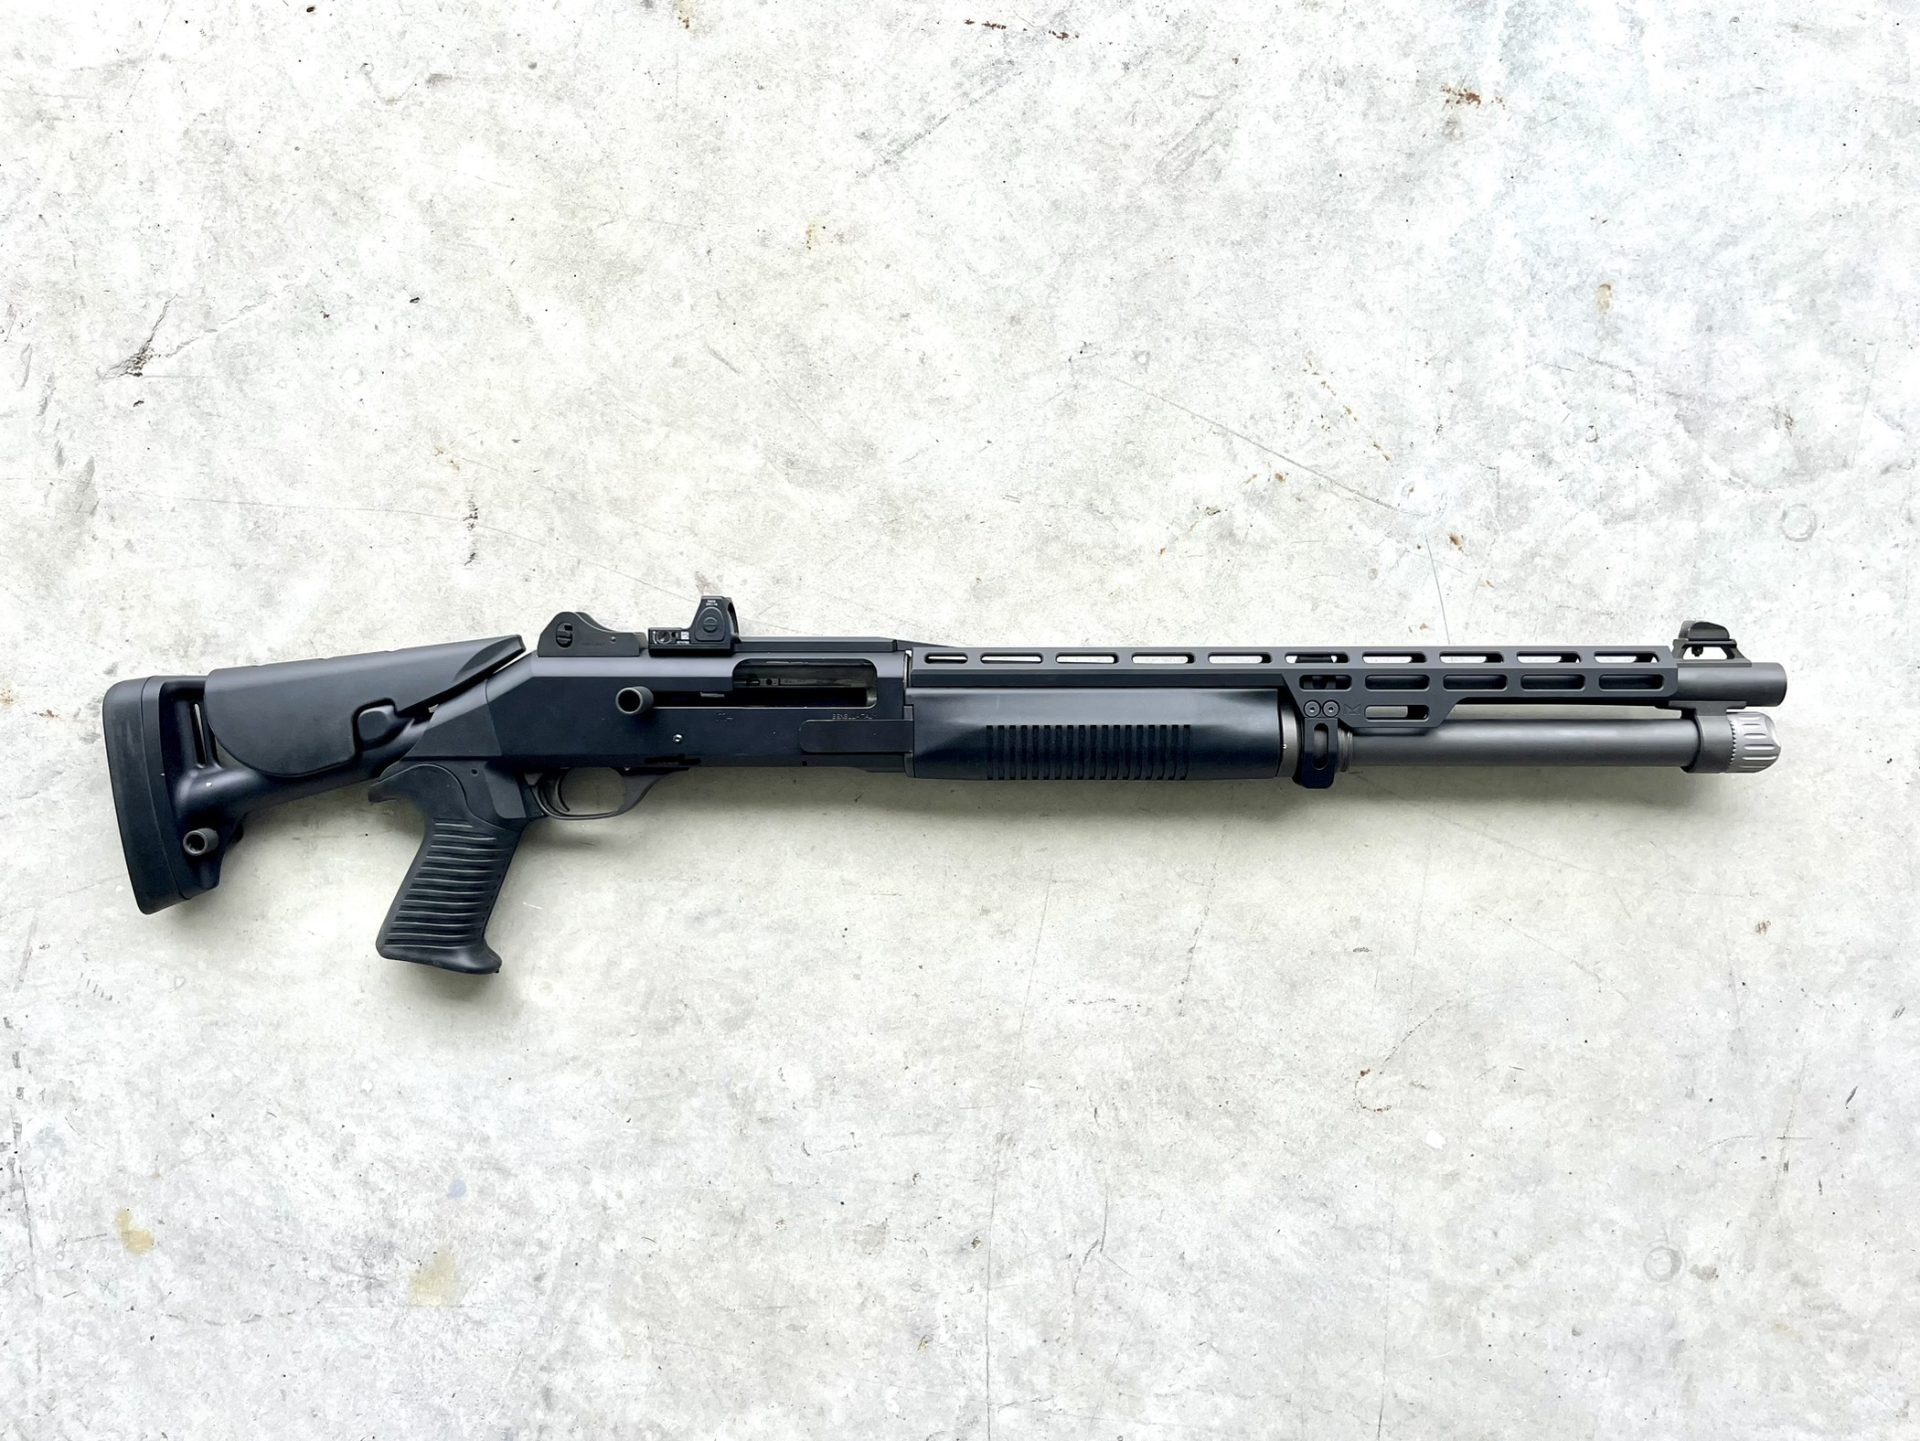
Hey all, Excited to announce this project, which I've been developing since Fall of 2022. Specifically designed to be fully compatible with the OEM Polymer 2pc Benelli M4 Handguard (Benelli 70117, and Benelli 70116). This brand new concept revolutionizes the way the Benelli M4/M1014 handles. It gives the user multiple options for accessory attachments, protecting hands from barrel heat, all while retaining the superior and unmatched ergonomics of the original Polymer 2pc Benelli M4 Handguard. Machined from billet 6061-T6 and mil spec hard coat annodized. Once installed, this Heat Shield offers fast, and tool-less takedown of the Benelli M4/M1014. Fully compliant with ARDEC Solicitation DAAE-30-98R-0401. It is not any slower to take down the weapon than if you didn't have the heat shield on at all. The design requires an Rx Arms Optic Mount to function (as the receiver optic mount has a boss hole which accepts the heatshield). Initially will be offering a mil spec picatinny rail, and RMR rail. To follow will be the aimpoint T2, and P2 rails in early 2024 it is looking like. All optics will co witness from close range to long range. If you are interested, you can sign up on the waitlist at rxarms.com. It is looking like Q4 2023 for availability. If you have any questions I'd be happy to answer anything I can.

 11 points
 -
Finally an easier solution for adding a Limbsaver to the Benelli M4 is available. This is significantly easier and requires fewer parts in the past assemblies of the 10111 model that required the Noveske adapter plate that is no longer sold. For this assembly we'll be using the Limbsaver 10403. This model has a raised lip on the inside of the buttpad that helps center the pad on the stock. First step is to remove the collapsible stock from your shotgun. You will then need to remove the factory buttpad by using a philips screw driver and inserting it in to the two small holes on the factory buttpad. Use a little oil or spit on the driver to help push it in. Push the driver in firmly as you unscrew the fasteners. Pull the buttpad away from the stock as you unscrew it. The screws will remain captive inside of the buttpad. Not the large hole roughly in the center of the stock. This is where the receiver extension passes thru the stock and in to the buttpad when the stock is in the fully collapsed position. The next step is to fit your buttpad to the stock. I had to purchase screws from the hardware store to make this buttpad work for this application. I used M4 machine screws, 0.7 thread pitch, 16mm in length. You will need two of them. The ones I bought use a 2.5mm allen head driver. Press the screws in to the Limbsaver buttpad through the two holes in the rubber. Use your driver to press since it will have to push past the rubber. They will snap in to place once seated. You'll see the threads sticking out of the bottom of the buttpad. Screw the buttpad on to the stock. Note the two holes top and bottom for accessing the screws. Now we need to make a hole in the plastic base of the buttpad for the receiver extension to pass in to. Now that you have the pad attached to the stock, you'll want to get a Sharpie marker with the cap off and drop it down the hole of the collapsible stock where the receiver extension goes. I use a silver one since it makes it easier to see the marks. I shake the stock around a little to get the marker to give me a witness mark as to where I am going to drill. Now remove the buttpad from the stock and check your witness marks. You should have something like this. You now know roughly where you need to drill your 7/8" hole. Rather than trying to bore that big of a hole in one pass, you'll have better luck starting small and moving up. I start with a 1/4" Forester bit and drill it out on a drill press. You do not want to drill all the way through the buttpad. You only want to drill through the plastic back which will open up to a void inside the buttpad. I suppose you could drill this out with a electric drill, but your quality of work is likely going to suffer. First hole is drilled. Take the pad and offer it back up to the stock. Look down the hole where the receiver extension goes down with a flash light and see how close to center your hole is to the hole you're looking down. I see that I'm a little off center to the right of the screen. No problem. Move to the next size up bit 3/8" and try to correct for the alignment. Continue through the 1/2, 5/8 and finally the 7/8 bit. Here is the end results. Clean out all the plastic debris from inside the buttpad and clean up the edges. I use a deburring tool but you don't have to get that fancy. Offer the buttpad up to the stock again and check to see if you can see the sides of the buttpad through the hole. You should be looking straight in to the hole drilled. If an edge is present, it will liely contact the receiver extension and prevent it from collapsing. You can hog out the hole slightly with no ill effects on performance. Finally offer up the stock with the buttpad screwed in place to the shotgun and see if the stock fully collapses. If it hangs up, you need to remove the offending area. If it fits, finalize the installation by applying some blue Loctite 243 to the screws then snug them up. No retard strength is needed. These threaded holes will strip easily if you muscle it. Use your fingers to hole the buttpad in alignment to the stock as you tighten it. There is a small amount of wiggle room in the pad that will allow you to even out the alignment. Make sure everything still fits after you've tightened the screws. The rubber of the Limbsaver will often times have a dried out look to it. You can rub some lubricant on the rubber with a rag and it will return it to a deep black finish. Limbsaver claims you'll see a 70% reduction in perceived recoil with these pads. That figure is a little optimistic. Realistically I'd say you'll see a 40% reduction.11 points
-
I've made a few of these tools available that's pretty useful if you swap out recoil springs often. https://dogedesign.squarespace.com/shop/p/driver16mm11 points
-
This will be out until I get my hands on a C-stock.

 11 points
 -
The misinformation with title 2 firearms never ceases to amaze me. It is only a short barreled shotgun when it has a short barrel. Put an 18 on it and it is not a short barreled shotgun. Take it anywhere a shotgun is legal, even sell it with the 18 if you like. NFA would like to know it’s been “converted” back to a title 1, but that isn’t even necessary. Unlike machine guns and NFA’s “once a machine gun always a machine gun” position, an SBS or SBR is only a title 2 when configured as a title 2. You do not give up any rights. .gov can’t come into your home anytime they wish. Still America folks, probable cause and a warrant is necessary to enter your home.11 points
-
Hi All: Rumaging around on the Internet for these manuals is kind of a pain, so I'm linking them to this forum from my Google Drive. These links should be good forever, unless Google goes under or the Internet disappears: USMC Technical Manual (TM 10698A-10/1): Operator's Manual for Shotgun, Combat, 12 Guage Semi-Automatic M1014 1005-01-472-3147 November 2000 18410698000: https://drive.google.com/open?id=0BxN5CusgXy6nbm1udXh5dzYyYUU Benelli M4 Product Manual M4 (comes with the shotgun): https://drive.google.com/open?id=0BxN5CusgXy6nNmlRcGxjWEpOaXM ENJOY!10 points
-
Hey guys, finally worked out all the details on this, I will be moving ahead on it. Target price will be between 150-180USD. CNC machined, black nitride finish for sure, possibly cerekote also if tolerances allow for it. I’ll be updating this page as progress moves along, I’m probably around 2-3 months out. www.rxarms.com if u would like to notified when it is in stock.10 points
-
Looks like yet another rail that wasn't designed by someone who uses a firearm in the field. Terrible ergonomics compared to the polymer handguard. Added weight. No placements for lights that make sense. They'll sell a ton.10 points
-
Bought an H2O with 7-round mag but they sent me the 5-round version. Just after I upgraded to 7-round tube, I saw a brand new, old-stock with factory 7-round mag.
 10 points
 -
Here’s a couple of mine10 points
-
10 points
-
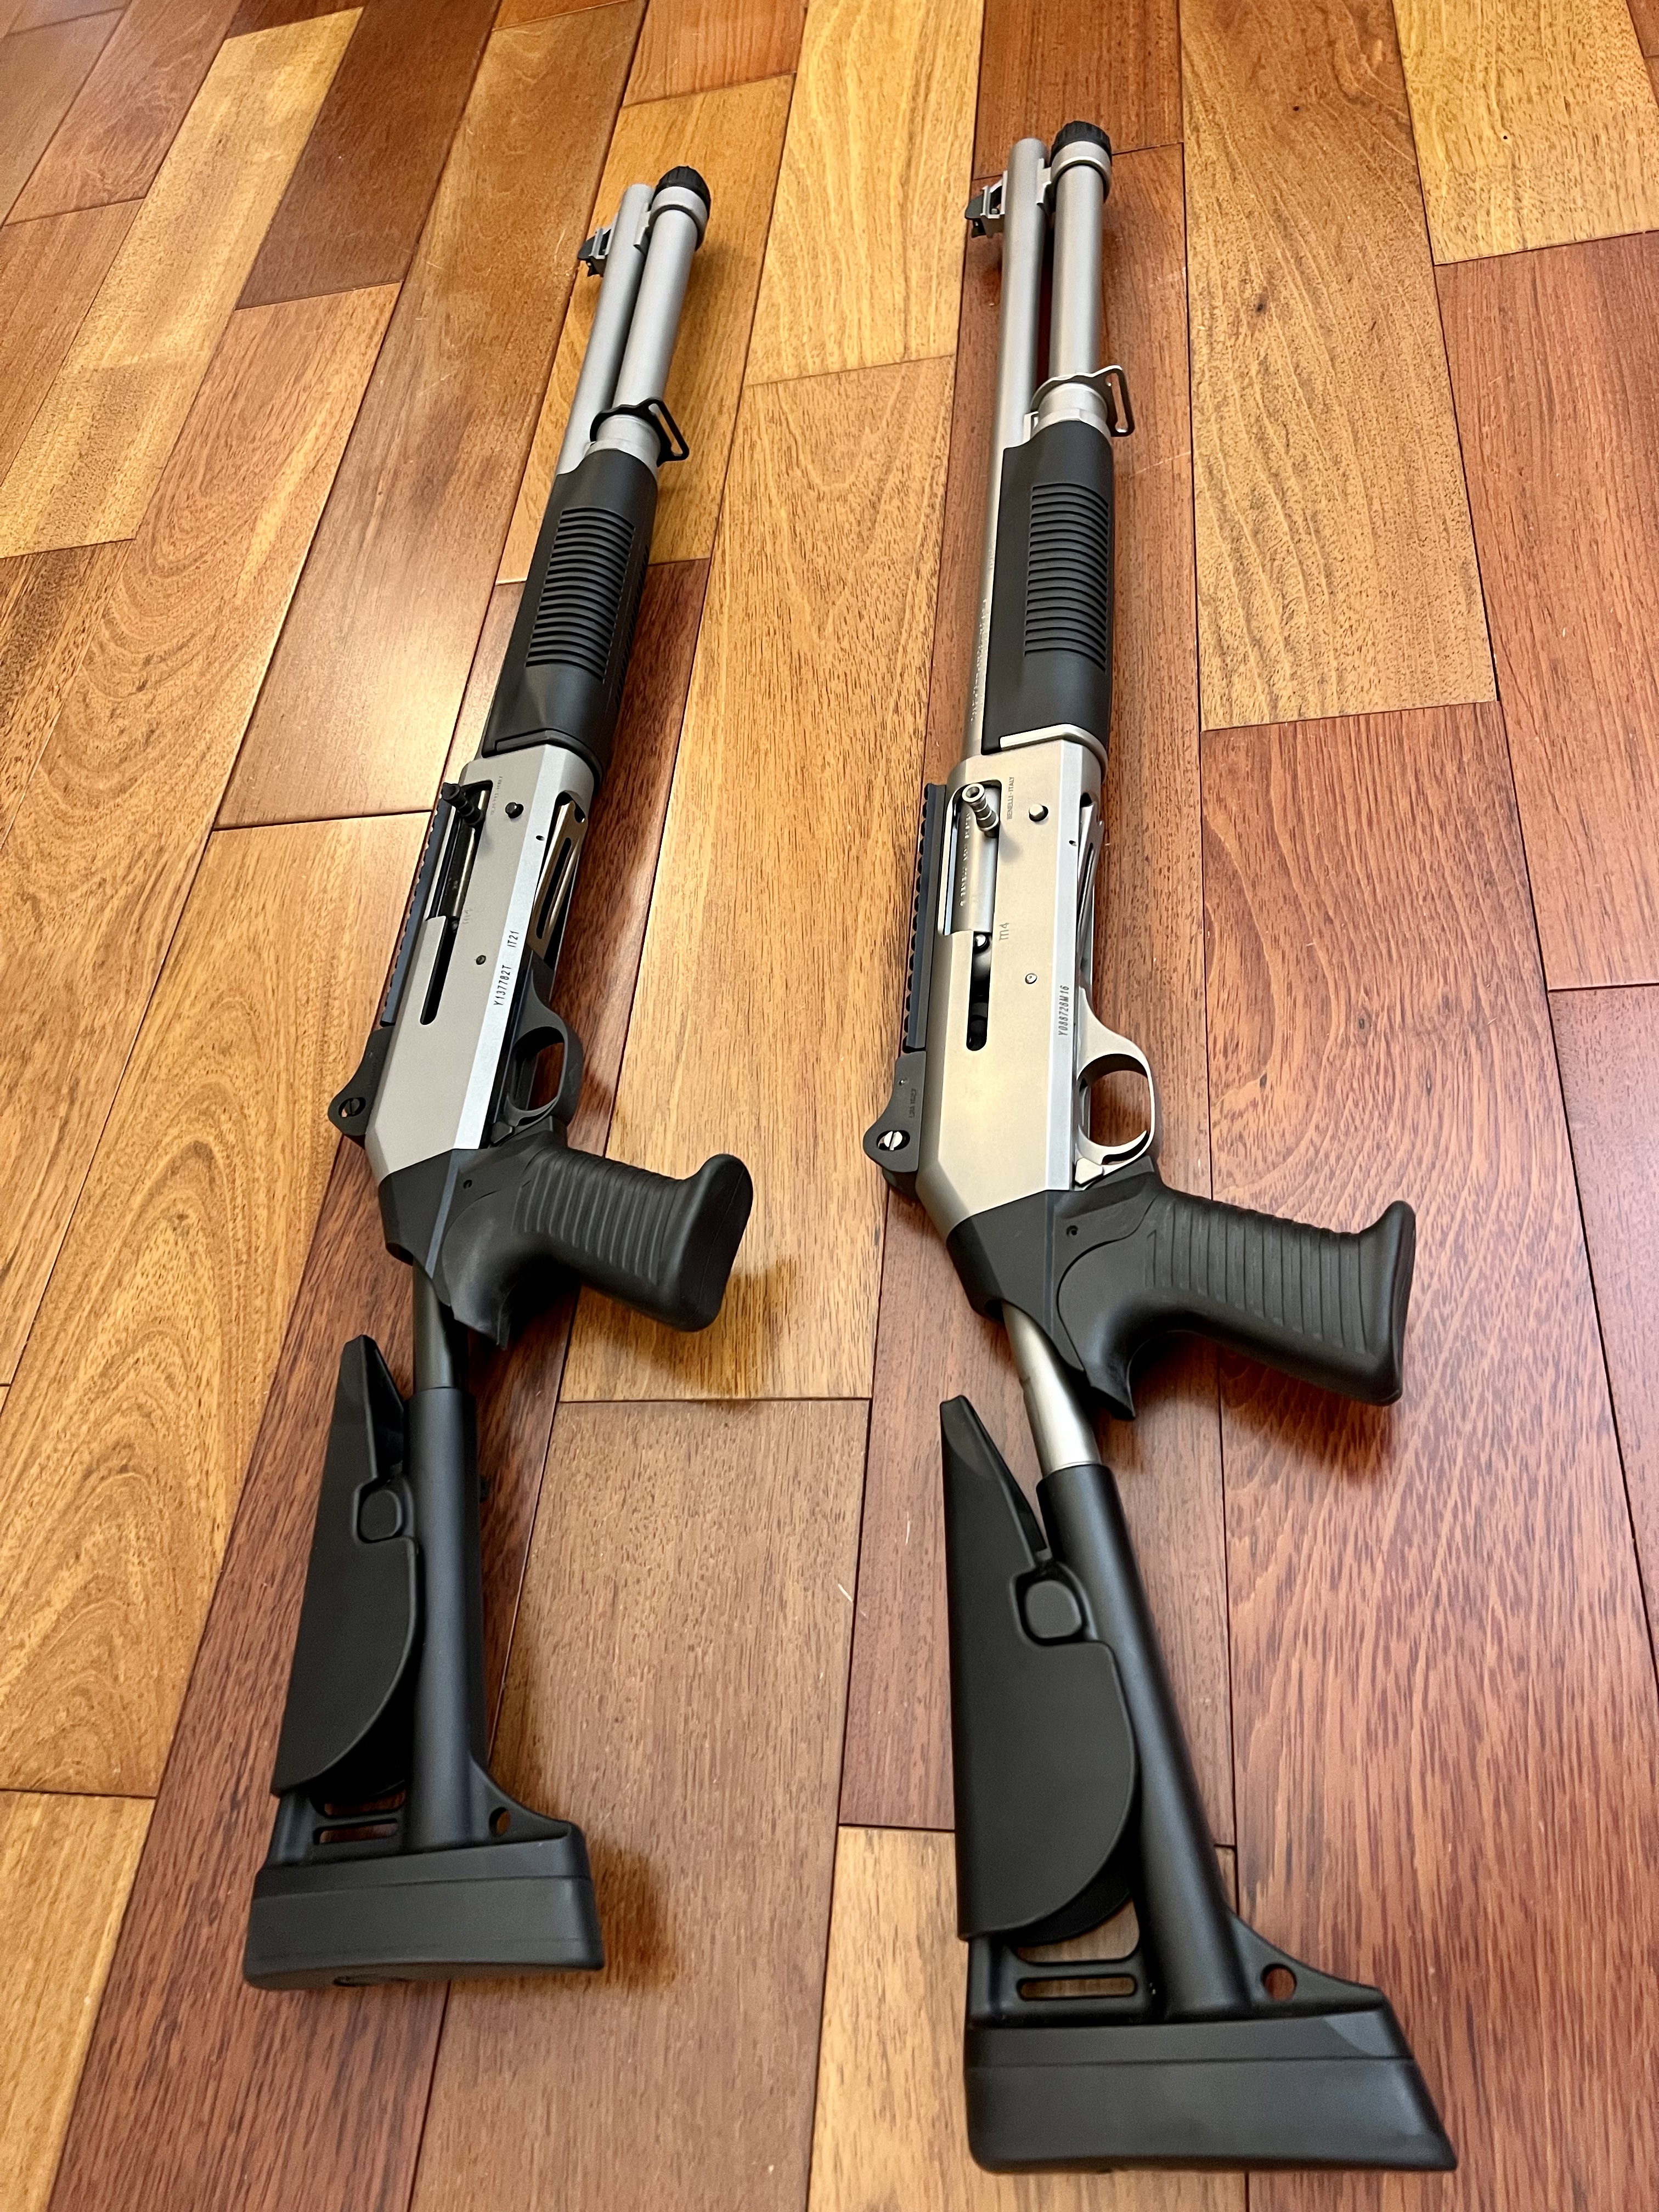
I thought it might be interesting to do a little comparison between my Dad’s 2020 M4, and my new (2023) one. After taking them both apart I took some pictures of the most prominent differences I found, so here they are: The piston plugs have a very different finish. The old ones have a polished steel look, and the new are a more opaque finish. Perhaps they tried to reduce visibility as they’re slightly exposed by the t-pro hand guard. The pins are also a little different, the old ones being a polished steel look, and the new ones having an bronze like coating. I found that the finishing work to the piston housing was slightly more refined on the older model, but this could be because of the difference in colour. There are some differences in the barrel assembly. You’ll notice that the pins are miss stamped in the newer model, I did see this on another fde t-pro, so it might be a prevailing change/mistake. Overall I would say the finishing work is close in terms of quality. I wish I had an even older model to add for more reference. None of the firing pin pictures quite show the finish change, but it’s much like the pins in the piston plugs. The old on has a polished steel finish, and the new one is a sort of bronze finish. The bolt head retaining pin has a larger notch in the new one. The bolt heads have slightly different identification marks, but in terms of workmanship they seem pretty close. My new one has some nicks on the bolt face that the old one doesn’t suffer from however. New Old There was a slight discolouration in the finish on the metal parts of the new trigger grouping in places. (New trigger group on top.) Everything else seemed to be pretty similar. The old pistons finish seemed like it had a more grey tinge, while the new ones had almost a green tinge. You might be able to see it in some of the previous photos, but I had a hard time getting a good photo of it otherwise. I’d be interested if anyone else has an old one they wouldn’t mind rating these against in terms of workmanship. Also, if anyone else has a t-pro I’d be interested to know if you’ve found that the internal parts of yours share the same finishing differences as mine. Cheers, and thanks for reading!9 points
-
First off, thank you to @StrangerDanger for your guides. I saved a bunch of them to review while waiting on my stamp to clear, and it made my work much easier, thanks bud. 👍 I still need an optic, but here she is so far. It was on my bucket list and I had a helluva bonus last year, and I found a good deal on her. Still working on the 5-shell thing but she is definitely fun to shoot.
 9 points
 -
Small update. After a long 4-5 months since I initially started this project, I am happy to say, the tubes are machined and completed. Im hoping to get them off for heat treating next week, then PVD finishing thereafter, slowly but surely...9 points
-
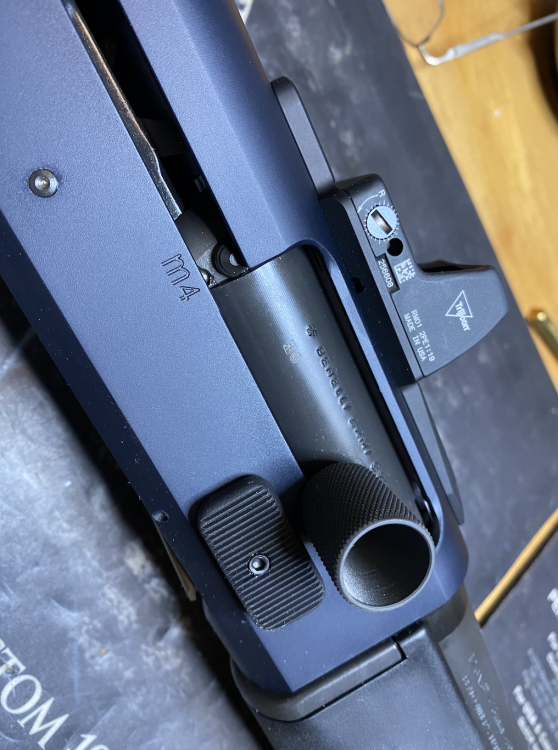
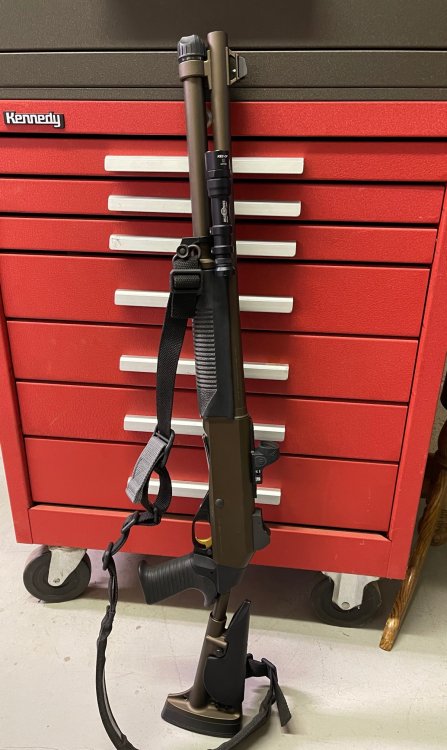
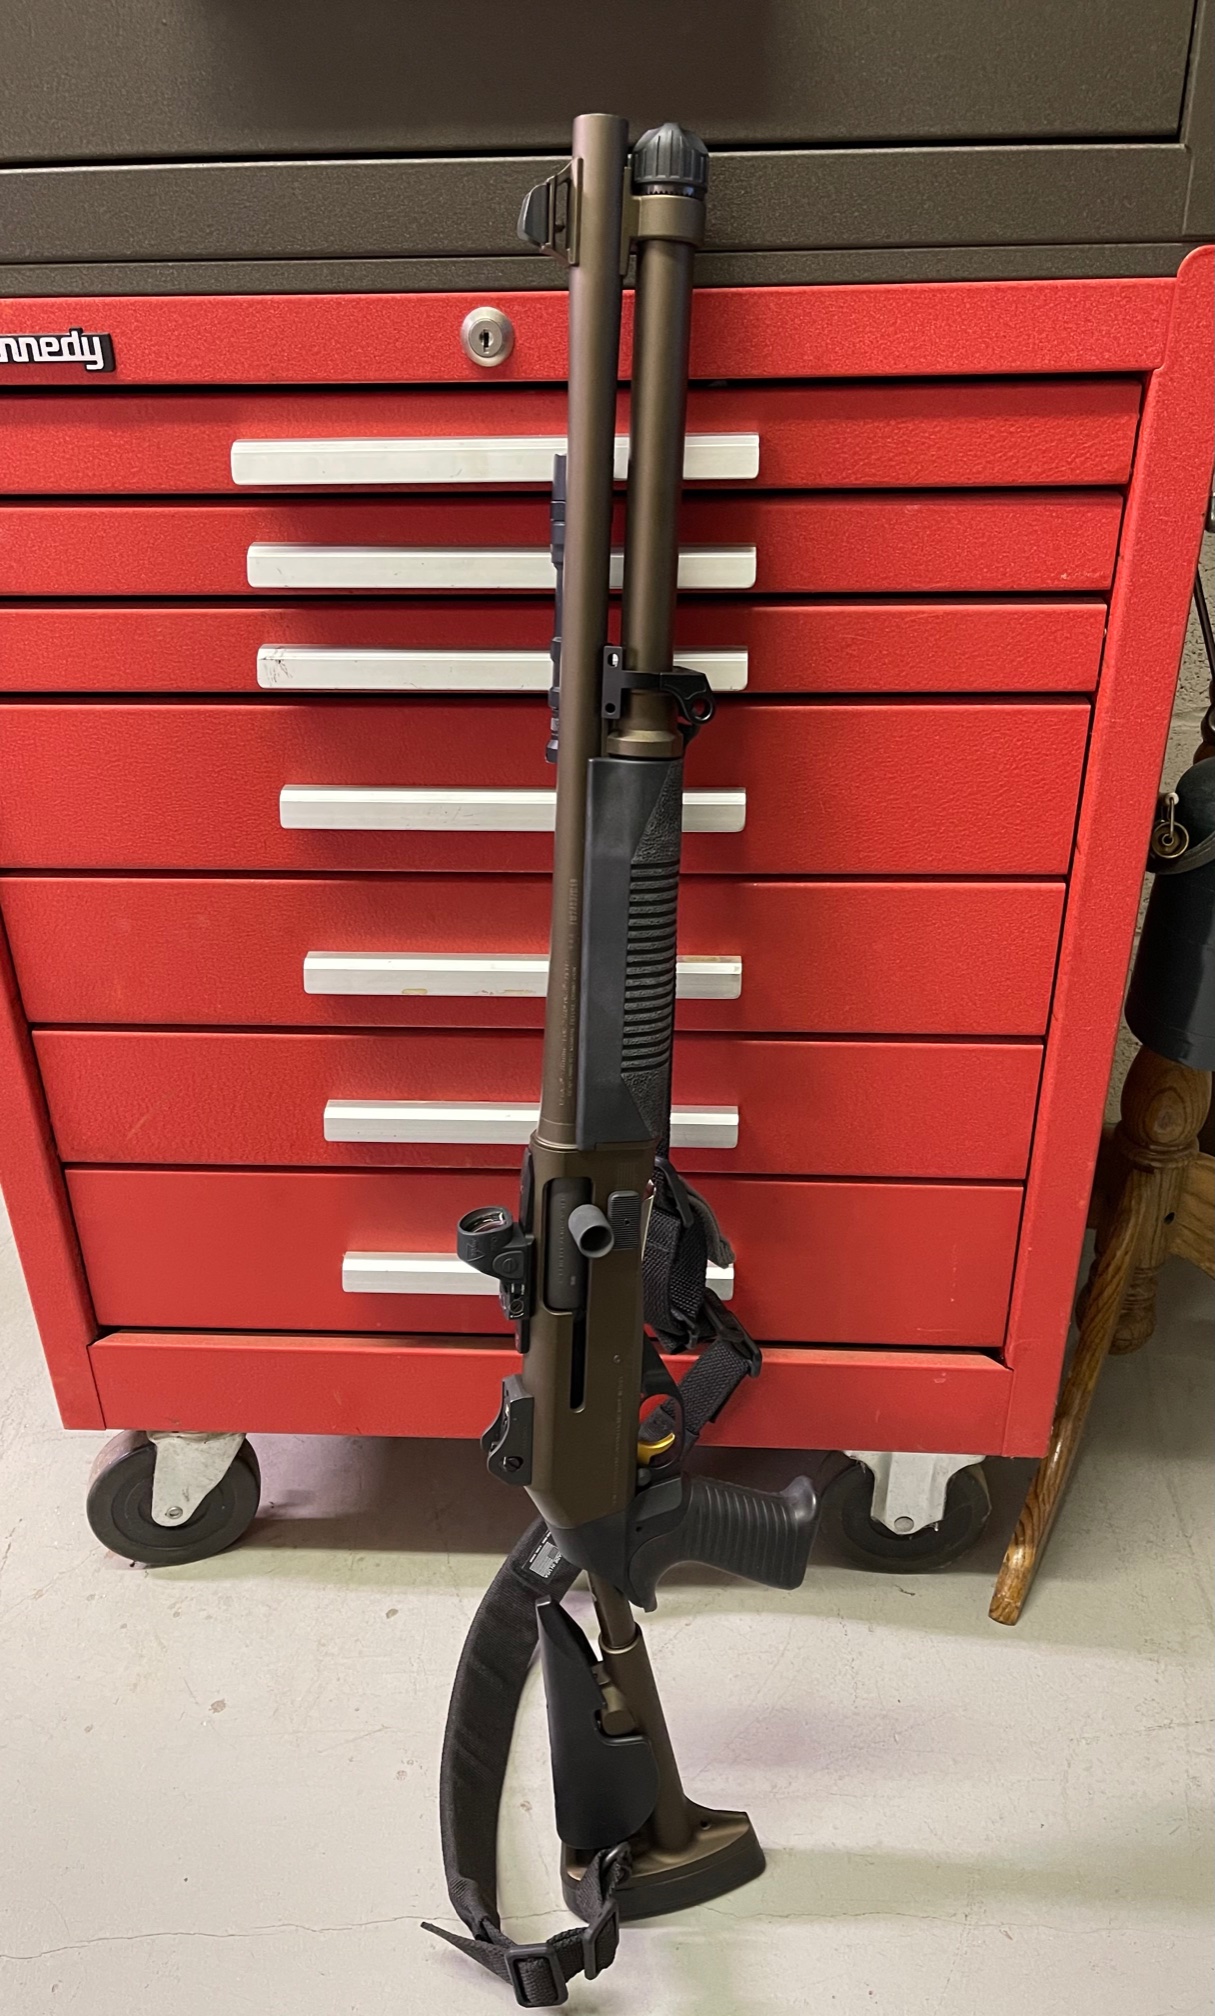
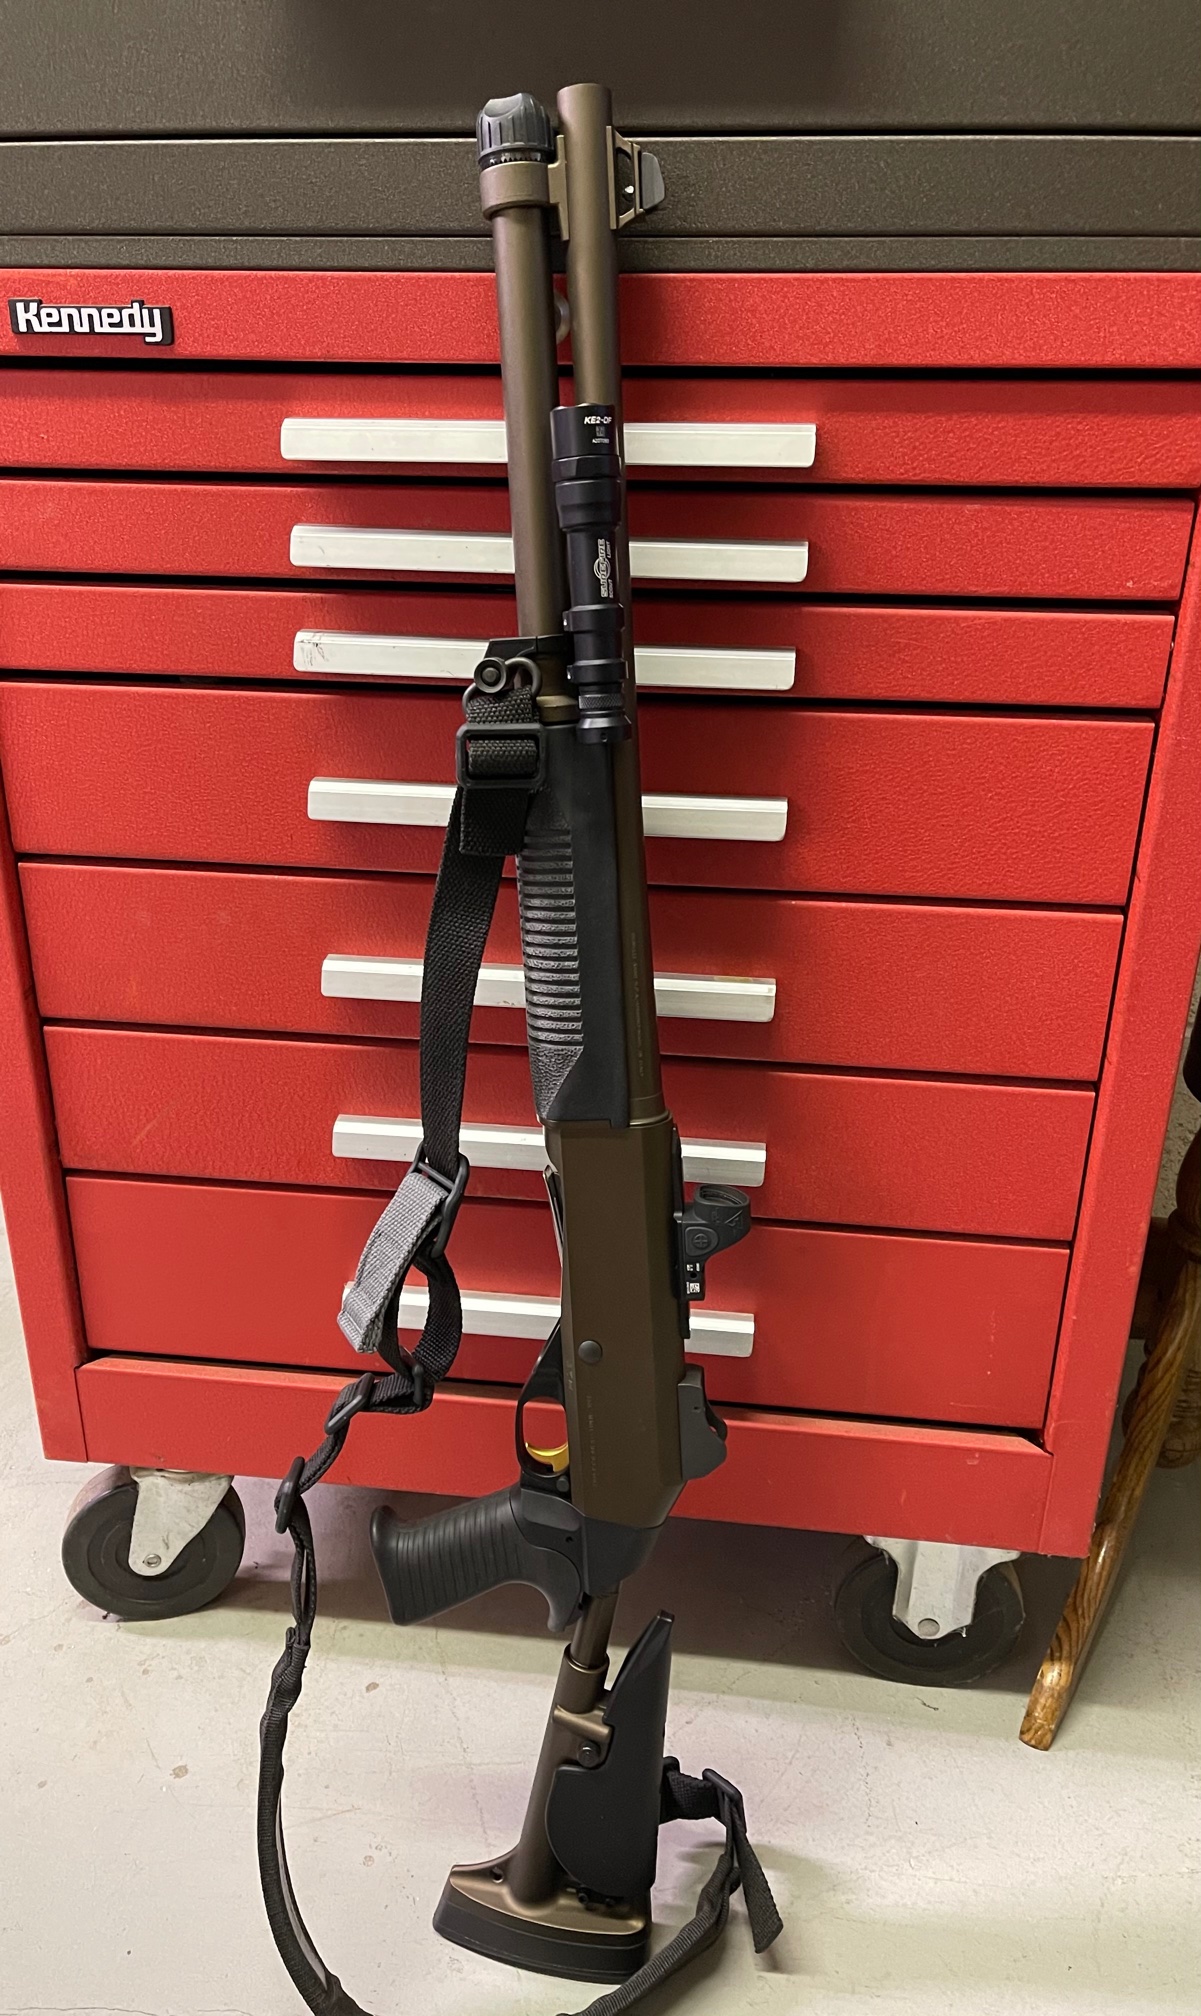
Received Form 4 Approval on Aug 3. This after I sent a Expedite Request. Wish I’d have known back in February. Barrel was flush. So I was a static that I didn’t have to send it off to Steve Rose. I was worried about the finish being blue, but it was HK black. Looks great stock. However for practical purposes I had already committed to a Scalarworks mount, a T2 micro, Modlite PHL, Impact weapon system light mount and Esstac shotgun cards. I purchase 7 round cards, but cut them down to 4. Only thing left to do is stippling the hand guard eventually. Limb Savor modified and installed yesterday. Unfortunately the Stock is canted to the right and improperly timed. This will need remedied. Not really noticeable when cheeking the gun. Should affect function. Ran approximately 75 rounds of light trap loads this morning after some 00 & Slug sight in. Ran like a kitten. If cycles light loads, it should run anything. Very pleased after today. Enough to drown my canted stock bitterness. Very fast on El presidente poppers. Can’t wait to take it to class next month. I’ll shake hands with it a bit more until then.


 9 points
 -
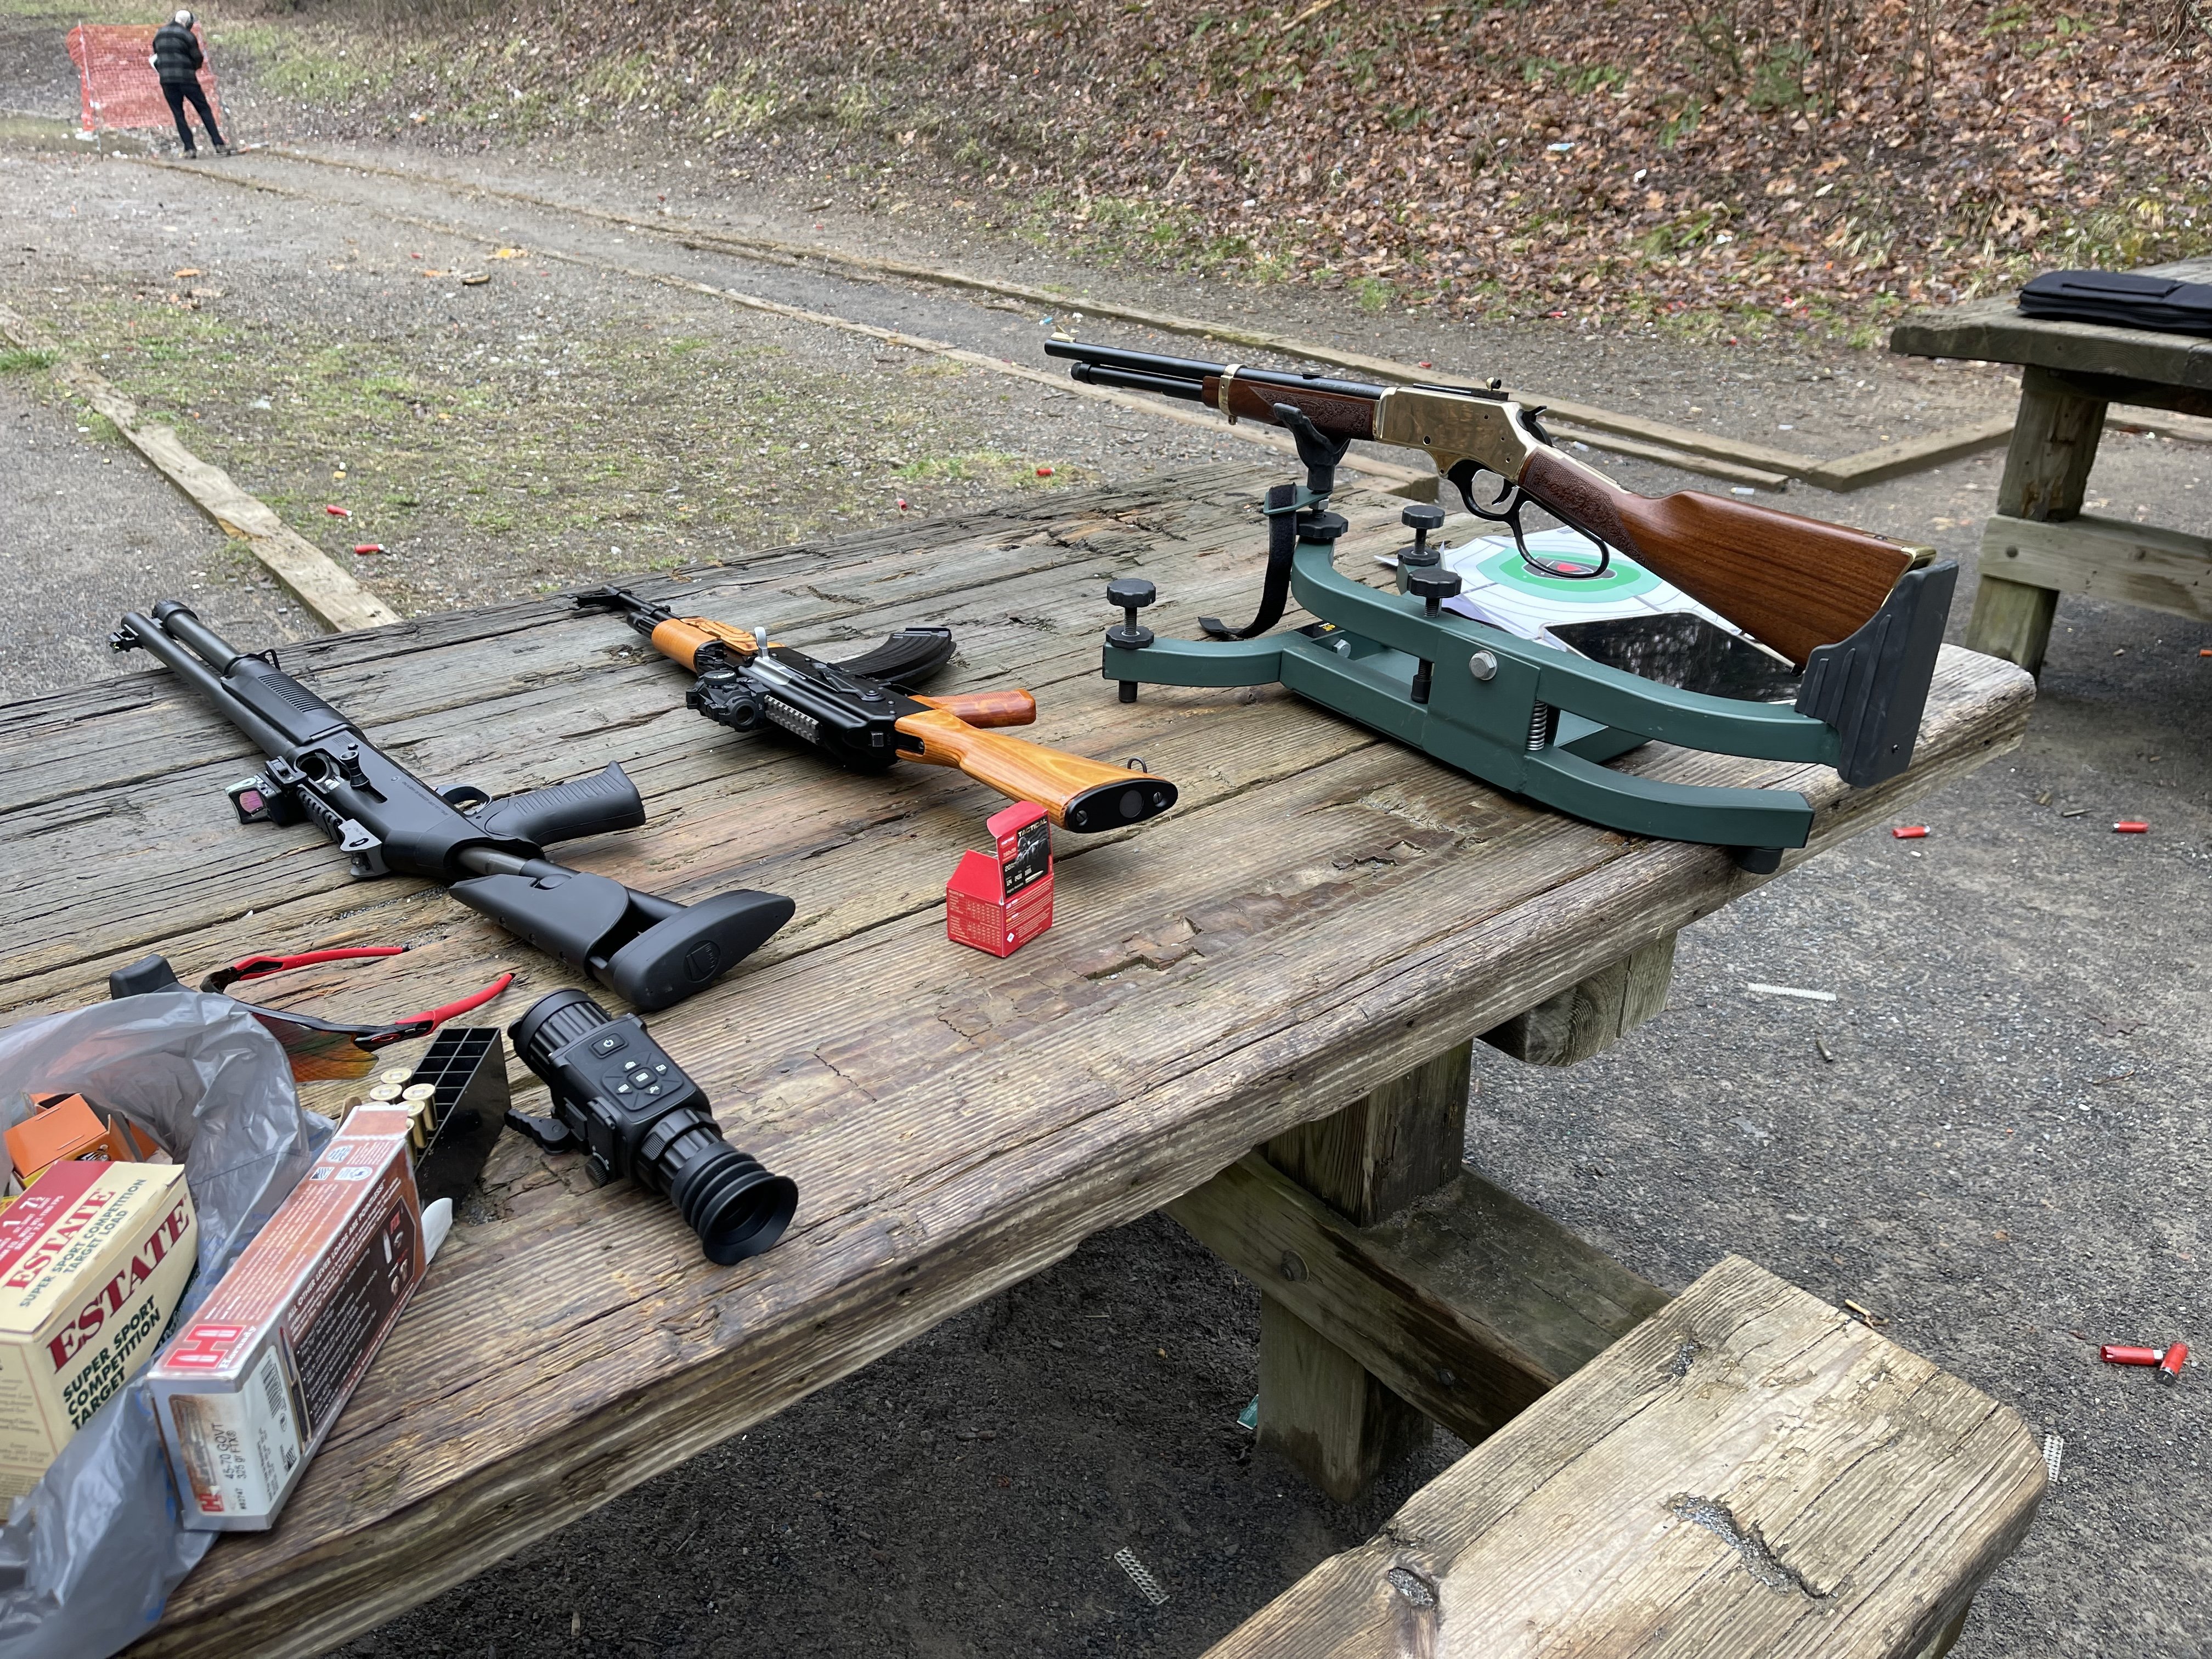
A friend actually gave me this 1983 mfg. imported via F.I.E. Miami, FL, NIB Franchi SPAS (Sporting Purpose Automatic Shotgun) with folding stock and infamous "hook" arm brace (way ahead of it's time) 10-12 years ago. It's definitely a cult firearm piece, glorified by it's highlights in Arnold Schwarzenagger "Terminator" movie. It took 10 years and $2500 for me to acquire all the known available "accessories", the last of which was the 2-piece muzzle "diverter" for $1300 in 2021, from the SPAS12.com site originator nonetheless. Several years ago I balked @ $500 for the device, bad non-purchase. It's one heavy and clumsy gun to manipulate. Importantly there was a Safety Recall in 1991 regarding the original "lever" style safety lever that would, without warning, discharge the firearm while toggling the lever from ON-OFF / OFF-ON position; a good time to emphasize the primary safety on any firearm is muzzle direction. My Franchi SPAS 12 (Sporting Purpose Automatic Shotgun) has a 21.5" barrel, SPAS 12 external muzzle thread protector, folding stock, 8 round magazine = pre-ban SERIAL NO. AL XXXX DATE CODE “AL”=1983 Imported by F.I.E. , Miami FL - collector desirable. pump / semi-auto modes. The pump mode was for cycling low powered rubber tip riot cartridges. First year mfg 1979. (1994 assault weapons ban) Removable magazine restriction plug, FIE scope mount, Vario-Mix choke tubes (cylinder, modified, full choke), sling, "hook", muzzle “diverter” device paid $1300 in 2021 for this 2-piece accessory Trigger guard “lever” safety (Safety Recalled in 1991; factory replaced recalls with the cross-bolt trigger group. SAFETY MALFUNCTION DEMONSTRATED: https://static.wixstatic.com/media/0cdaa4_952e6a62edc84135a0113b9964845d33~mv2.gif I authored an Anatomy Series Manual on the differences between the Lever / Cross Bolt safety trigger groups available that also details how the safety malfunction occurs and the factory resolution using the same lever trigger groups! A bit of musing on the "muzzle device" and it's parallel development in the armed forces follows. A variety of shotgun muzzle devices have been tried over the years to enhance their effectiveness in a defensive role. One item that comes off often is "Duck Bill Spreaders" most seem to originate in the early 70's. Crane Lake is often cited as were their origin and cited has being used by the SEAL's in Vietnam and by the Air Force Security Forces. In each case they are cited as being regulated for use with #4 buck shot. Relative reference manuals from the early 70's reveals #4 buckshot was the preferred load for LE-military shotguns. Crane Lake is often cited as such prototype muzzle devices used by the SEAL's in Vietnam and the Air Force Security Forces. A&W muzzle in "The Police Shotgun Manual", by Roger H. Robinson, 1973. Mr. Robinson includes many high speed photos that were provided by A&W Engineering of shot loads coming out of the A&W duck-bill device; photos show the diverter to be very efficient at pattern modification. At 10 yards a 7 1/2" H x 29" W pattern with #4 At 30 yards a 25" H x 96" W pattern with #4. A claimed a 22% reduction in recoil an diminish the muzzle flash to that of a .38 special at night. A slug can be used as well, imparting two grooves on either side of the slug with a reduction in projectile yaw. According to Swearengen in _The World's Fighting Shotguns, the US Air Force Directorate of Security Police in the mid-1960s developed a requirement for a spreader choke that would produce a wide elliptical shot pattern. This horizontal pattern spread was supposed to increase the hit probability from a shotgun on a moving target. The Air Force request went to Frankford Arsenal for action, at the time Frankford was working on improvements to the military shotgun in general. Early experiments at producing a spreader choke were less than successful- the chokes split, patterned poorly and in various ways failed to produce te desired result. Ultimately Frankford ordnance engineer Charles A Greenwood developed the duckbill choke in answer to the Air Force requirement. It was subjected to a good deal of laboratory and field testing. The original duckbill choke was simply a sleeve with a long V-notch cut on either side, the apex of the V toward the rear. The top and bottom of the sleeve were compressed toward the centerline at the muzzle, constricting the emerging pattern of shot in the vertical plane and forcing it to spread horizontally. The sleeve was permanently brazed onto the barrel so that it would not be blown off or rotated by firing the gun. Early examples of duckbill- equipped shotguns were deployed to Vietnam in the hands of Marines and Navy SEALs. It was found that the open V- notches in the muzzle of the duckbill hung up badly on vegetation as the shotgunner tried to move through thick growth, so the duckbill was modified with a ring around its muzzle to exclude vines and branches. It was discovered that the spreader device worked as advertised, but in reality what was needed in a fighting shotgun was a way of producing dense, lethal patterns. Spreaders in field testing produced patterns five feet high and twelve feet wide at 30 meters with #4 buckshot loads. At 40 meters, patterns were six feet high and sixteen feet wide. At 40 meters an average sized man would only be hit by a couple of pellets. But with a standard cylinder bored barrel shooting approximately a four- foot circular pattern at 40 meters, some 60% of the shot would strike an average man- sized target. Still, the duckbill choke had its adherents, among SEALS especially. Development on the idea continued for several years. Clifford Ashbrook and Wilson Wing of Kexplore, Inc. in Houston, TX developed the A&W Diverter in the late 1960s using mathematical concepts, and received patent protection (# 3,492,750) in February 1970. The HK 512 gas operated 7+1 shotgun, it was manufactured by Franchi for HK under a contract to supply an elite force in Germany (GSG9), i.e. the "Anti-Terrorist Shotgun" . A production over run of 270 units which were imported into the US, employing a shot diverter that creates a rectangular spread .9 points
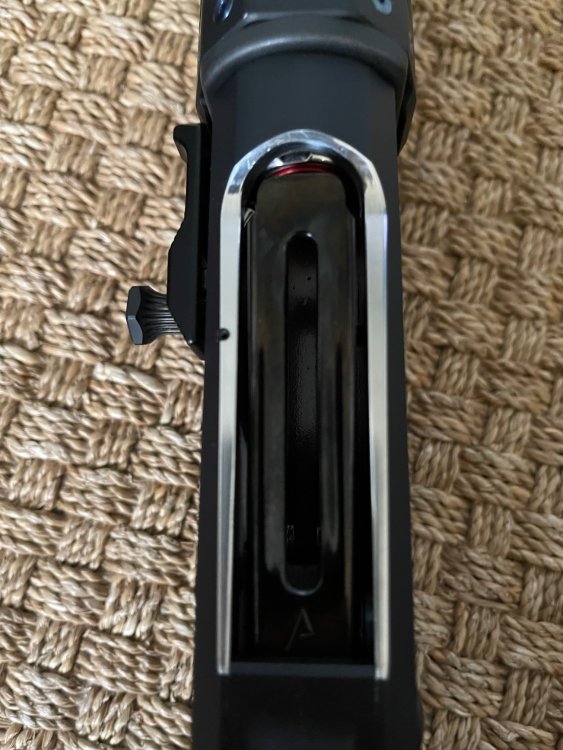
-
If that’s a Tacstar side saddle, it’s a notorious piece of shit that will definitely squeeze the receiver if tightened too much. Not tightened enough and it falls apart. Then it starts scratching up your receiver. Any aftermarket shell elevators in use? I’d take the magazine tube apart and clean it well inside. Do not apply oil inside the magazine tube at all. I’d recommend making a polishing jig for the magazine tube. I put a 12 gauge cleaning rod in my drill gun, then wrap fine steel wool around a 12 gauge chamber brush. Then go to town up and down the inside of the magazine tube for 5 minutes. Clean out the residue and admire the mirror finished magazine tube. Note the difference in sound once you reinstall the spring and follower. The magazine spring won’t be fighting the resistance inside the magazine tube as much so that it can deliver more of the spring energy to loading shells onto the elevator. This is particularly important when it is the last round or two being loaded from the magazine. The polishing can be done on steel, titanium or even the Briley carbon fiber magazine tubes.9 points
-
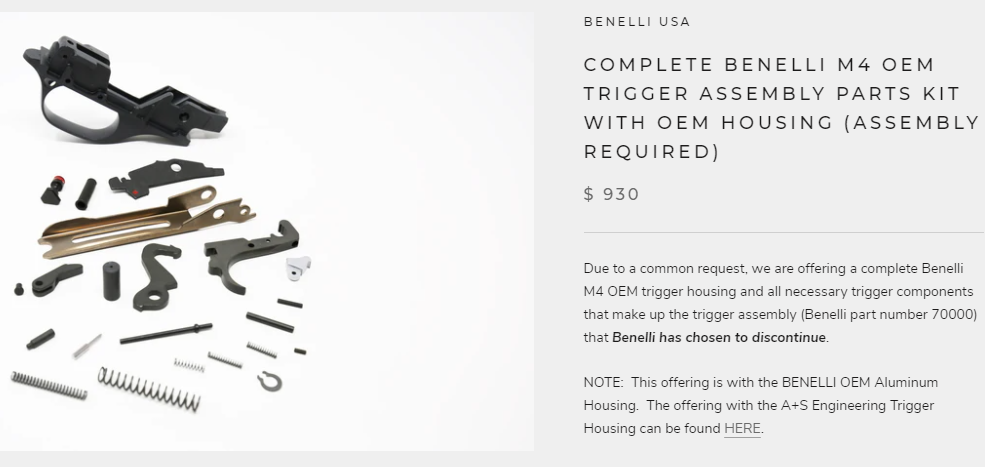
Just want to publicly say thanks to Unobtanium for the trigger group I bought from him in this thread. I received it today and it is perfect and new just as he described it. I knew that it would be from my impression of him during the last several years on this forum, is that he is a person who is very meticulous about his firearms. He also sent it out to me without first receiving the funds I sent him. Thank you, sir!9 points
-
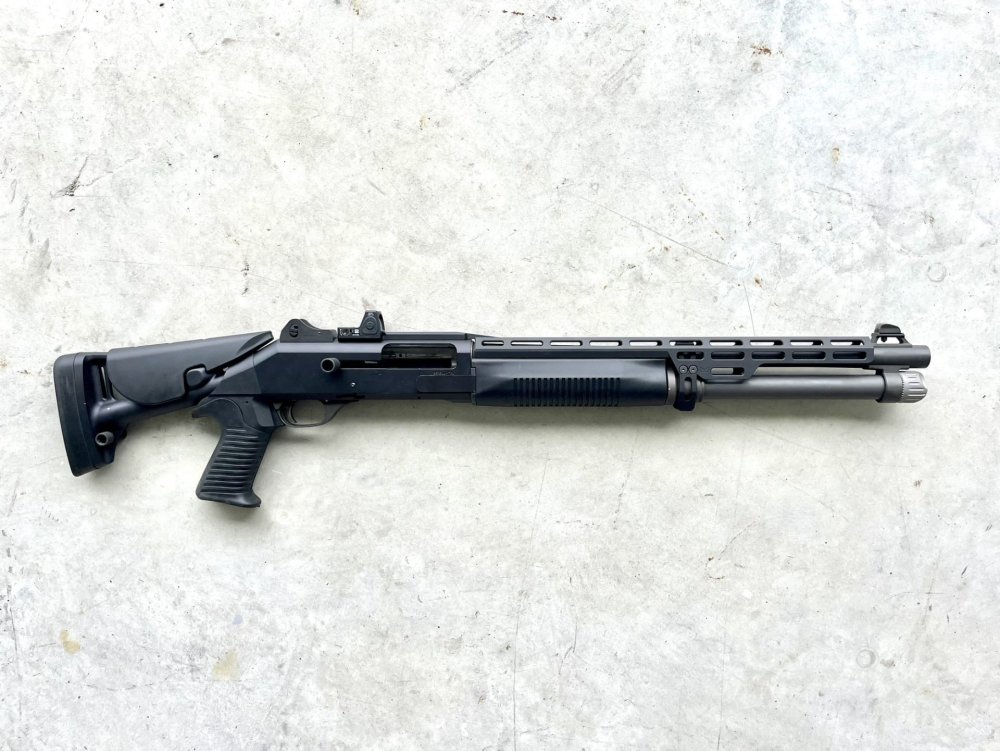
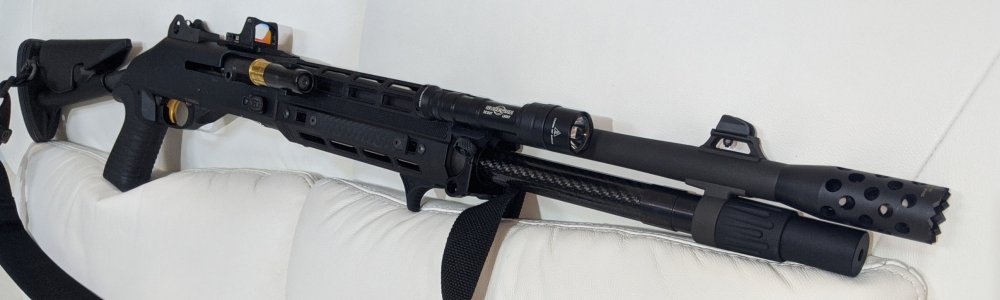
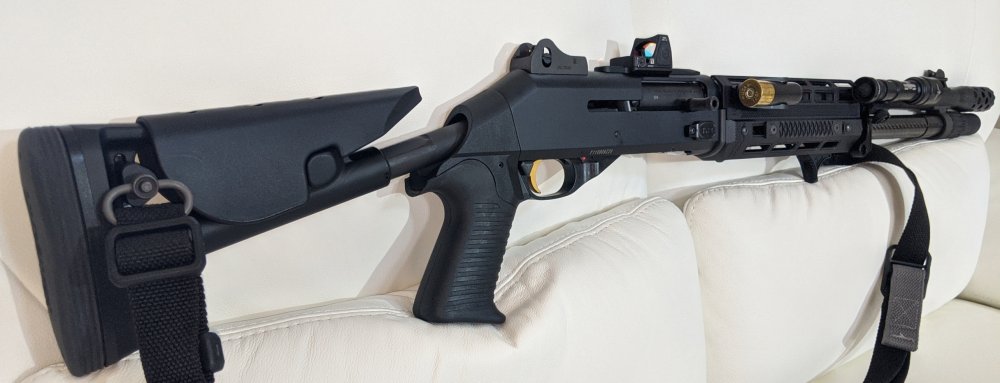
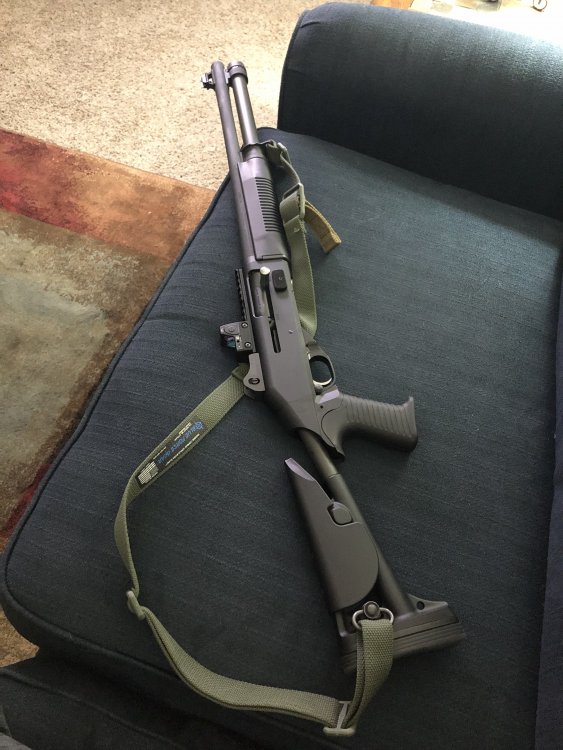
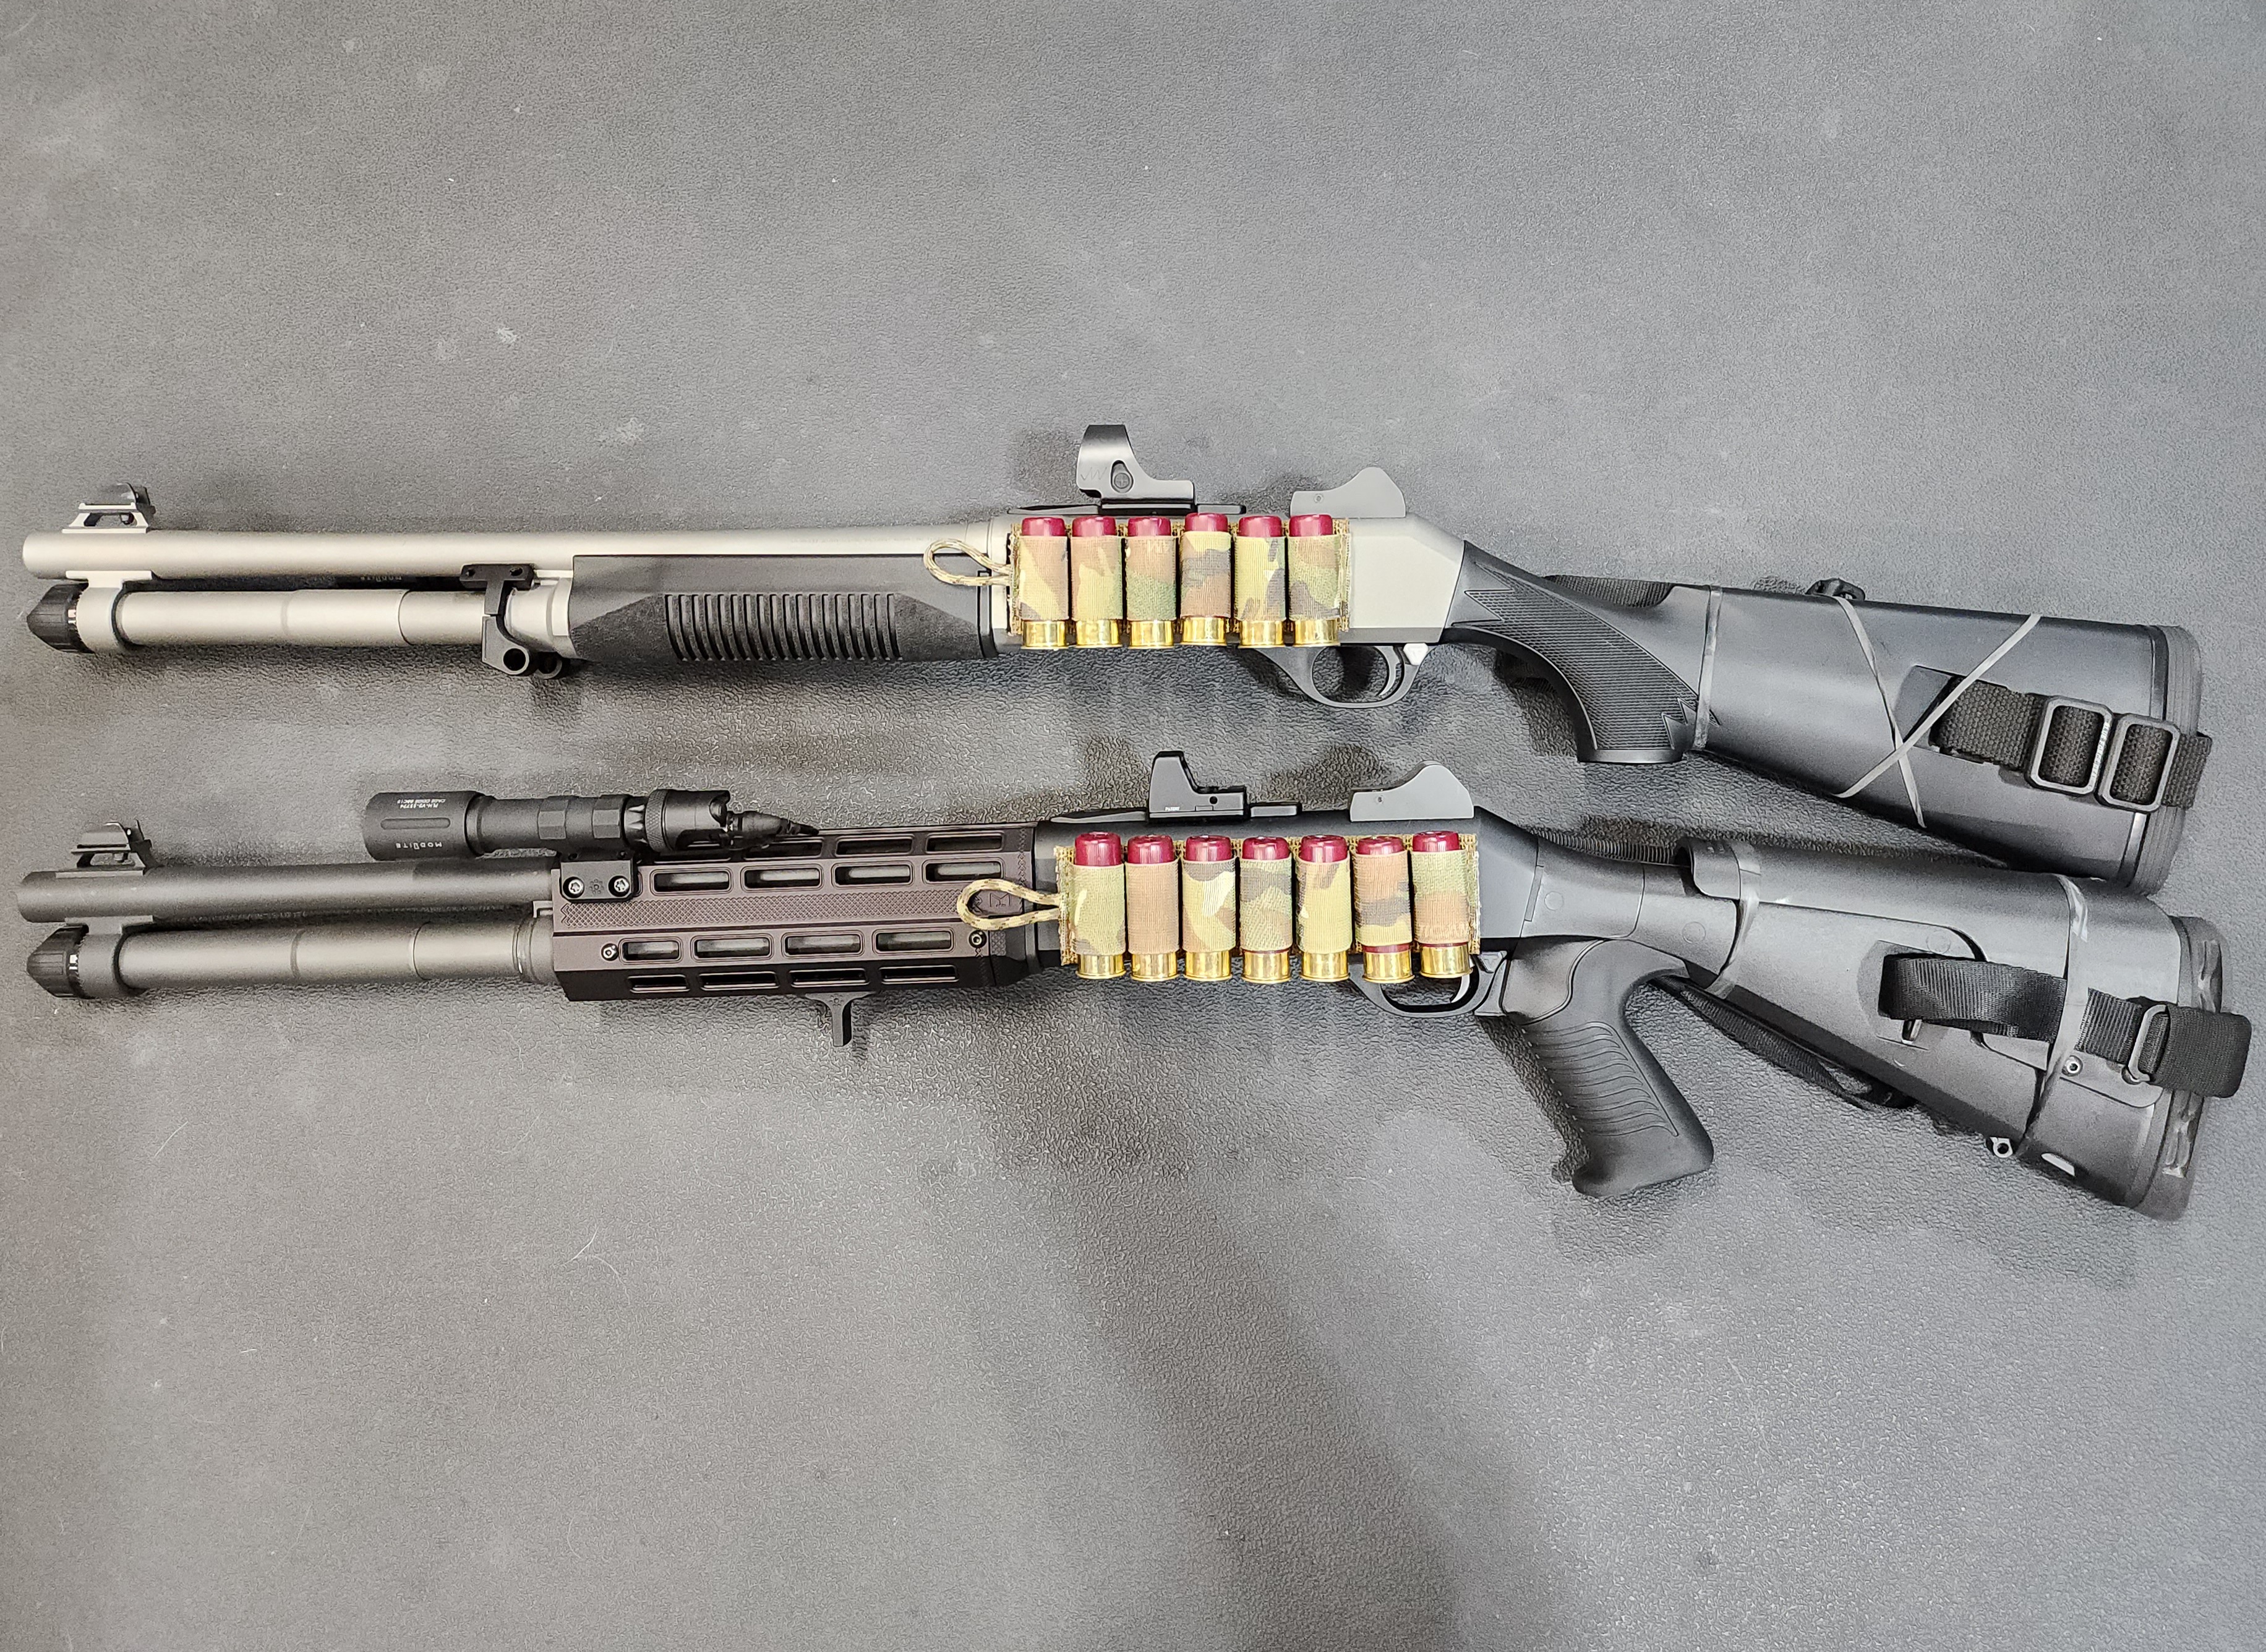
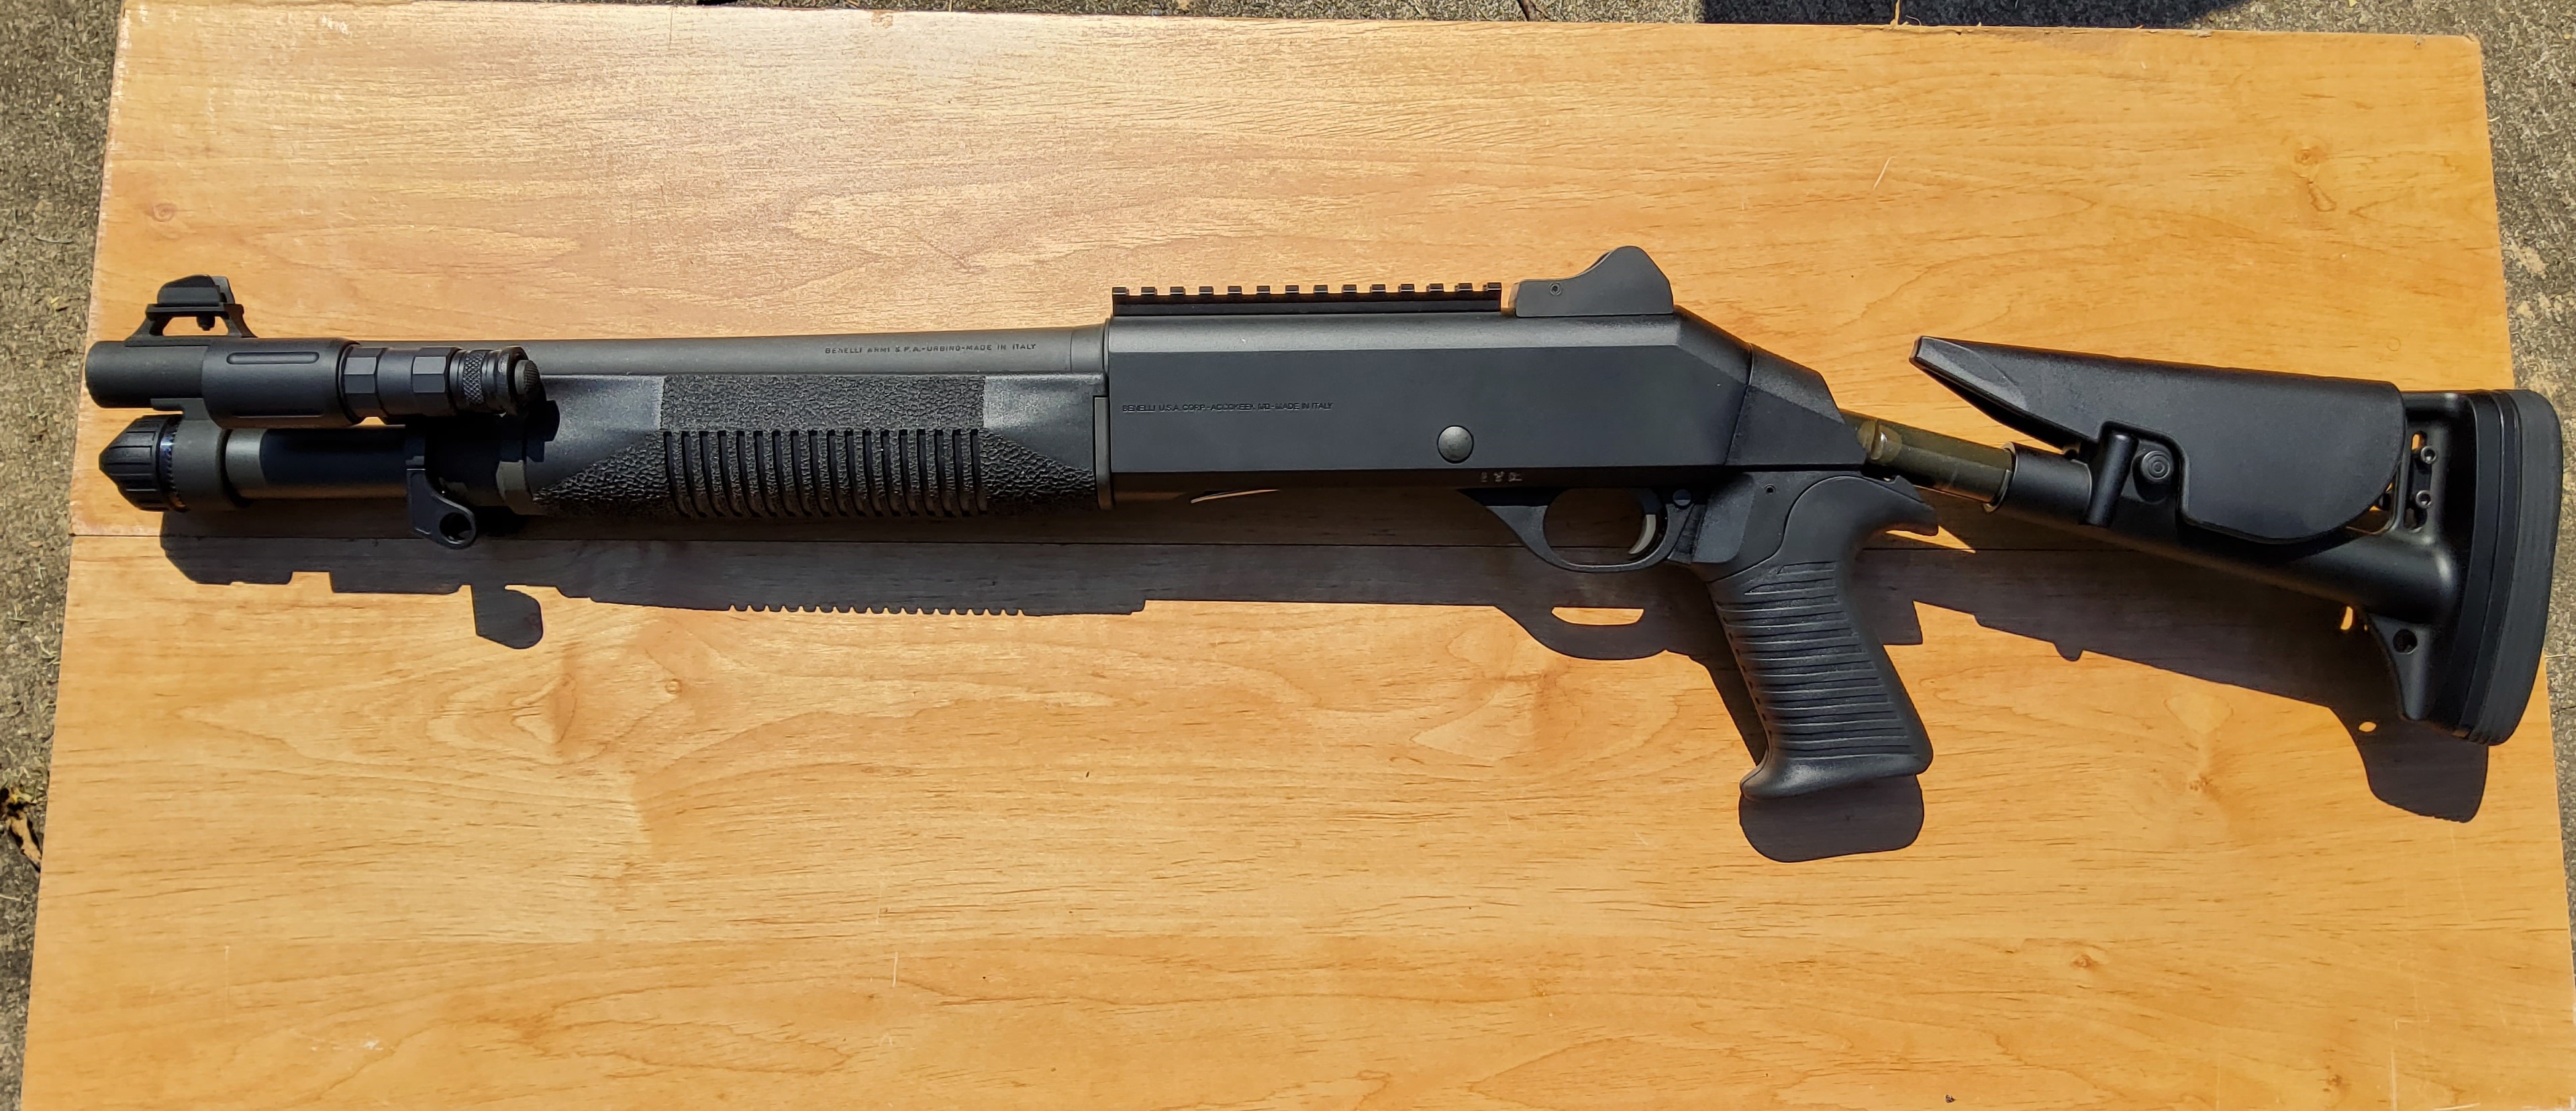
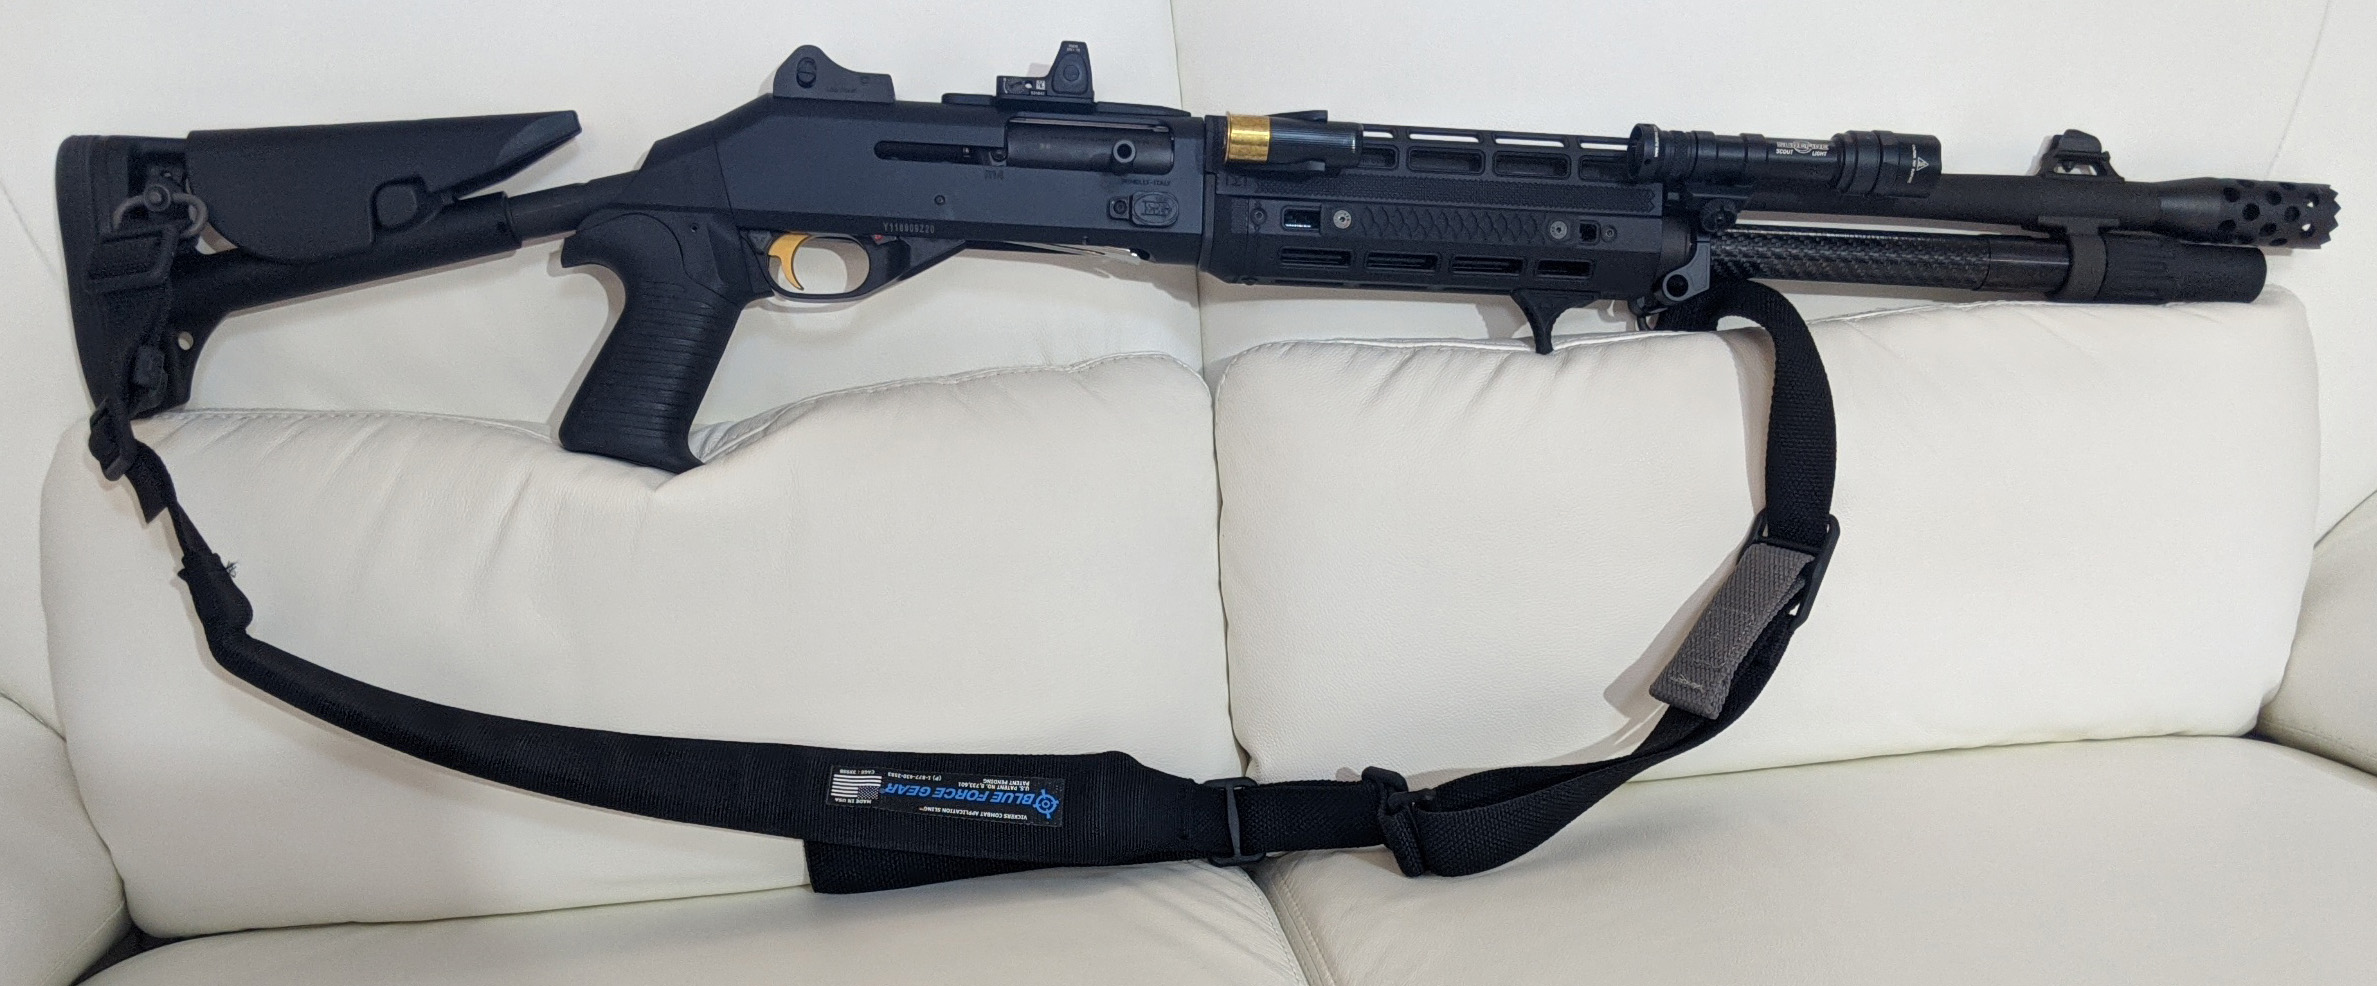
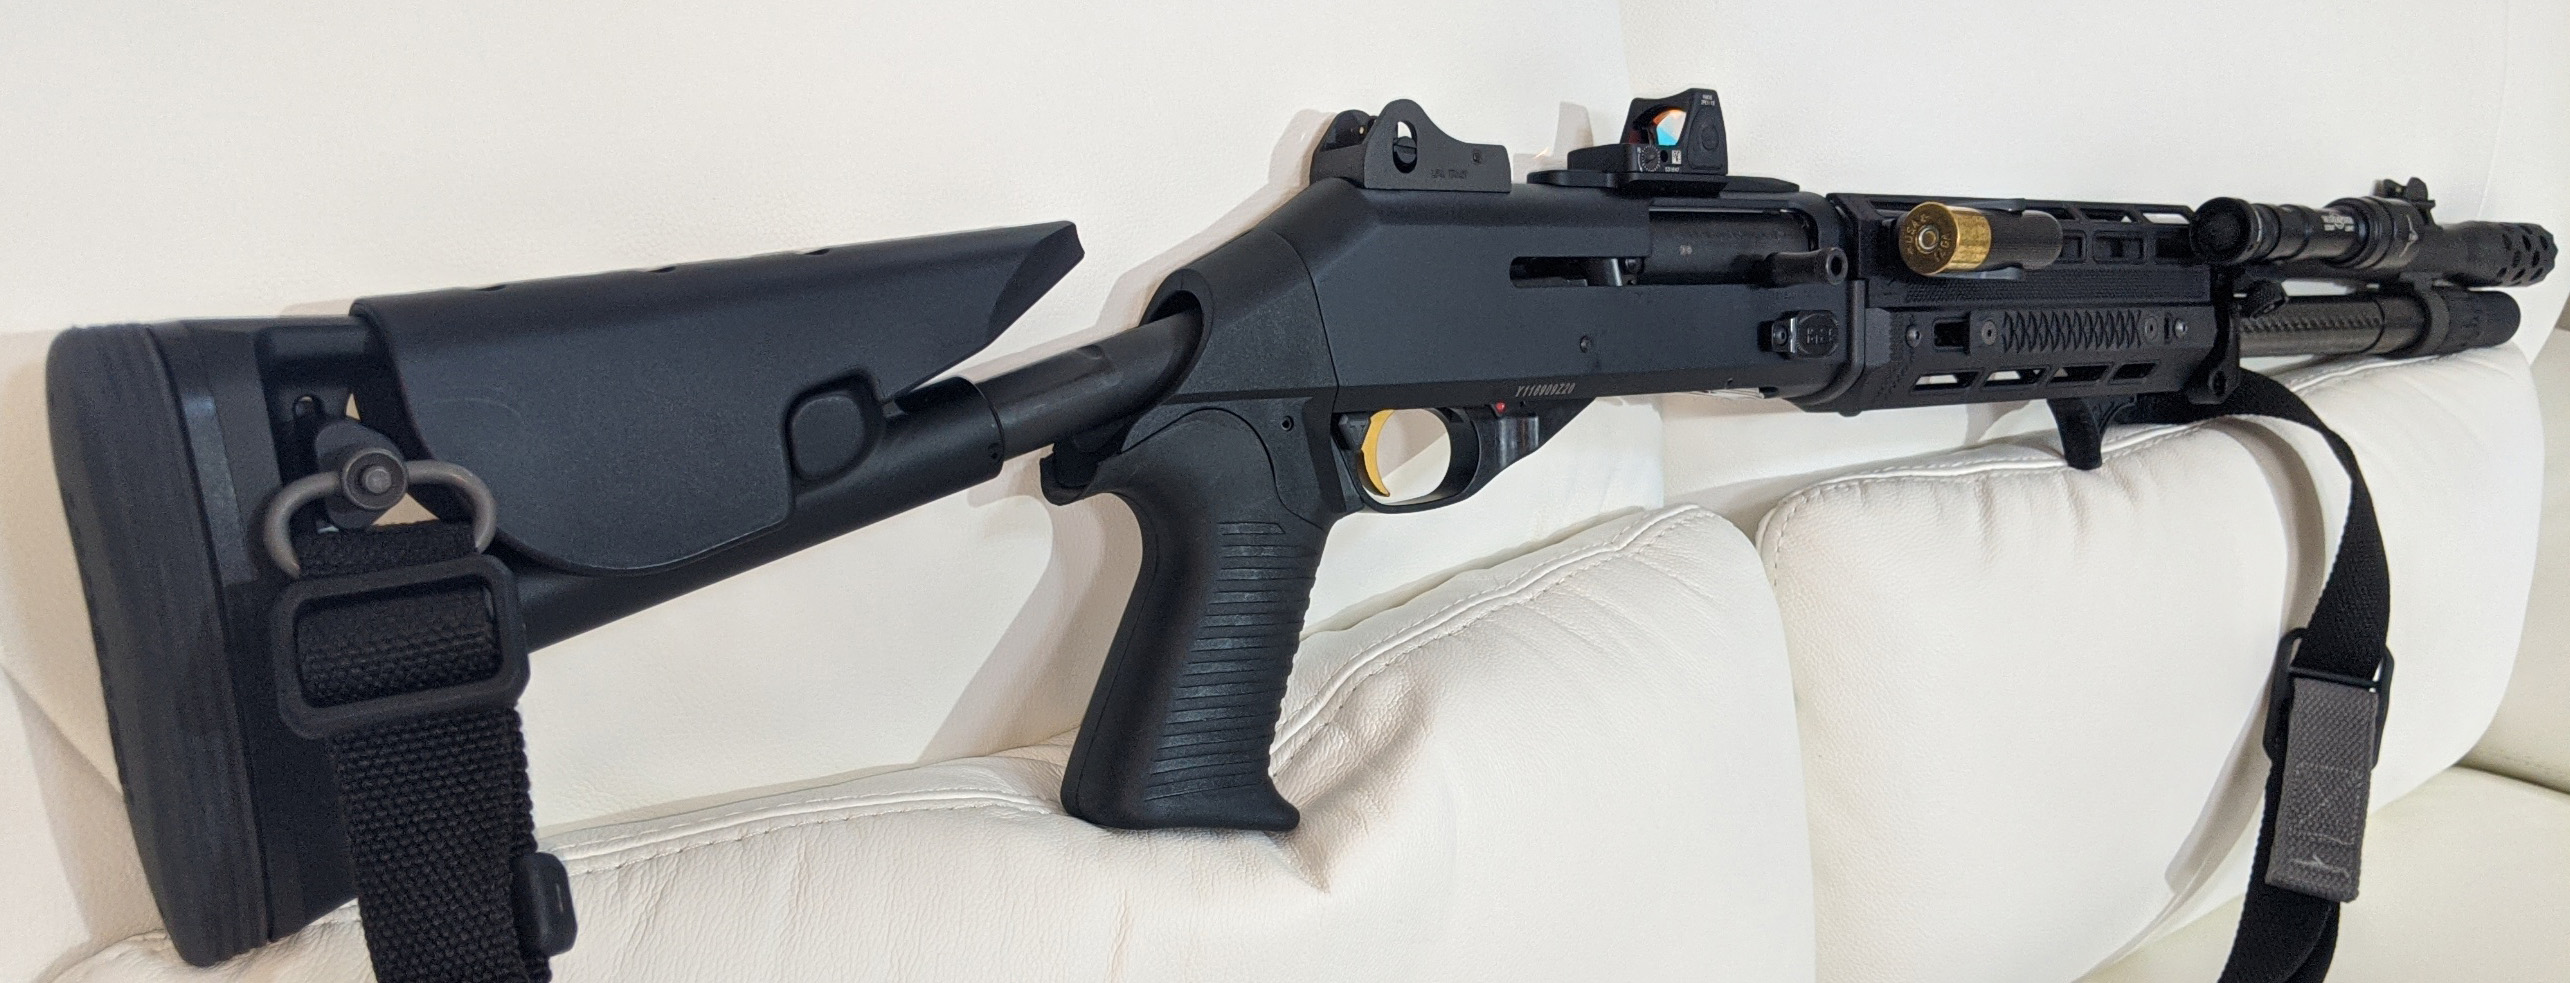
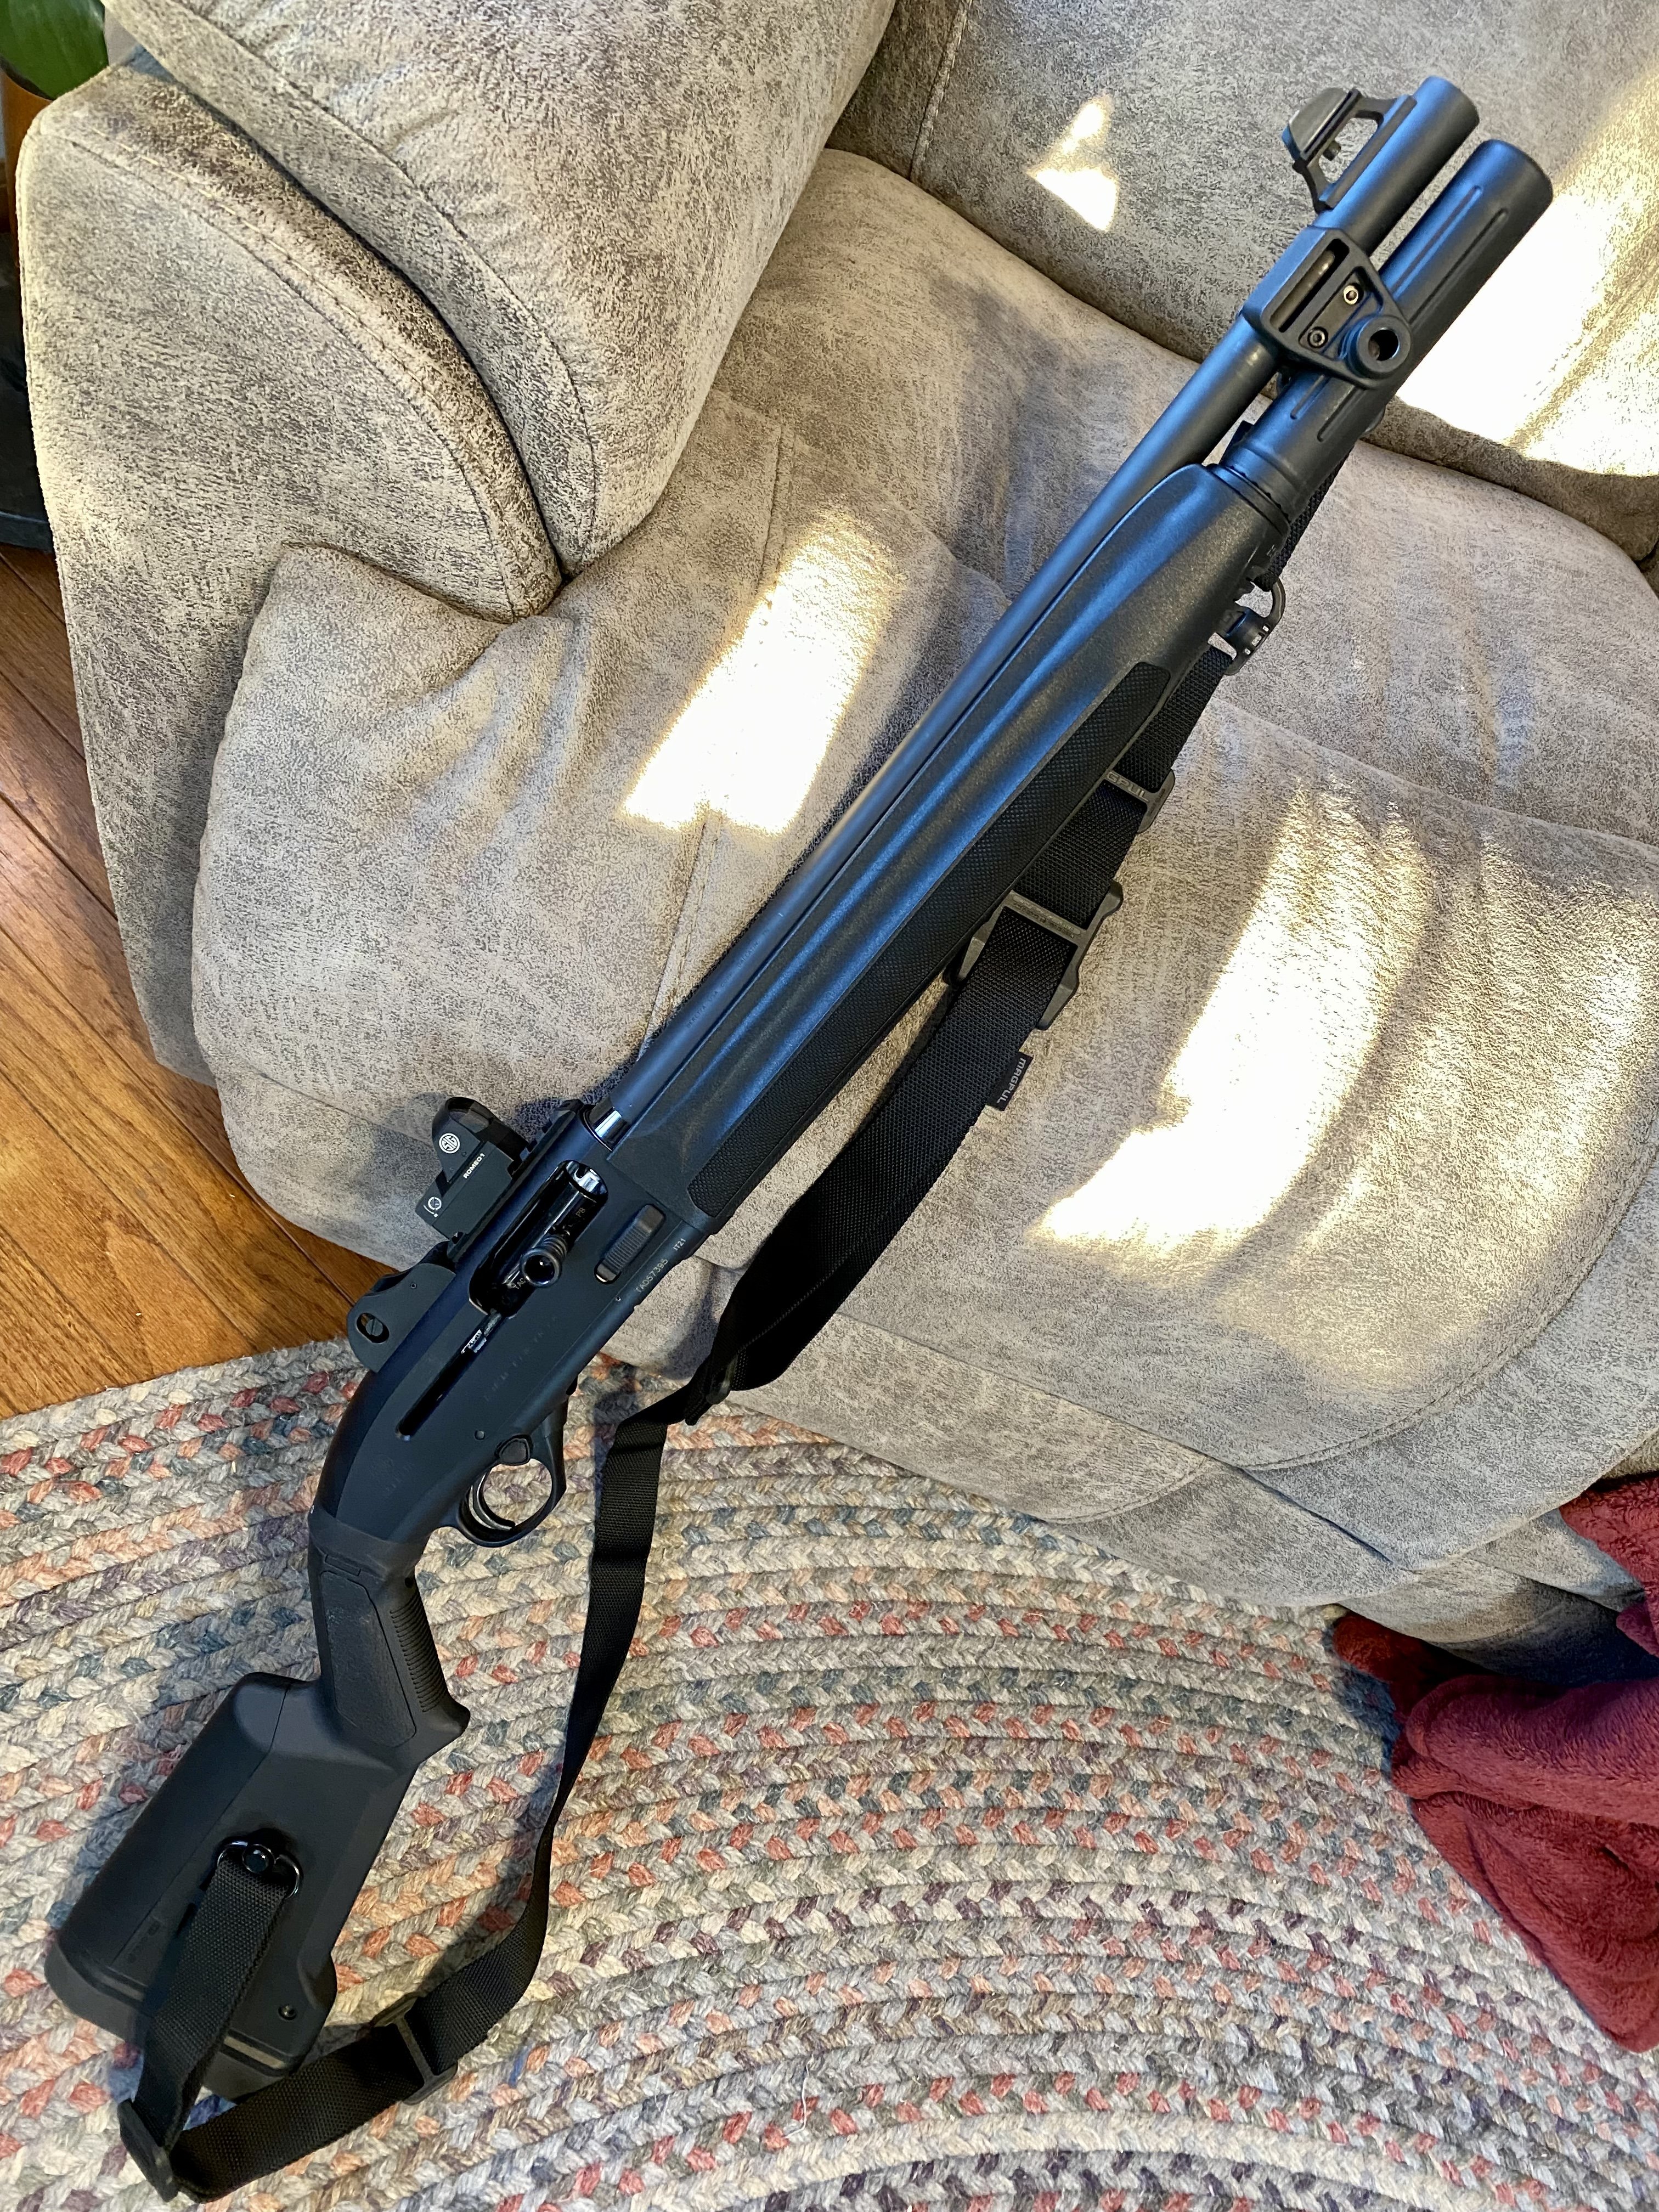
Here's mine. Build list: Briley CF extended mag tube Briley Handguard Briley Bolt Release Nordic 1 shot mag extension Benelli Muzzle Brake Benelli Collapsible Stock (California Button Pinned) Limbsaver Stock pad IWC Multi Light Scout Mount IWC Buttstock QD Mount Surefire M600 Ultra Scout light Taccom Premium Stage Saver with Briley Stage Saver Adapter TTI Charging Handle TTI Shell Lifter TTI Safety Carrier Comp Follower Briley Match Trigger A&S Enhanced Trigger Guard Scalarworks Sync Trijicon RMR06 Type 2 Railscales G10 Dragon Scale Railscales Karve Blue Force Gear Sling

 9 points
 -
9 points
-
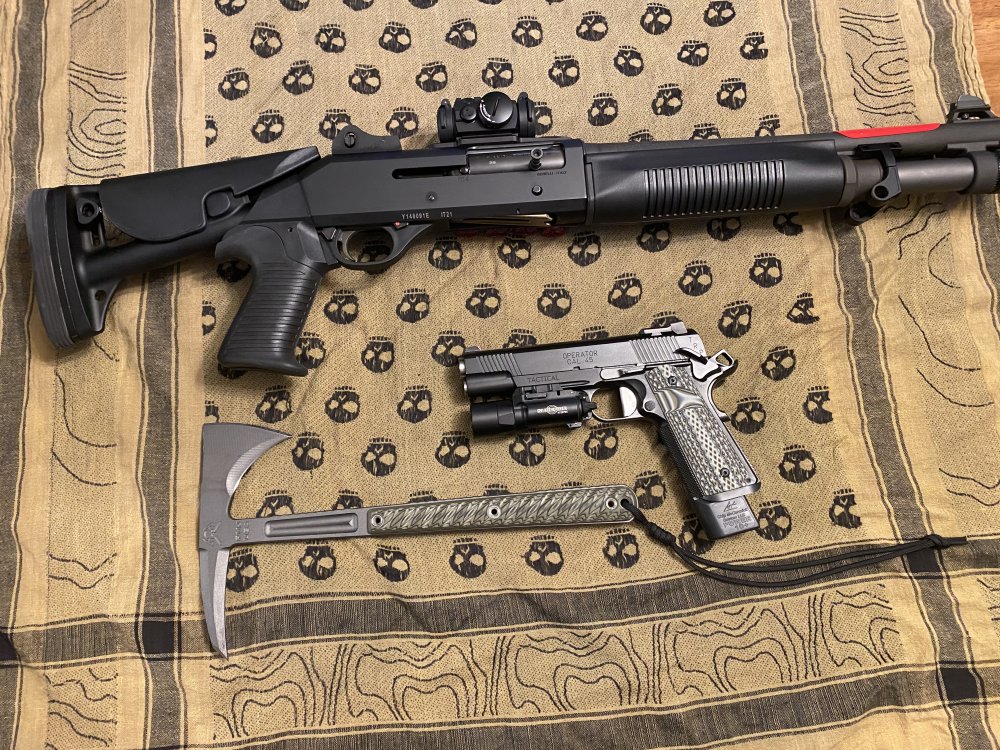
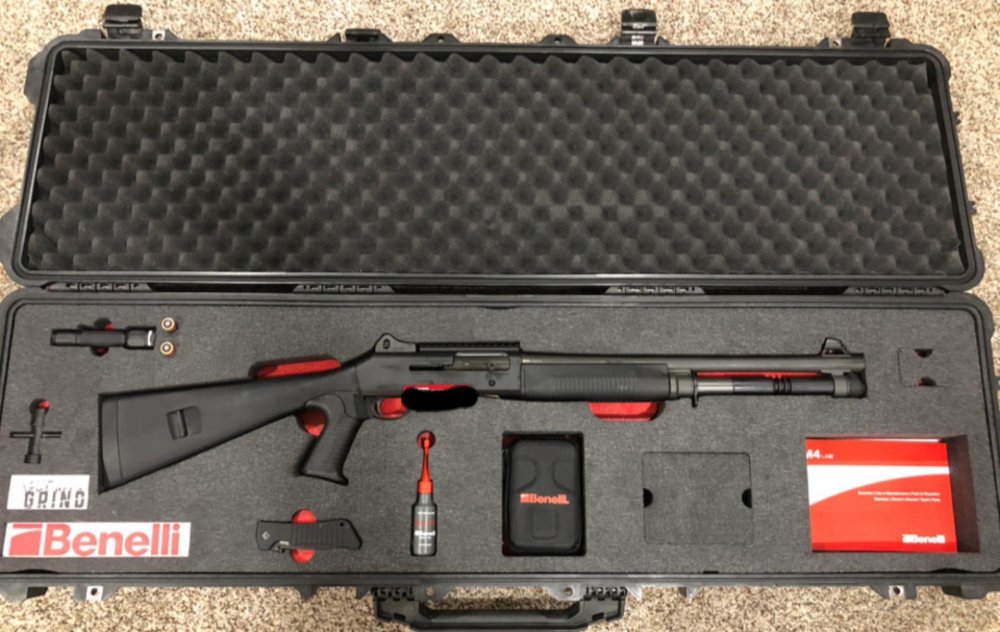
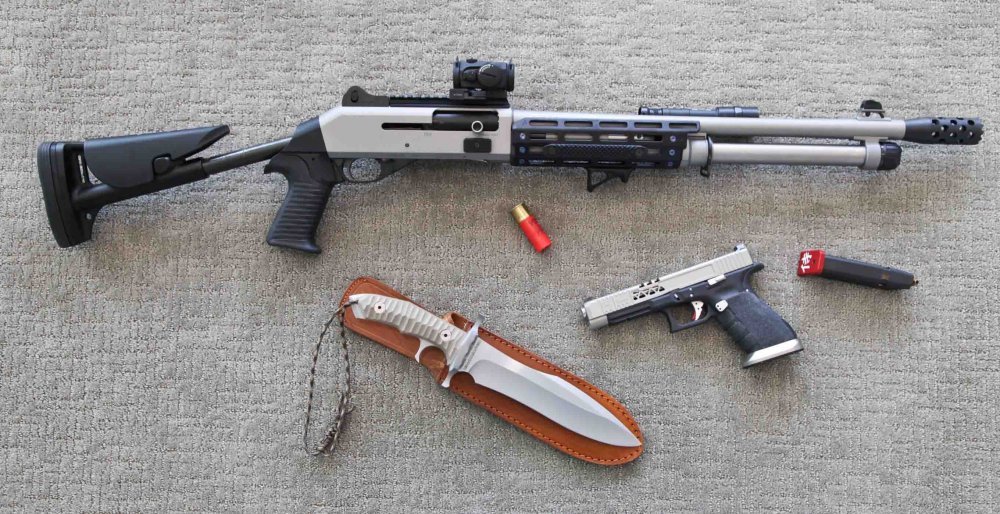
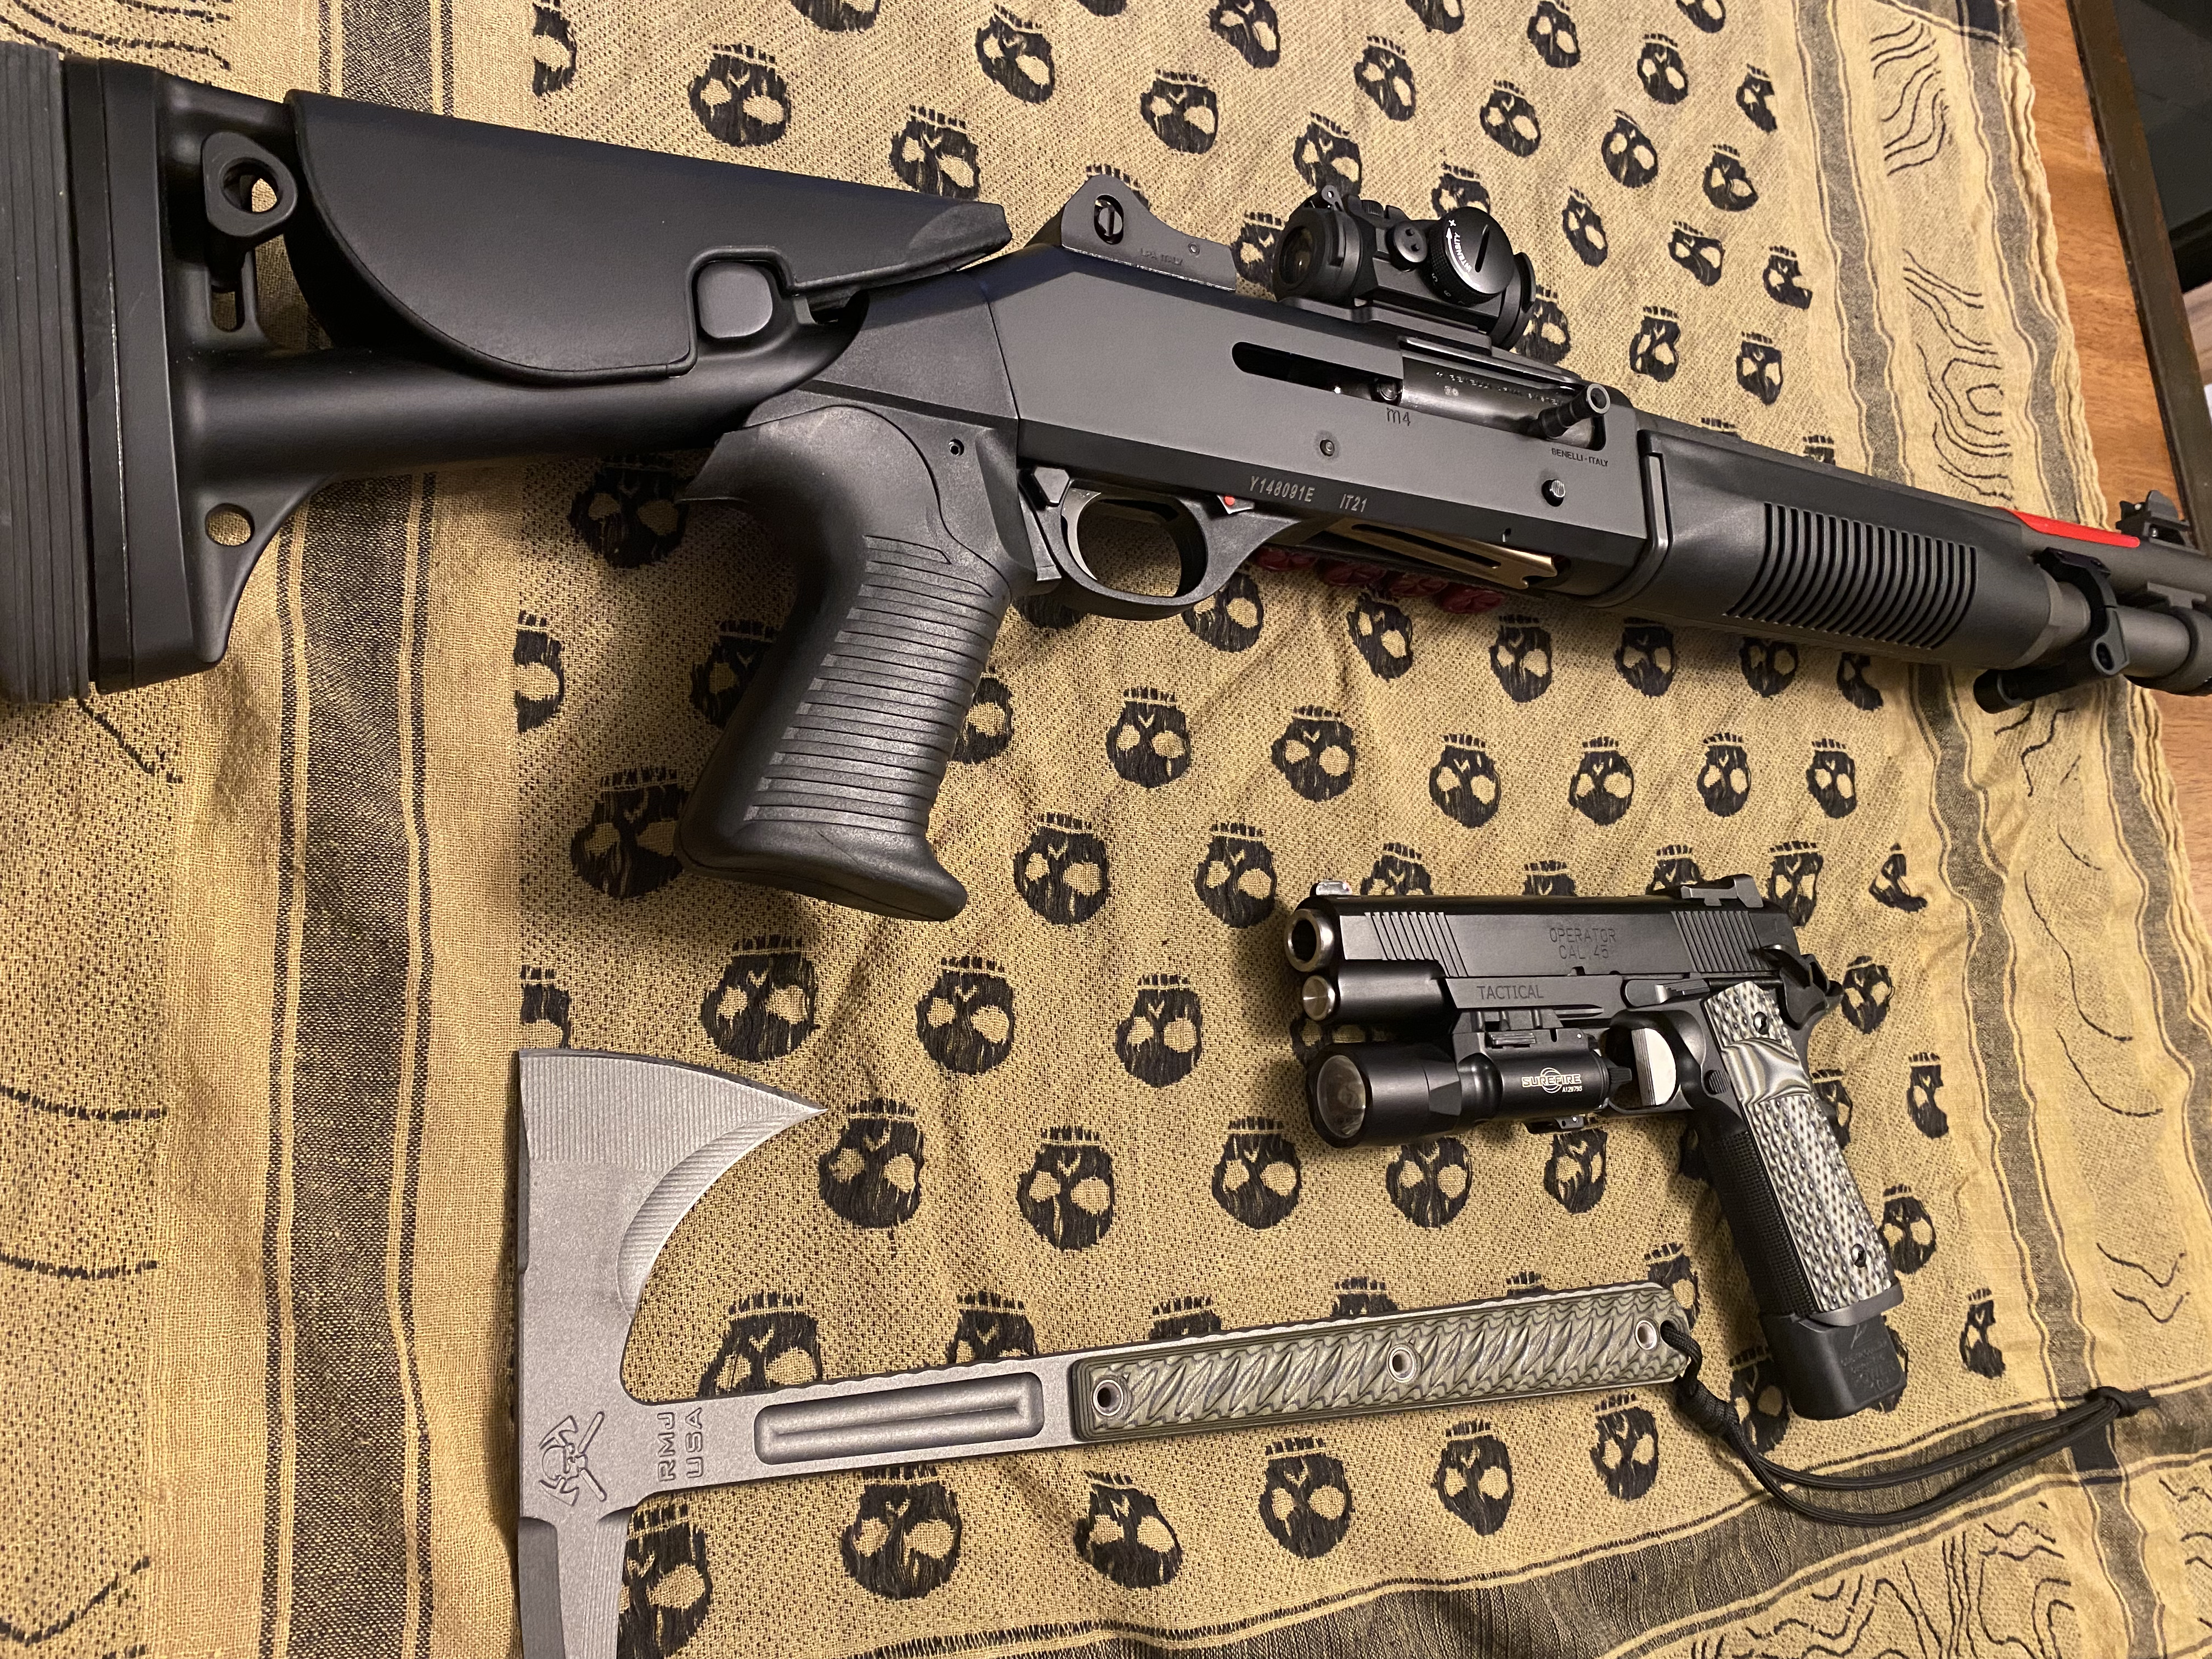
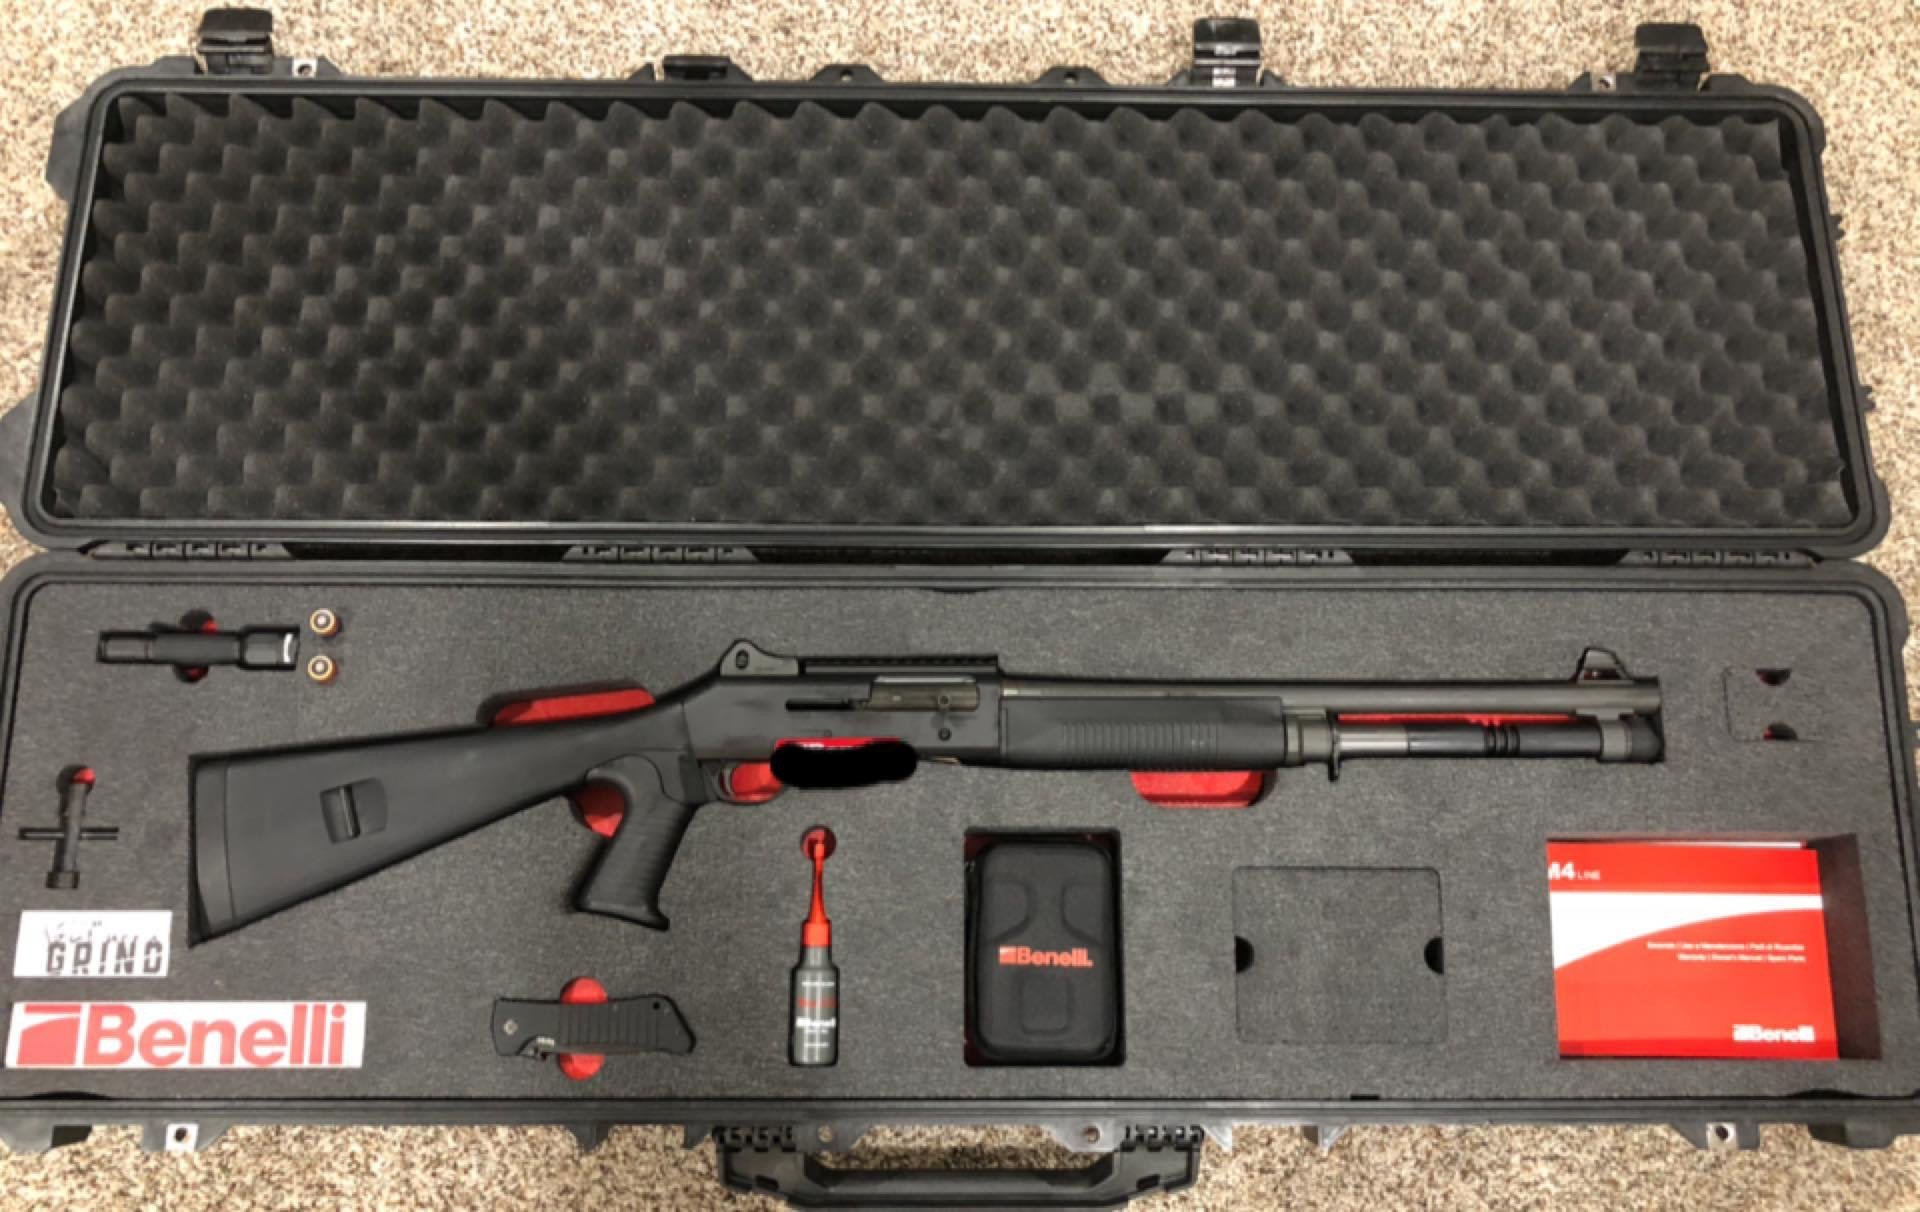
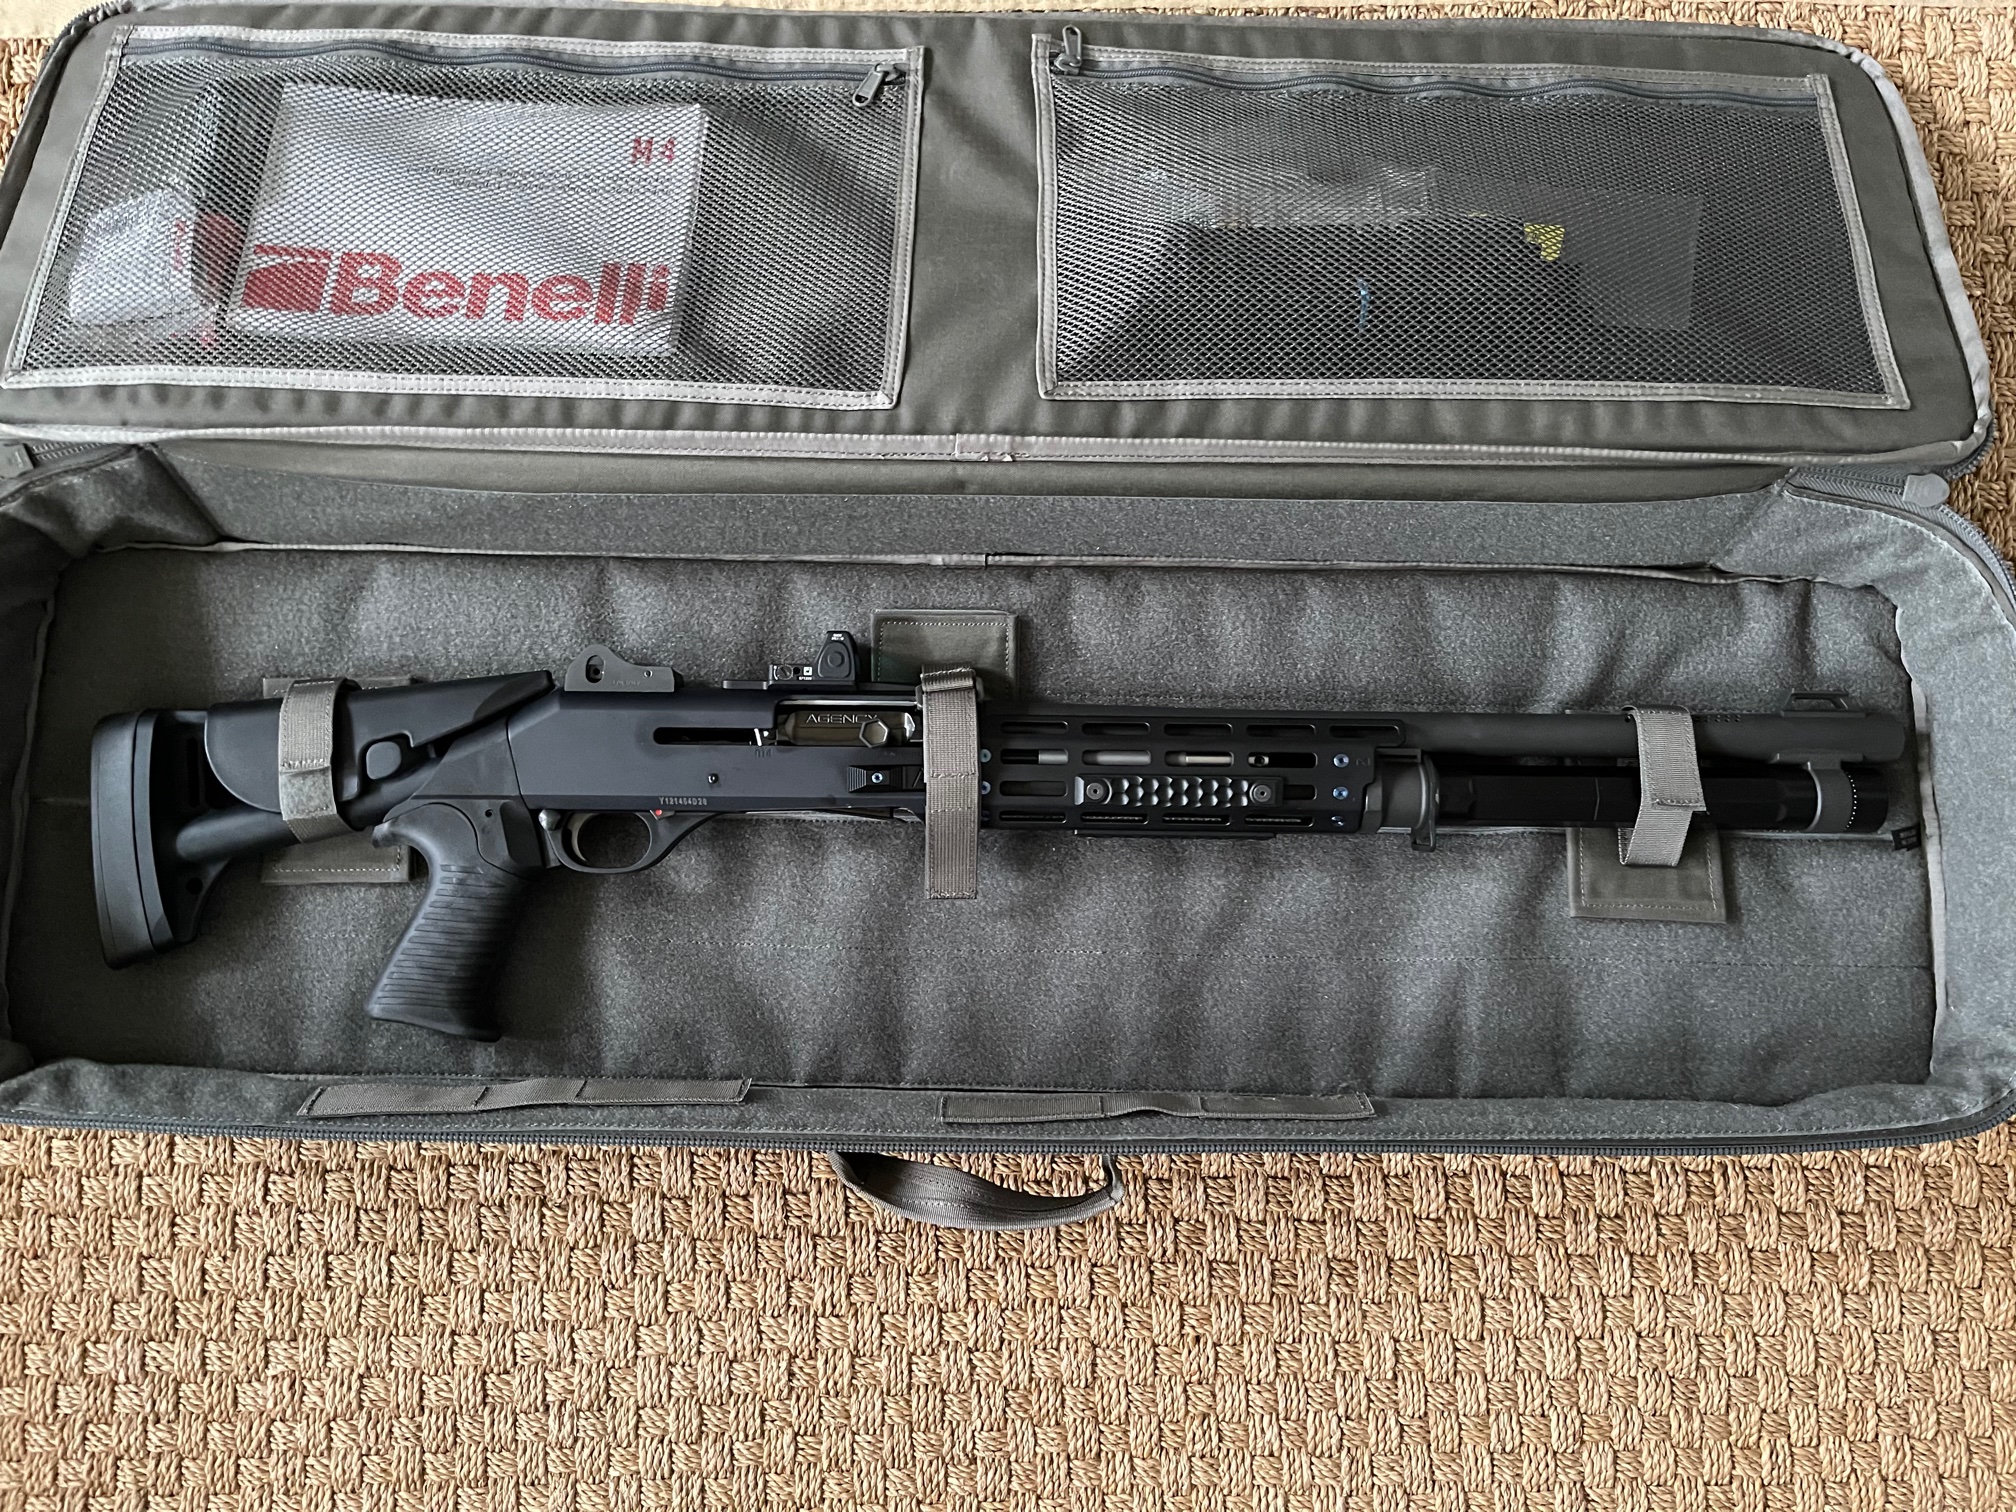
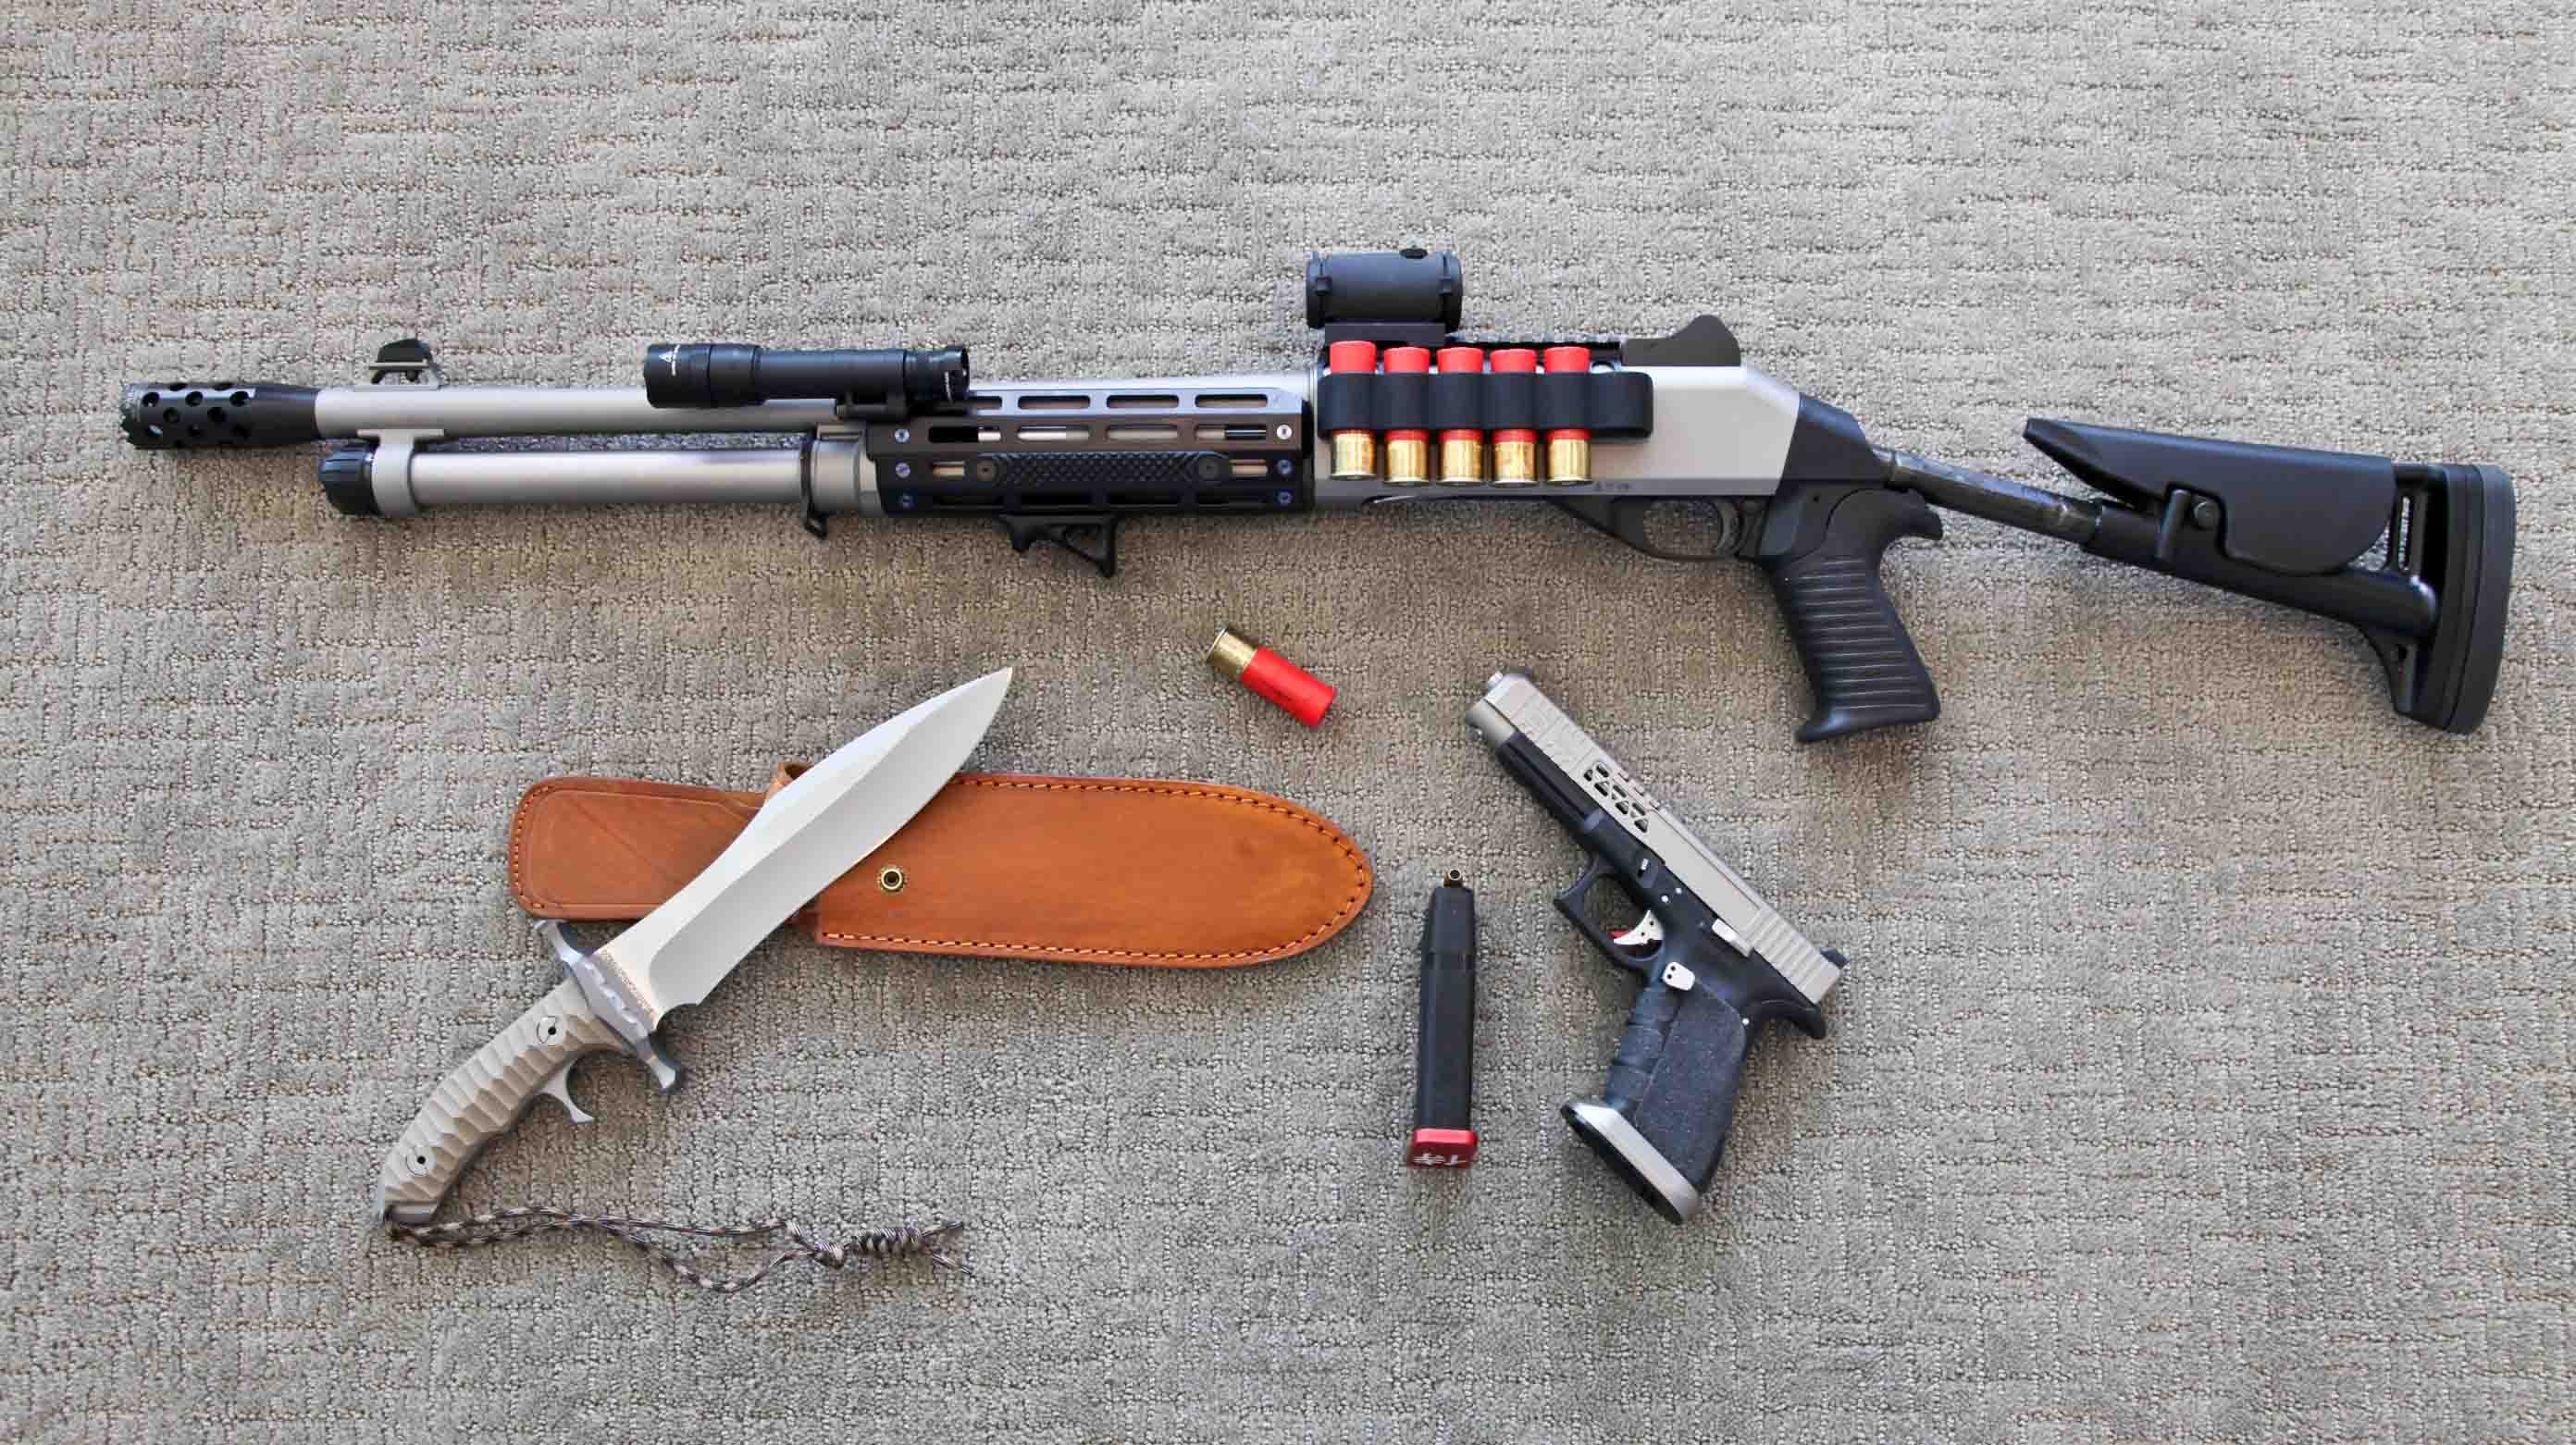
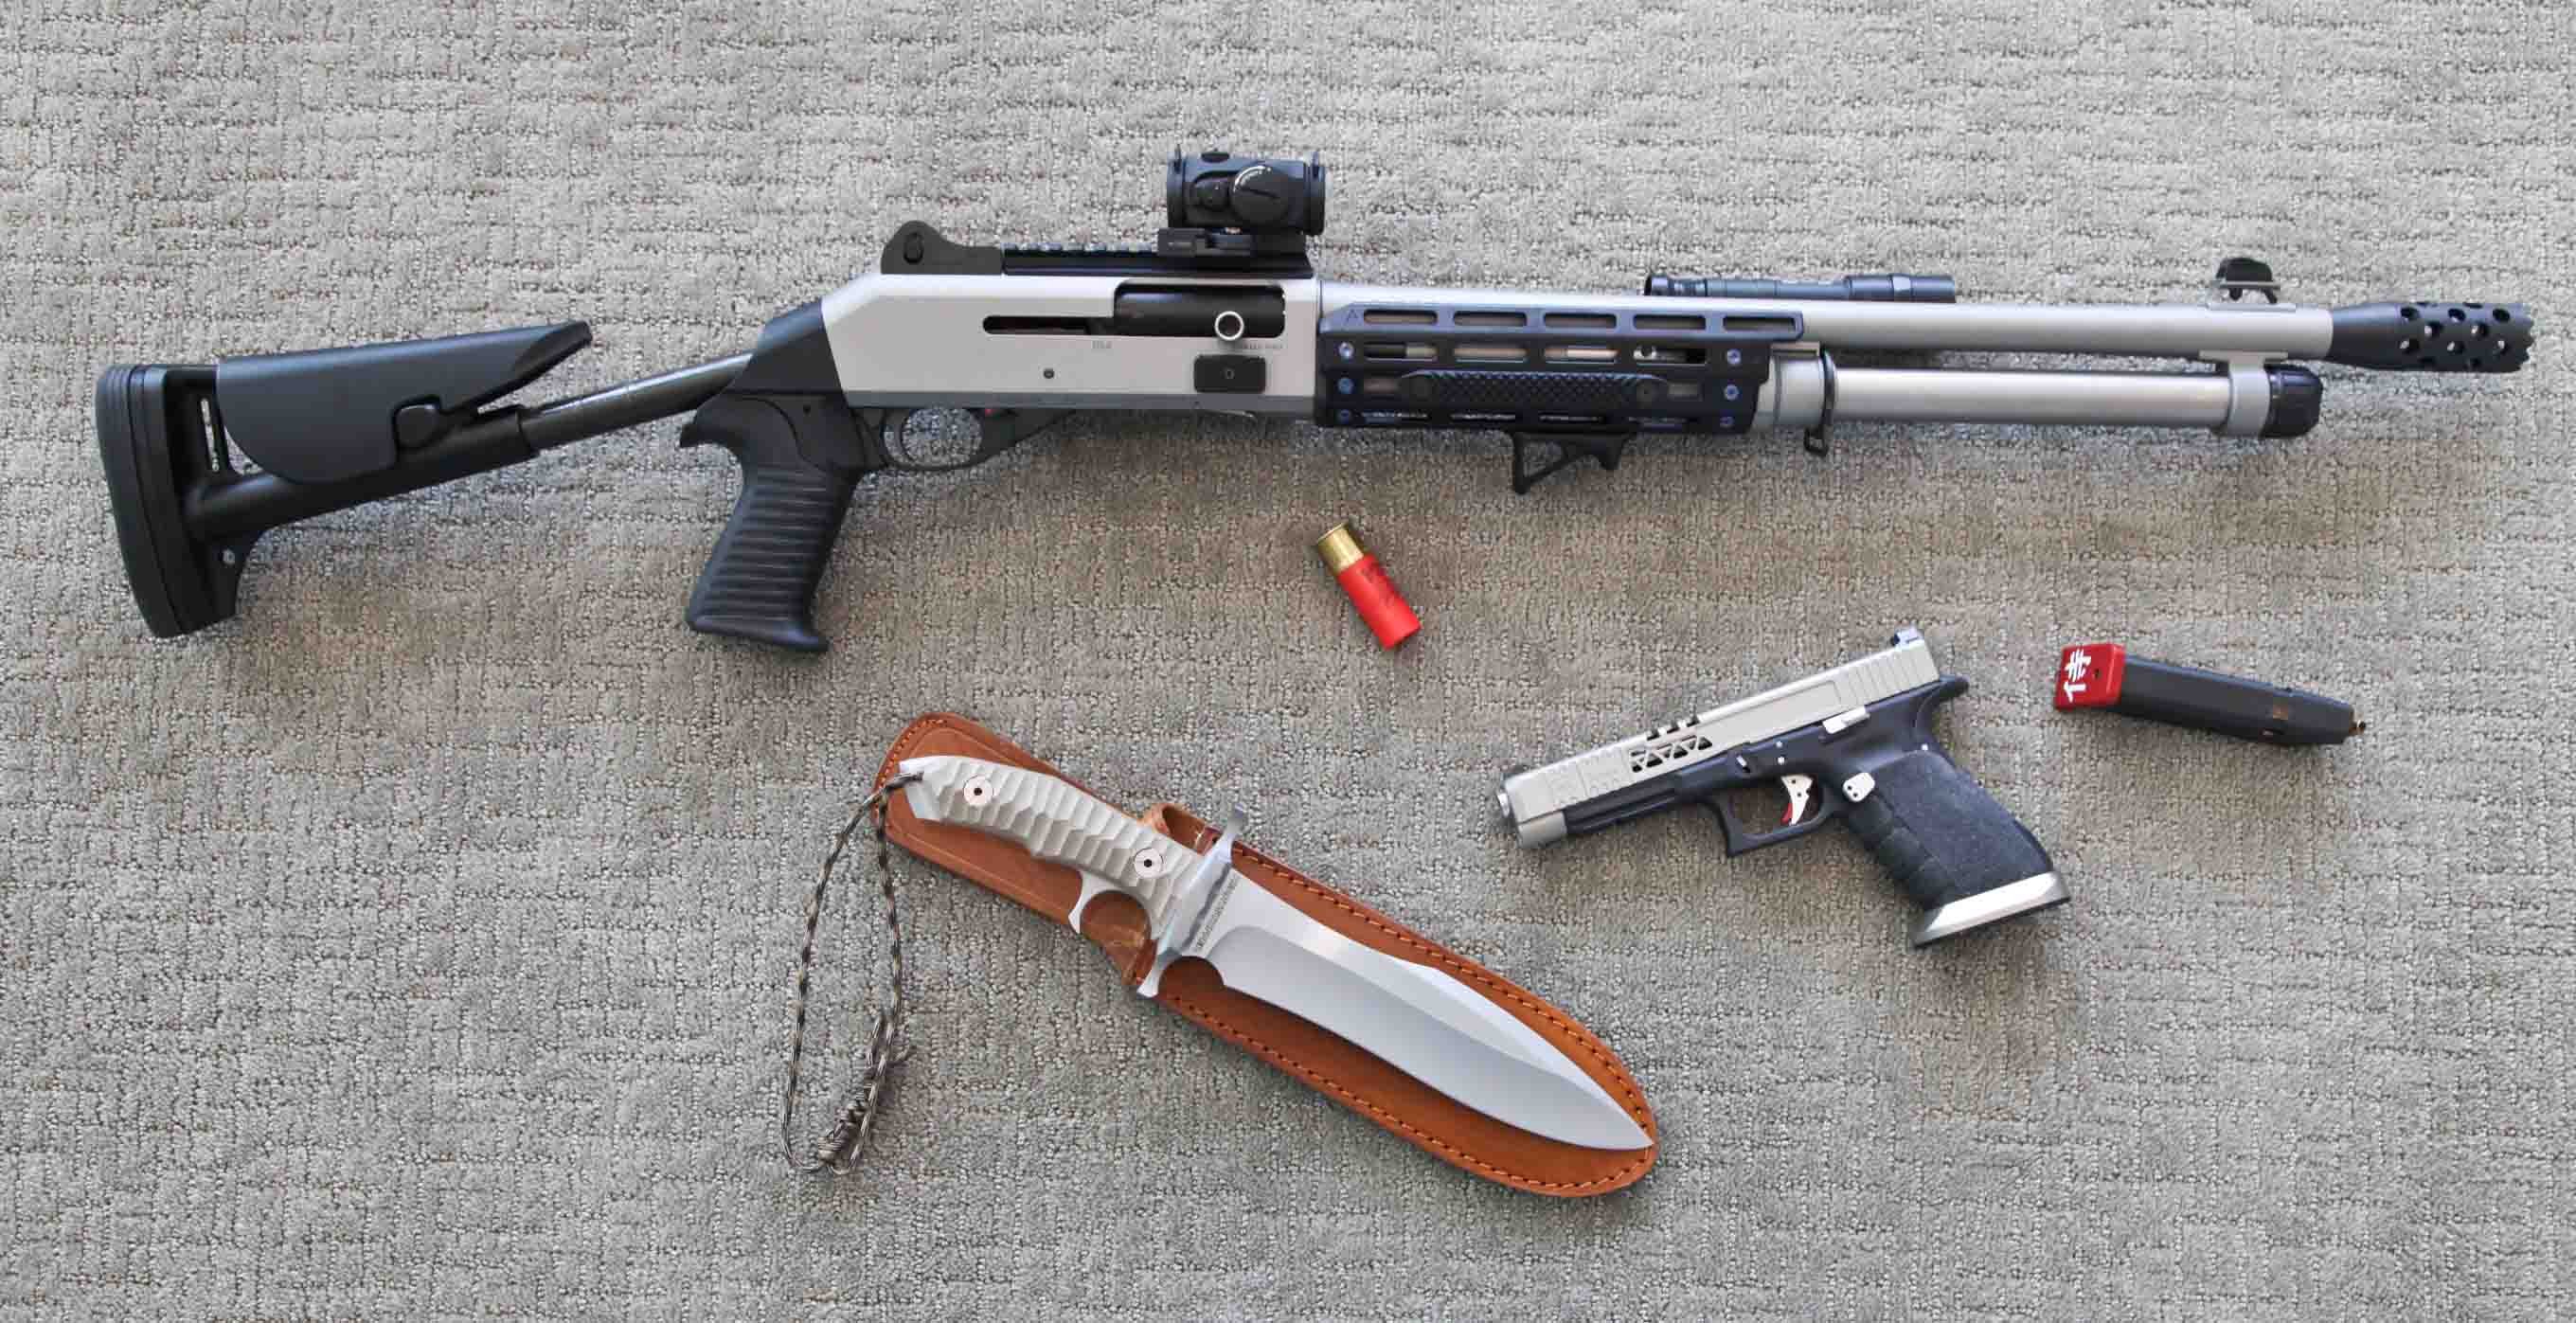
My M4 looks just like any other right now, but the custom case with a benelli flashlight and a interestingly gripped knife with a matching serial number is pretty unique. The only downside is the case is a bit oversized, and the foam isn’t cut in a way that permits adding an RMR, a light, or a stock with an adjustable length of pull so I might have to buy another pelican case.
 9 points
 -
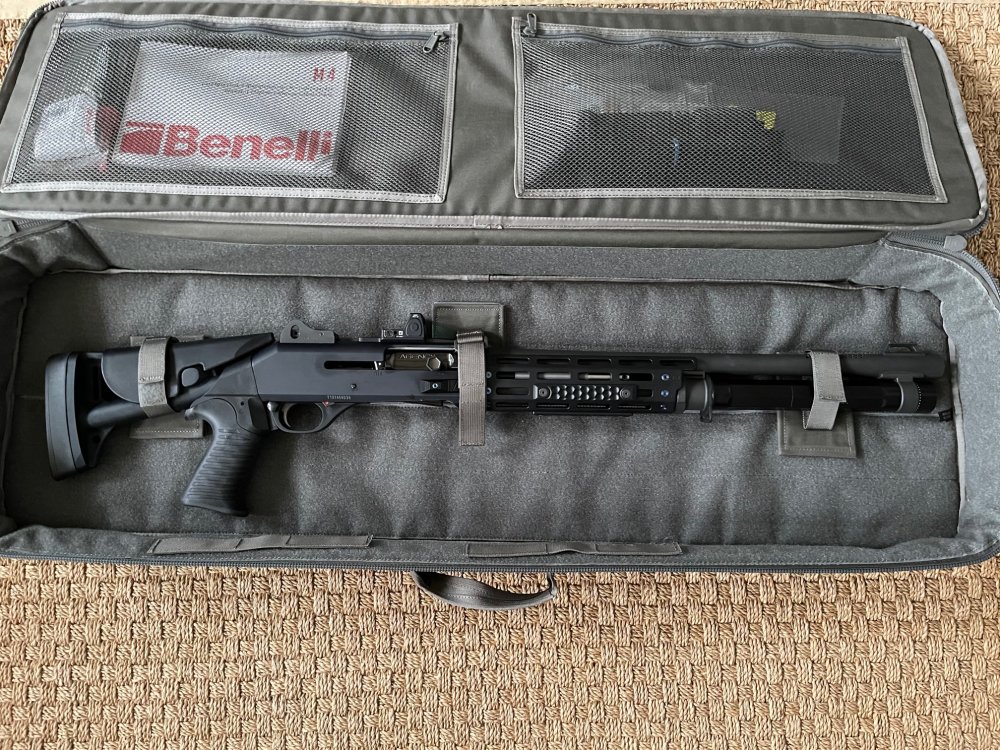
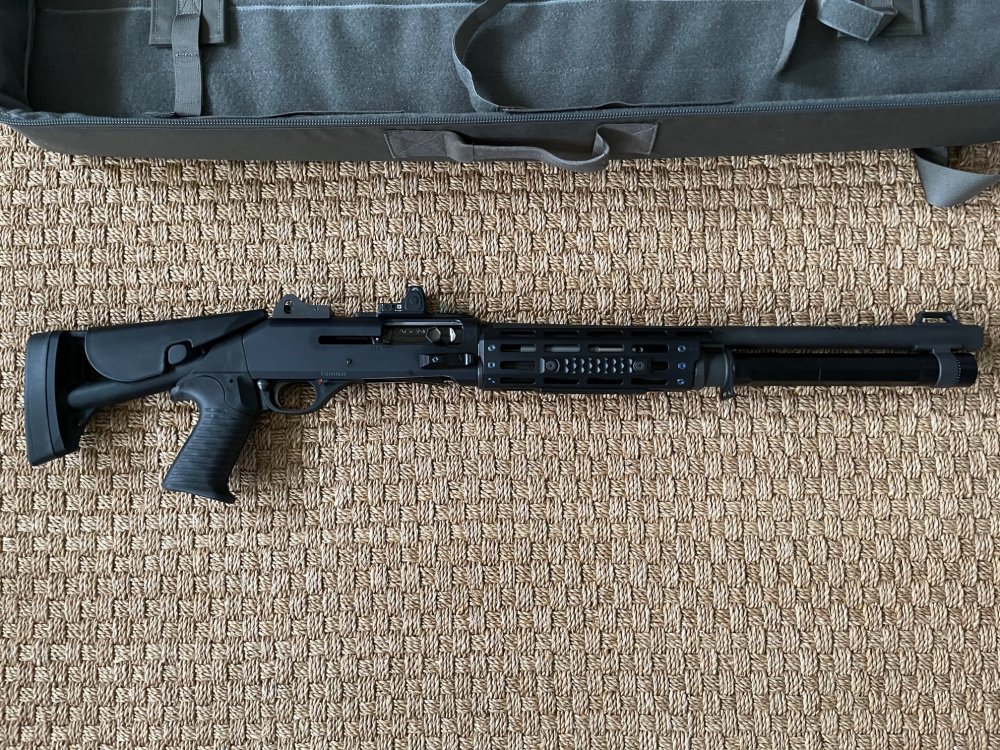
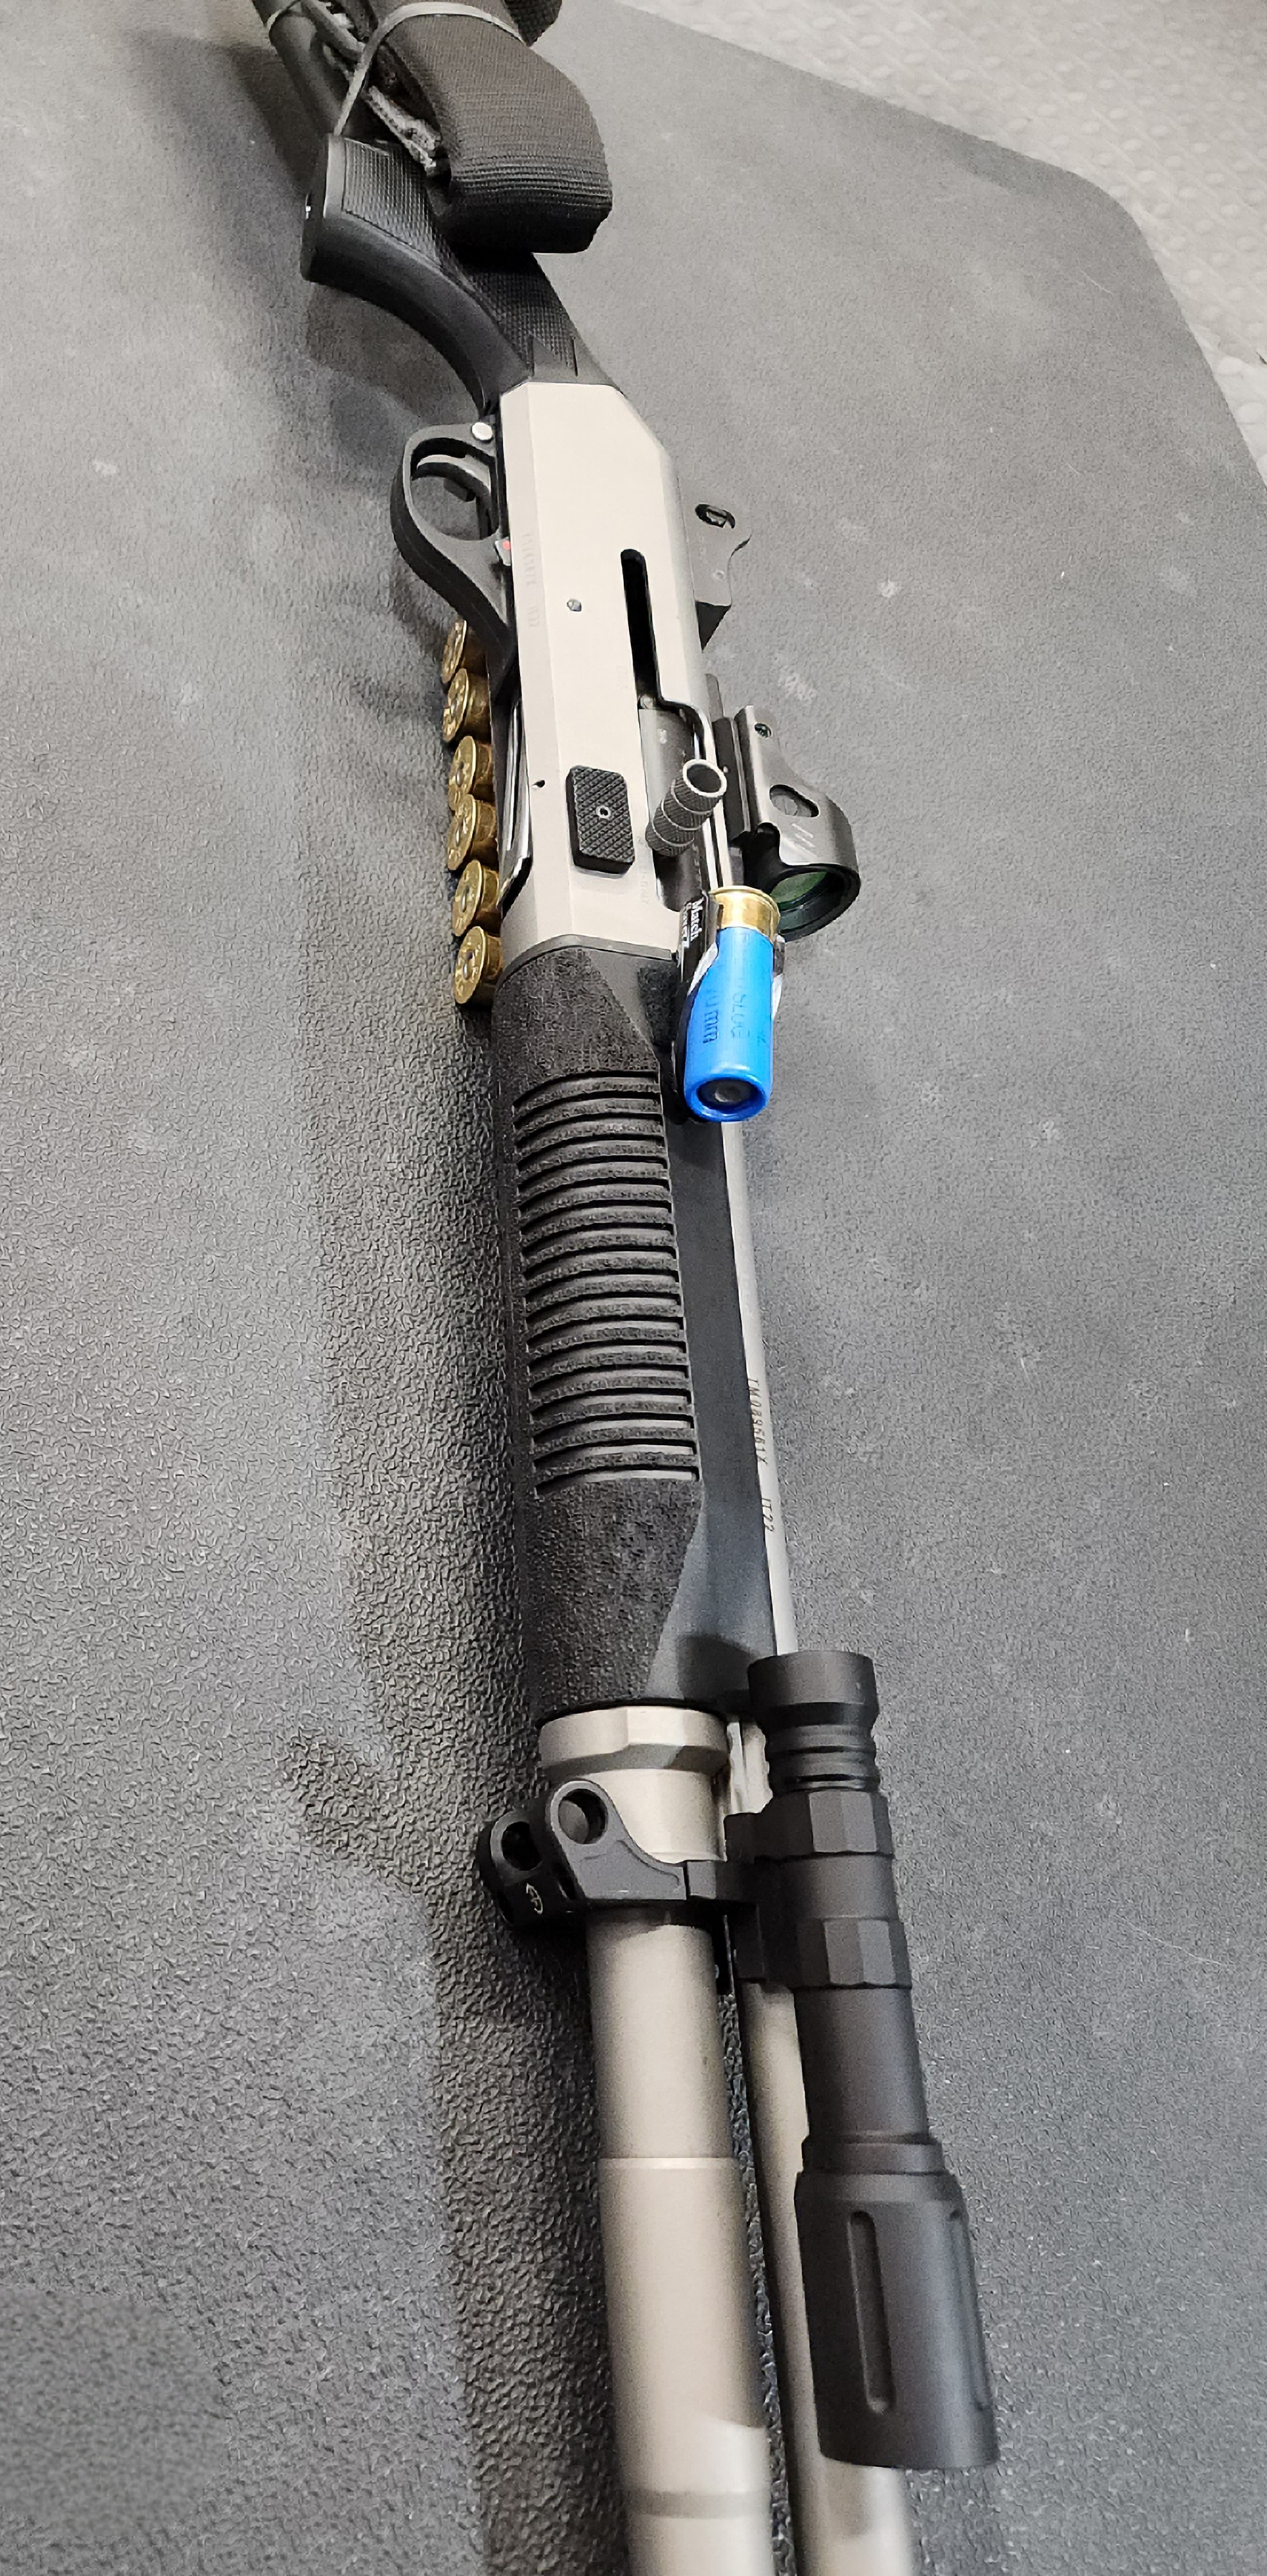
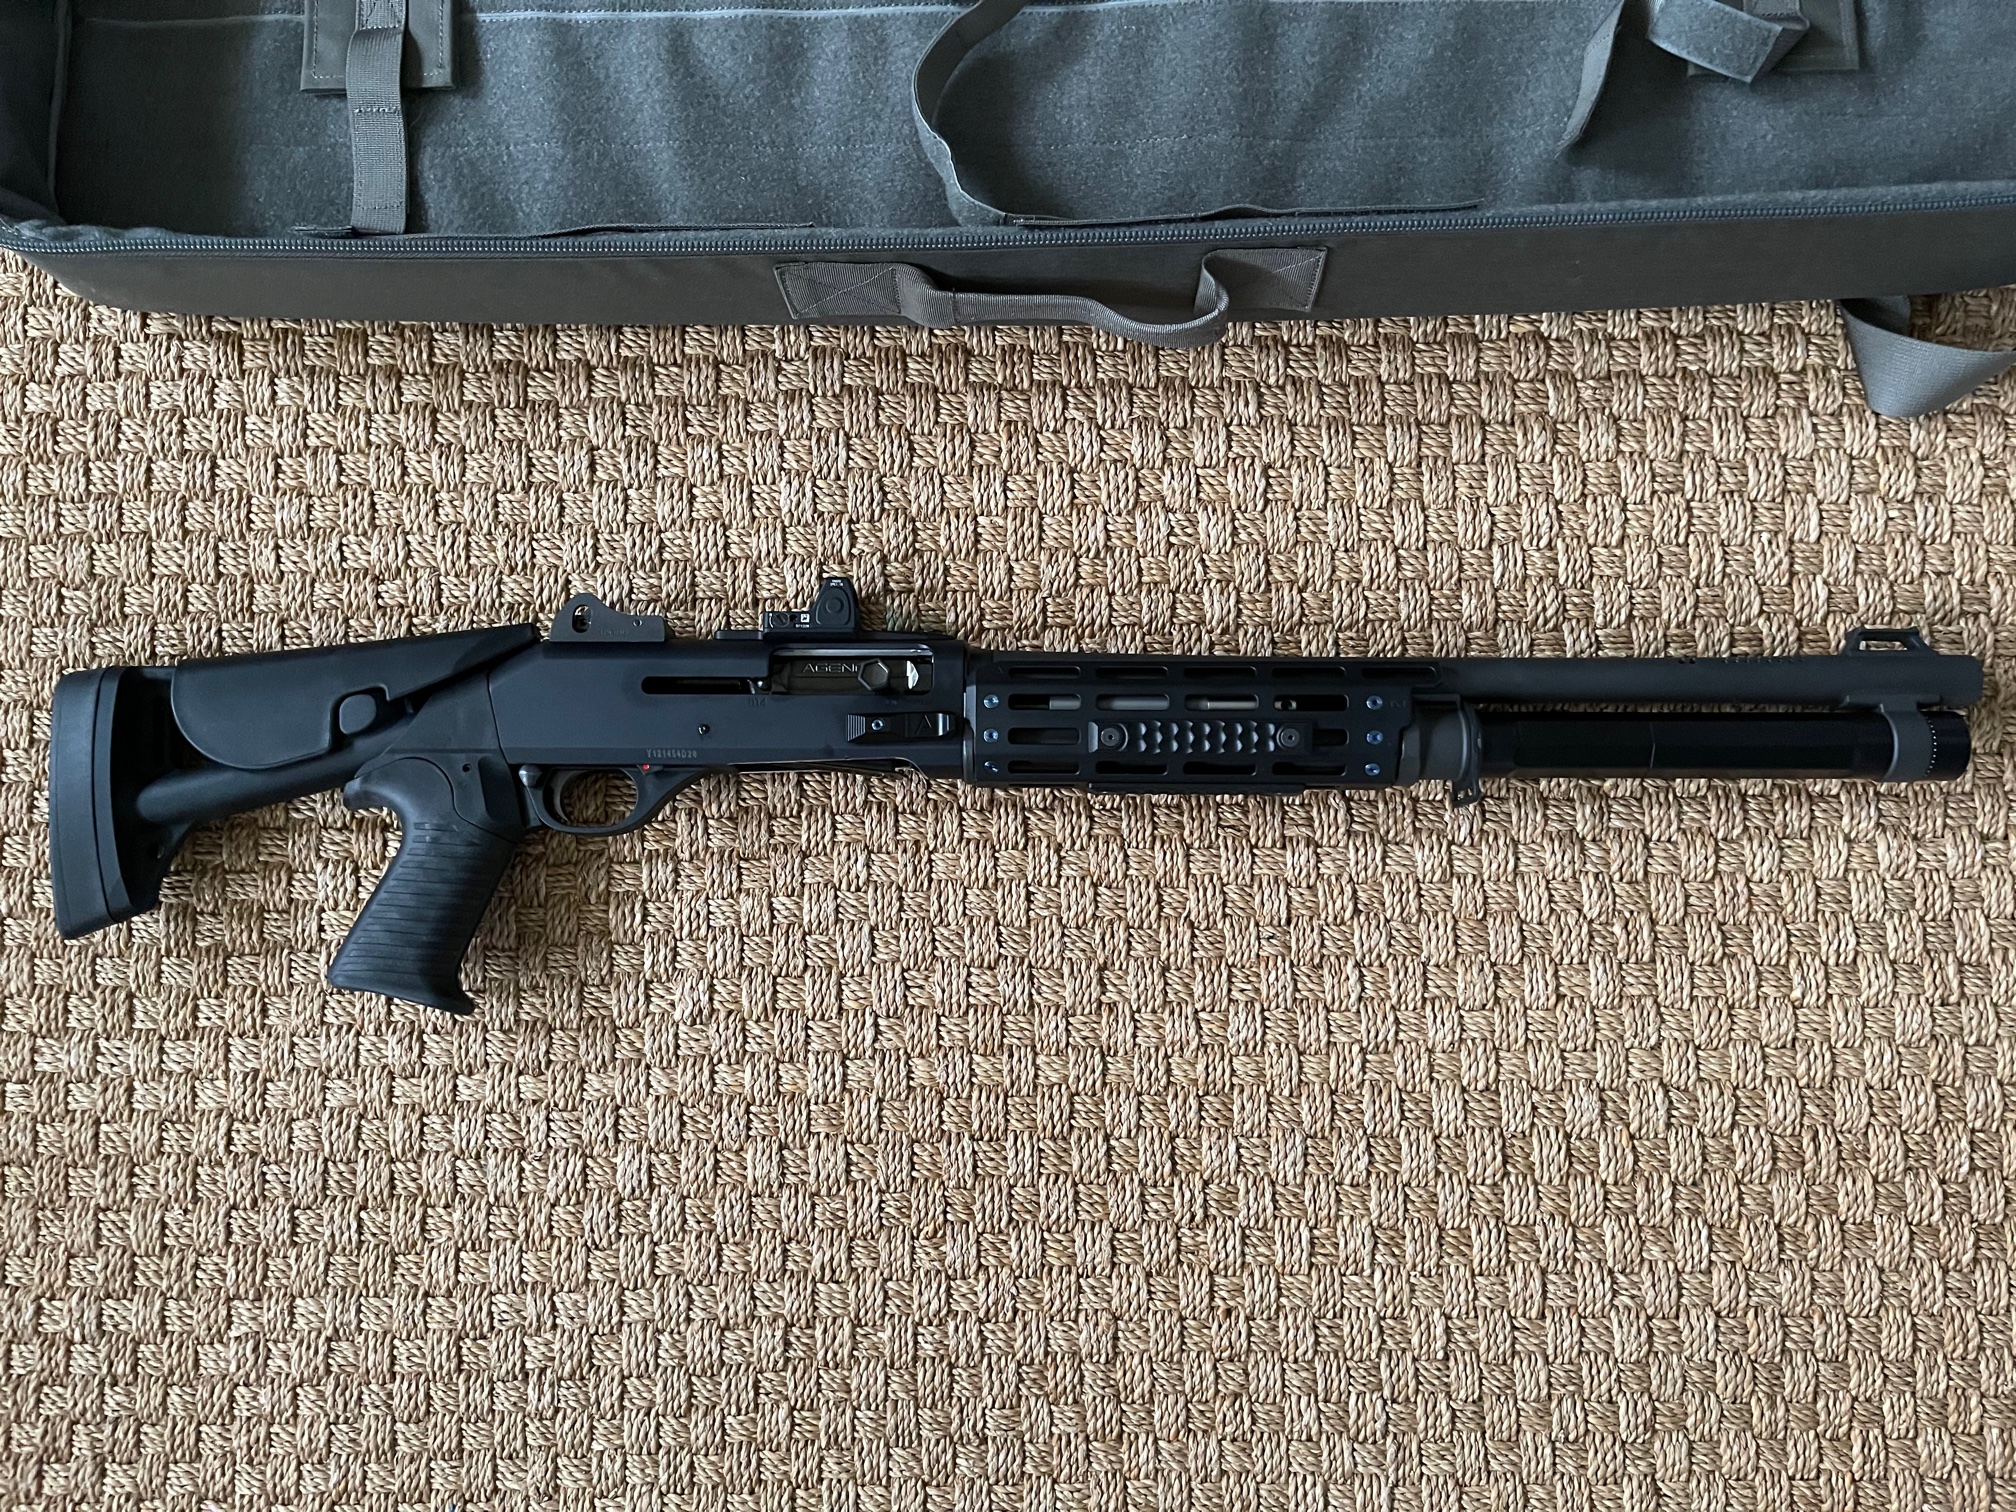
I found a NIB M4 early last year and sent it out to California for the Agency Arms build. Details Include: Agency Arms octagonal Extension Tube Kit (Increases TOTAL capacity to 7+1, 9 if ghostloading), Barrel Porting, Agency Arms Extended Carrier, Agency Arms Extended Bolt Release, Agency Arms Extended Charging Handle, Modified Bolt Carrier, Receiver Loading Port Machining, Agency Arms MLOK® handguard/rail, Gunsmith trigger job, texturing of the stock (on select models) and installation of an oversized dome safety. Extended Carrier and Bolt Carrier are polished and refinished in a PVD coating. I added the Scalarworks Sync with 6MOA RMR, a few RailScales, Agency RMR matching screws and thats a wrap. I ordered a tritium ghost ring and front post but will stick with the factory sights for now. It's really a different feeling gun now in a good way. I have a preban HK M1a and an M2 but the M4 is night and day to the other guns.

 8 points
 -
I wish I could say more but I’m deep in R&D on a system that is unobtrusive, Will mount the light near the muzzle and comfortably mount a remote switch near the handguard. It also takes down with no tools. Im not ready to disclose more, and this isn’t a plug, but if you want details in the future you can sign up on my newsletter at www.rxarms.com (I only email out once every few months when new products are available).8 points
-
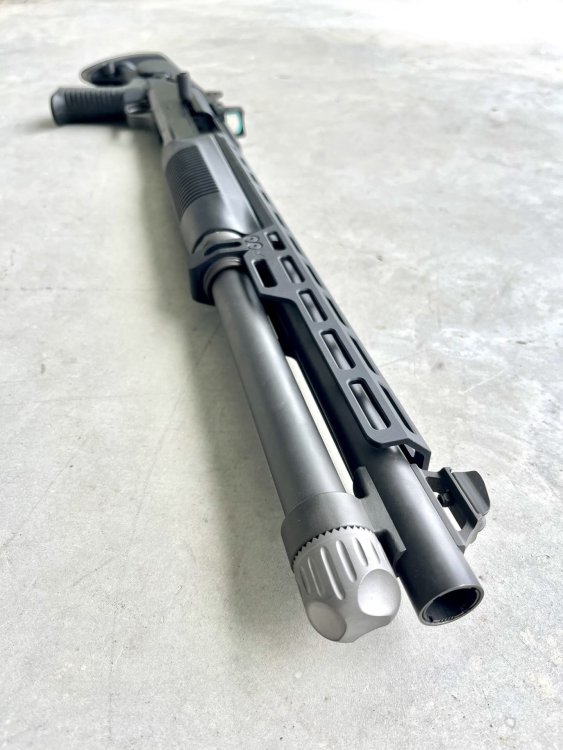
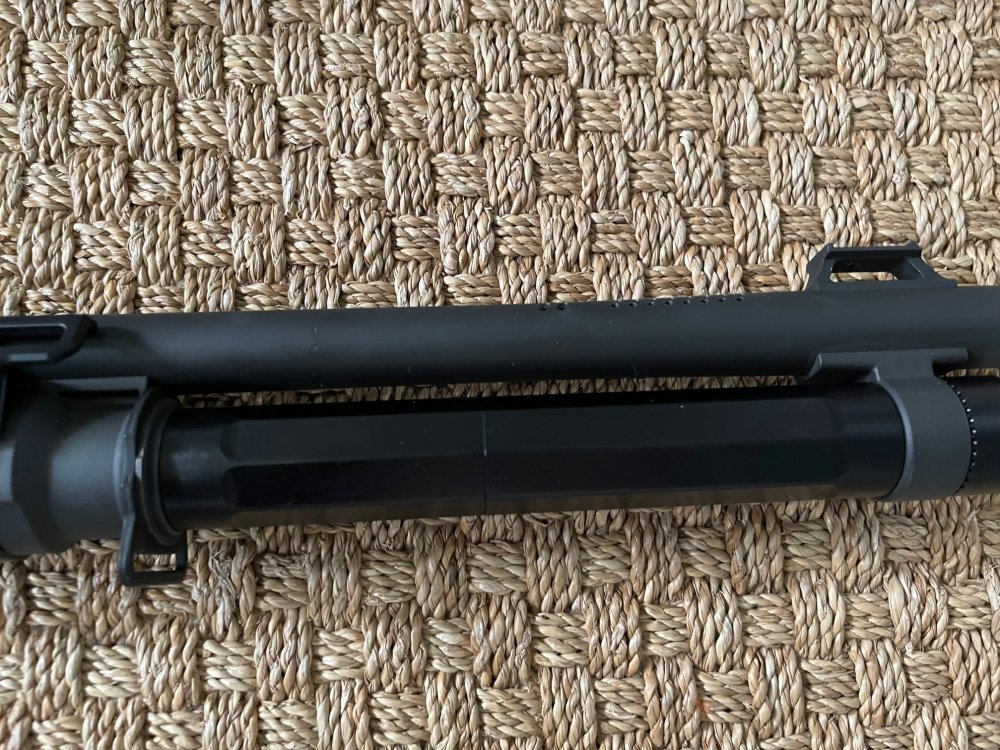
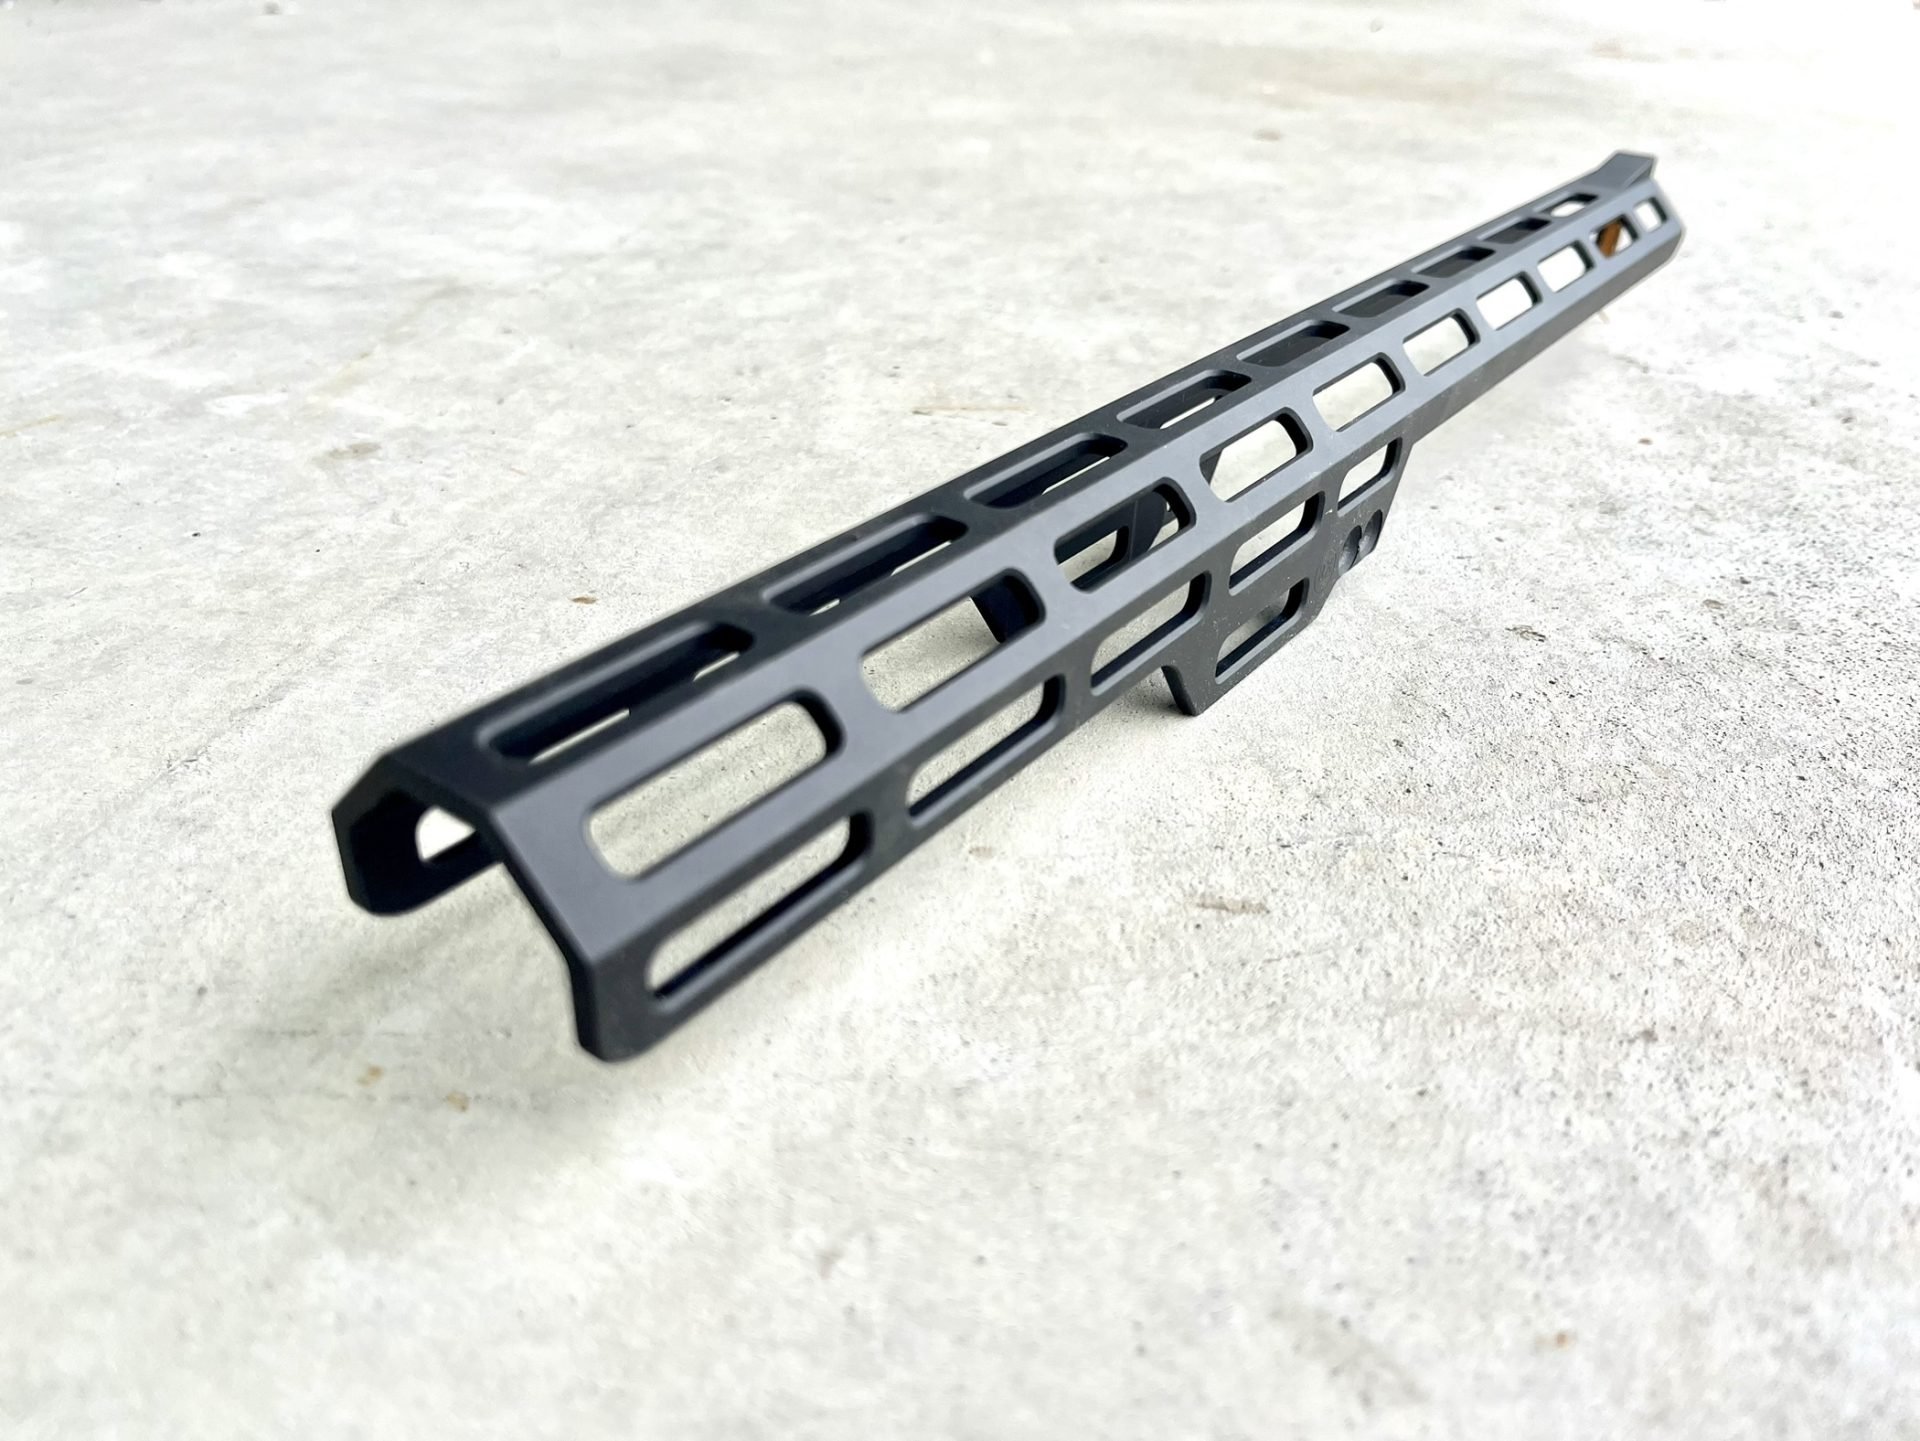
For now, this is just an initial review since I just got the rail in this evening. I'll list the issues I see with it and some of the positive attributes. At this point, I don't know if I like it or not, and if I can make it function for my intended purpose. All of the secondary spare parts have not come in yet from other retailers. Cons. 1. The rail is a pain in the ass to install. I assume it'll get easier with more exposure, but it's kind of retarded and not intuitive at all. I read the supplied instructions like five times and thought I might be retarded since most of it just seemed to be an assembly of big words that made no sense. When the manufacturer is claiming to line up such and such flange, they should probably build a diagram indicating what exactly they're calling the flange. 2. This thing has a lot of wiggle in it. With moderate hand pressure, you can push the rail enough to make contact with the barrel. You'd have a bad time trying to zero a laser in on this thing. Part of the wiggle is that you're compressing the polymer caps that fit into the barrel hanger. Other flex is the fact that you're just flexing 6061 aluminum. 3. This thing is super smooth and hard to hold onto. Expect to add some kind of rail covers to build some traction. 4. This rail did not want to fit over the Briley carbon fiber magazine tube. It seemed to be hanging up around the barrel hanger. I had to motivate the barrel/rail assembly over the magazine tube by lightly mortaring the buttstock on the desk to force the magazine thru. This is likely the fault of that stepped design of the Briley carbon fiber tube. Pros. 1. The weight is a lot less than anticipated. I weighed the rail and its polymer end caps and got 11.5 ounces. The OEM forend is approximately 5 ounces for comparison. 2. Ergonomics are pretty good. Having the 15" rail gives you a lot more options for hand placement. If you shoot with your support arm more forward on AR type rifles, this will feel a lot more intuitive and comfortable. 3. The primary purpose I see for this rail is getting a light pushed out to the muzzle to eliminate barrel shadowing and light blow back off of the barrel and front sight assembly. In minimial outdoor testing, this worked great. The only issue is now how I want to use the switch. If you hand hands forward, its quite easy to reach the activator button on the back of the light. Routing a tape switch rearward is also an option. I'm still waiting on a few options to arrive in the mail to see if they'll work. I'm mainly interested in trying the Unity Tactical Hot Button. 4. Switching to a MLOK front sling mount is an improvement. You have quite a bit of mounting options and the ability to use angled QD sockets which really improve sling comfort. 5. MLOK mounting is much easier than the Agency Arms rail. No modifications were needed to any of the MLOK mounting hardware for clearance with the gas pistons. I've rough tested the light at 3, 6 and 9 o'clock. 9 o'clock works well if you're using a regular Z68 type tailcap. You're still going to risk jamming your thumb though. 3 o'clock works well for using the tape switch. 6 o'clock works, but may interfere with hand placement. Note on my railscales placement, I spanned the gap in the center of the rail that doesn't have an MLOK socket. This was helpful in making a continuous griping surface. I'll probably move to an offset MLOK light mount if I keep this setup as is. Moving it high to a 1:30 - 2:00 o'clock position will clean up the package so that the light isn't sticking out the side so far.8 points
-
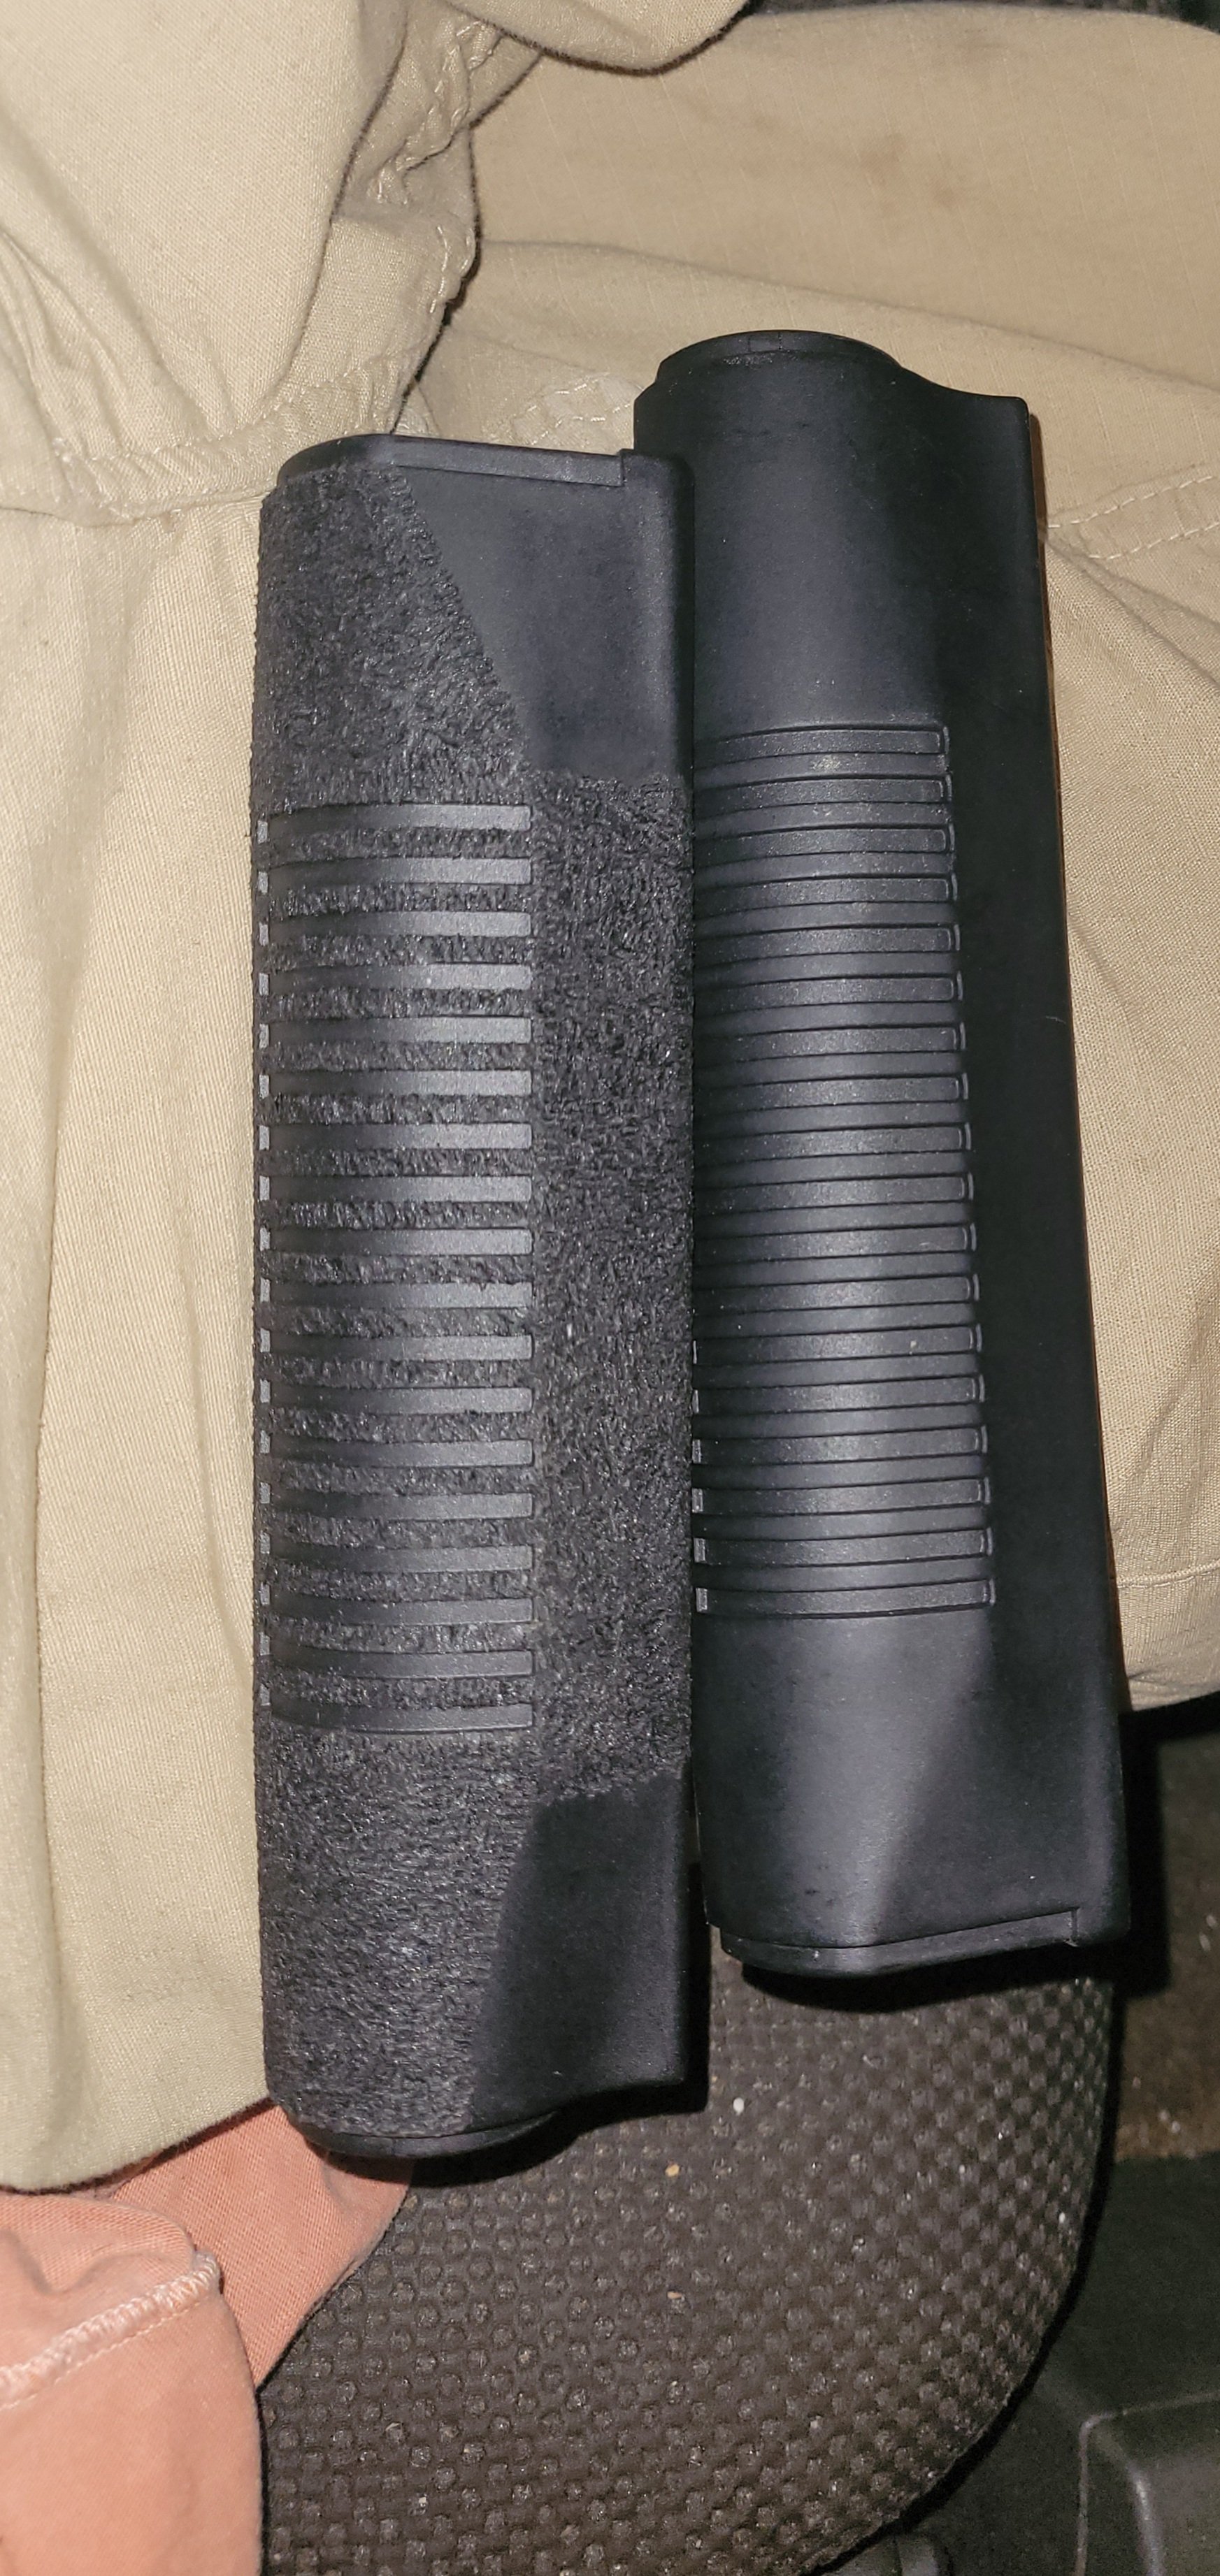
The traditional M4 weighs in at 7.8 pounds unloaded. This new model with its rail and different stock weigh in at 8.4 lbs. Considering most of the new stock is polymer, my guess is most of the gain lives in that rail. I'd assume this rail is either 6065 or 7075 aluminum. So its a bit of a chonker. Looking at the rail closer, I don't think those are MLOK/Keymod sockets. It appears to have threaded holes for attaching Picatinny rail sections. In two years, I'll be at 20 years on this platform. I've been riding the struggle bus chasing a proper rail system all that time for the sole purpose of mounting a weapon light in an efficient manner. Nothing beats the ergonomics of the OEM polymer handguards, extra points if they're stippled professionally. Every rail system out there for the Benelli M4 has been poorly designed. Poor installation systems that require the use of tools to service the firearm. Terrible ergonomics where you're holding onto a Pringles can. Stupidly positioned Picatinny/MLOK/Keymod rail positions that have little to no thought process on why they are there. Failure inducing designs where the rail makes contact with the gas pistons. All add substantial weight to the firearm. All rail systems abandon the enclosed ARGO piston design that keeps debris out and gases trapped inside. This is why the IWC weapon light mount is so popular for the M4. It gets you a serviceable light mounting solution without ruining the firearm with stupid crap. Unfortunately the mounting solution isn't perfect either on 18.5" M4's. Most of these rail systems require that you remove all of your accessories from the rail in order to slide the thing off of the barrel assembly. So after you've locked all your screws in with thread locker to keep them from being shaken loose, you get to do it over and over again for general maintenance of the ARGO system.8 points
-
Speaking from experience, when a sh*t blizzard breaks out one is not going to waste valuable nanoseconds strapping on accoutrements such as vests, belts, cool forearm devices, or even bandoliers (my preference), one's just going to grab that one gun, better make it good. I started out with five rounds, down to one round when help rolled up. I'm not ever running out of ammo again.8 points
-
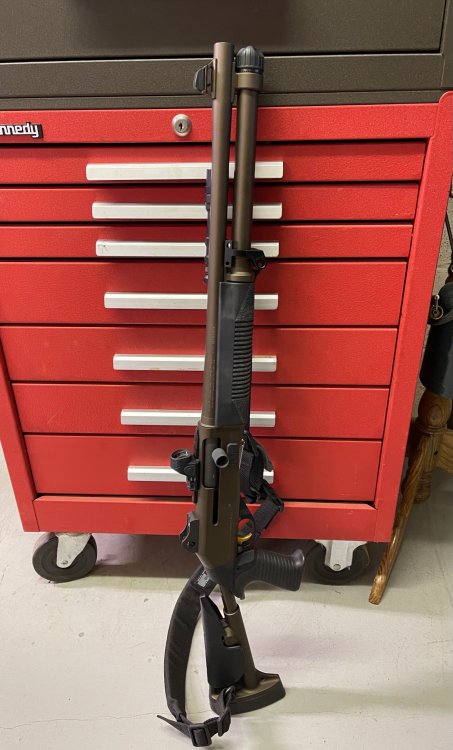
Finally out of jail after 11 months .Was a Leo trade in at Mydealer.Got it for a price I couldn’t pass up .Time to tear it done and build it .Atleast has metal trigger housing8 points
-
I did my own with a soldering iron. Found a set of oem handguards on GunBroker for $30ish. Might not be quite as good as tango arms but they tired out nice enough.
 8 points
 -
Hi everyone, I'll be releasing the 5 position tube in the above pictures today. These tubes are nice if you are wearing thicker jackets and or plate carriers. I'm working on another design that has finer adjustment points that I'll be making and testing in the upcoming week. Thanks for all of the input!8 points
-
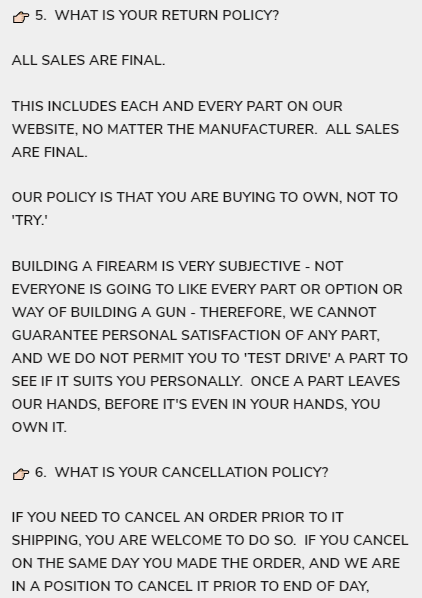
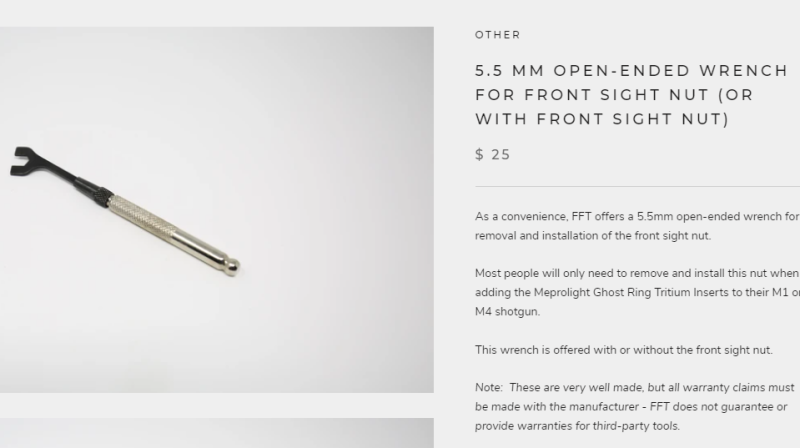
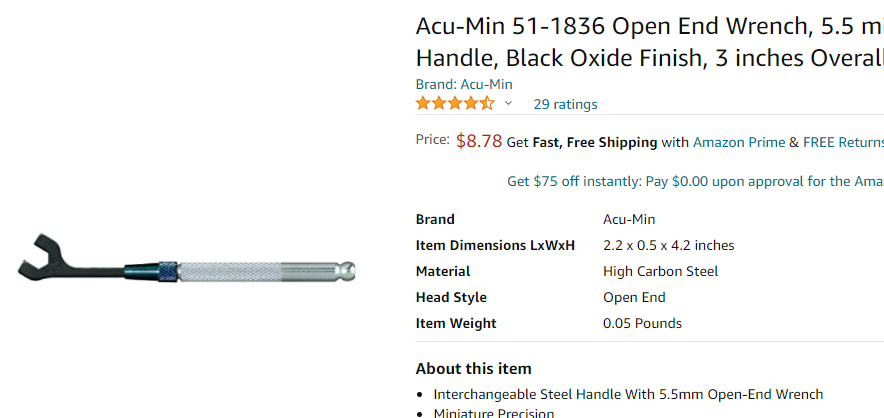
My opinion is take your money elsewhere. FFT doesn't do returns and is often the most expensive option compared to other places. If you run into problems with his custom parts its very difficult to get things resolved. There's like a bajillion disclaimers on every page stating with very anti-consumer messaging. Just some examples of the super scalping there:

 8 points
 -
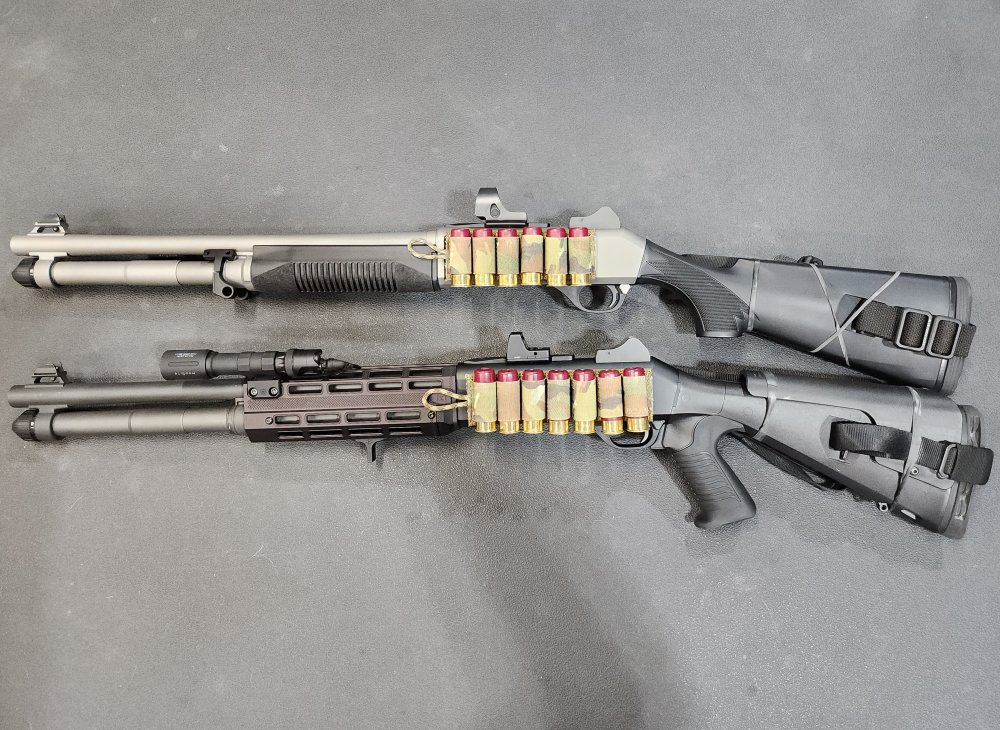
Bottom two went home this past week. Second from the top should be going home this week. The FDE one is still waiting for some corrections on paint.8 points
-
Yesterday after about two hours of fitting forearms my M4 was completed and finally brought to life. Or, brought back to life I should say! It's been a 10 month process with a lot of ups and downs. These downs ended up having me reassemble the entire M4 essential on my own. NP3 plated in and out and many aftermarket upgrades. I certainly learned a lot and know much more about this platform than I ever did. StrangerDanger and Vertcofiremarms were sounding boards throughout my journey and that was very much appreciated. I want to put out what an awesome individual Stranger Danger is. He took his valuable time on many occasions to answer my countless questions. Always responding with a will to help and a courteous attitude yet he owed me nothing. SD is a tremendous resource and a credit to this forum. I have never interacted with anyone with his level of firearm knowledge that didn't act like they were guarding the launch codes. Thank you for your help, advice and fantastic tutorials. Enough gushing. Now I have to find time to sight this day ruiner in!8 points
-
Looks nice! Here's one I put together using a 1911 extended mag release button. Just had to drill and tap for a 5-40 screw to fit. All for about $25
 8 points
 -
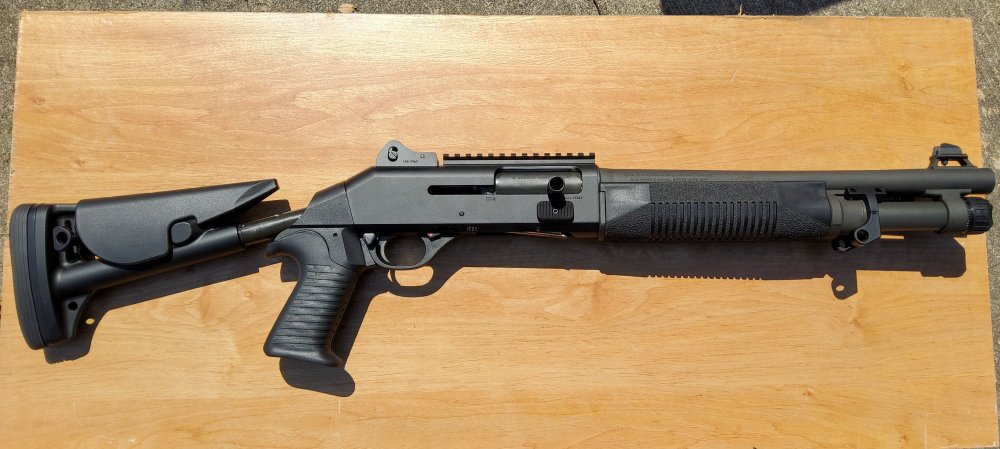
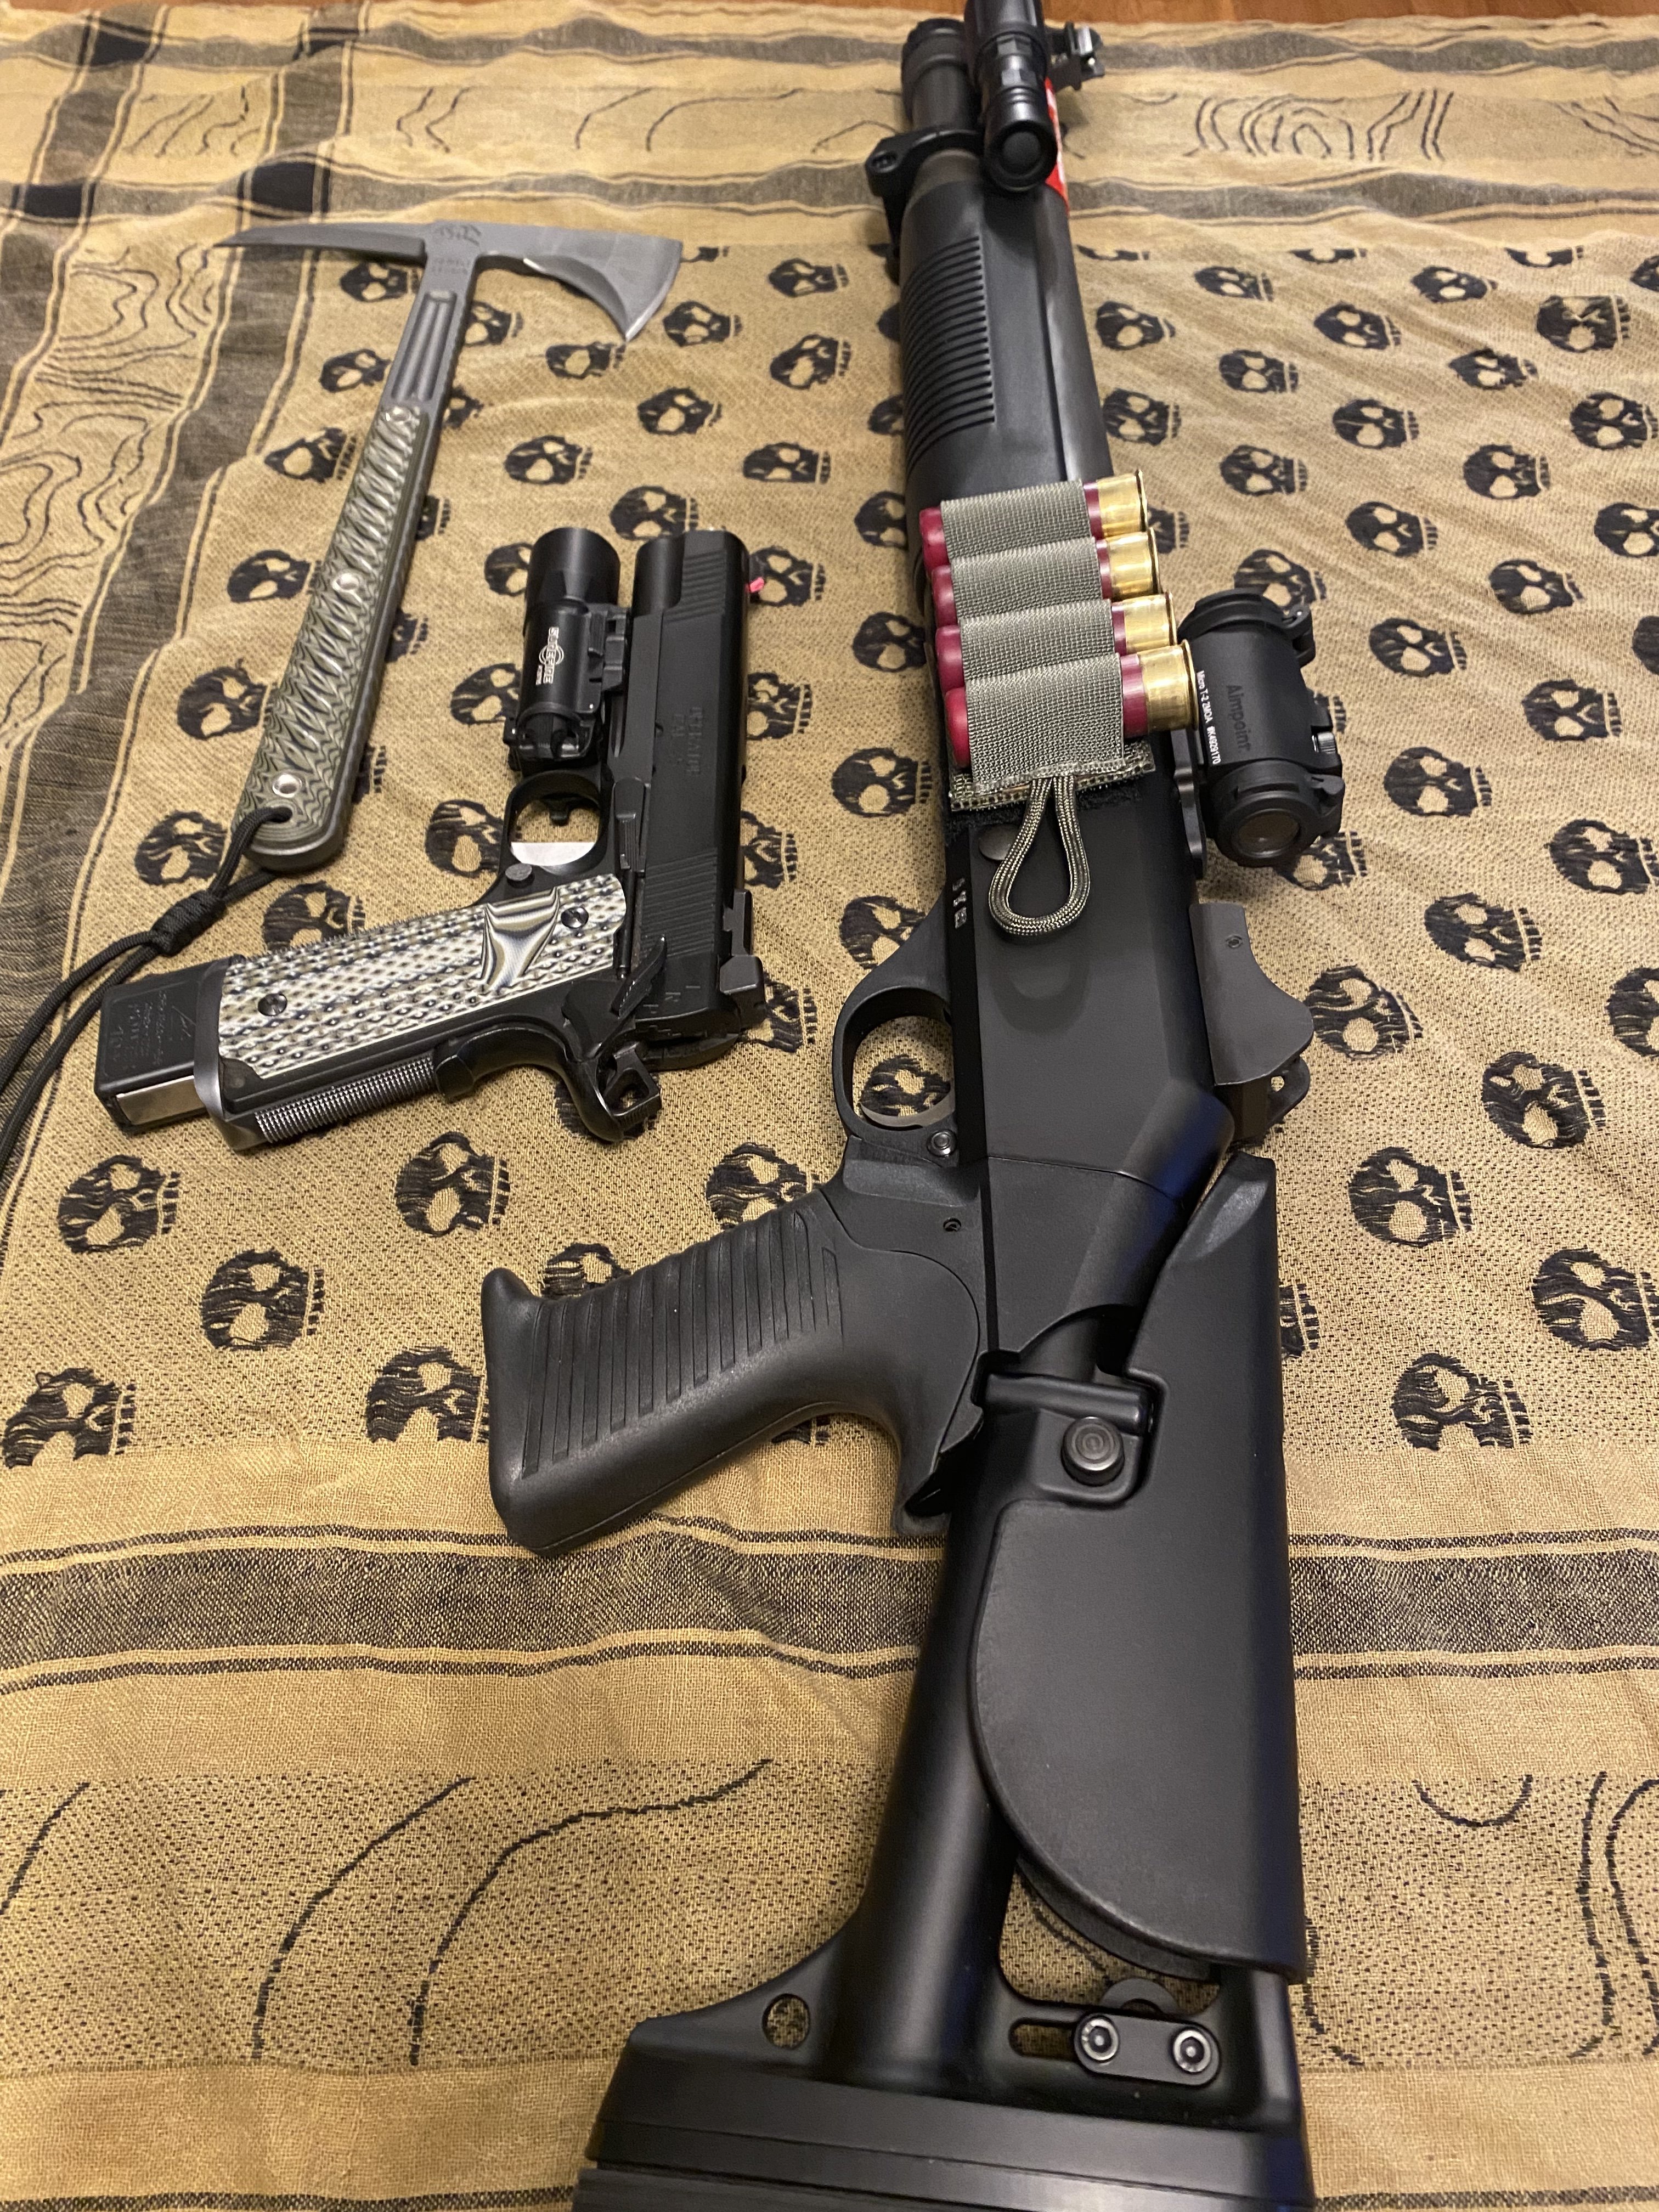
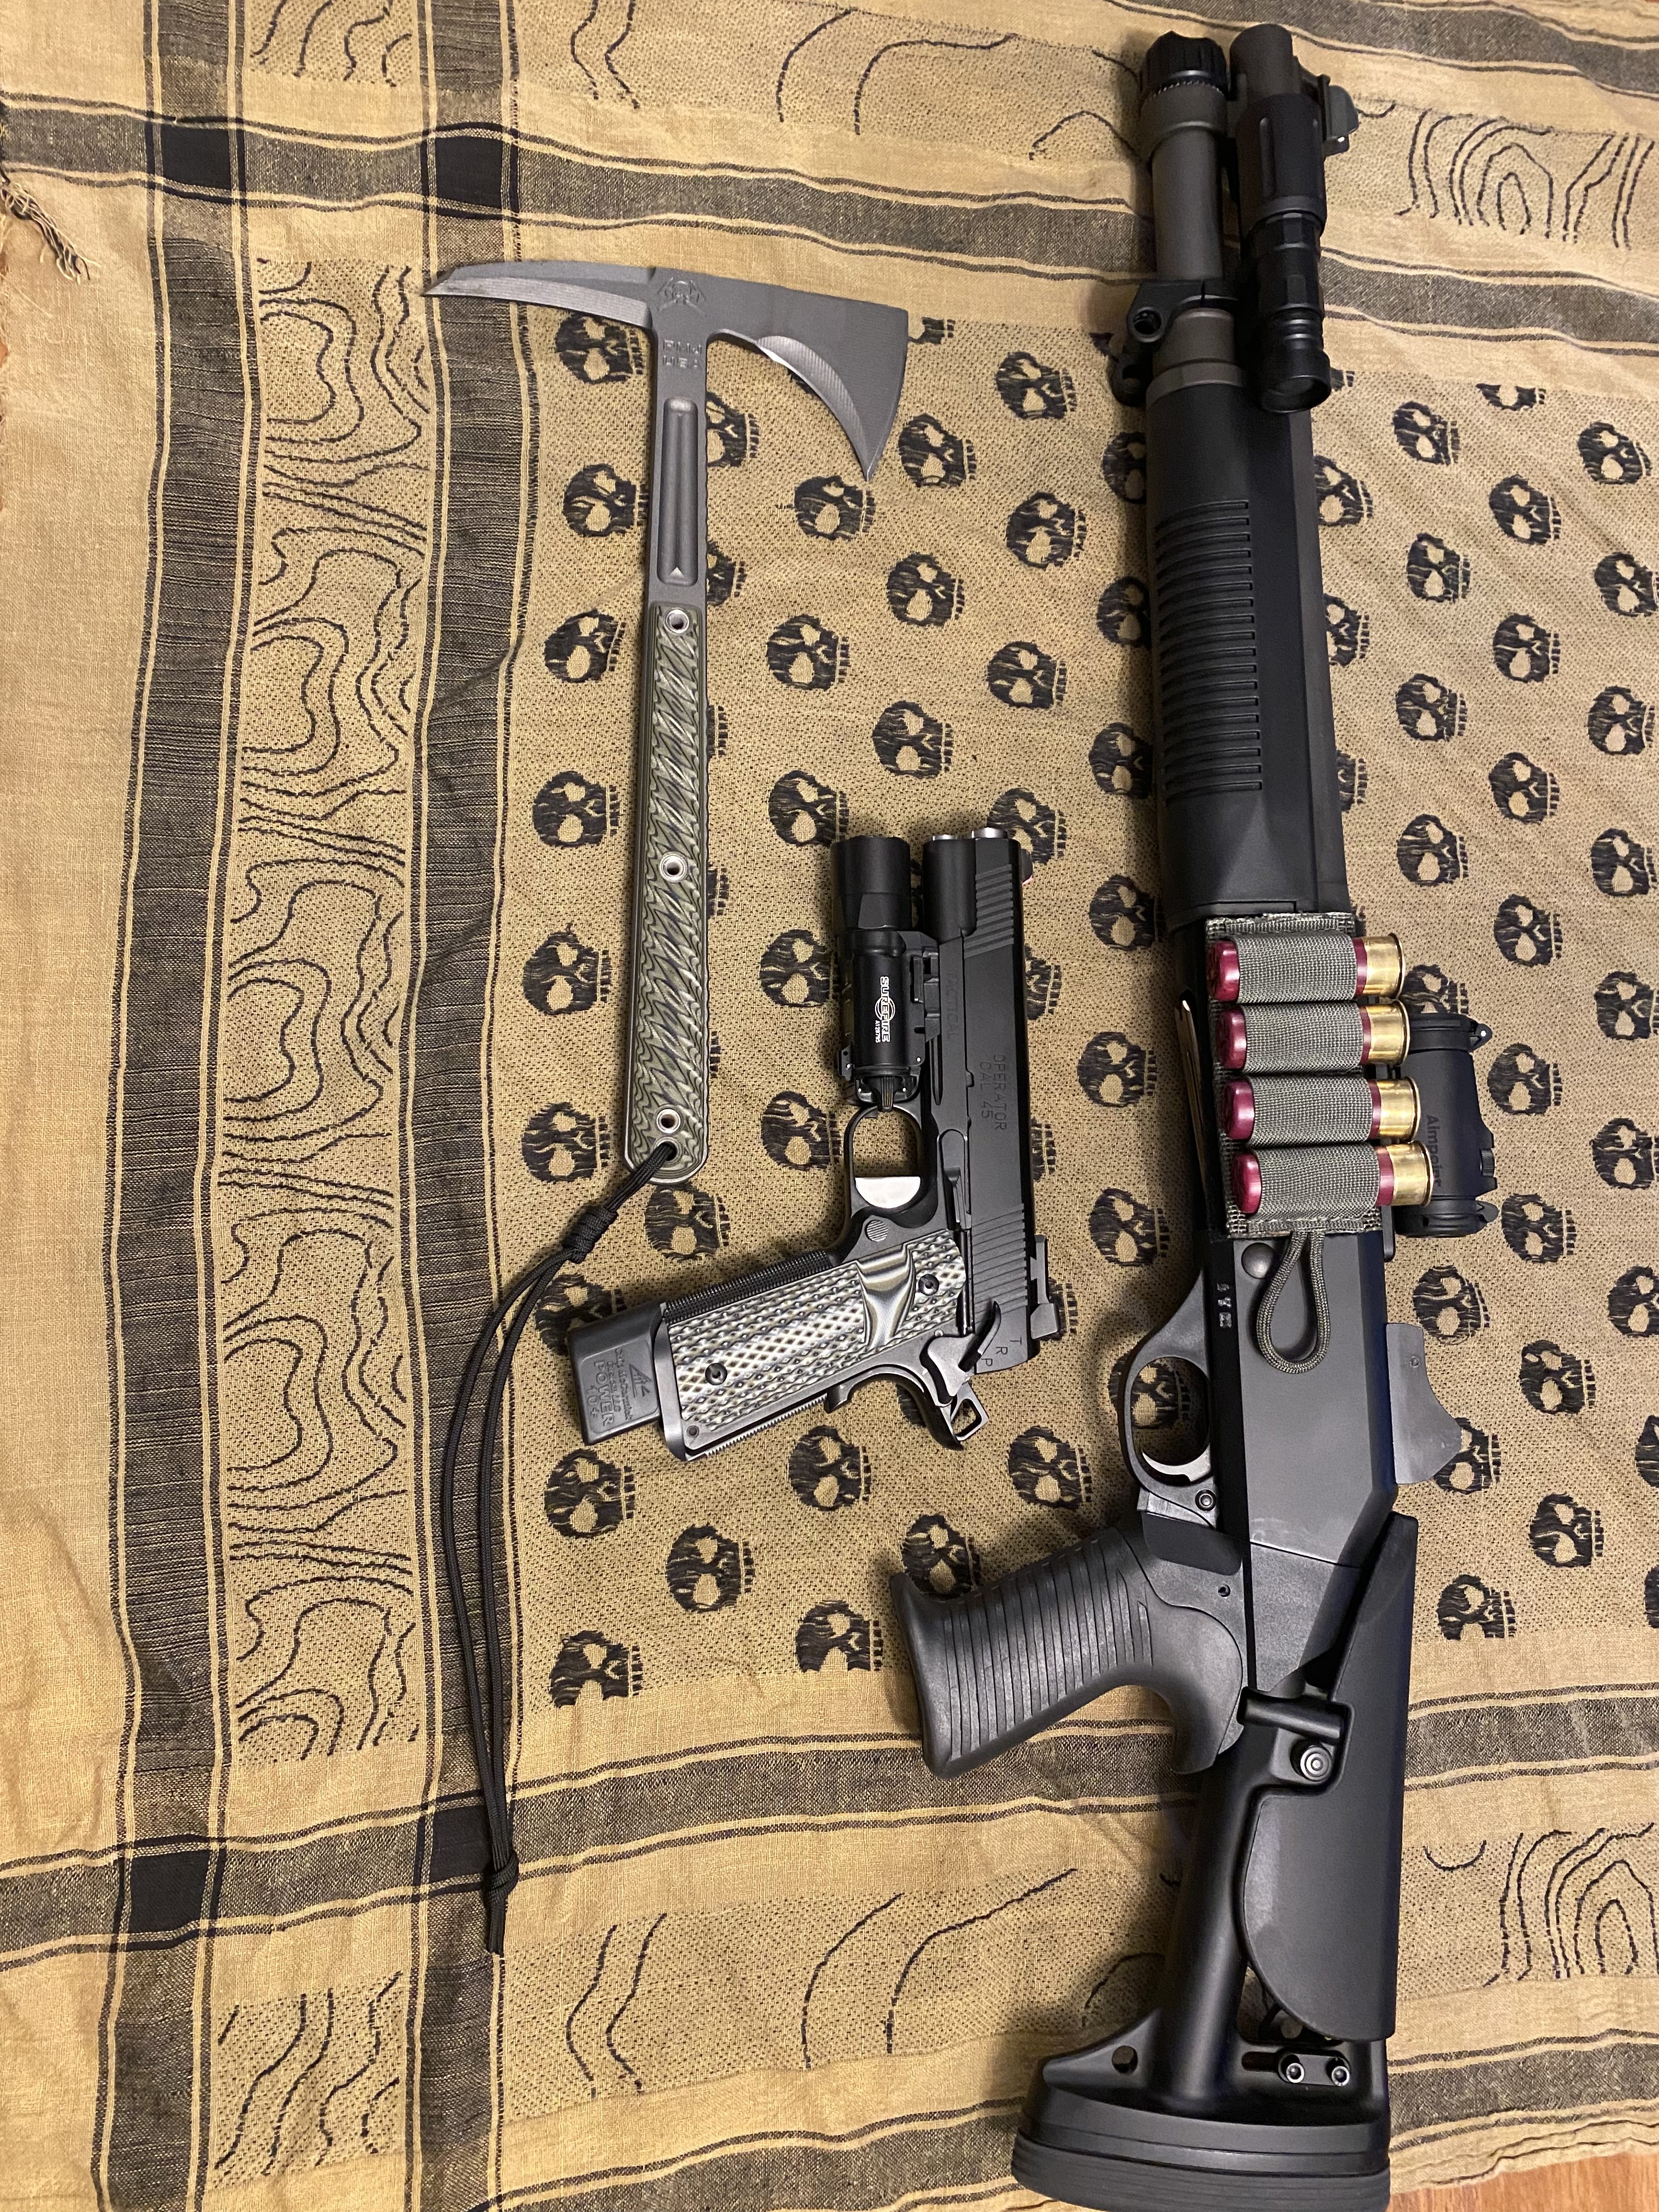
My Background The M4 is my first shotgun, and I have never taken a formal training class with it. My M4 haD less than 200 rounds through it before this class. My Equipment The Shotgun M4 with a steel 7 round tube, C-stock in the middle position, and the following mods: Surefire Dual Fuel Light on an IWC QD Mount GG&G Bolt Release TTI Shell Lifter Aimpoint T2 on ADM Low Mount FFT Trigger Set and A&S Housing IWC QD Rear Mount VTAC 2 Point Sling Tactical Gear SOE 12 GA Micro Rig The Class This was a “Basic Tactical Shotgun” run by a well-regarded local outfit that I’ve trained with before. It’s the first of a three class progression. This class focused heavily on a handful of items: Understanding how the shotgun patterns and functions at different distances and with different loads. We ran a variety of 00 Buck, #4 Buck, and slug loads at 7, 15, 25, and 50 yards. We then ran the slugs all the way out to 100. This was done from standing, supported kneeling, and even prone position. Learning how to do combat and speed reloads. This was a major emphasis of the training and one that was eye-opening for me. Dynamically loading while engaging multiple reactive targets was fun. Doing “slug select” drills to dynamically change out the round that you have. Concluded with a “shoot house” engaging paper targets The temperature hovered in the low to mid 90s for most of the training, requiring us to build in plenty of water and cooling breaks. Lessons Learned Know what ammo your gun likes: I can say with confidence that I’m never using Fiocchi #4 Buck again. Had multiple, repeated failures to eject/extract that led to a lot of (unexpected, but valuable) experience in failure clearance drills. This was not an issue with either my Federal Tactical slugs or PMC 00 Buck. Malfunction drills require a lot more thinking than an AR or a handgun: It’s not as easy as “tap, rack, bang” with an M4. For example, FTEs because of an extended crimp are not as simple as cycling the bolt and smacking the receiver. Getting a live round back into the chamber once you clear also requires practiced discipline with the manual of arms. You feel every ounce of weight you drop off of this platform: The M4 is a heavy beast, especially when you’re using it for several hours during a 90 degree day. Dropping the Mesa side saddle helped, but I’m looking forward to replacing my steel tube with a titanium one. I may even SBS this thing and drop down to 14” barrel. This is an impressively accurate gun: With a 2 MOA red dot and Truball slugs, I was making consistent spine box hits at 75 yards, and was hitting “minute of man” at 100. I was not truthfully not expecting that out of this gun. For my fellow lefties, you have to work on modifying manual of arms: While the safety can be swapped and things like combat reloads might be easier because of visibility into the bolt, other drills are not. For example, grabbing a round off of a chest rig to do a slug select can be tricky. You have to rotate the gun, tuck it into your armpit, use your left hand to current round and hold it open long enough to drop in the new slug. Anyway, it was a very eye opening experience for me. I’m still sore (birdshot didnt come in in time, so ran the entire course with buck and slugs) and a touch dehydrated, but well worth the time and energy.8 points
-
Wanted to share a customer photo, M4 with wood furniture... what a beauty!7 points
-
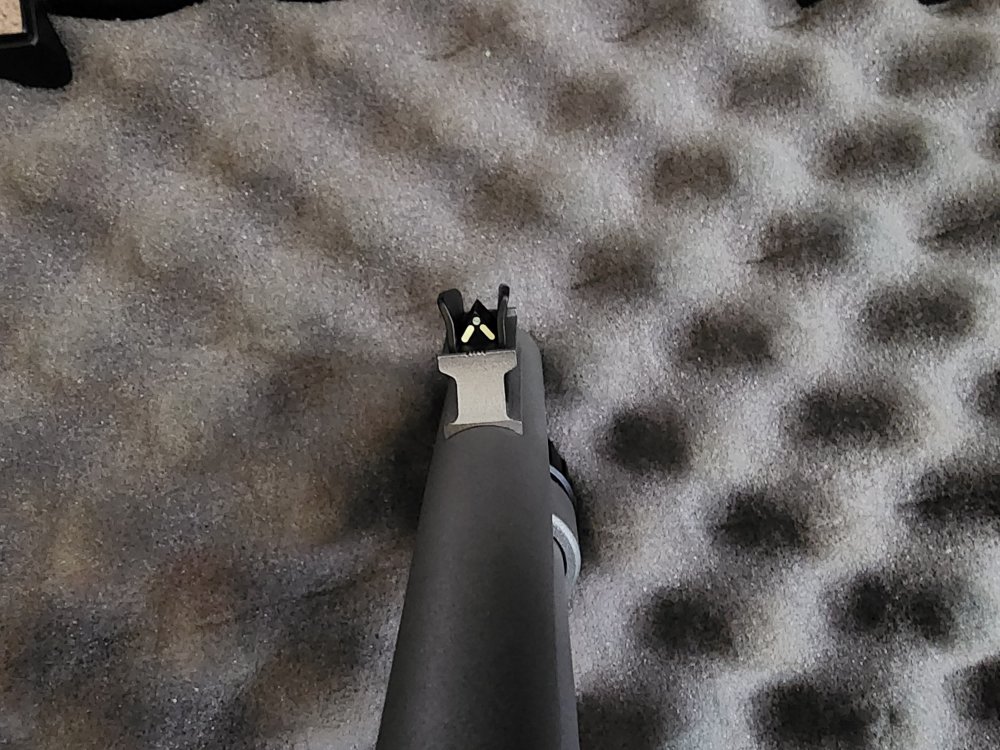
I took a couple pics below for those wanting to see it. I like it A LOT. They are well made and super easy to get on target with. Couldn t be happier with it
.thumb.jpg.79cc541042b39375fb444c95d1a6cd7d.jpg) 7 points
7 points -
Man just stop feeding it and it will go away.7 points
-
I have over 1000rds through my 2021 M1014, never had a failure, no QC issues, the chrome in the bore & gas ports looks new. The finish is perfect. Never had a problem with the poly trigger housing but I did swap it out pretty early on for an aluminum one. Positive locking of CH, straight sights, it’s been amazing. Im not saying there isn’t QC issues with new Benellis , just saying some of them are GTG.
 7 points
 -
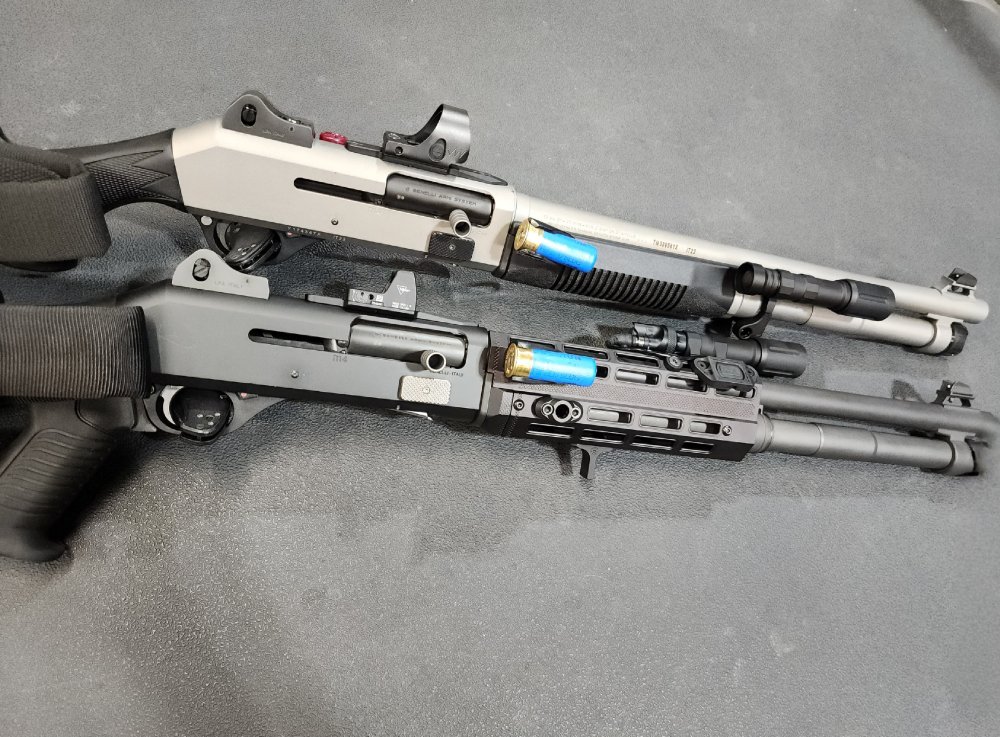
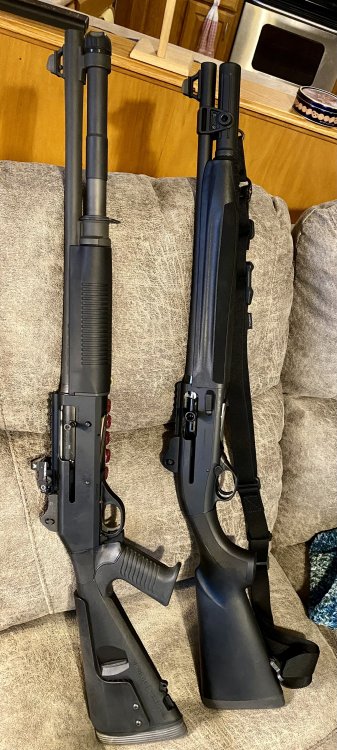
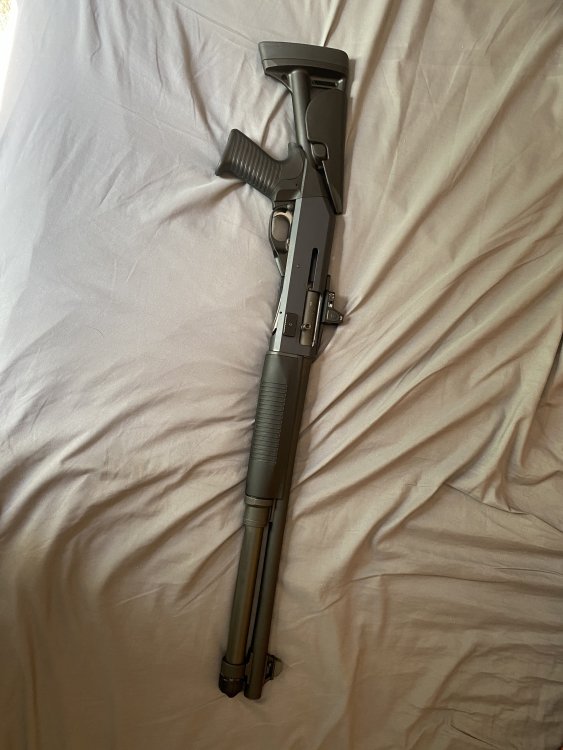
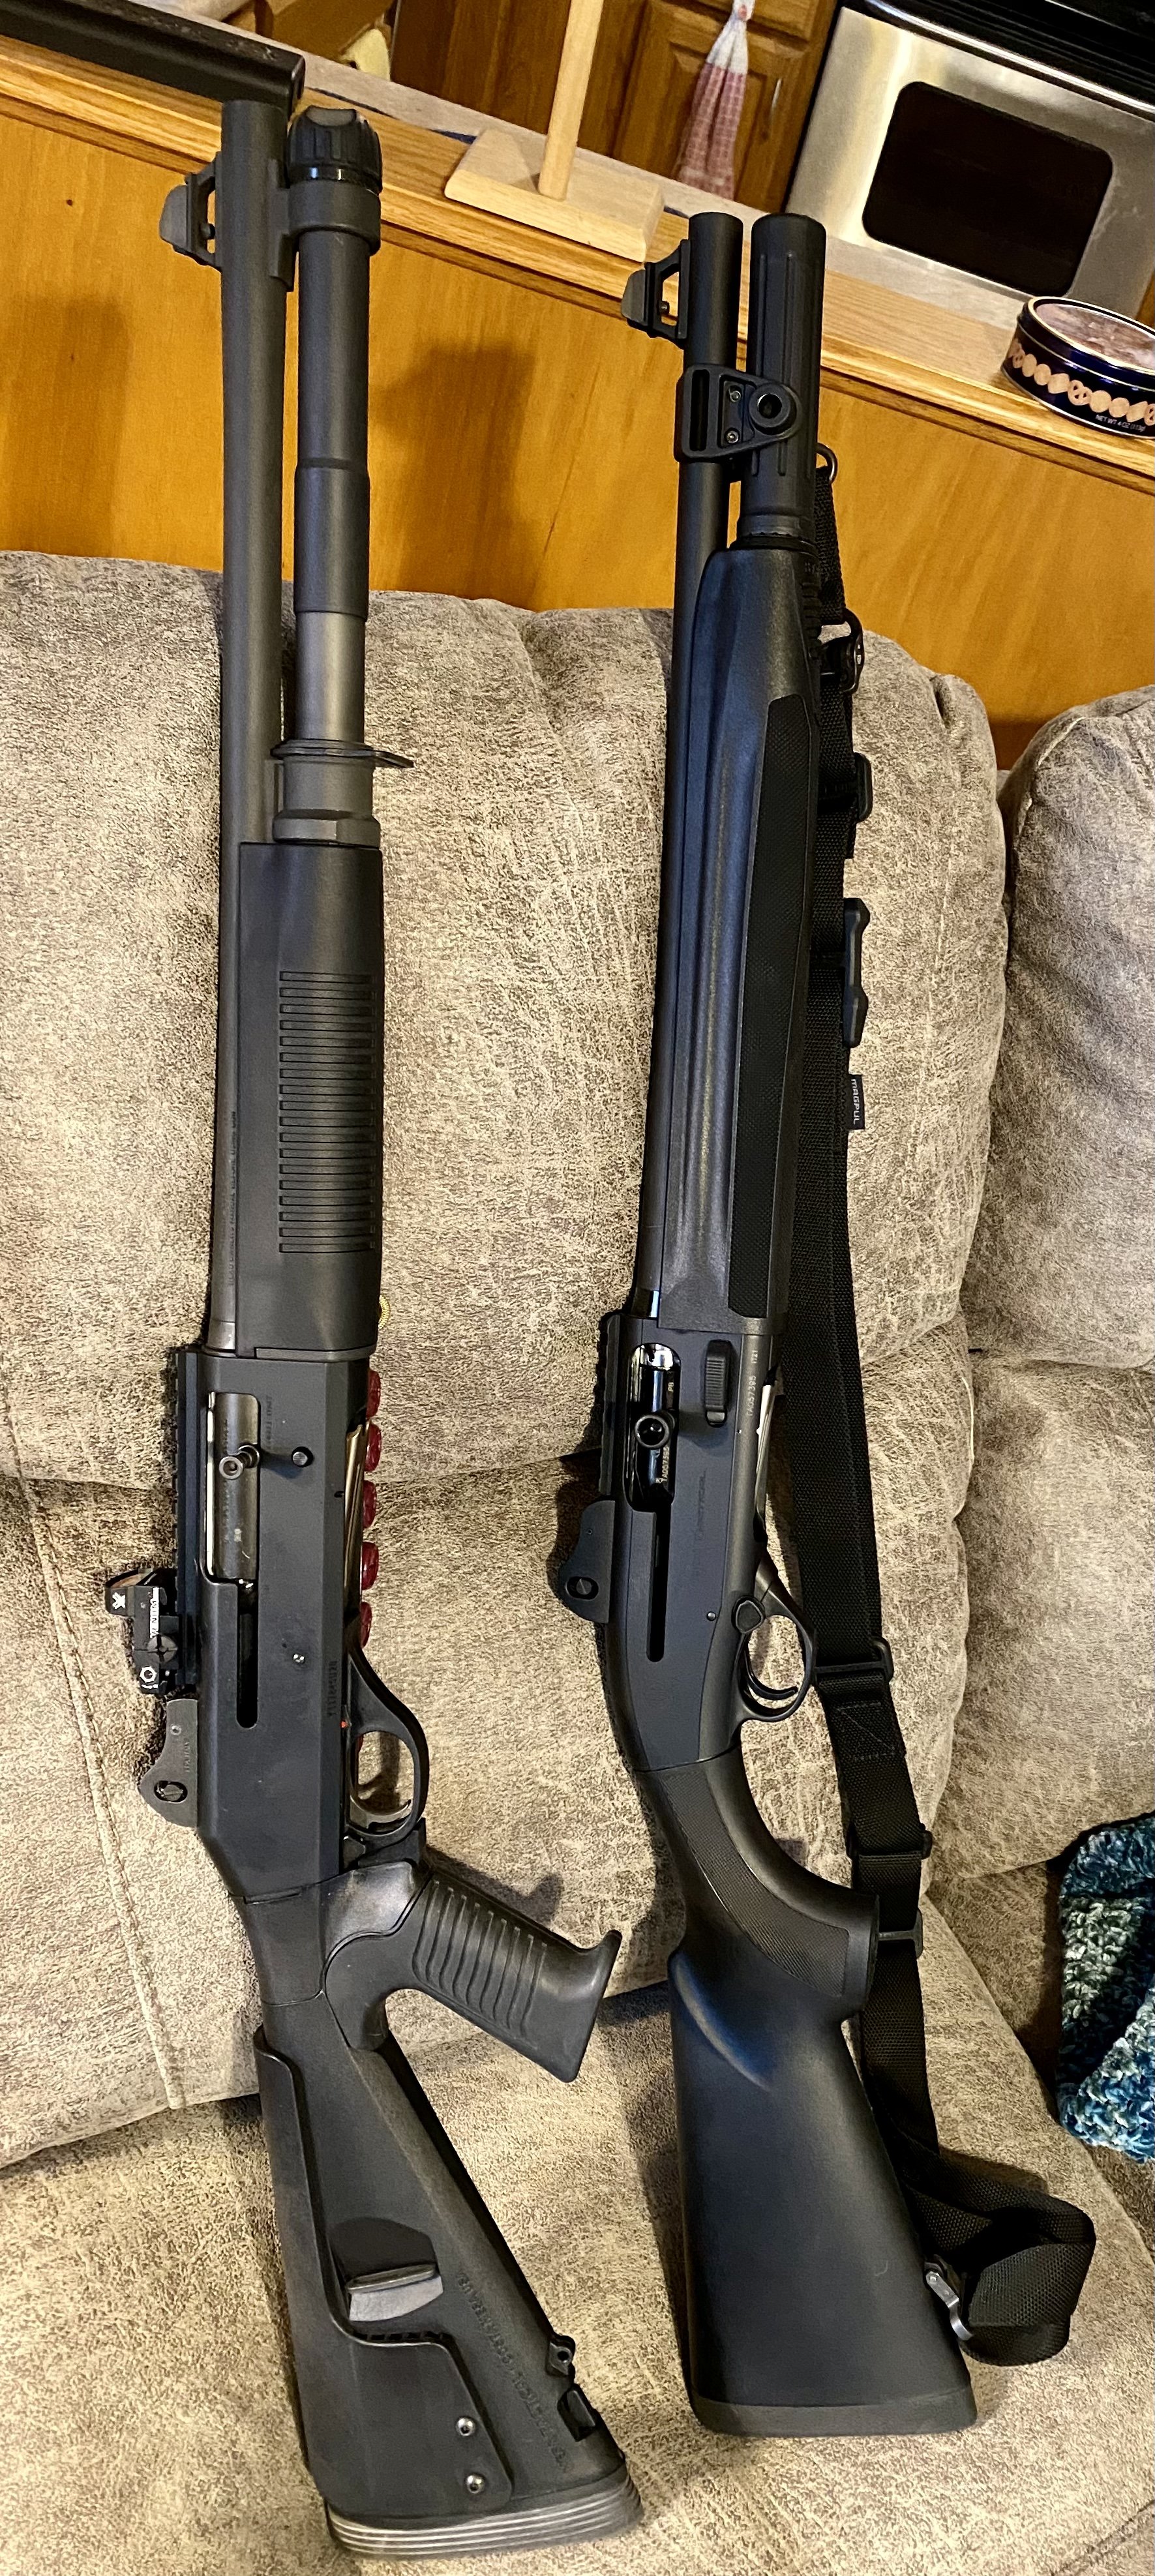
These are both fantastic shotguns. One does not replace the other. I’m fortunate to have both. The Magpul stock is mounted with a GG&G adapter. It works nicely. I think the Aridus adapter looks cleaner, but I couldn’t find it in stock at the time.
 7 points
 -
Mostly done . I have a Vickers sling on order and may make a few more changes but have a pic of both sides

 7 points
 -
7 points
-
Fucked up or not, the blue is beautiful.
 7 points
 -
Latest evolution of my M1014: Carrier Comp Ti mag tube ceracoated midnight bronze (they coated the 3 position recoil tube as well). Briley match trigger and loading port work TTI lifter GG&G Charging Handle GG&G Bolt Release Scalarworks Mount Trijicon SRO Daves metalworks safety IWC light/sling mounts Stippeled fore grips by Tango BF vickers sling
 7 points
 -
Update: I installed the bolt release button. Thanks to StrangerDanger for the awesome instructions. Here are a couple of pictures. Thanks

 7 points
 -
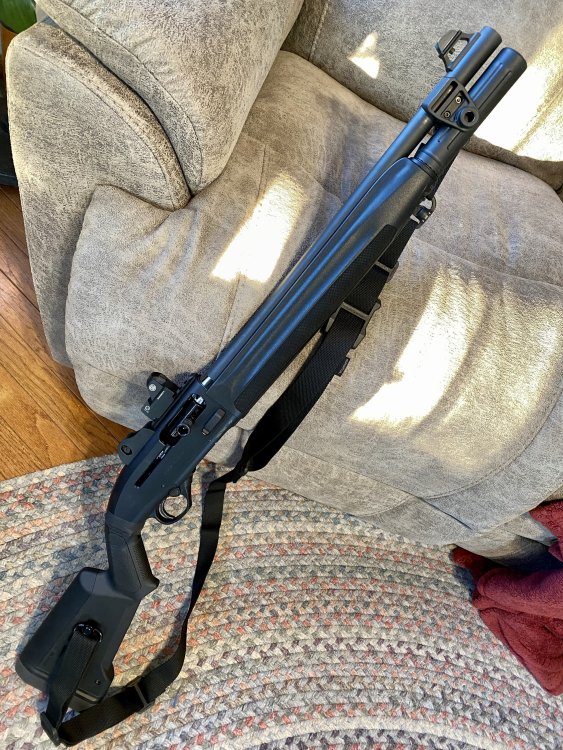
It occurred to me that I have yet to post a photo of my M4 since completion.
 7 points
 -
M1014/11701: Limited edition flag model. Comes with a oem collapsible stock that doesn’t function. The receiver extension is neutered to prevent function. Barrel does not have removable chokes. The original release of 1-2500 came with aluminum trigger frames. Current production flag editions outside of this initial release have polymer frames. Original release had a different barrel design that didn’t have the seating ring that mates against the receiver face. Handguards were slightly different as to account for this seat ring. 922(r) rules apply for modifying the shotgun’s capacity and collapsible stock. 11703: When originally released, this was a 4 port barreled model made for low recoil rounds. Everyone hated it and Benelli would replace the barrel if asked. The shotgun would beat itself to death if standard rounds were used. It also came with the neutered receiver extension. It came with a pistol grip stock. Barrel assembly has removable chokes. Came with an aluminum trigger frame. For some stupid reason, Benelli released this model number again around 2014 with some changes. The barrel is the standard 2 port barrel. It has a regular 3 position receiver extension. It came with a polymer trigger frame. Came with a field stock. Why they didn’t give it its own model number, we will never know. These models are rare to see anymore. 922(r) rules apply for modifying the shotgun’s capacity and collapsible stock. 11707: This is the gold standard model. Comes with a 3 position receiver extension. Barrel is a 2 port barrel with removable chokes. The barrel have the new seat ring design and some modifications to the barrel extension inside the receiver. Early production models came with aluminum trigger frames where as current production models have the polymer ones. We’ve seen some minor changes in finishes on small parts like the Argo plugs and receiver anodizing over the years. Some Receivers almost have an OD green hue. These models come with a 5 round magazine that has a limiter in place. 922(r) rules apply for modifying the shotgun’s capacity and collapsible stock. I will note that 60 were released from Benelli with 7 round magazines and functional collapsible stocks until the ATF made them stop. 11710: This M4 essentially the same as a 11707, but it comes with a field stock. 11711: This model has all of the features of the 11707, but the shotgun was plated in Np3 by Robar. These are quite rare and not to be confused with the Cerakote model that is painted silver to copy the look. These true NP3 plated models are arguably considered the best model due to the performance of the Np3 finish. 922(r) rules apply for modifying the shotgun’s capacity and collapsible stock. 11713: This M4 is a law enforcement model that is 922(R) exempt like the 11721. This model has all of the features of the 11707. The only real difference is it comes with a steel 7 round magazine tube. 11717: This model has all of the features of the 11707, but the shotgun has a three tone desert camo pattern. 922(r) rules apply for modifying the shotgun’s capacity and collapsible stock. 11721: This is a law enforcement model that has all the features of the 11707 but doesn’t have to abide by 922(R) restrictions. It isn’t meant to be sold to civilians, but they often are. They are sold at a premium price. Given that it comes with a collapsible stock, this makes the price more appealing. The shotgun includes a 7 round steel magazine tube. 11723: This is a 14” Entry gun version of the M4 the barrel doesn’t have a removable choke. This would be a NFA firearm. It comes with the field stock. Other features are similar to the 11707/11721. 5 round capacity due to length. 11724: This is a 14” Entry gun version of the M4 the barrel doesn’t have a removable choke. This would be a NFA firearm. It comes with the oem collapsible stock other features are similar to the 11707/11721. 5 round capacity due to length. 11795: This model is similar to the 11707 in features. The only real difference is it is Cerakoted. I have seen both a H2O titanium finish and a dark earth color option. Pistol grip and field stocks can be had under this model. 11796: This is a law enforcement model like the 11713/11724. The only difference is the Cerakote paint options. The firearm is generally sold with the oem collapsible stock and a 7 round magazine tube. There may be other options and models out there. Benelli has a European model with a slightly longer barrel. There is also a redesigned M4A1 that has been floated that uses the Supernova collapsible stock and has a railed handguard assembly from the factory. I don’t think these options have been imported to America yet.7 points


.jpg.587cd882e7093fa0686fce6bdce871c1.jpg)

-6(5).thumb.jpg.931bee6152e52dd671a17d7189caf02f.jpg)


This leaderboard is set to New York/GMT-04:00