Leaderboard


Popular Content
Showing content with the highest reputation on 02/25/22 in all areas
-
I have two m4’s and one 1301 LE. I love my Benellis, but the 1301 does better with lower loads; not even one hiccup after firing about 500 rds this week. It’s a great weapon that hopefully will soon be combat proven by the US Military.2 points
-
Seems like a headache with anything FFT sells. I never heard one positive thing from FFT. I guess the one positive is hes from commiefornia and its easy to avoid those kind of people? Lol.2 points
-
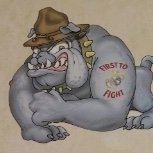
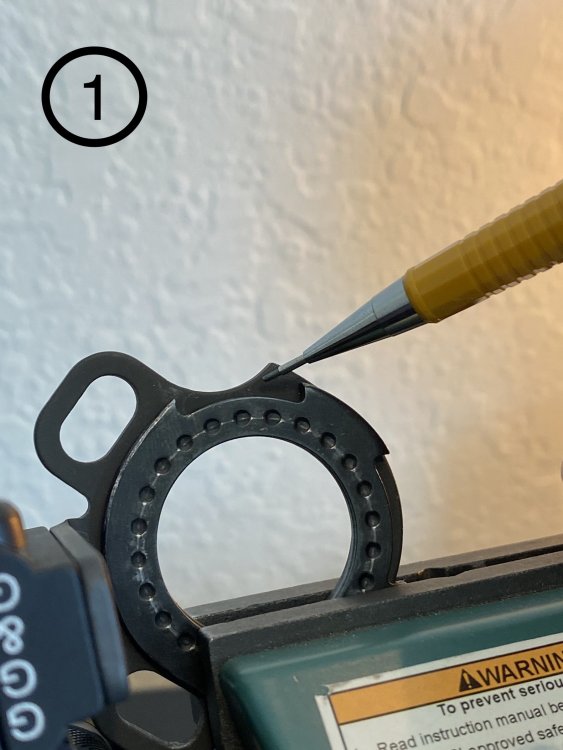
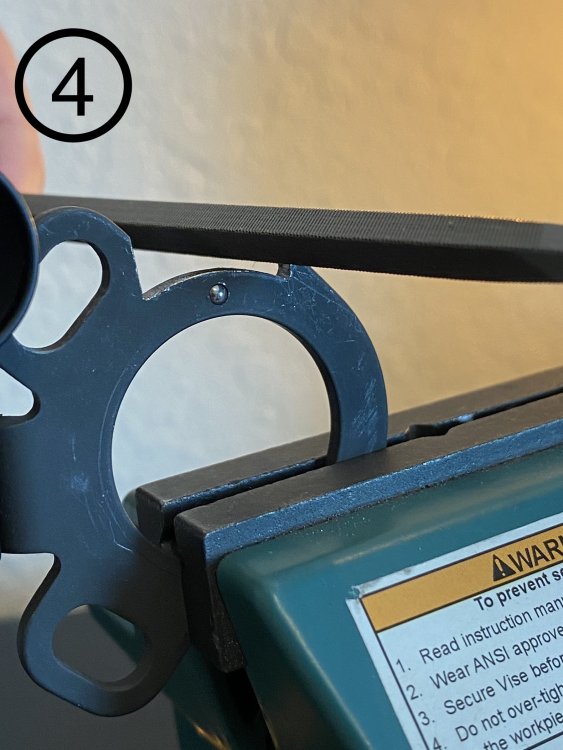
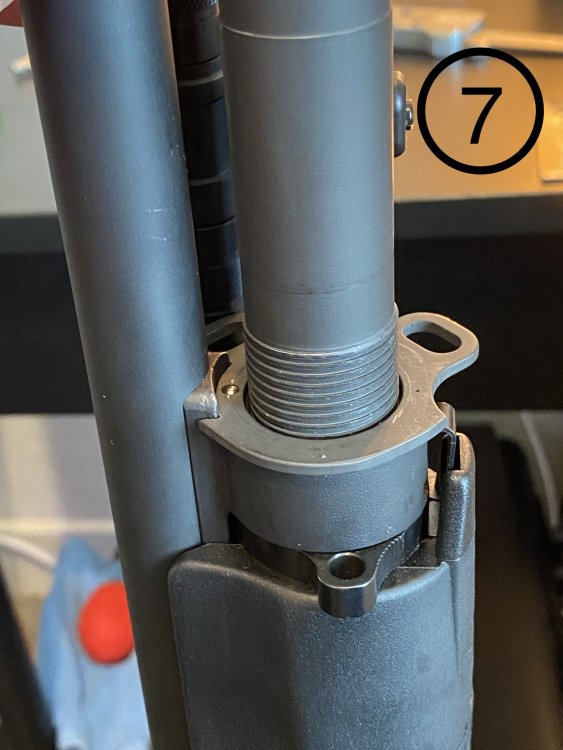
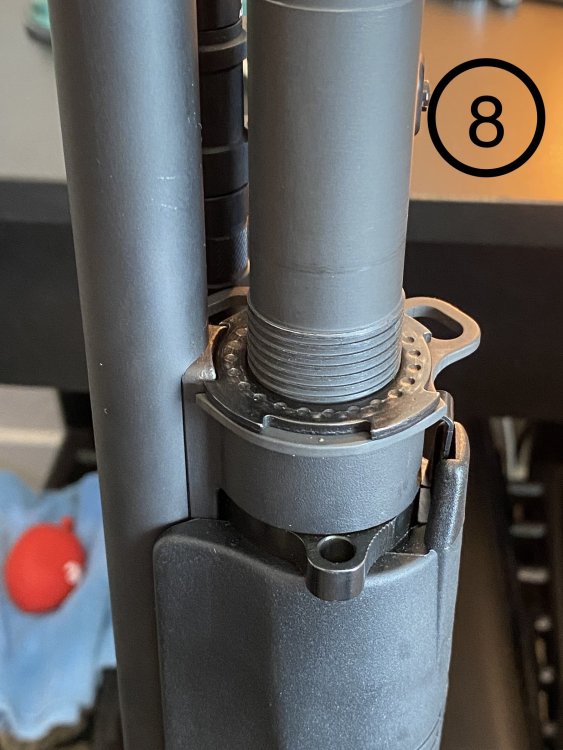
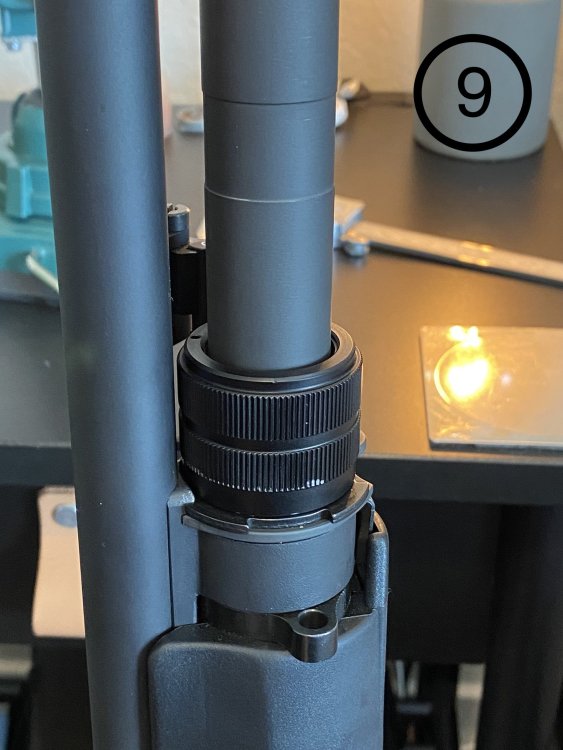
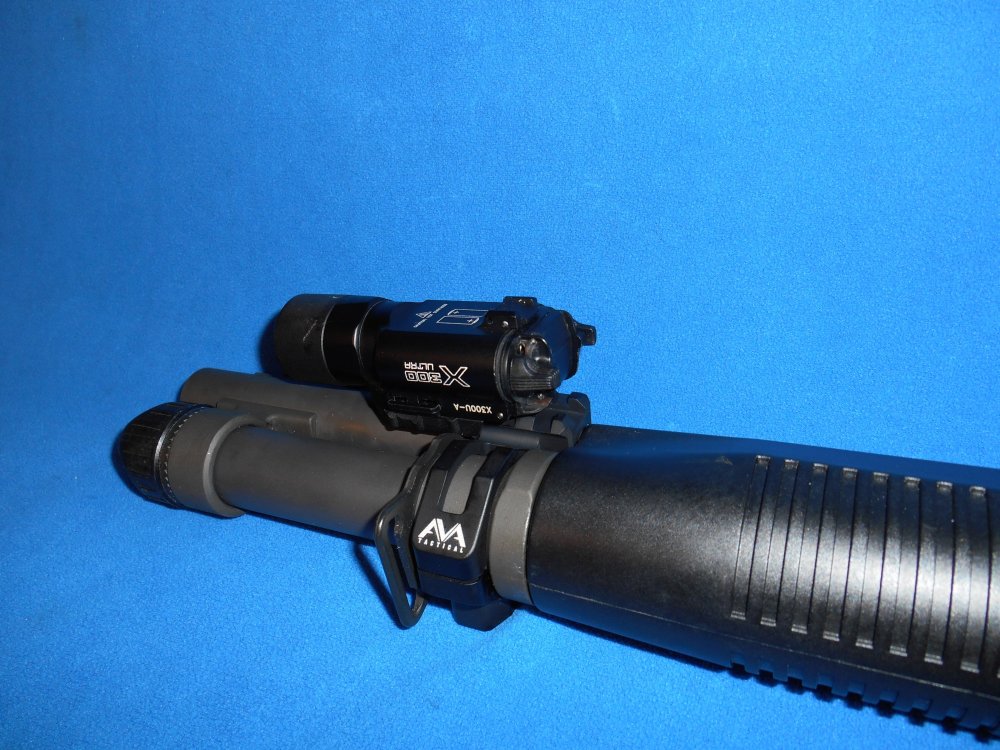
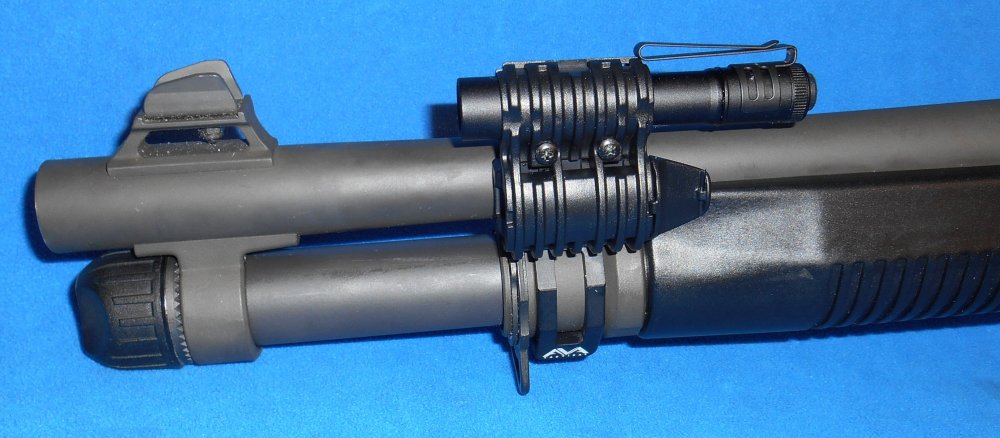
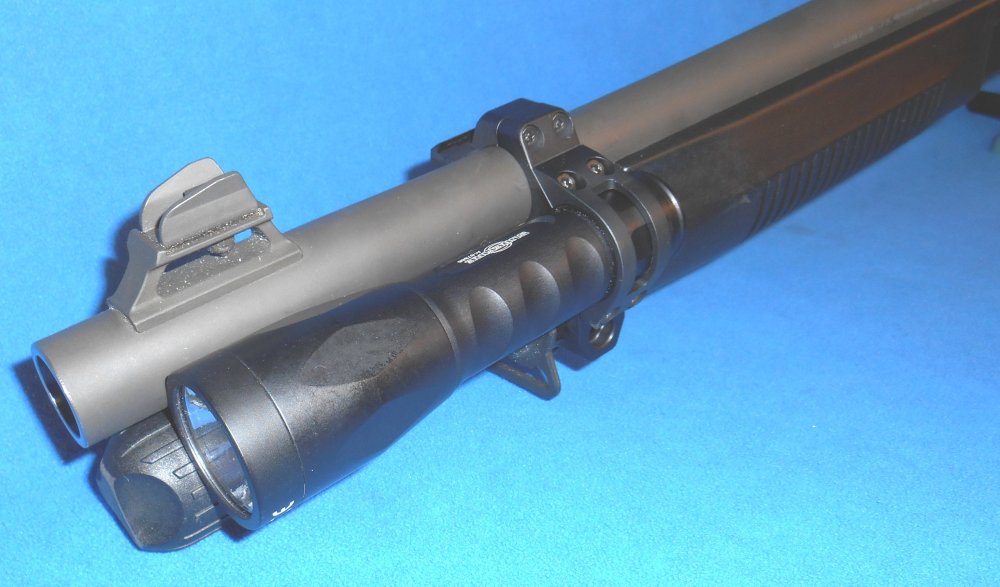
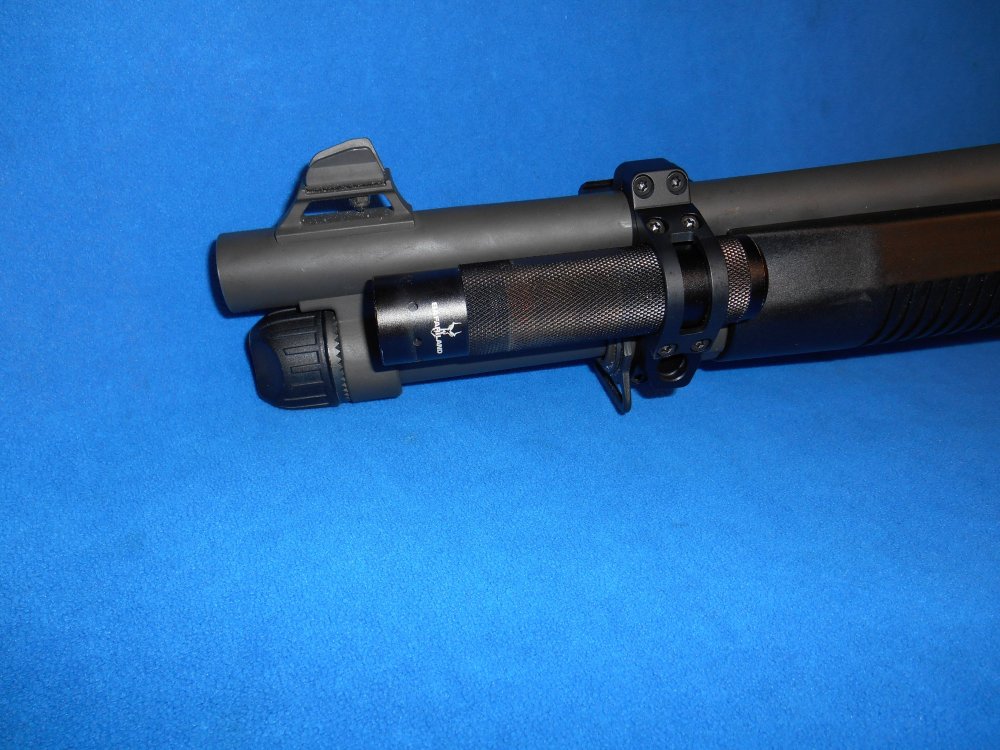
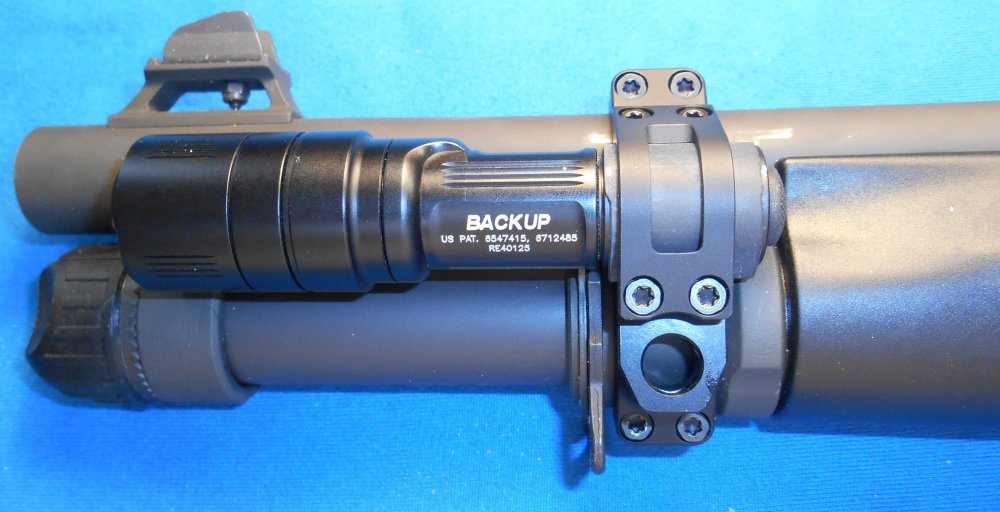
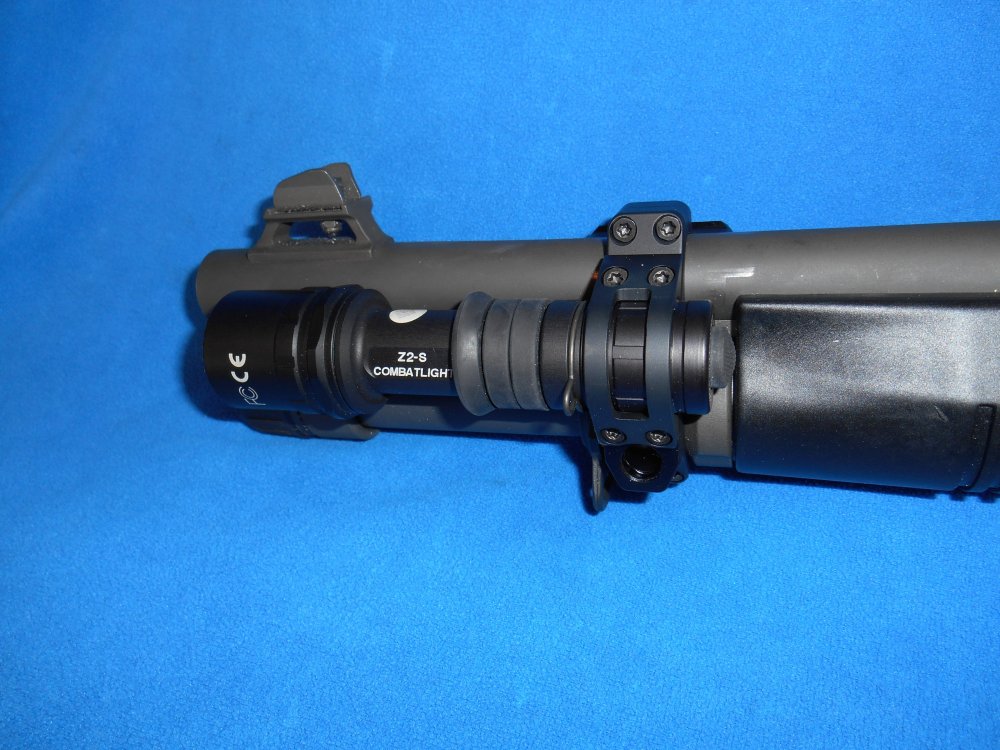
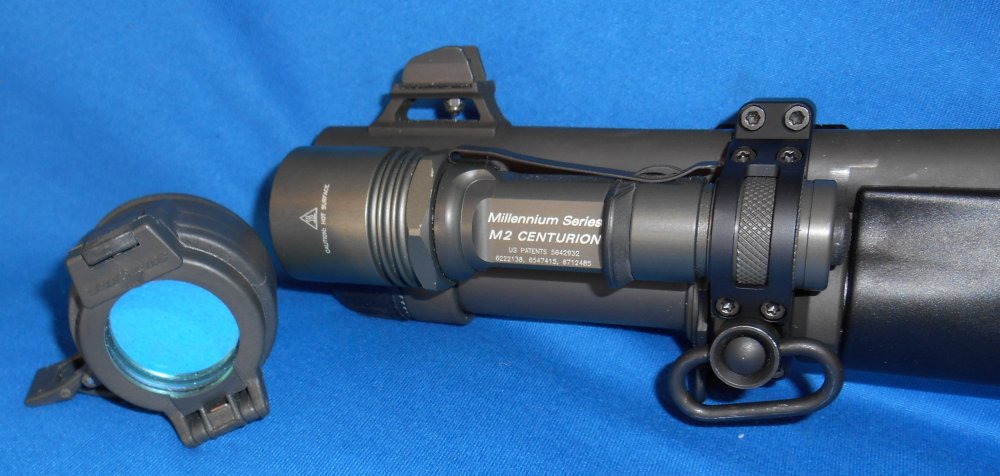
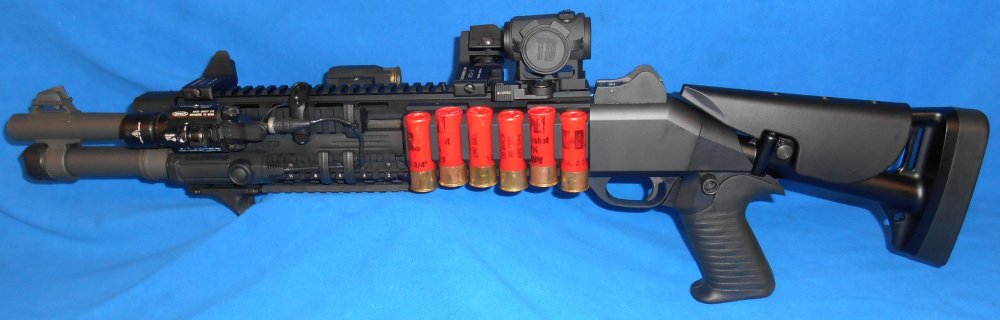
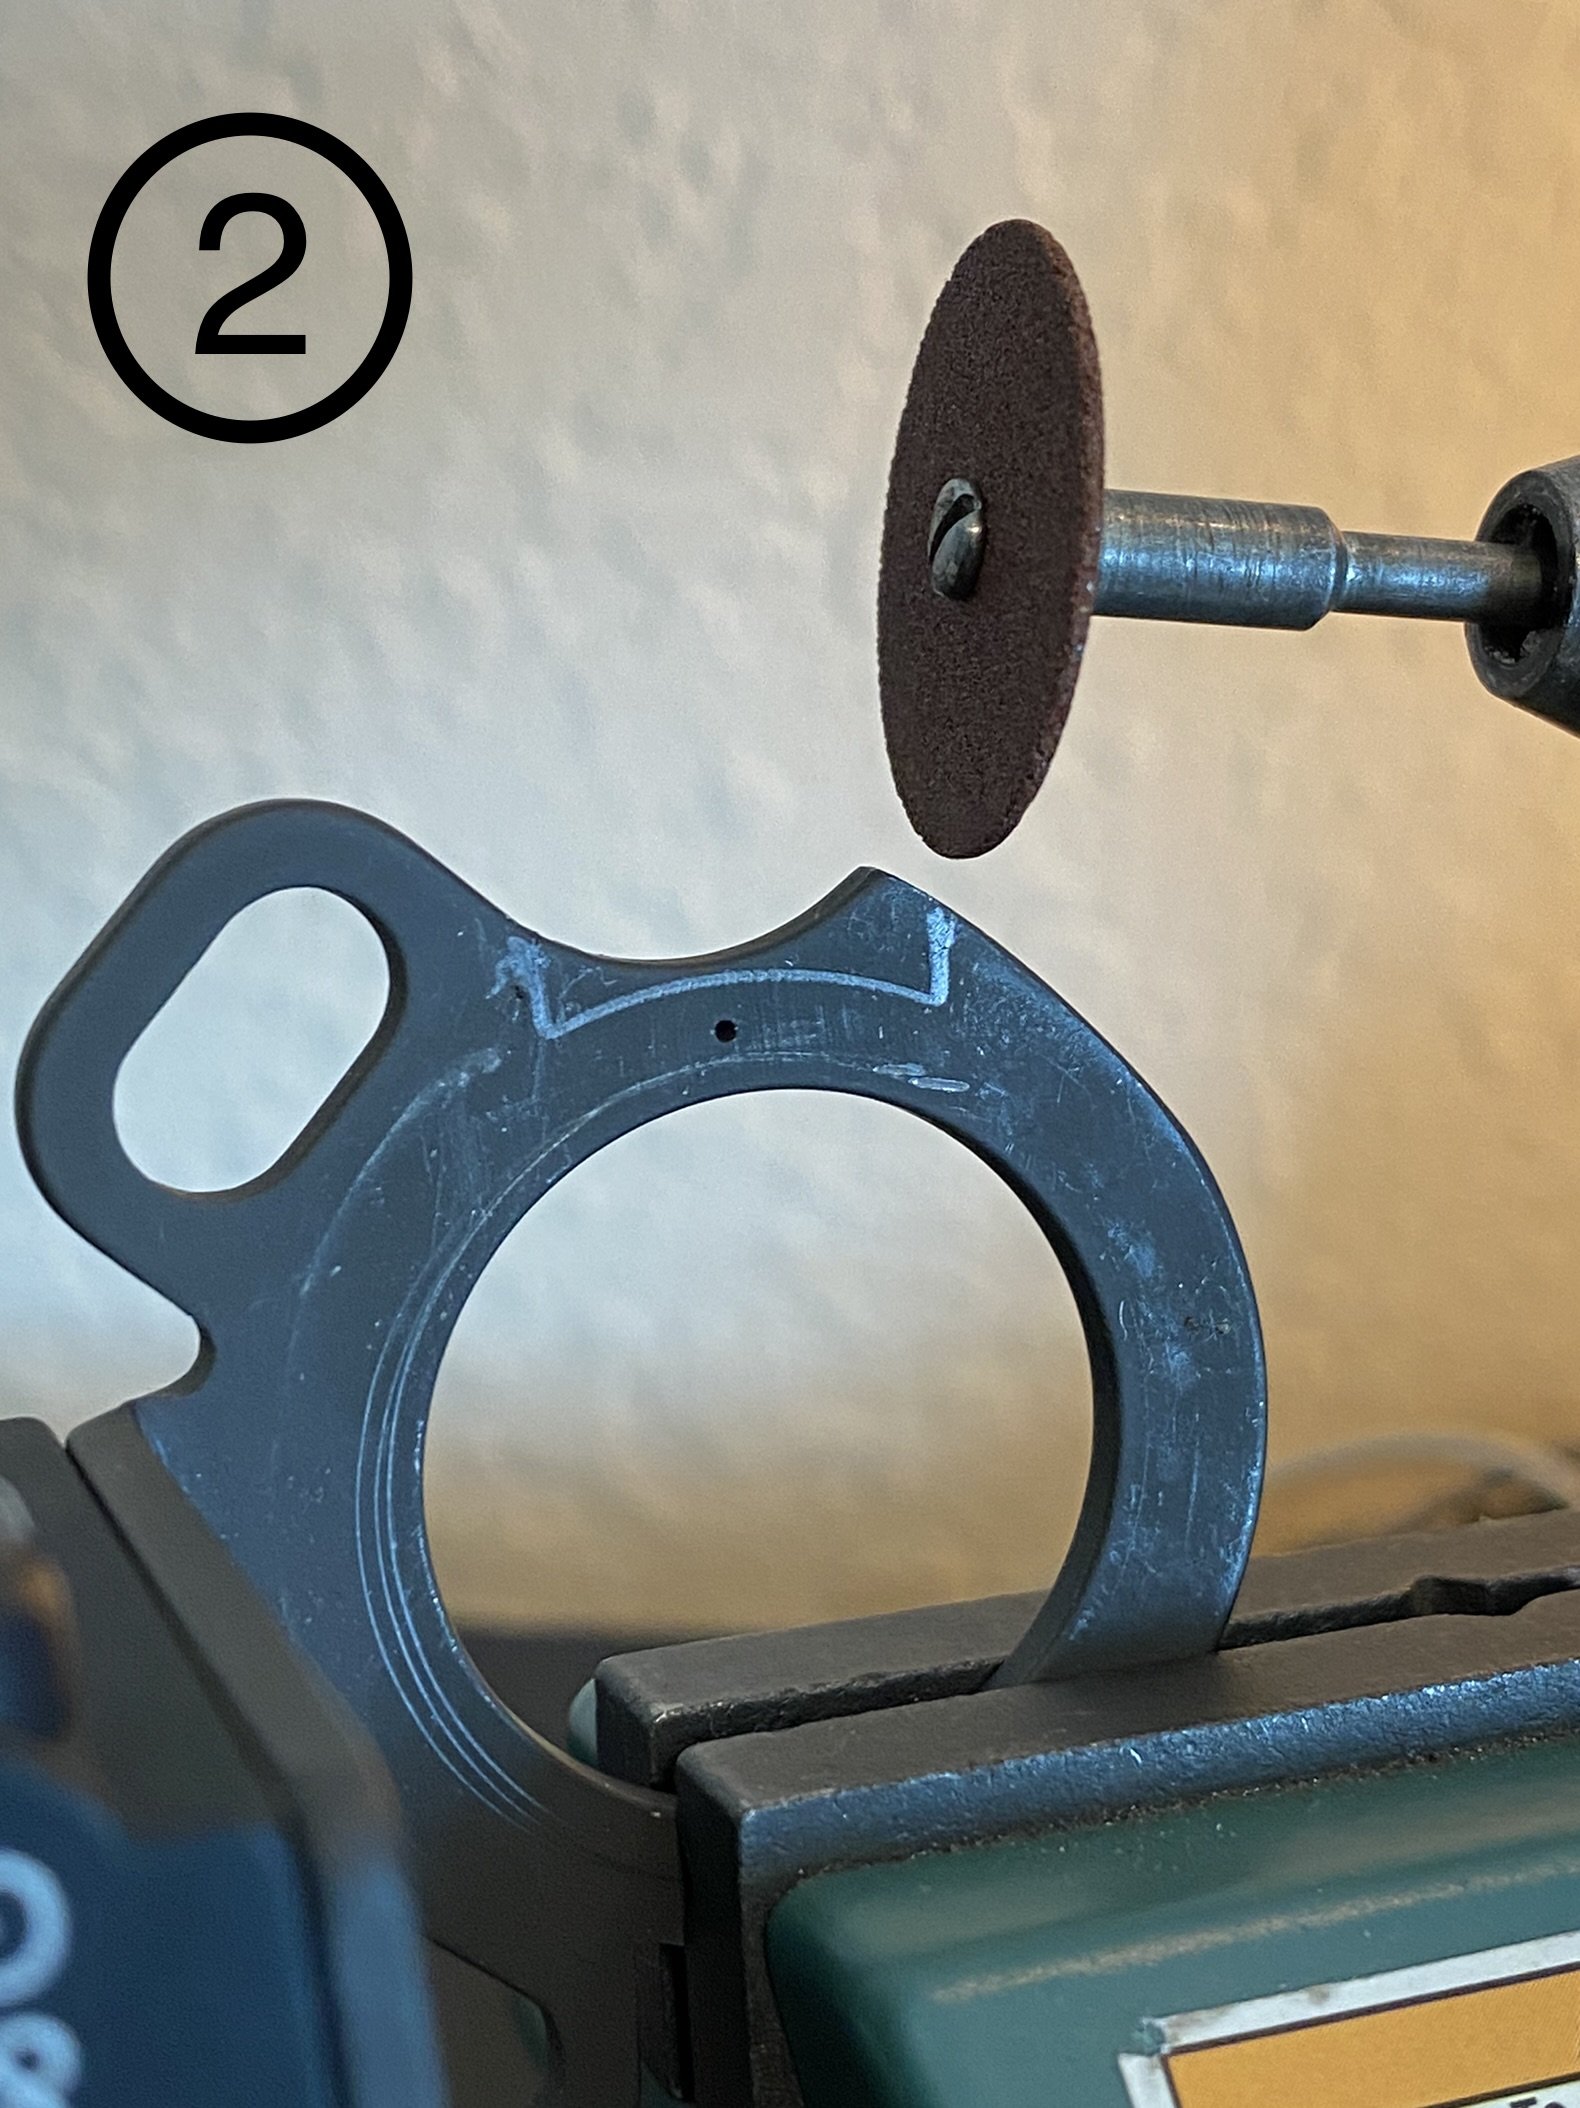
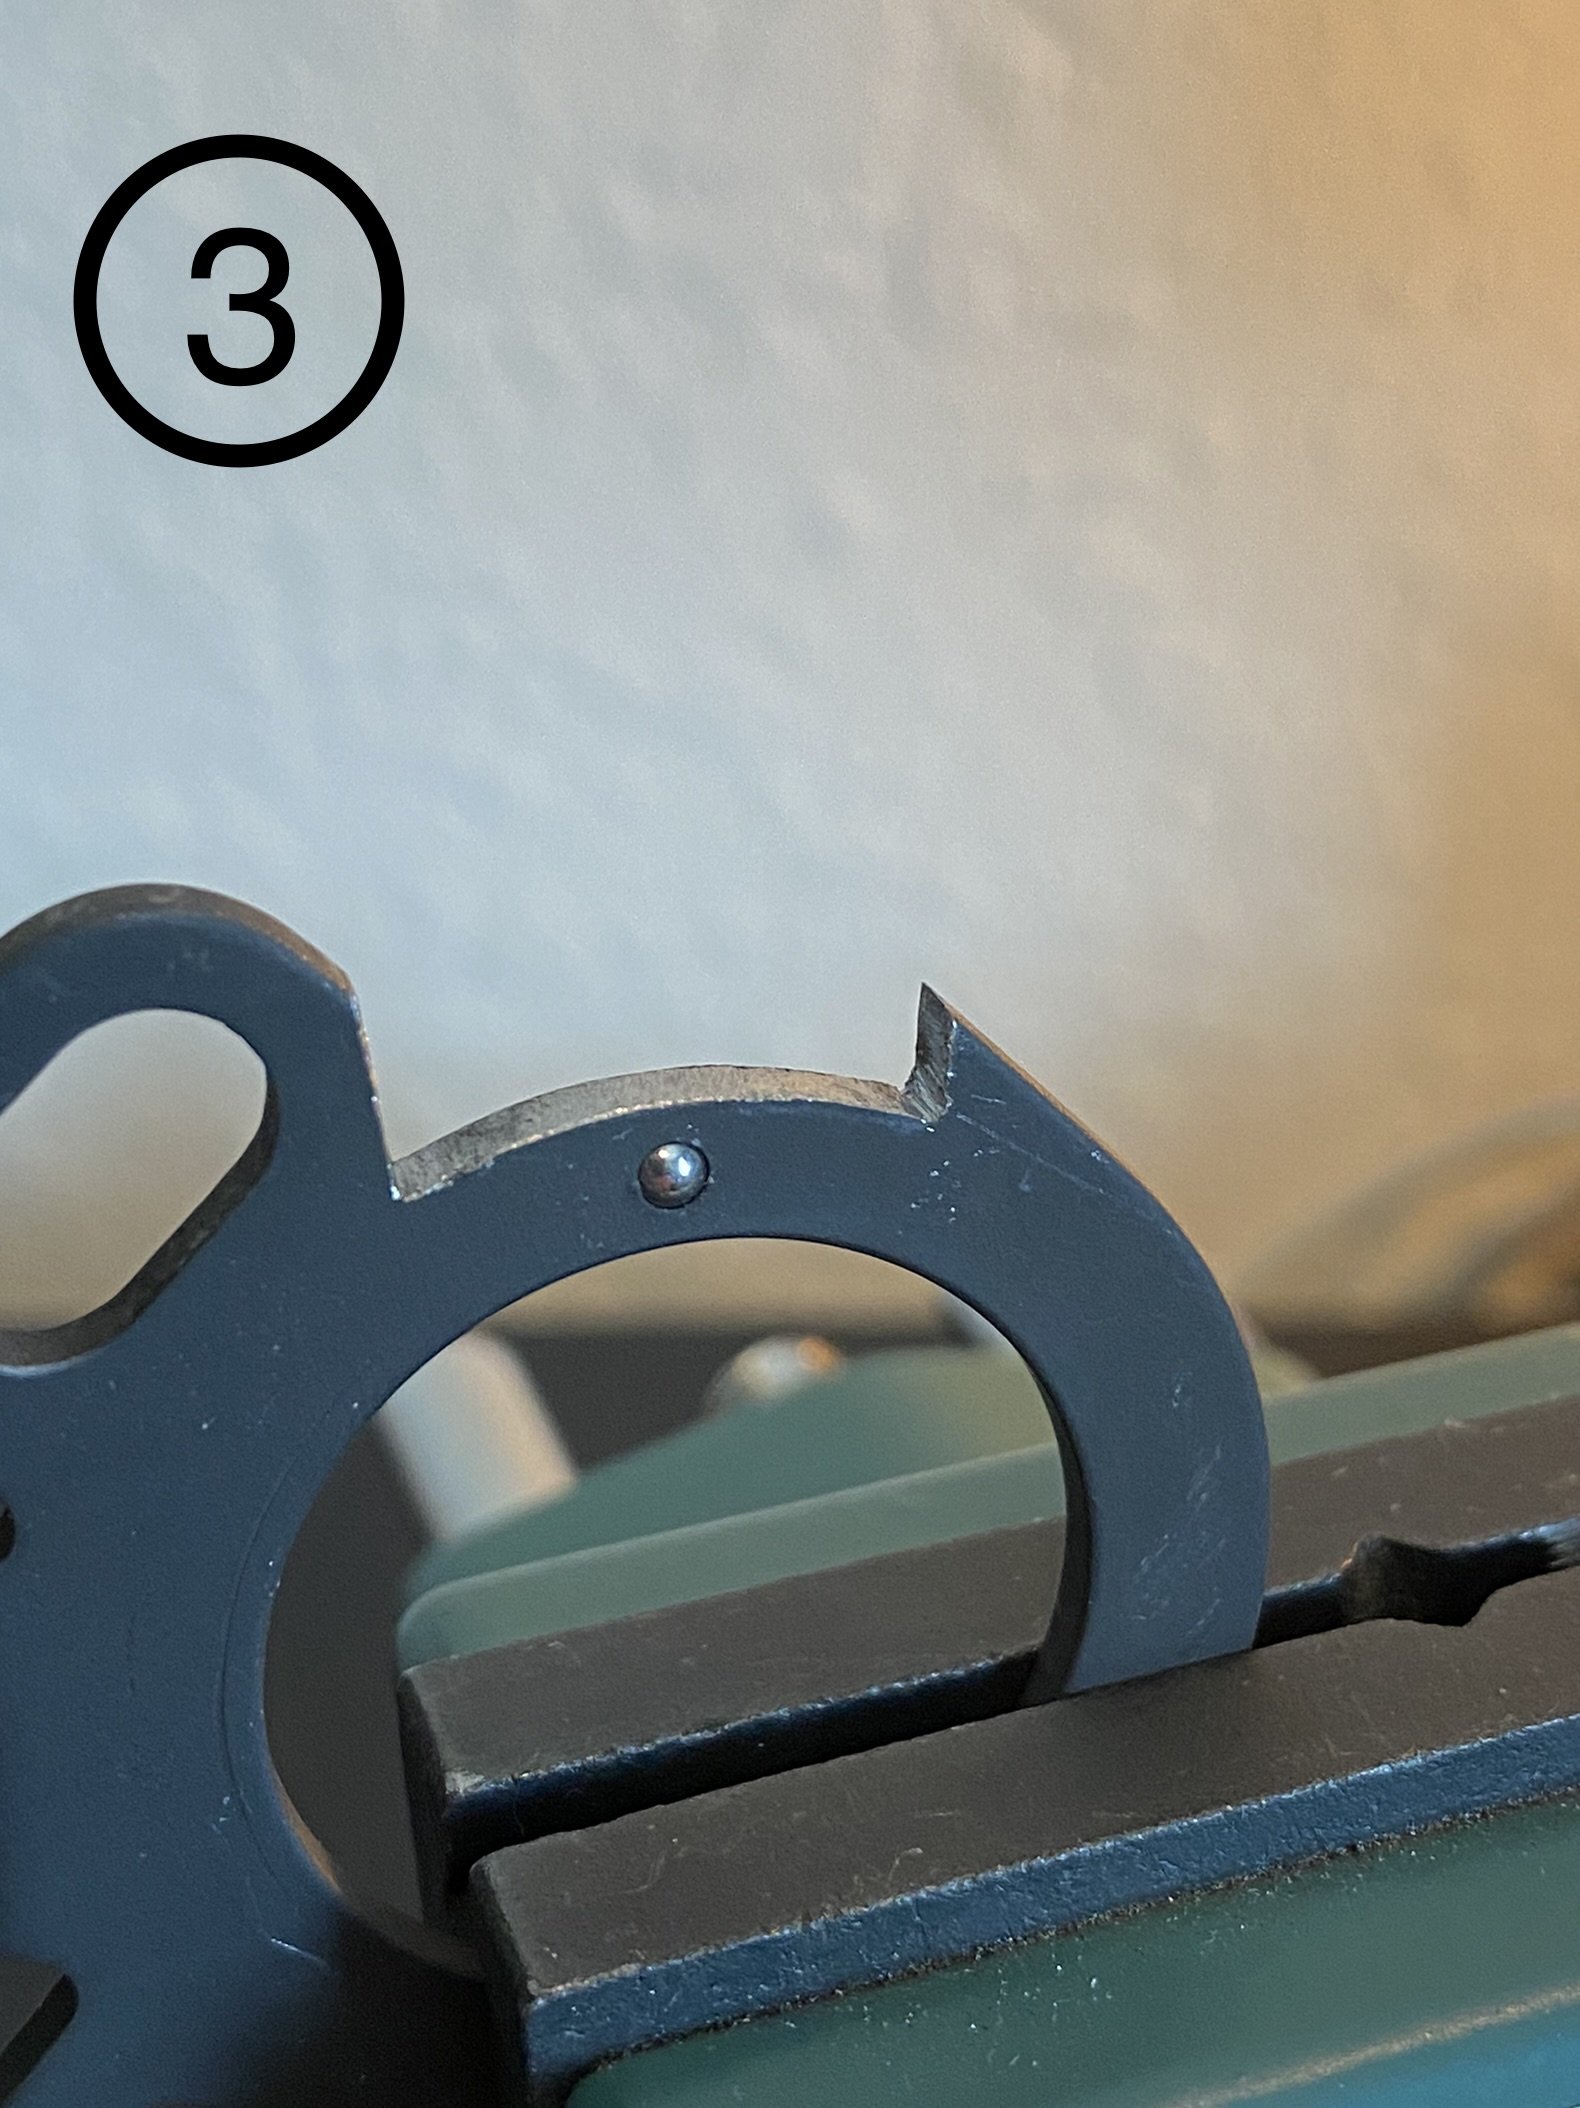
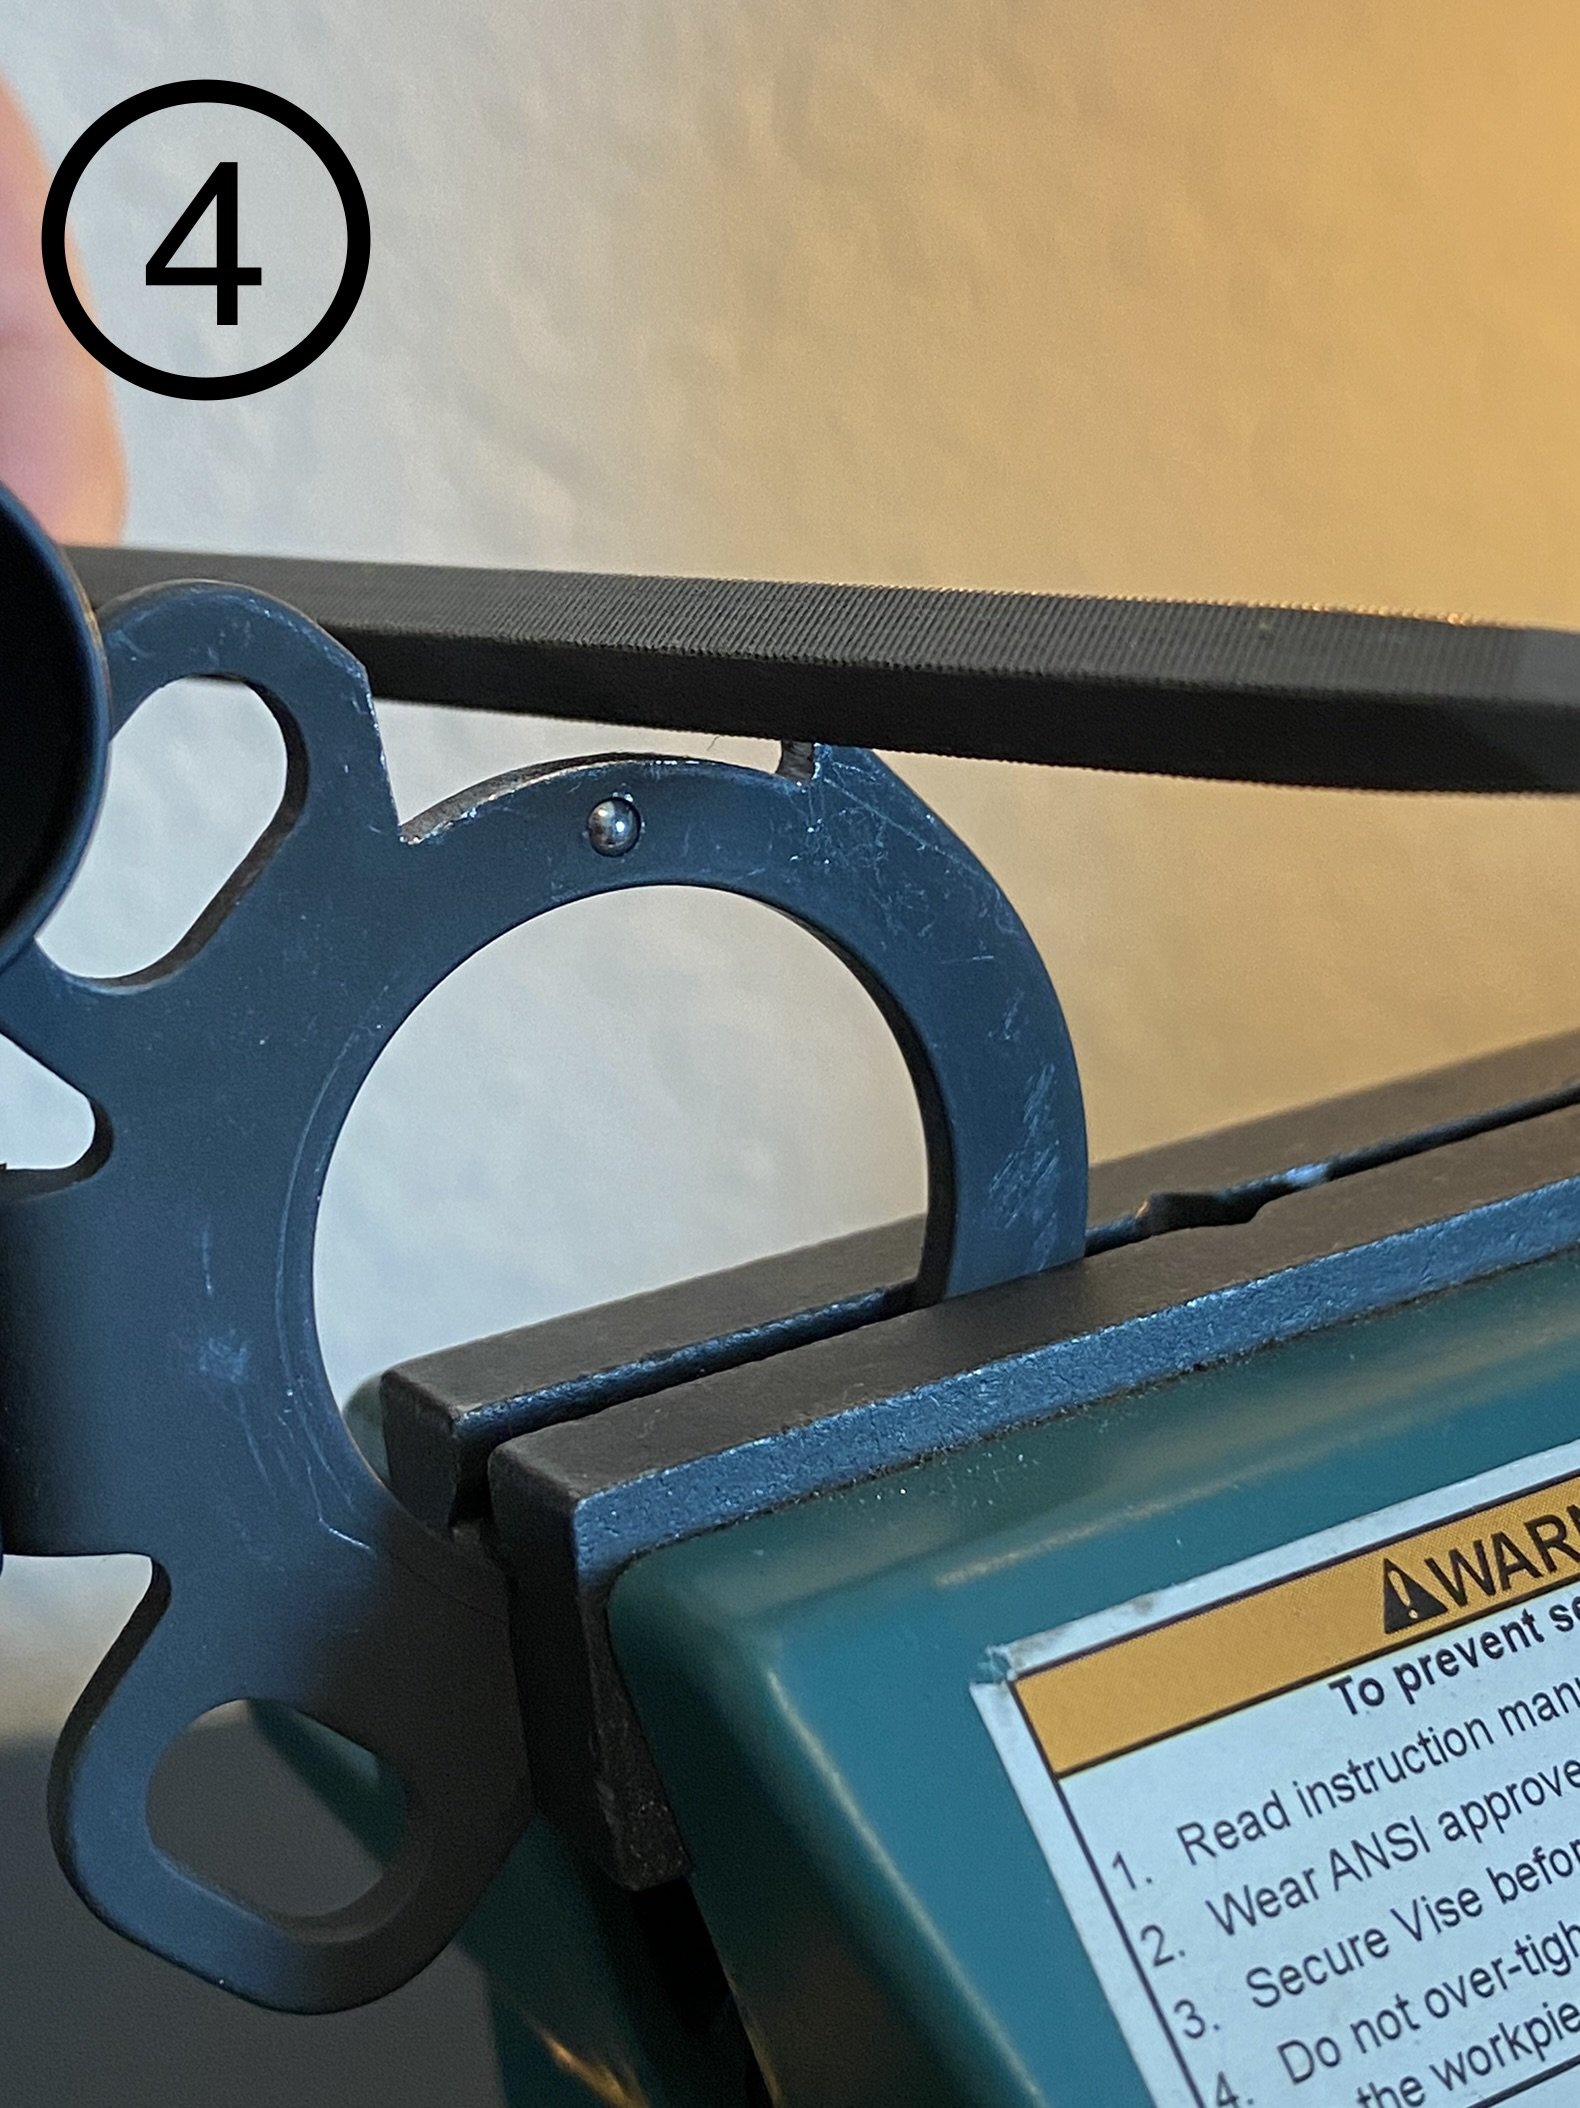
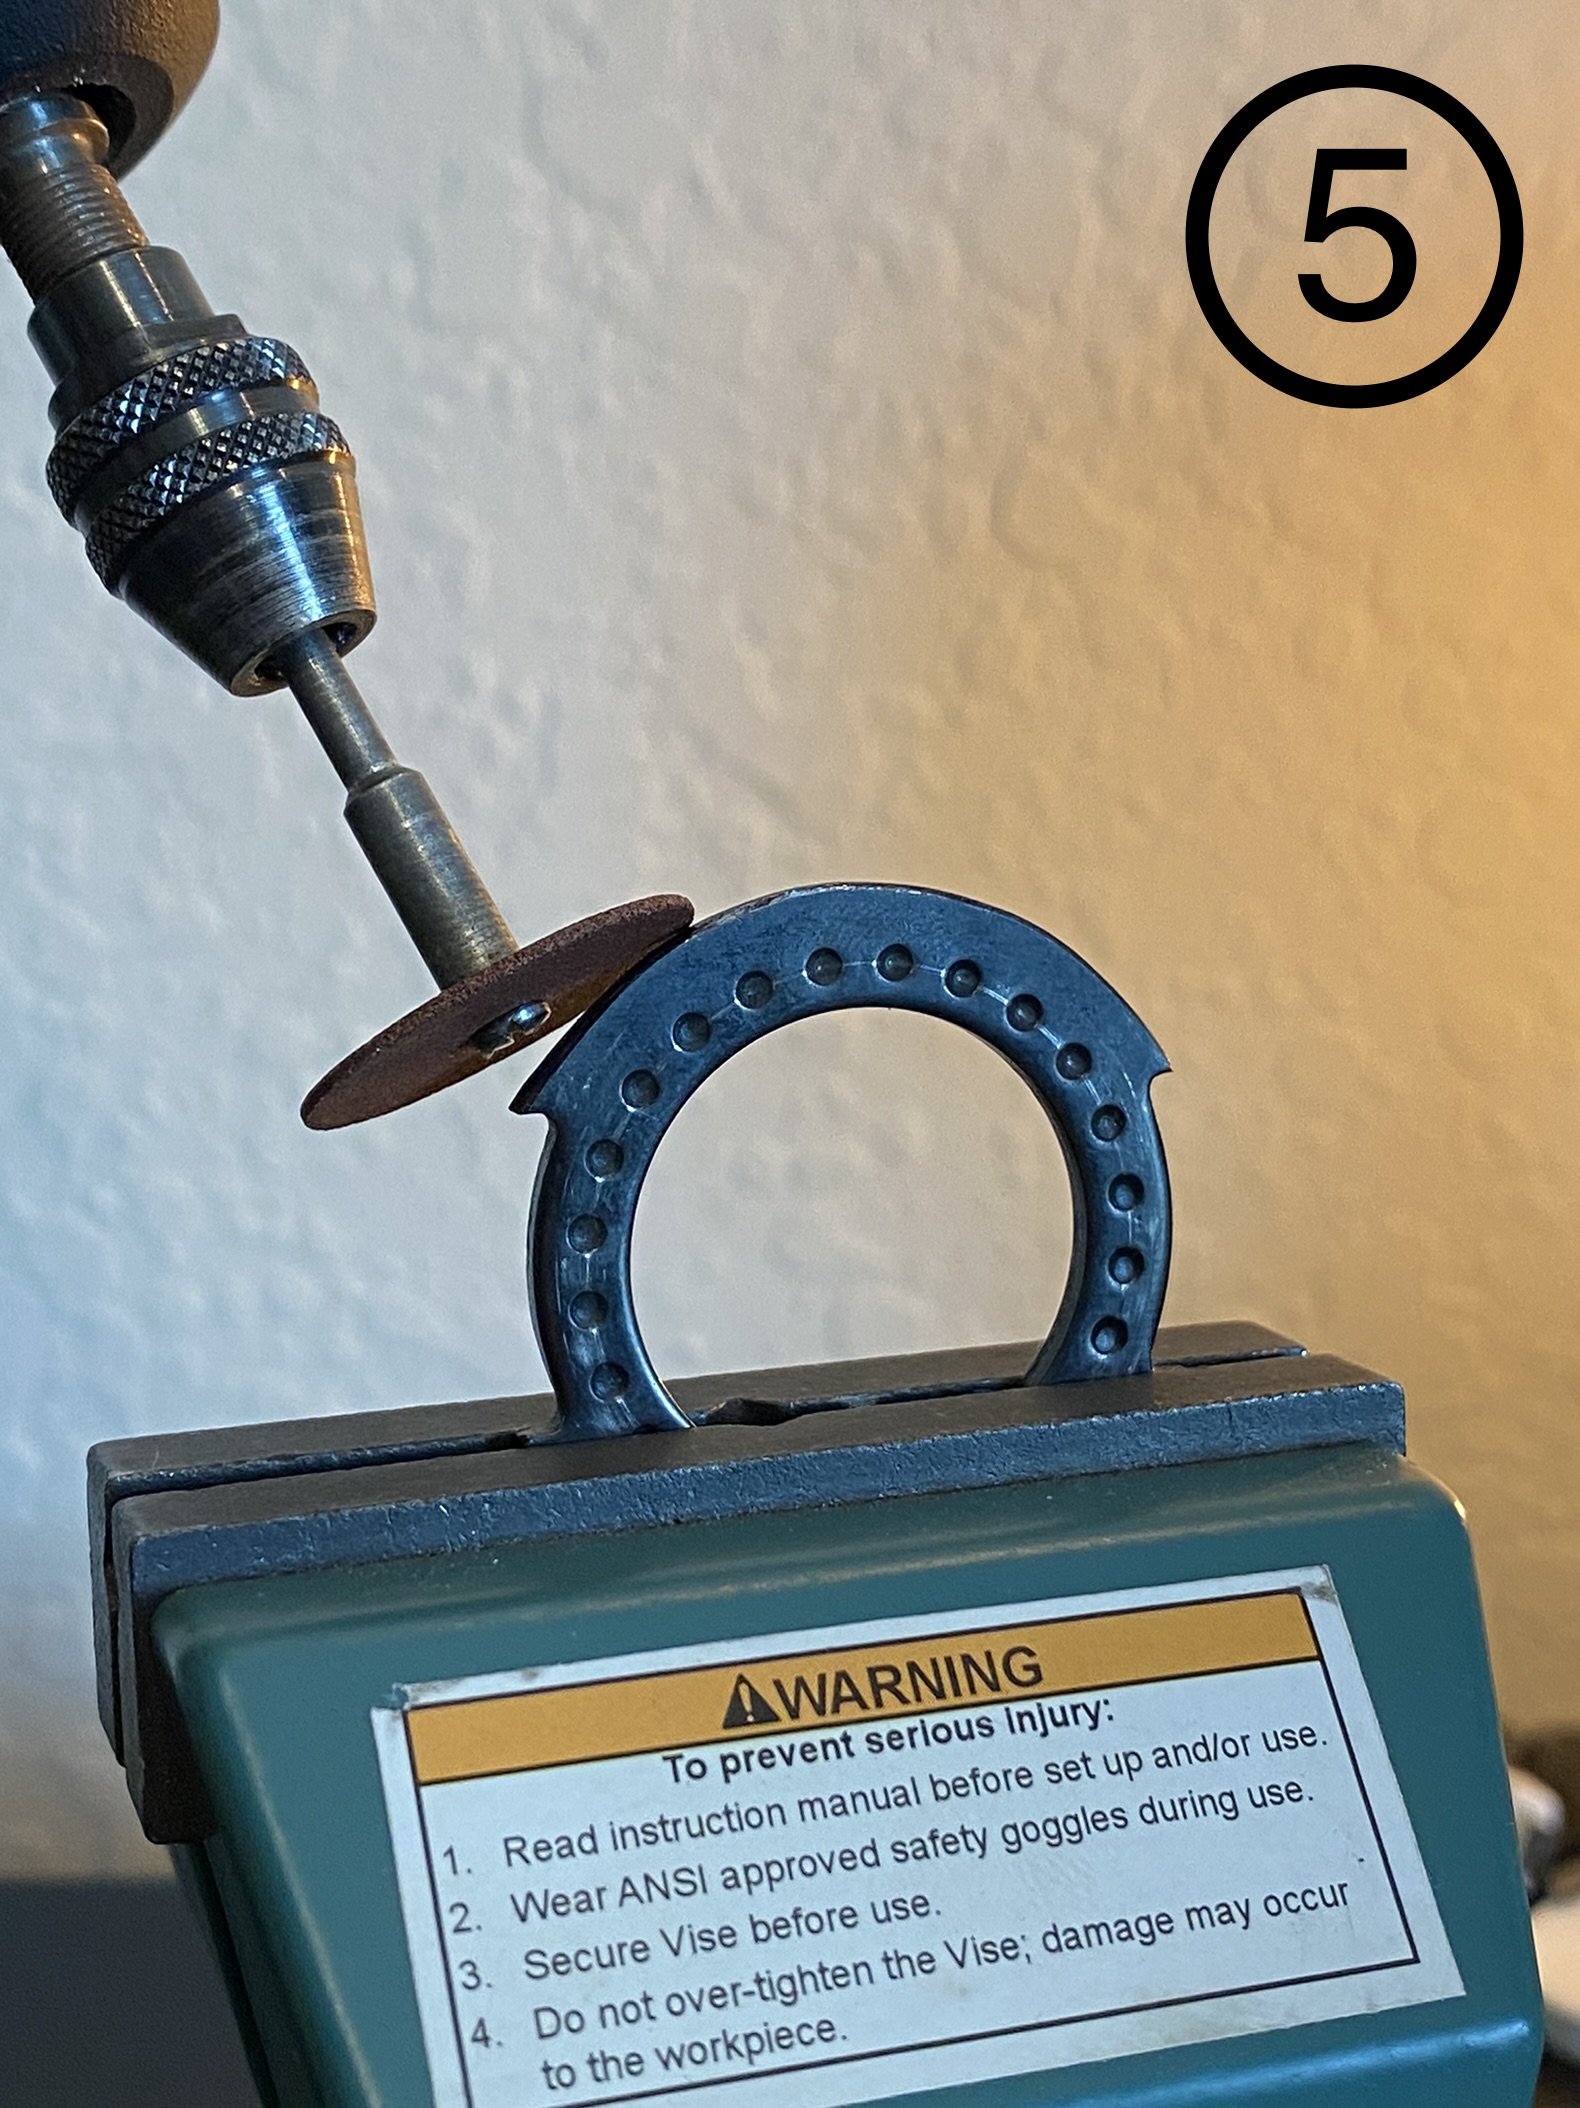
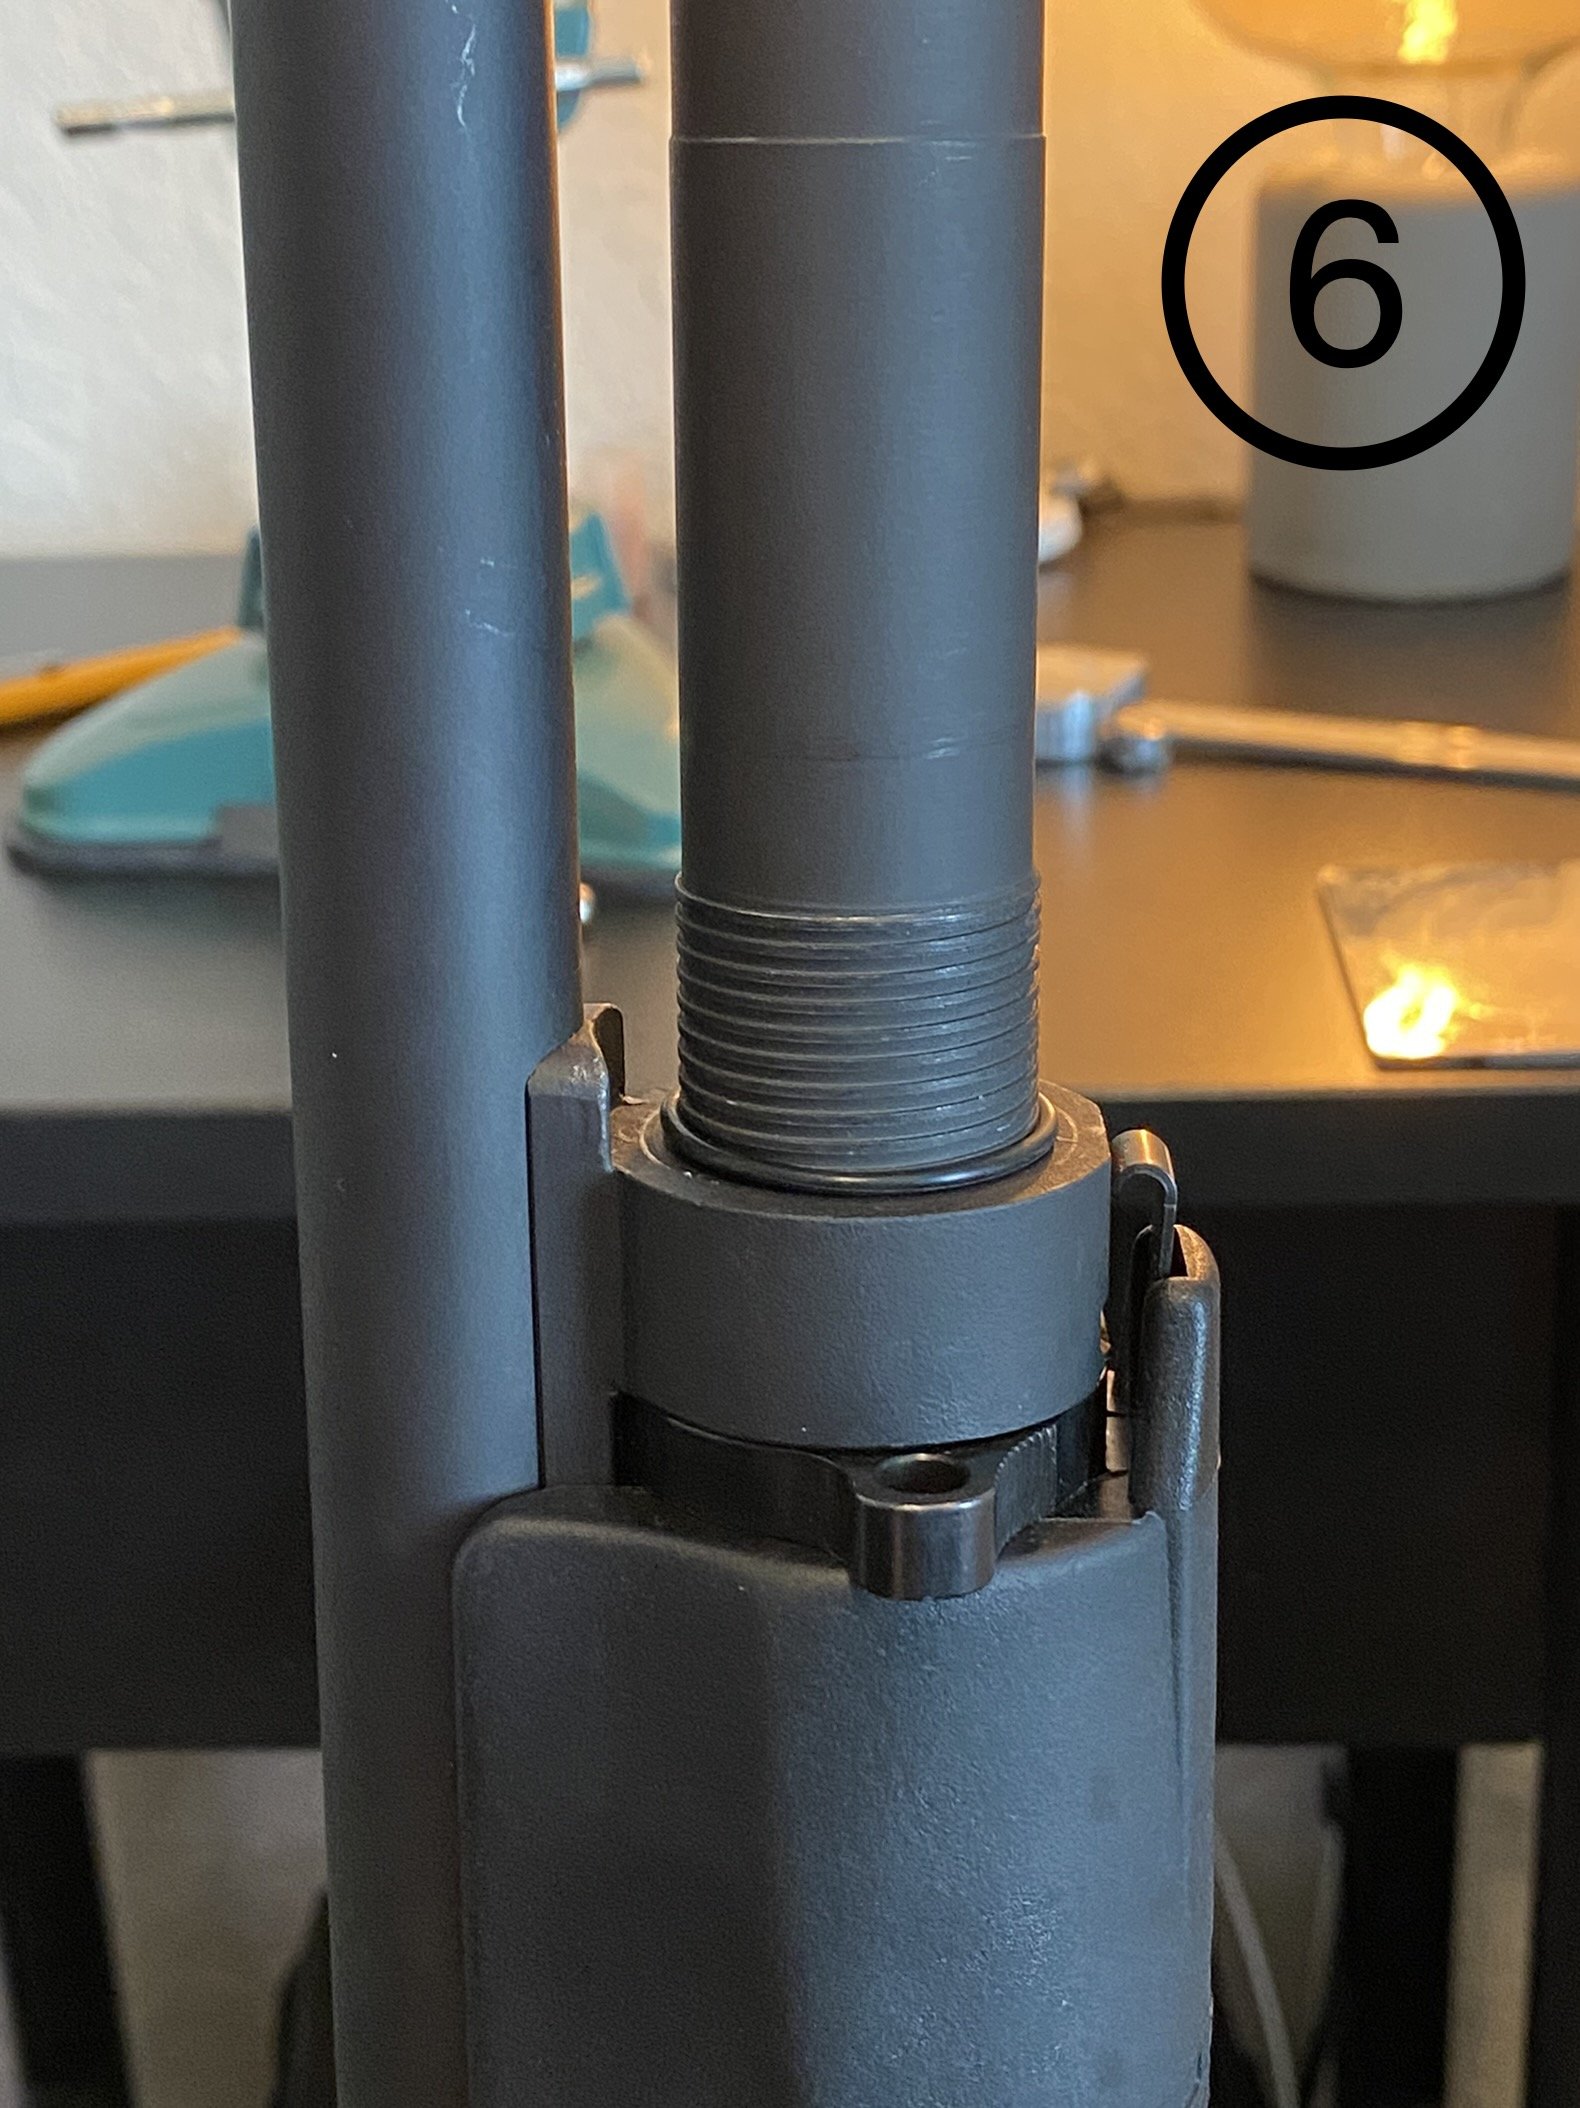
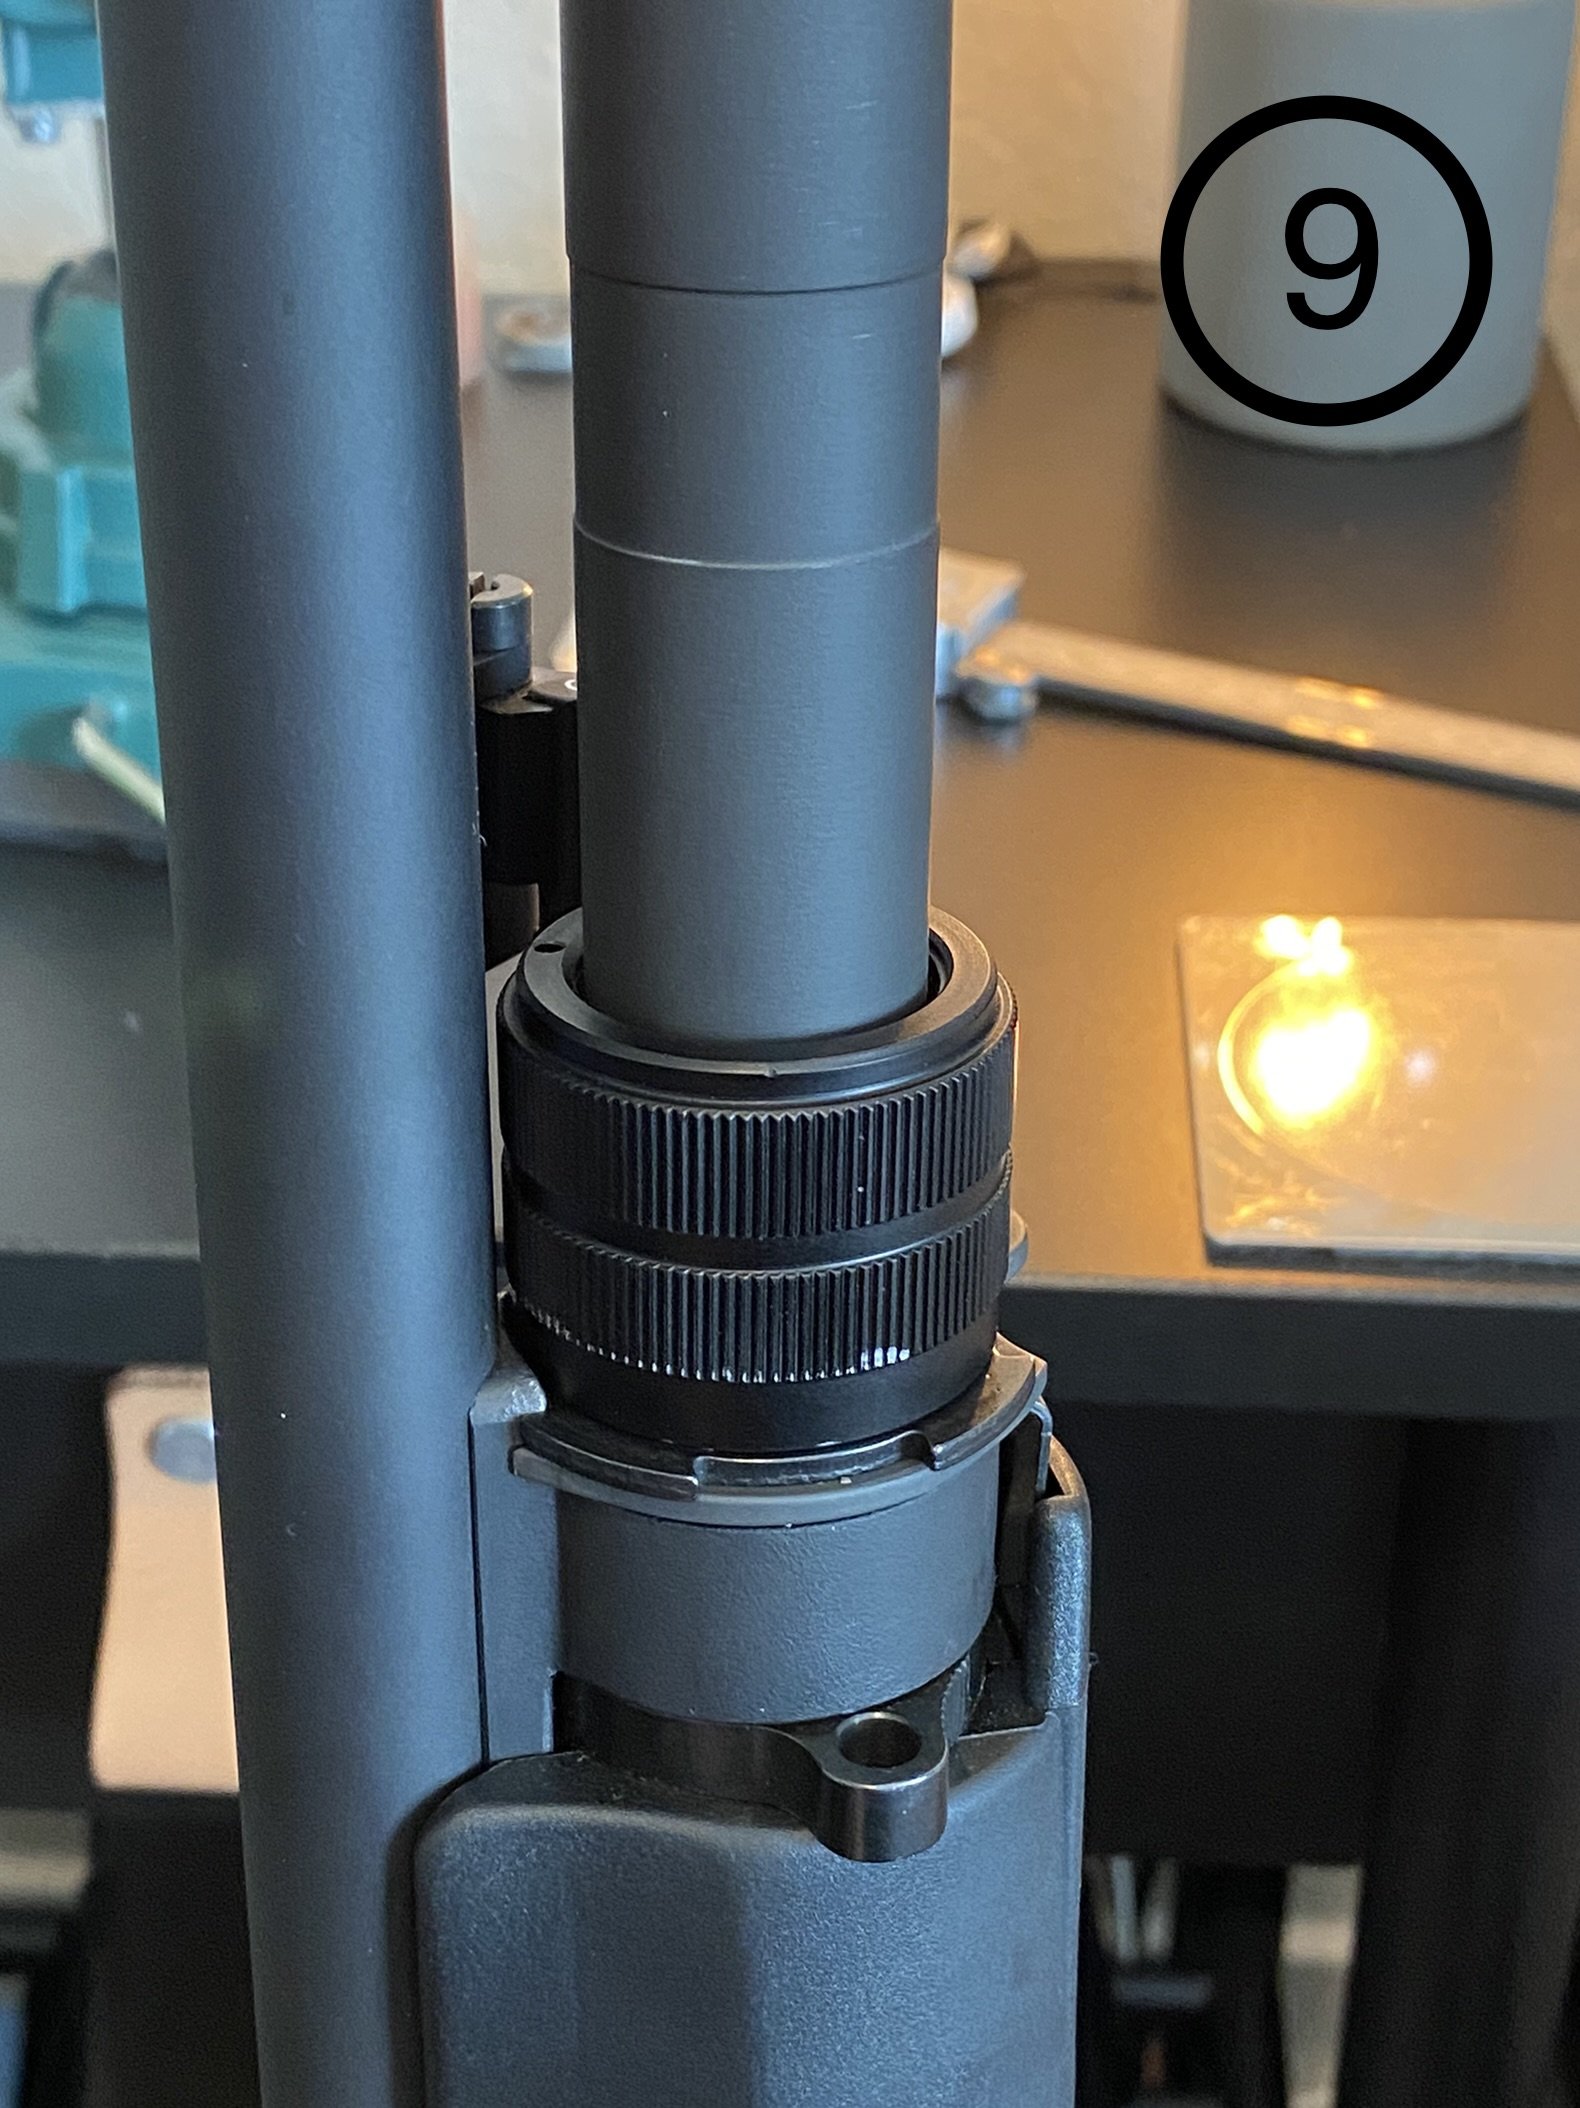
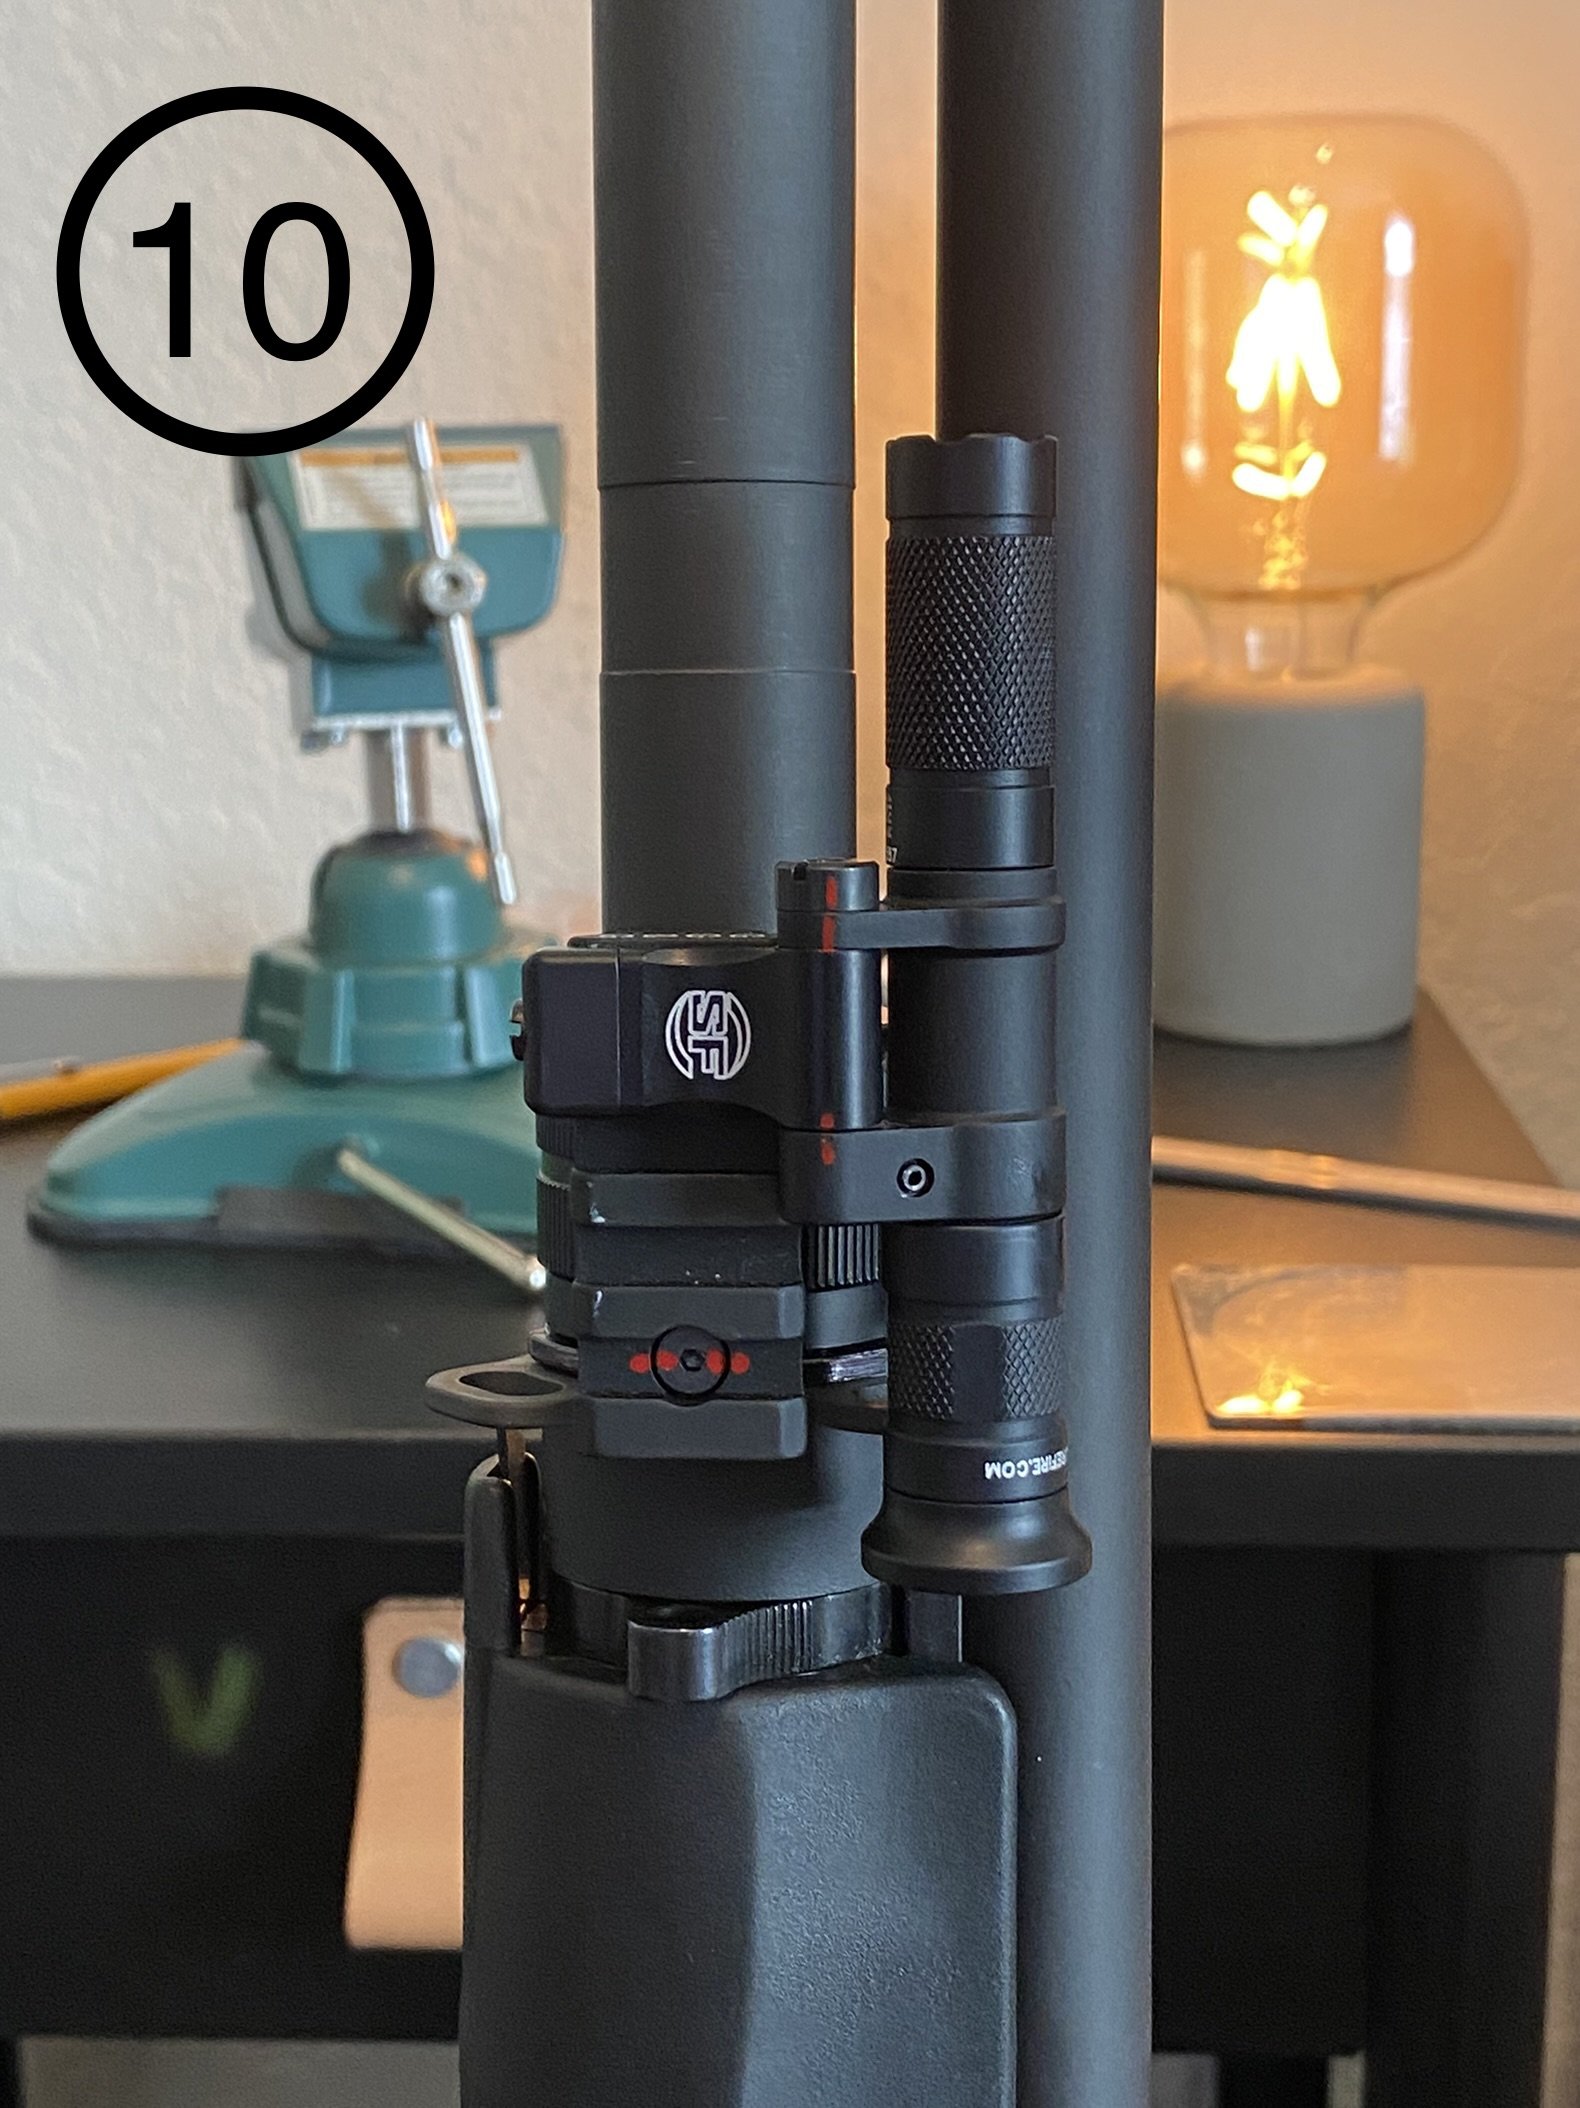
This will be for those of you who do not want a clamp style mount that attaches directly to the barrel and/or shell tube. Required tools & hardware: - Dremel & cutoff wheel - Vise - File - 20mm-25mm o-ring - GG&G Benelli M2 sling and flashlight mount - Your light of choice that will mount to a pic rail Since the GG&G M2 light mount has a smaller scalloped cut than what is required to fit on the M3, some cutting and shaping is required: Start out by using the original sling mount as a stencil for tracing out the required cut out size onto the GG&G mount for a reference when cutting with a dremel [Figure 1]. Once the outline is traced, use a dremel to remove material [Figures 2, 3]. Once the rough shape is cut out, use a file to remove burrs and slowly and precisely shape the cut. Be sure to test fit often, as you do not want to make an oversized cut and have a loose fitting part [Figure 4]. Once this part is complete, it’s time to move on to the original sling mount. This will still be required to ensure the shell tube nut has a ratcheted engagement. I chose to remove the sling mount with the dremel, but this is not required if you’d like to have additional sling mounts on your shotgun [Figure 5]. All parts should now properly fit. When test fitting, you may have noticed that the GG&G mount is loose and may rattle even when the tube nut is tightened down. This is where the o-ring is used. It will evenly fill the gap and provide for a secure fit. Slide the o-ring onto the tube as far as it will go on the threads until it butts up against the barrel block [Figure 6]. Then install the GG&G mount, then the original sling mount, and then the tube nut. Add your flashlight if choice (the lighter the better as to decrease the possibility of a malfunction due to the recoil operating system) [Figures 7-10].


 1 point
 -
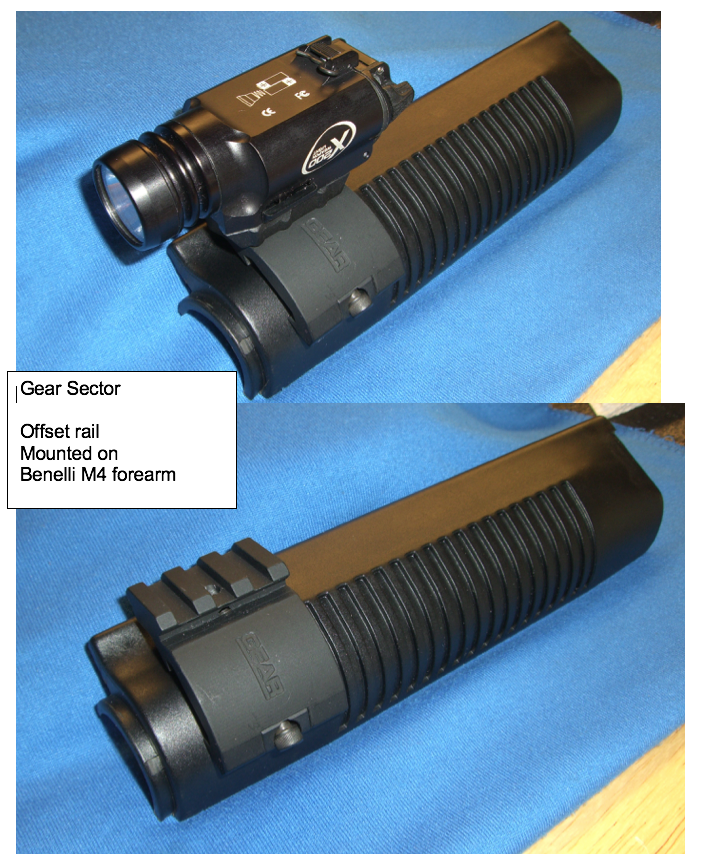
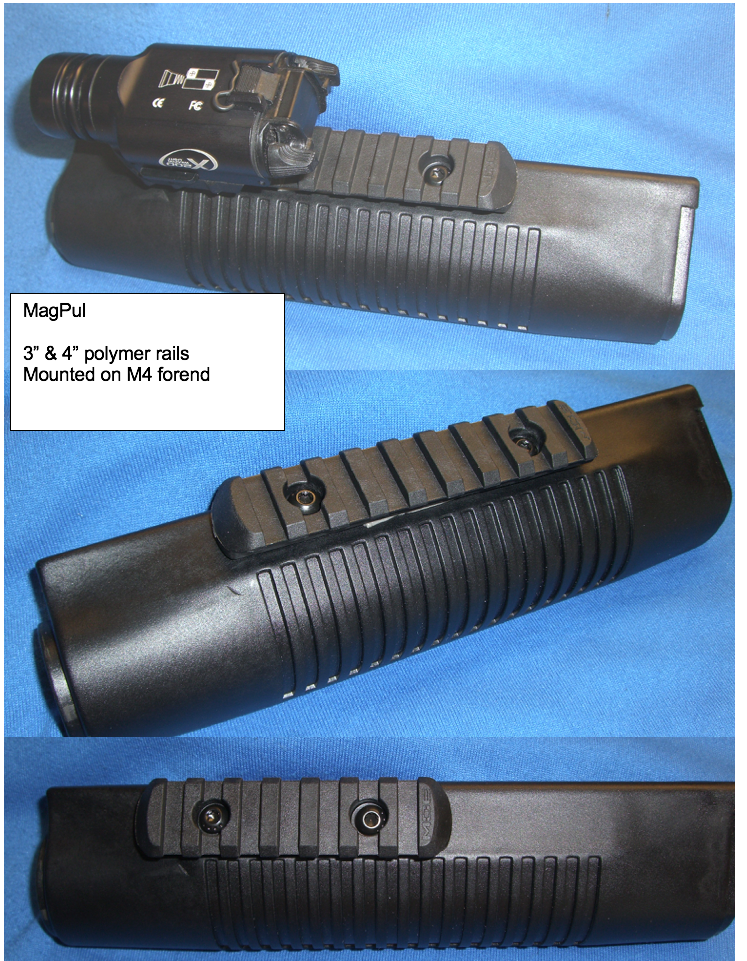
Don't like the 1.5" offset from the barrel. Their have been a number of good setups in the past, AVA tactical mount being one of them. Pretty easy to mount a picatinny rail to a factory rail panel as well. That said I like a SureFire forend tri-rail.


 1 point
 -
I just got a rmr on my new 34. I sprung for the plate. Was only $10 for my setup. For a $500 rig that's nothing1 point
-
I have put around 8k shots through my Benelli m4, about 5k of them being light loads, never had a single issue with even fiocchi, which a lot seem to have issues with, or claim to. Been flawless.1 point
-
I ain’t got time to hand fit parts, especially not on some silly handguards. Hand fitting the trigger and hammer on a 5000$ atlas gunworks 2011. Sure, that makes sense. The gunsmith should be doing that.1 point
-
I’ve fit a bunch of those FFT forends. I use a big flat metal file and remove material from the end closest to the muzzle. It’s a lot of trial and error to fit them since you don’t want to remove too much material. I use the seat ring at the base of the barrel to determine if the forend fits or not. Once I can’t slide a piece of paper between the ring and the receiver, I know it’s good to go. Without doing this, you could end up with light primer strikes since the bolt won’t fully rotate and lock into the barrel lugs.1 point
-
That is like a perfect fit.1 point
-
blitzkrieg components1 point
-
I enjoyed Mike’s review of both M4 and 1301. With Limbsaver pads on both, recoil isn’t bad on either. I love both of mine. Wonder why there’s so much shotgun love lately.
 1 point


This leaderboard is set to New York/GMT-04:00