Leaderboard


Popular Content
Showing content with the highest reputation on 03/16/21 in all areas
-
I can confirm this guy's work is amazing. I bought one of his 7 round tubes many moons ago and it looked just as good mid not better than a Benelli brand tube.2 points
-
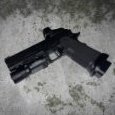
The forum has been really slow lately, so I figured I'd try to add some content again. Recently I was contacted by a client to put together the ultimate Benelli M4 with a focus on reliability, and reduced perceived recoil. Cost is not a concern. The main goal was to have a shotgun built for home defense. So, with that said, here is the roughed out plan. The M4 is a 11707 model. It's an older version that has an aluminum trigger frame. The shotgun itself is brand new and never appears to have been fired. This is an 18.5" barreled model. Receiver Upgrades - Loading Port Modifications - GG&G Oversized Bolt Release - TTI Stainless Bolt Handle - FFT Reproduction Handguards Stippled by Tango Arms Stock Upgrades - Benelli M4 OEM Collapsible Stock - IWC MOE QD Sling Mount - Limbsaver 11011 Custom Fit with Noveski Adapter Plate Magazine Tube Assembly - Carriercomp Titanium Full Length Magazine Tube, internals polished - Carriercomp Magazine Follower (Old style with the red plastic indicator) - Carriercomp/Wolff Magazine Spring Trigger Pack - A&S Engineering Trigger Frame - FFT Trigger/Hammer/Disconnector Kit - FFT Shell Elevator - DMW Oversized Safety - Wolff Trigger Pack Spring Kit Sights and Optics - Scalarworks Sync Rail - Trijicon RMR Type 2, RM09 - 1moa dot size - Meprolight Night Sights Weapon Light Package - Surefire M600DF 1500 lumen output. - Impact Weapon Components Benelli M4 Light/Sling Mount - Surefire tailcap modified to remove the shroud Sling - BlueForceGear Padded QD Sling Refinish All parts are to be refinished in NP3 by Robar. Plastics will remain black. Items such as the lamp head on the weapon light will be painted to match the NP3 finish. The Trijicon RMR will be left alone. I received the shotgun on August 6, 2019. By August 7, 2019, the shotgun had been fully disassembled down to the smallest parts. Threaded parts were cleaned up chemically and with a wire wheel to remove any thread locker compound. Cleaning the parts up eats up a lot of time when done right. Even the bolt head is disassembled which is nearly an impossible task without some specialized tools. Getting that roll pin that holds the extractor claw out is almost an impossible task. You need a tiny curved punch in order to tap it out successfully. I disassembled his pistol grip stock so that the sling hardware and the installation screw inside the stock will all be plated in NP3 as well. As expected, the two screws that hold the rear sight in place are destroyed upon removal (the tip of the screw almost always breaks off.) I believe LPA stakes the top of the screw and creates that cupped shape. The nut that holds the front sight in place is a one time use item and will be replaced upon reassembly. This nut cannot be NP3 plated since it has a nylock insert. Small springs are bagged and tagged for reassembly. Some of them are confusing to know the difference by just looking at them. Springs like the one that holds the bolt handle detent and the extractor claw spring can be easily confused with ones from the trigger pack. I'll begin the loading port modifications once the A&S trigger frame arrives. I plan to go high, on the port, but not as high as Briley. I also plan to open the mouth more than Briley typically does. The entire loading port will be dehorned and there will not be a single sharp edge inside the mouth. Mine are all done by hand, so it is a little tedious. The owner supplied the carriercomp components, and the shipment from FFT arrived already. The handguards from FFT were mailed out to Tango Arms this morning. Will update with more as we move forward.1 point
-
Everyone be honest, how many Benelli's do you own? Don't judge, lol. You know you got them stacked!1 point
-
Yeah, I see that now. Just enough to get over the fiber and stainless mating, I guess. I remember on another post you mentioning how the follower could hang-up right at that crucial point -- the last shell in the tube I'd imagine. Briley states that the follower was designed for 3-Gun where deep and aggressive loading port reduction (see their pictures) can remove a portion of the mag tube fitment to the receiver, thus allowing a much shorter follower to cant off the axis of the mag tube as the follower is not fulling supported 360 degrees after the last shell is expended from the mag tube. A longer follower keeps things aligned. That made sense to me as it seems like a short (OEM) follower might jam a little bit if its canted in the mag tube during speed re-loads. Then again, call me Rosanna, Rosanna, Danna!1 point
-
Plenty of posts on here about not getting full capacity in the mag tubes. While shell lengths do vary, the secret will be to cut your spring down a little and remove some coils. Spring lengths vary as well depending on whose spring you are using. There are posts about that as well and recommendations on how much to cut. A place to start would be to see how much of that last shell sticks out of the mag tube when the spring is fully compressed. If it's a 1/4" or so you can remove the spring and compress a few coils together to see what will give you that last 1/4". Then cut those coils off. My experience has been that removing a few inches of spring either way was not that critical. Obviously go slow until you remove what you need. Having enough spring tension to soundly eject that last shell onto the shell carrier is critical. When you have trimmed your spring to the proper length, turn the bitter end in and downward with a pair of needle nosed pliers. When reinstalling the spring I like to make sure the factory finished end of the spring goes toward the follower and the ugly end that you just cut goes against the mag tube spring retainer clip. Where safety glasses as shit can go flying in your face at the speed of heat with no warning!!!!!1 point
-
I just spoke with them and the next batch from Carrier Comp will be June timeframe. They have a bit of a delay at the moment. For this reason I went with the Briley Carbon tube. I did buy the CarrierComp magazine tube spring to put in the Briley. I've read mixed reviews about magazine capacity with the Briley magazine spring.1 point
-
The follower isn't likely to make a bit of difference in magazine capacity. Keep in mind that manufacturer shell lengths vary, even within a given stated range such as 2 3/4in. This variation sometimes leads to capacity issues due to the fact that even adding a small amount of length to each shell results in a significant overall length difference when shells are stacked end to end. If you have access to different shells you can experiment to see if your gun will hold a full 5 rounds. If it will, then your problem is likely what I outlined above.1 point
-
i am 6'4" with somewhat "oddly long arms" and the LOP of the factory stock was about at the limit for a comfortable fit for me. i did change the stock to the mesa urbino which does shorten the gun significantly and allow you to pull it into your chest more, which is a more common position for home defense.1 point
-
If you have some big money to invest, you could always turn your blue M4 into a real deal NP3 H2O.1 point
-
Personally, I think you’re making a mistake. 15 years from now, people will be LOOKING for the blue receiver Benellis. People did the same thing with the plumb HK P7 pistols.1 point
-
Parts came back from Wright Armory on Wednesday. They’re the new go to for Np3 plating. Normally Robar would electro-pencil serial numbers on each part except small screws and such. At Wright, they laser engrave the control numbers in tiny font size 4 lettering. They place them on spots that aren’t likely to show when assembled. I had about 600 parts with this batch. The only negative was they mixed the parts from my sorted bags. So having a couple hundred screws and washers to figure out what goes where can be challenging. They no longer plate titanium parts either. So I’ll have to get the magazine tube and a few other parts painted to match. One off topic mistake I made was sending in the shell plates to my Dillon 650. Apparently there are five plastic plugs in each plate. I thought they were metal plugs. Well they melted I guess so now I’m buying more plugs from Dillon.1 point
-
Got a bunch done today. Broke down the collapsible stock for plating. The button spring is in the bag. Those springs are coated in grease. Tore down all the other accessories that have come in. Still waiting on a few small parts. A few small OEM parts are back ordered, so that will slow some of this down. I also knocked out the loading port job tonight. It's my least favorite part of doing one of these builds. No matter how many you've done, putting a file to someone else's 1800 dollar shotgun is always scary. The first step of one of these port jobs is to use painters tape to give yourself some guidelines on what you want to do. Take into account the bolt release, the profile of the trigger pack and how aggressive you want to open up the area around the magazine. I used one of my complete trigger packs to plot my cuts. My Wilton vise has been getting a lot of love this year. Mounted to the top of my Milwaukee work benches has been a huge improvement. The top of the work benches (I have 4 of them) are covered in rubber mats. I put the mat beneath the vise so that I have a nice work surface that doesn't mar anything. I put painters tape on the sides of the receiver and used padded vise jaws. Be sure to check your side profiles. The point of no return. Once you've broke the anodizing, there is no turning back. A few minutes in. The initial cut is to profile the shape. Using a large flat file, you can keep both sides uniform. Deeper, and making a lot of chips now. Continue checking your side profile to see how much material has been removed and if each side is uniform with the other. If that's the goal at least. My favorite bits with the Dremel. Having the pen attachment makes things a lot easier. This bit breaks the corners with ease and removes the tooling marks. After I cut my profile, I removed material from the inside to enlarge the mouth.1 point
This leaderboard is set to New York/GMT-04:00